
Editor Media Extension
No more img tags in the source code view: a button in the text editor opens the media manager, you pick the image, size and alignment, and it goes straight in.
On this page
- Introduction
- What you get out of this plugin
- Who is this plugin for?
- Installation
- Getting started
- Why there is nothing to configure
- How to insert an image
- Choosing the image
- Setting alt text, size and alignment
- Checking the result and saving
- Where the button is available
- Tips for everyday work
- Troubleshooting
- The image icon is missing from the toolbar
- The image ends up somewhere else than intended
- Nothing happens when I click “Add media”
- The image is too large or too small in the editor
- The image was not inserted at all
- The image does not show up in the shop
- FAQ
- For administrators / Technical details
- System requirements
- Installation via the command line (Composer)
- What the plugin does in your system — and what it does not
- What is created when inserting
- Uninstalling
- Administration build
Introduction
The Editor Media Extension adds one more button to the toolbar of the text editor in your Shopware Administration. With it you insert an image from your media library straight into a text — no detour through the source code view, and not a single line of HTML.
What you get out of this plugin
- You place images in product descriptions, category texts and text elements of the Shopping Experiences by picking them instead of typing them.
- You decide size and alignment before inserting, so there is nothing to fix afterwards.
- The image lands exactly where your cursor was sitting in the text.
- The alt text is already filled in whenever one is stored with the image — good for accessibility and for search engines.
- Colleagues without a technical background can add images to texts too.
Who is this plugin for?
For everyone who maintains content in the Shopware back office: shop owners, editors, agencies, marketing teams. No prior knowledge is required — if you can use the text editor, you can use this plugin.
Installation
After your purchase the plugin is available directly in your Administration — there is nothing to download.
- Log in to your Shopware Administration.
- In the left-hand menu open Extensions and then My extensions.
- In the Editor Media Extension row, click Install.
- Then switch on the toggle to the left of the name. When it is blue, the plugin is active.
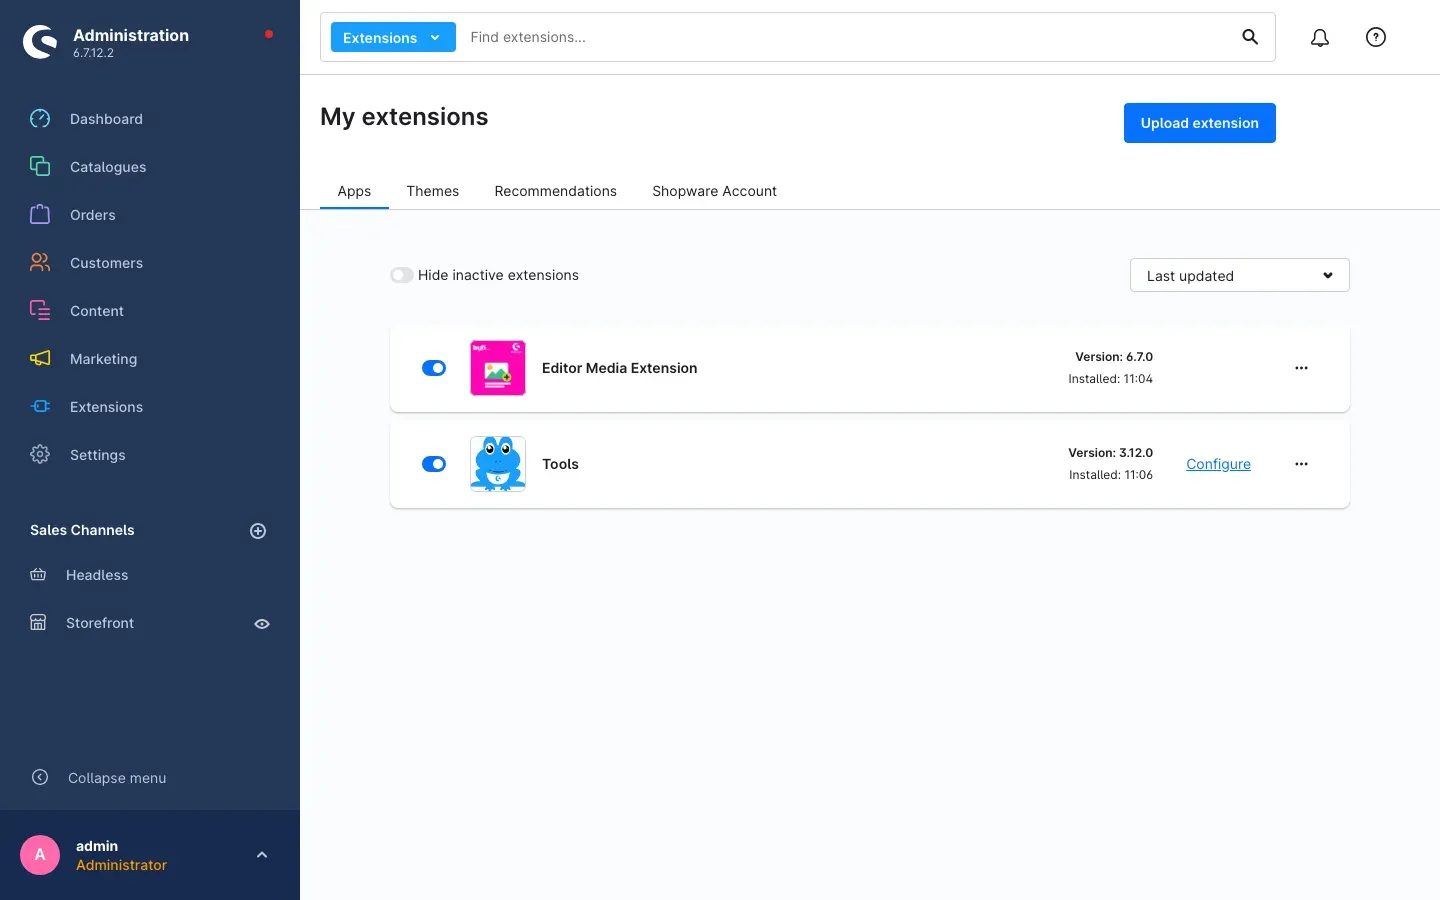 Fig. 1: Under “My extensions”, the Editor Media Extension is installed and the toggle is switched on.
- Reload the Administration in your browser once. Only then does the new button appear in the toolbar.
Not listed at all? Then your Shopware account is not yet connected to the shop. You can sign in under Extensions → My extensions on the Shopware Account tab; the plugin then shows up in the list automatically.
Getting started
Once the plugin is active there is nothing to set up. You can see straight away that it works:
- Open any text in the Administration — for example a category under Catalogues → Categories and there the Description field.
- Look at the toolbar above the text field. At the far right of the left-hand icon group — right next to the table icon — there is now an image icon.
- Hover over it and the tooltip Insert image appears.
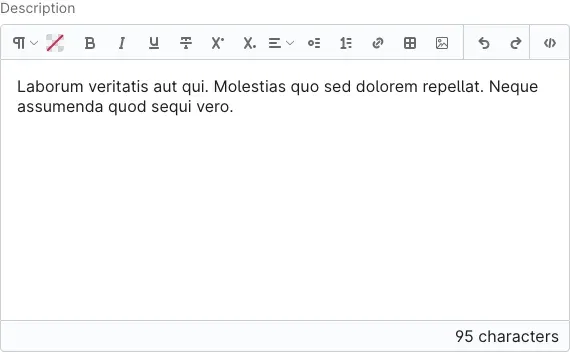 Fig. 2: The image icon sits directly to the right of the table icon, before the undo and redo arrows.
If you can see the icon, everything is ready. How to insert an image explains what to do next.
Why there is nothing to configure
This plugin deliberately comes with no settings. That is why you will not find it under Settings → Extensions, and why there is no Configure link next to it in the My extensions list.
This is not a missing chapter, it is on purpose: everything that has to be decided per image — which image, how large, how aligned, which alt text — you decide in the dialog at the moment of inserting. A default that applies to all images at once would be the wrong choice for half of them anyway.
What that means for you: after activating the plugin and reloading the Administration it is ready to use. There is nothing you could forget or set incorrectly, and nothing you would have to adjust after an update.
You also do not have to grant anyone extra permissions. The rights your users already have in Shopware for media and for the respective content apply: anyone who may edit a category and open the media library can insert images too.
How to insert an image
What this gives you: an image sits in the middle of your text after a few clicks — at the right size, in the right place and with an alt text. No source code view, no copied image addresses, no hand-typed image elements.
The example below uses a category description. It works exactly the same way in every other text field.
Choosing the image
- Open the text the image belongs in — for example a category under Catalogues → Categories and there the Description field.
- First click in the text where the image should go. The plugin remembers that position and puts the image there later.
- In the toolbar, click the image icon (Insert image).
- The Choose media dialog opens with your media library. On the Media Library tab you can browse the folders or look for a file name using the Search… field.
- Click the image you want. It gets a blue background and appears in the preview on the right.
- Click Add media in the bottom right corner.
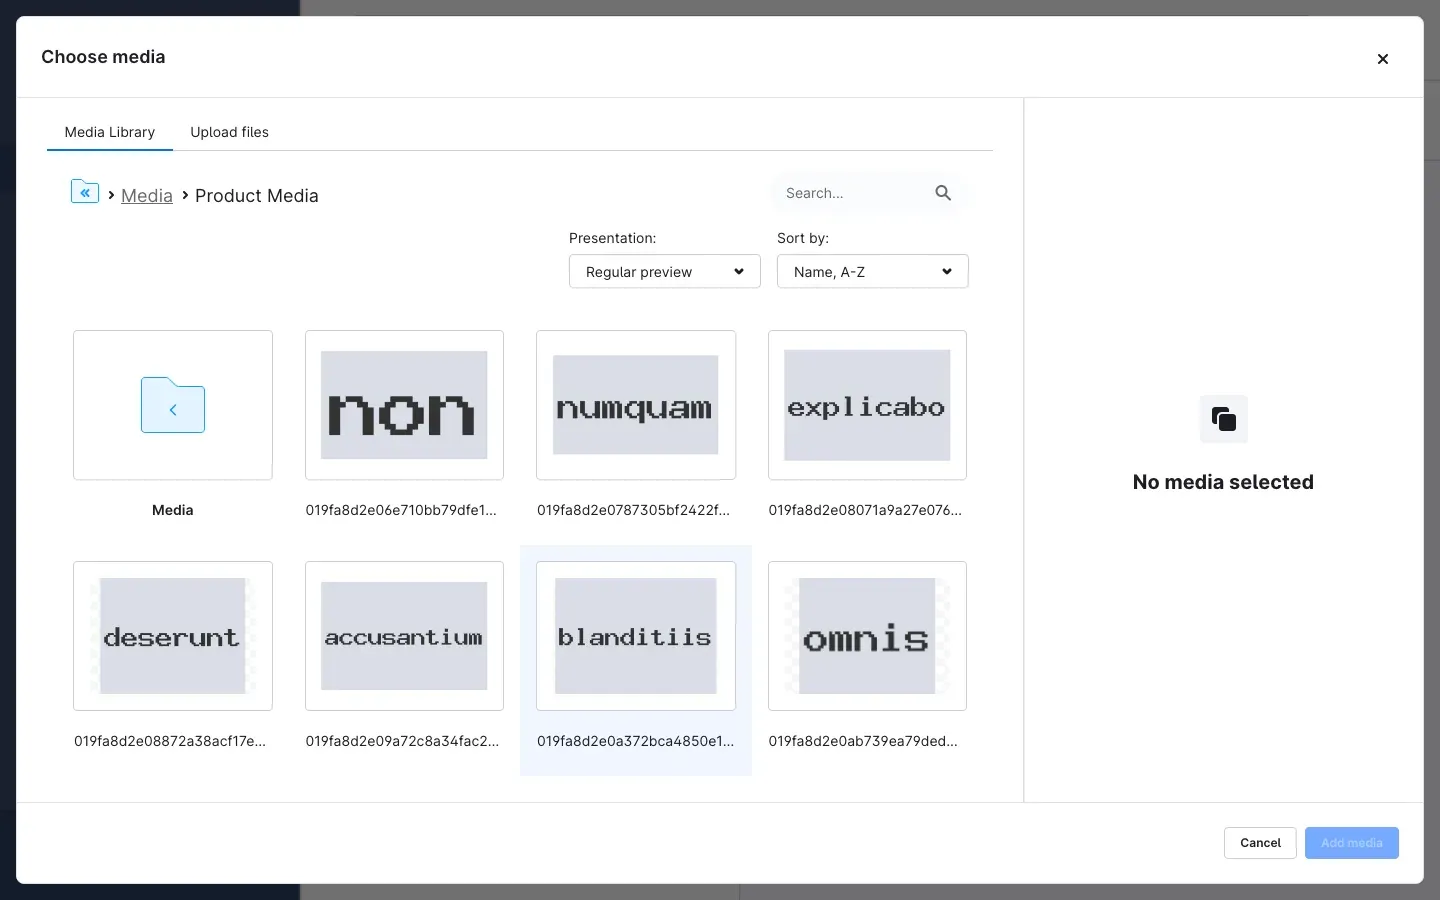 Fig. 3: In the “Choose media” dialog you pick the image from your library and confirm with “Add media”.
Tip: Is the image not in the shop yet? Then upload it in the same dialog on the Upload files tab and select it afterwards.
Important: You insert exactly one image per run. That is intentional, because every image gets its own size and alignment in the next step. For a second image, simply click the image icon again.
Setting alt text, size and alignment
Right after your selection the Insert image dialog appears. At the top you see a preview of the chosen image, below it three areas.
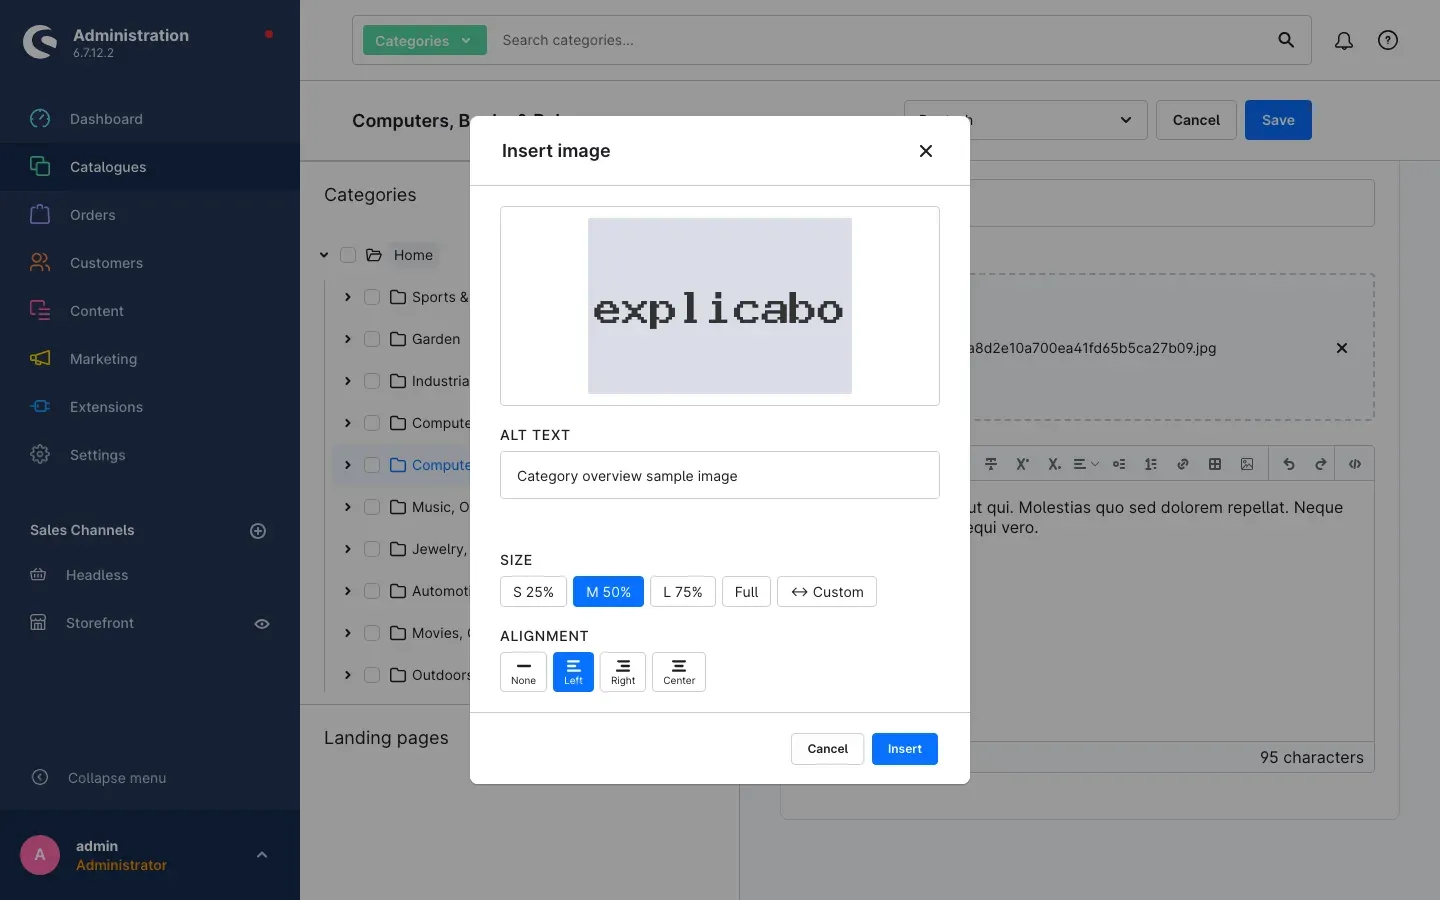 Fig. 4: In the “Insert image” dialog you set alt text, size and alignment — here “M 50%” and “Left”.
Alt text
The field below Alt text takes a short description of what can be seen in the image. Screen readers read this text out loud and search engines evaluate it; it is also shown in the shop if an image cannot be loaded. If an alt text is already stored with the image in your media library, it is filled in here — keep it or overwrite it. If the field is empty, it shows the file name in light grey as a hint; just type your own text over it.
Size
Under Size you choose how wide the image appears in the text:
- S 25% — narrow, good for small icons, seals or logos next to running text
- M 50% — half width, the usual choice for an image with text flowing around it (pre-selected)
- L 75% — a large image that leaves only a narrow column of text beside it
- Full — the image takes up the entire available width
- ↔ Custom — for every case where none of the four sizes fits
Clicking ↔ Custom reveals the Width field below, with a list of the units px, % and em next to it. Enter the number you want and pick the unit: px for a fixed width in pixels, % for a share of the text width, em for a width that follows the font size.
Alignment
Under Alignment you decide how image and text relate to each other:
- None — the image simply sits at the cursor position, with no text flowing around it (pre-selected)
- Left — the image moves to the left edge and the text continues to the right of it
- Right — the image moves to the right edge and the text continues to the left of it
- Center — the image sits centred as a block of its own, the text starts below it
Insert places the image in the text. Cancel discards everything and leaves the text unchanged.
Checking the result and saving
After you click Insert, the image appears in the editor immediately — exactly the way you set it up. In the example below it sits on the left at half width with the text flowing to the right of it.
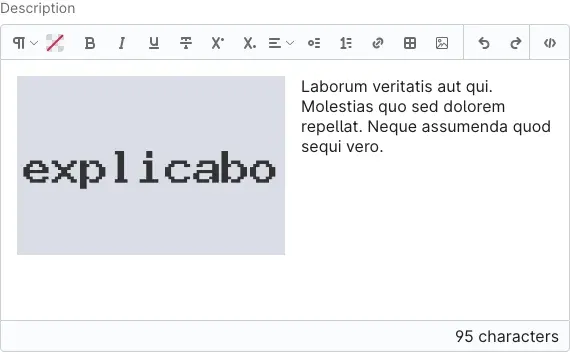 Fig. 5: The image sits on the left inside the text, the paragraph continues to the right of it.
You can now carry on writing as usual. When you are done, save the content with Save in the top right corner. Only then is the image visible in your shop as well.
Tip: If size or alignment is not quite right, select the image in the editor, delete it and insert it again. The dialog only appears while inserting and cannot be reopened for an image that is already in place.
Where the button is available
The plugin extends the text editor itself, not one particular page. That is why the image icon appears in the toolbar everywhere Shopware shows this editor — for example:
- in product descriptions
- in category texts
- in text elements of the Shopping Experiences
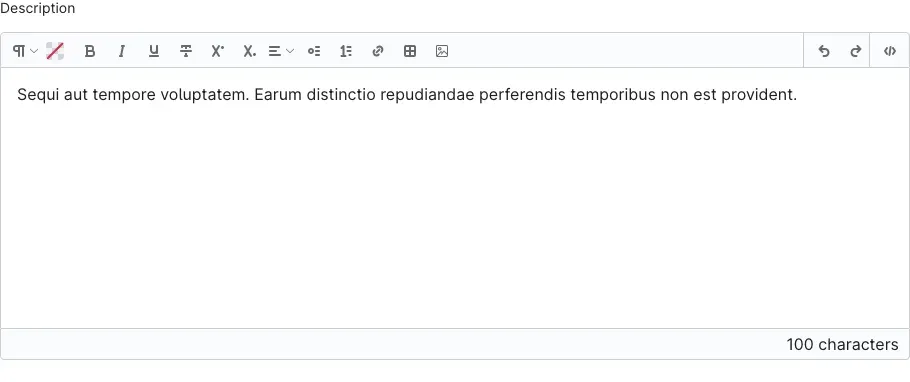 Fig. 6: The same button in the text editor of a product description — the workflow and the dialogs are identical everywhere.
The way you use it never changes: choose the image, set size and alignment, insert.
Tips for everyday work
- Click first, insert second. Always place the cursor where the image belongs before you open the dialog. That saves you moving it afterwards.
- An alt text is always worth it. One sentence is enough. It helps people using a screen reader and it counts for search engines.
- One wrapped image per paragraph. Two images wrapping directly below each other quickly look restless in the shop. For a series of images, Center or Full works better.
- Maintaining alt texts up front saves typing. If you store the alt text with the image in your media library, it is filled in automatically every time you insert that image.
- Check the result in the shop. After saving, take a look at the page in the storefront, especially on a phone. On narrow screens a wrapped image behaves differently than in the editor.
Troubleshooting
The image icon is missing from the toolbar
What causes it: the plugin is not active yet, or the Administration is still running the state from before the installation.
How to fix it:
- Open Extensions → My extensions and check that the toggle next to Editor Media Extension is switched on.
- Reload the Administration in your browser.
- If that does not help, clear the cache under Settings → System → Caches & Indexes → Clear cache and reload the Administration again.
The image ends up somewhere else than intended
What causes it: the cursor was not where the image should go when you clicked the image icon — for example because you last typed somewhere else.
How to fix it: delete the image in the editor, click in the text where you want it and insert it again.
Nothing happens when I click “Add media”
What causes it: no image was selected — the button then stays pale — or only a folder was opened.
How to fix it: click the image once so it gets a blue background and appears in the preview on the right. Only then can Add media be clicked.
The image is too large or too small in the editor
What causes it: the size chosen in the dialog does not match what the text needs.
How to fix it: delete the image and insert it again at a different size. If none of the four sizes fits, use ↔ Custom and enter your own width.
The image was not inserted at all
What causes it: for security reasons the plugin only inserts images whose address starts with http or https. Anything else is silently rejected.
How to fix it: use an image from your own media library. If the problem persists, contact support and mention the name of the image.
The image does not show up in the shop
What causes it: the content was not saved after inserting.
How to fix it: open the text again and click Save in the top right corner. Then reload the page in your shop.
FAQ
Q: Do I have to configure anything after installing?
A: No. The plugin has no settings. Once it is active and you have reloaded the Administration, the button is there in the toolbar.
Q: Where exactly is the button?
A: In the toolbar above the text field, at the far right of the left-hand icon group, directly next to the table icon. It shows an image icon and the tooltip Insert image.
Q: Which areas does this work in?
A: Everywhere Shopware shows its text editor — for example in product descriptions, category texts and text elements of the Shopping Experiences.
Q: Can I reopen the dialog for an image that has already been inserted?
A: No. The dialog only appears while inserting. For a different size or alignment, delete the image and insert it again.
Q: Can I insert several images at once?
A: No, one image per run. Every image gets its own alt text, size and alignment.
Q: Can I embed videos or PDF files with it?
A: No. The plugin is built for images.
Q: Do I have to crop or shrink images beforehand?
A: Not for layout reasons — every inserted image is given a maximum width automatically, so it never breaks out of your layout. For fast loading times in the shop it is still worth not uploading unnecessarily large files.
Q: Does it work with my theme?
A: Yes. The plugin only works in the Administration and changes nothing about your shop design. How the image is displayed in the storefront is still up to your theme.
Q: Do my staff need special permissions?
A: No additional ones. The Shopware rights your users already have for media and for the respective content apply.
Q: What happens to my images if I uninstall the plugin?
A: They stay. Images you inserted remain part of your texts as ordinary content and stay in your media library. After uninstalling, only the button for inserting is gone.
Q: Which languages is the interface available in?
A: English, German and Dutch. The labels follow the language your user has selected in the Administration.
Q: Is any data sent to external services?
A: No. The plugin sends nothing to the outside and sets no cookies. All images come from your own media library.
For administrators / Technical details
This section is aimed at technical administrators. You do not need it for everyday work with the plugin.
System requirements
- Shopware: 6.7 (constraint
~6.7.0) - PHP: 8.2 or newer
- No additional server services, no external interfaces
Installation via the command line (Composer)
composer require swp/editor-with-media-six
bin/console plugin:refresh
bin/console plugin:install --activate SwpEditorWithMediaSix
bin/console cache:clear
Reload the Administration in your browser afterwards.
What the plugin does in your system — and what it does not
The entire functionality lives in the Administration. The plugin adds a button and a dialog to the standard text editor; nothing runs on the server side.
- It creates no database tables of its own and modifies no Shopware tables. There are no migrations.
- It ships no settings — there is no configuration page.
- It registers no permissions of its own. The existing Shopware rights for media and for the respective content apply.
- It does not touch the storefront: no additional database queries, no template extension, no effect on the HTTP cache.
- It sends no data to external servers, loads nothing from third-party domains and sets no cookies.
What is created when inserting
What gets inserted is an ordinary image element with an inline style, stored in the content field of the respective record — just like bold or italic text. Every inserted image is given a maximum width of 100 percent so it stays inside the layout on narrow screens. If a title is stored with the media item, it is carried over as the title attribute. Addresses that do not start with http or https are rejected; special characters in address, alt text and title are escaped.
Uninstalling
Uninstalling leaves no tables and no settings behind. Images that were already inserted remain in your content and are still displayed, because they are ordinary content and are not rendered by the plugin.
Administration build
The Administration extension ships pre-built inside the plugin. No build step is required after installation.
This manual was written for the Editor Media Extension version 6.7.0.
More manuals
Admin Password Reminder
Admin Password Reminder: your backend users renew their passwords on time, prompted after login and by a daily email. Premium locks expired accounts until the password is changed.
Open manual Shopware 6Age Check
Tobacco, spirits, knives: visitors who do not confirm their age never see the restricted items at all. You tick a box per product, the plugin hides it everywhere.
Open manual Shopware 6AI Media Labelling
AI labelling for images and videos: flag a media item once in the media manager and the badge with your notice appears wherever it shows up in your shop. No template work needed.
Open manualNeed a team that keeps your shop running?
We have been maintaining Shopware shops for more than 20 years, including updates, hotfixes and the plugins you are configuring right now.