Article information and icons
Vegan, organic, regional: mark your articles with your own icons and a short explanation. Grouped on the article page, optional badge in the listing, switchable per channel.
On this page
- What the plugin does
- Installation
- Settings
- Enable plugin for this sales channel
- Show icons in listing
- Expand icons
- Expand icons on default from a defined screen width (in px)
- Creating and maintaining icons
- Creating a new symbol
- Maintaining symbols in several languages
- Assigning icons to a article
- How it looks in the shop
- Troubleshooting
- No symbol appears in the shop
- The symbols appear on the article page but not in categories
- The symbol area is always collapsed
- Changes do not take effect immediately
- Frequently asked questions
- For administrators
What the plugin does
You mark your articles with your own symbols — for example “Vegan”, “Organic quality” or “Regionally produced”. Each symbol gets a name, a group and an explanatory text.
In the shop the symbols appear together in the buy area of the article page, sorted by group, each with its image and text. If you like, you can additionally show them as a small badge on the article tiles in categories, search results and shopping experiences.
Your customers see at a glance what sets the article apart, without reading the description. You maintain each symbol once and use it on as many articles as you want.
Installation
After purchasing in the Shopware Store the plugin is available in your backend.
- Open Extensions → My extensions.
- Find the entry Article information and icons.
- Click Install.
- Then flip the switch next to the entry to activate the plugin.
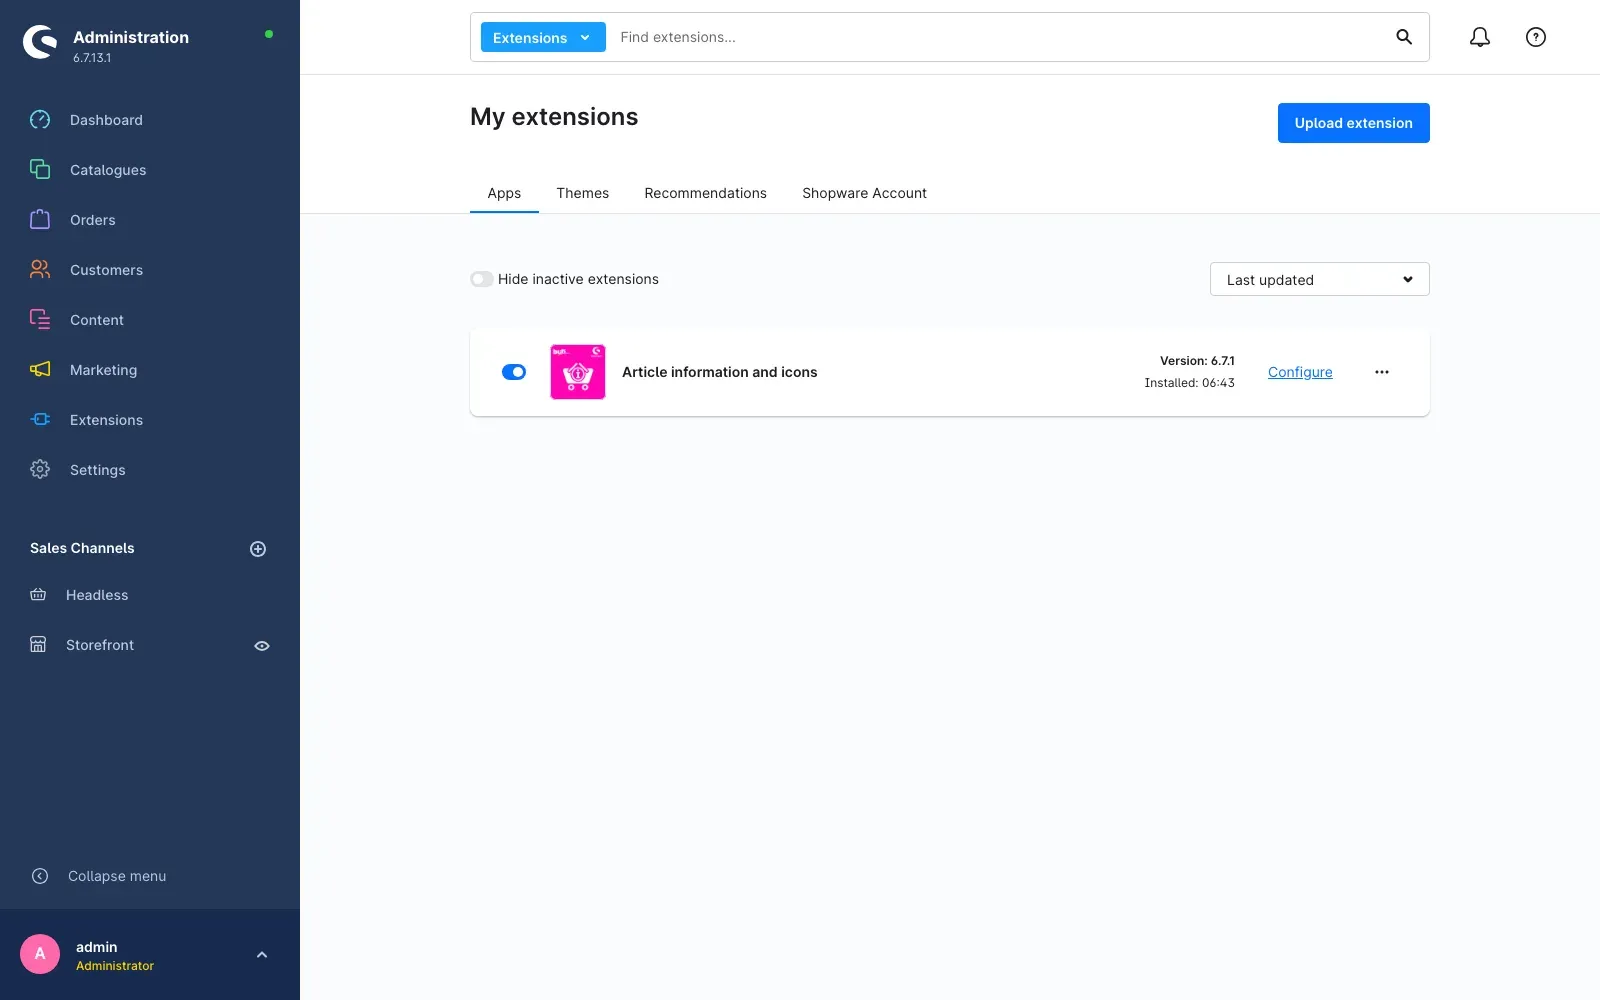
The plugin is now ready. It does not change anything in your shop by itself — something becomes visible only once you have created your first symbol and assigned it to a article.
Settings
Open Extensions → My extensions and click Configure next to Article information and icons.
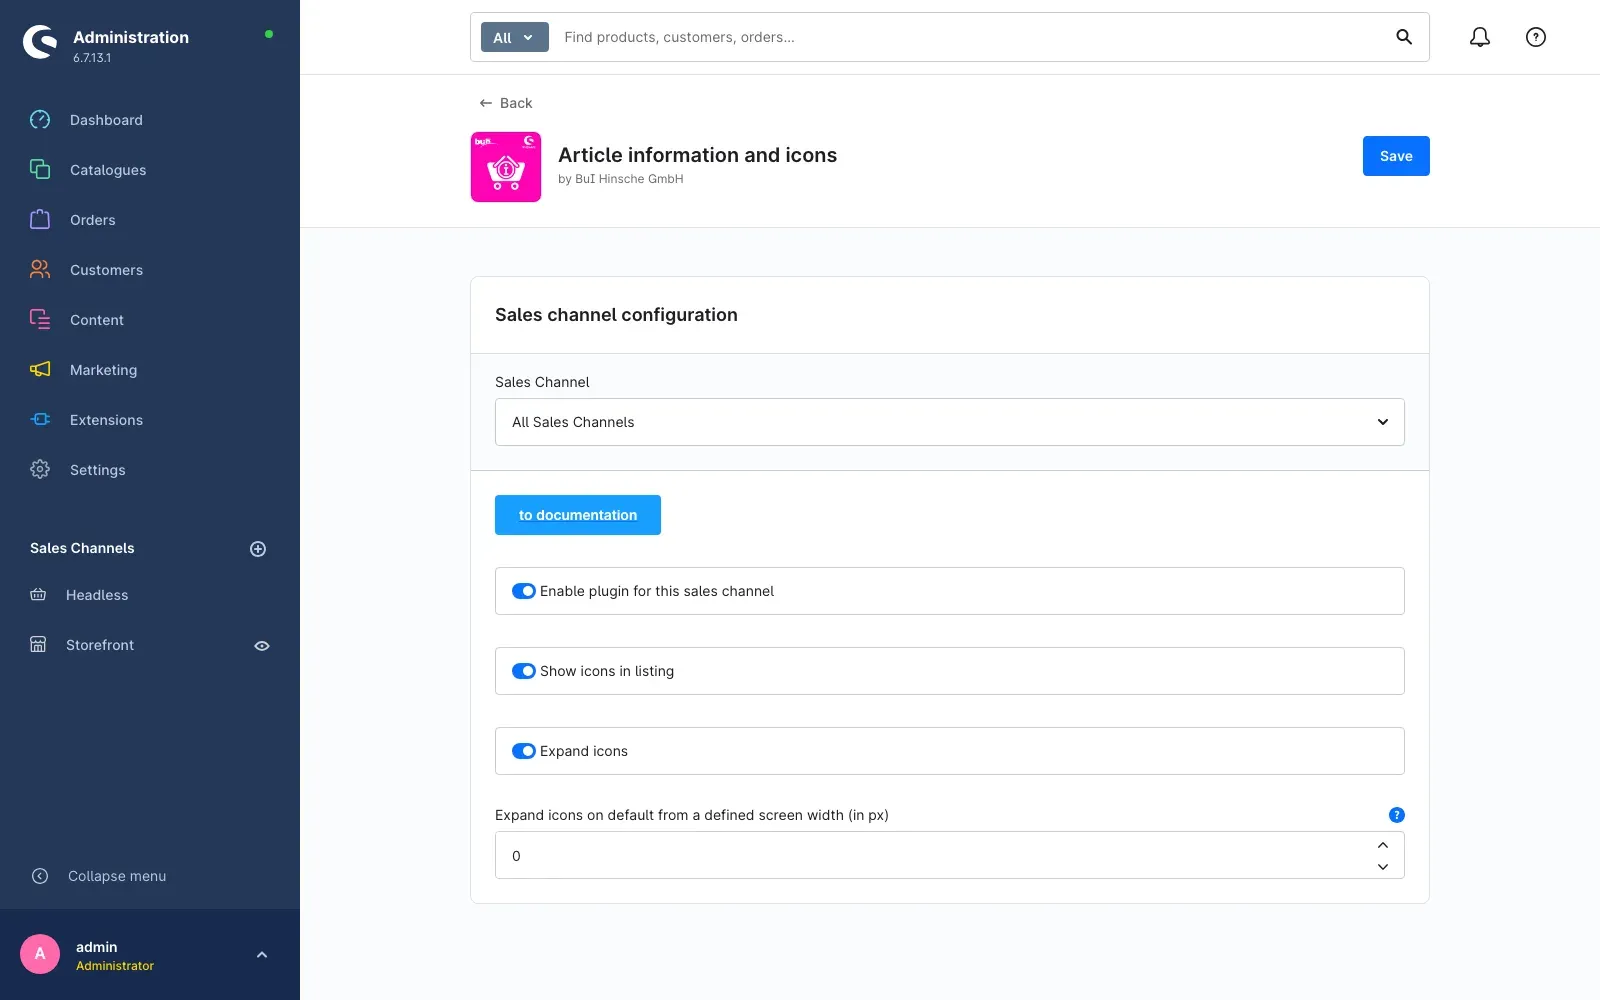
At the top you select under Sales channel which channel the settings below apply to. If the selection stays on All sales channels, every setting applies everywhere. Pick a single channel to deviate there — for example to show the symbols in your consumer shop and leave them out in your trade shop.
The to documentation button takes you to this manual at any time.
Enable plugin for this sales channel
The main switch. When it is off, no symbols appear in the selected sales channel — neither on the article page nor in lists. Your symbols and all assignments stay untouched; you merely hide them temporarily.
Show icons in listing
Shows the symbols on the article tiles as well — in categories, in search results and in shopping experiences. Turn it off if the tiles get too crowded; the symbols stay visible on the article page.
Expand icons
Determines whether the symbol area on the article page is open right away. When the setting is off, the customer first sees only the Article information heading and expands the area on demand.
Expand icons on default from a defined screen width (in px)
Controls the expanding depending on screen width. Enter 768, for example, and the area starts
collapsed on narrow screens and open on wider ones. The value 0 means: no distinction, only the
Expand icons setting applies.
Click Save in the top right after every change.
Creating and maintaining icons
You manage the symbols under Catalogues → Icons.
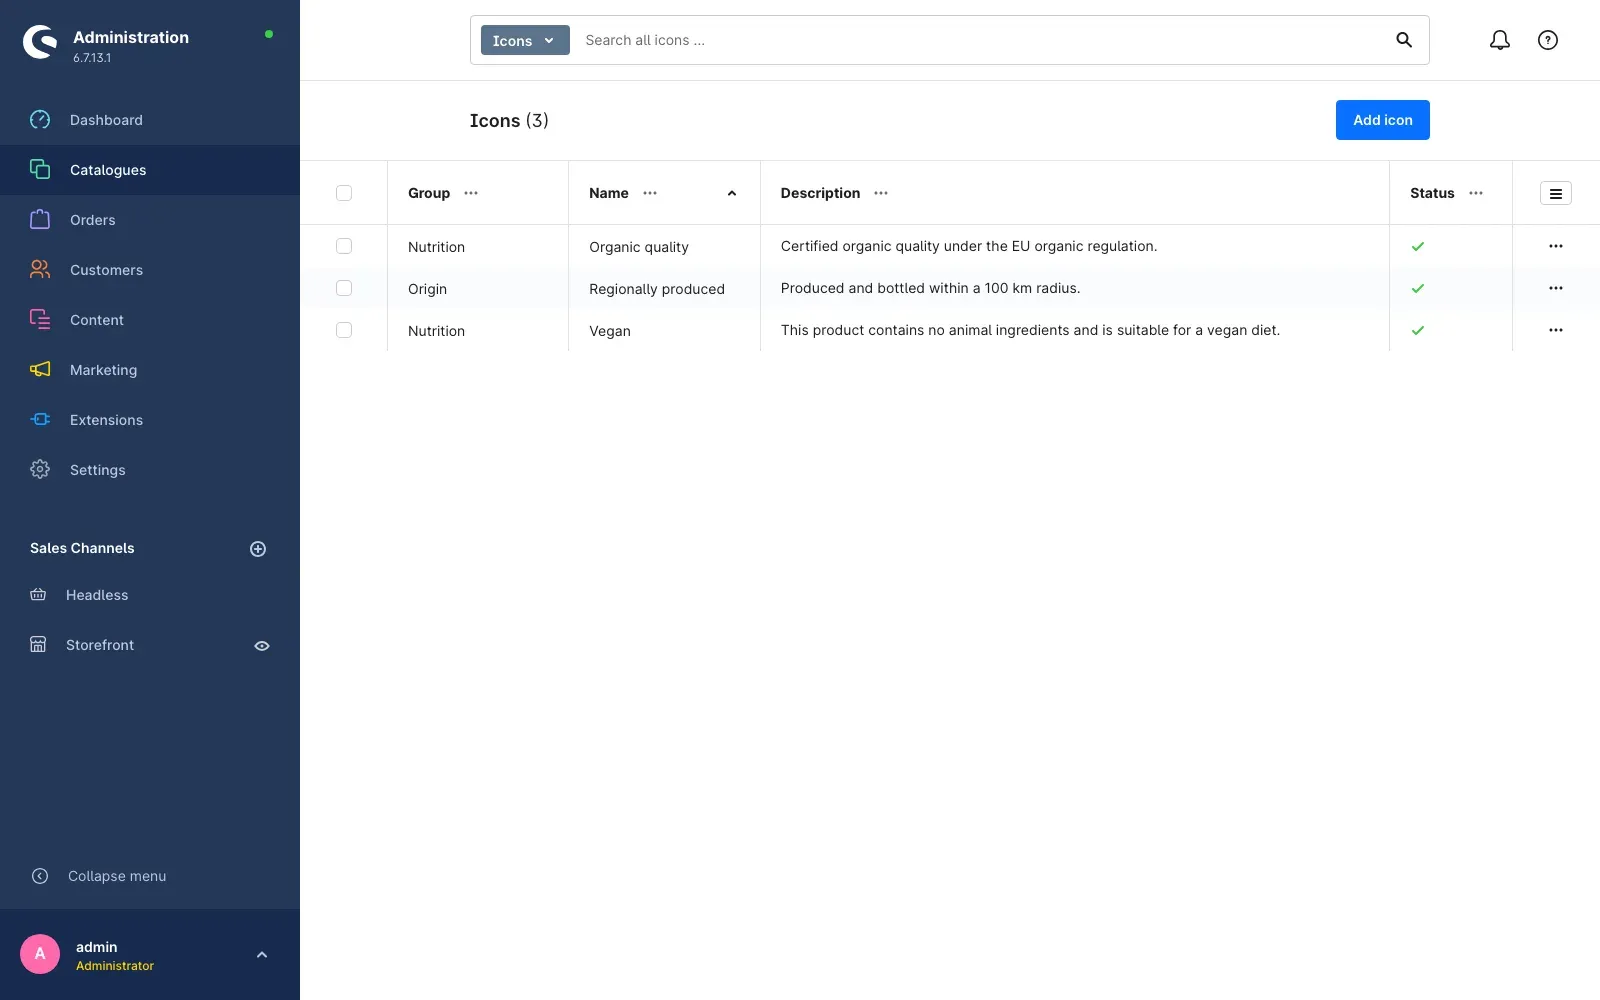
The list shows every symbol with its group, name, description and status. Use the search at the top to find single entries; the three dots at the end of a row let you edit or delete an entry.
Creating a new symbol
Click Add icon in the top right.
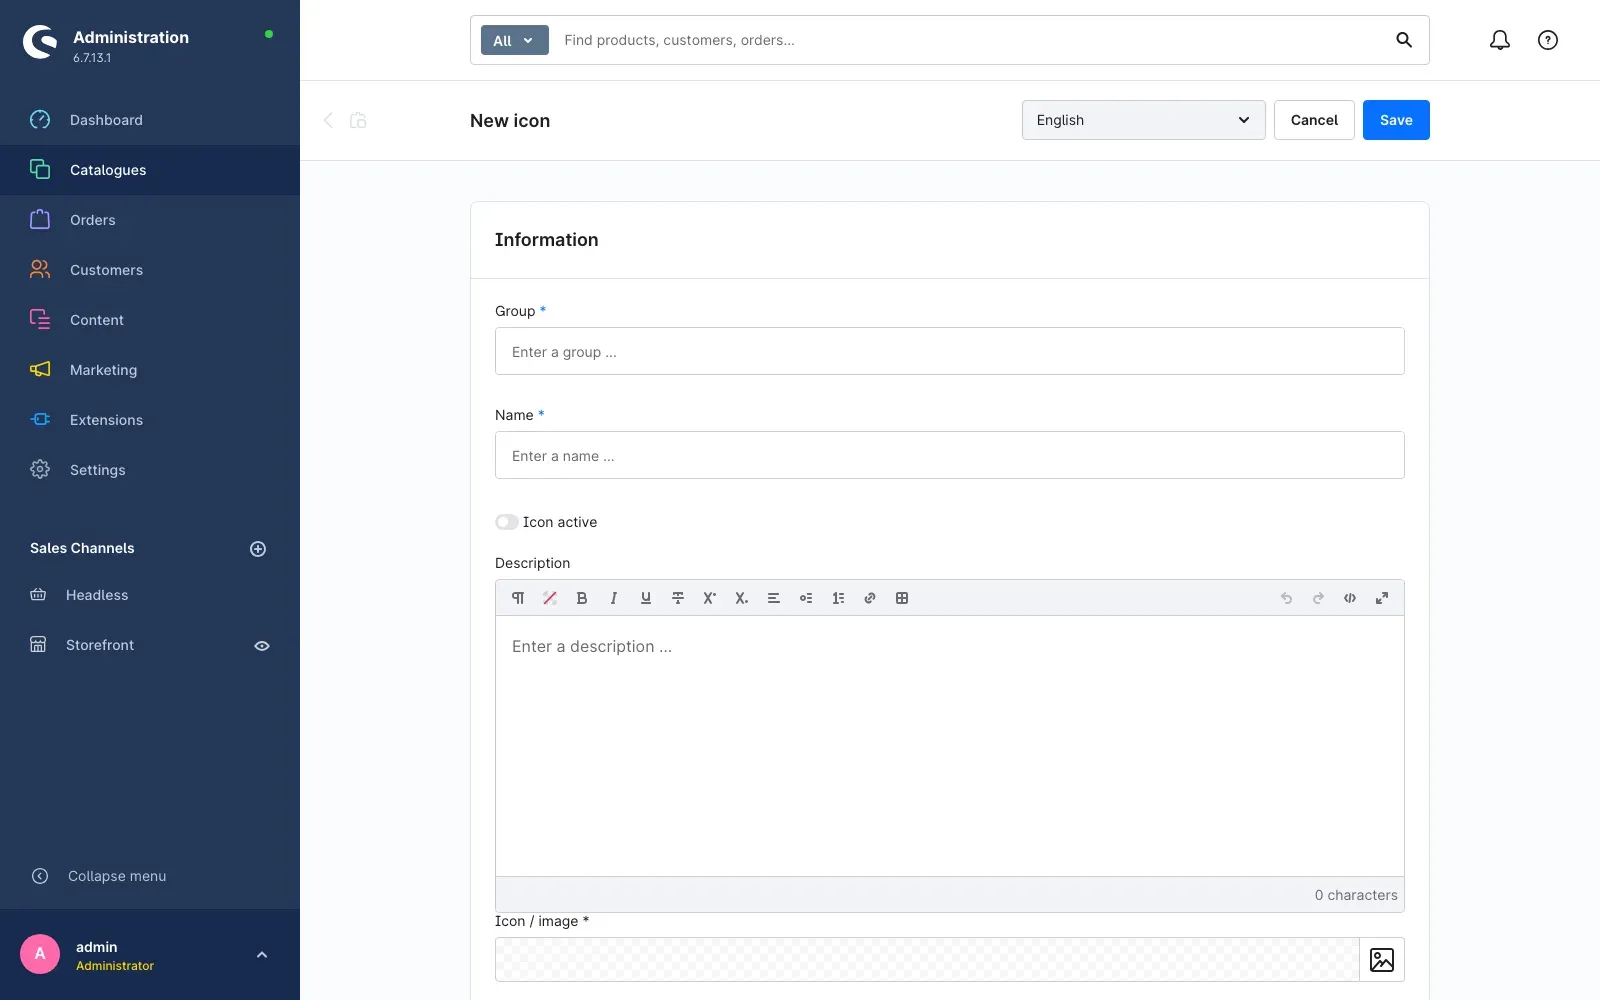
Fill in the fields:
- Group — the heading the symbol is filed under in the shop. Symbols sharing a group appear together on the article page. Descriptive umbrella terms work well, such as “Nutrition”, “Origin” or “Care instructions”.
- Name — the label of the symbol, for example “Vegan”. It appears when the customer hovers over the image.
- Icon active — only active symbols appear in the shop. Feel free to prepare a symbol in advance and release it later.
- Description — the explanatory text next to the image. You can format it, for instance set single words in bold.
- Icon / image — the image shown in the shop. Upload it or pick it from your media library.
Finally click Save in the top right.
Maintaining symbols in several languages
Name, group and description are maintained per language. Switch the language in the selector at the top and enter the translation. The image and the active state apply across all languages.
Assigning icons to a article
A symbol only appears in the shop once you assign it to a article.
- Open Catalogues → Products and select the article.
- Switch to the Specifications tab.
- Scroll down to the Article information and icons area.
- Select one or more symbols there. The selection accepts any number of entries.
- Click Save in the top right.
The area carries the same name as the plugin and sits at the end of the tab, below Shopware’s own fields.
Repeat the step for every article you want to mark. The same symbol can be used as often as you like — you maintain it in one place only.
How it looks in the shop
On the article page the heading Article information appears below the buy area, followed by the assigned symbols, sorted by group.
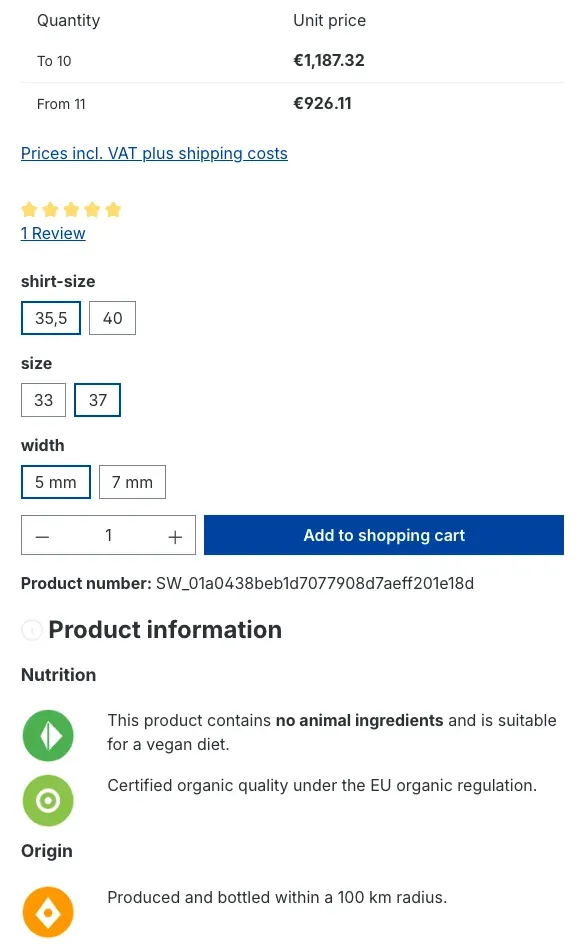
Each group gets its own subheading above its symbols. Every symbol shows its image and explanatory text. If the customer found Expand icons switched off, they open and close the area via the heading.
With Show icons in listing switched on, the article tiles in categories, search results and shopping experiences carry the symbols as a small badge as well.
Troubleshooting
No symbol appears in the shop
Check in this order:
- Is the plugin activated under Extensions → My extensions?
- Is Enable plugin for this sales channel switched on in the configuration — for the channel you are looking at? Check the selection at the top of the configuration page.
- Is the symbol itself released via Icon active?
- Is the symbol assigned to the article in the Specifications tab and the assignment saved?
The symbols appear on the article page but not in categories
Switch on Show icons in listing in the configuration. The setting applies per sales channel.
The symbol area is always collapsed
Switch on Expand icons. If a value is also entered under Expand icons on default from a defined screen width (in px), the visitor’s screen width decides — on narrower screens the area stays closed.
Changes do not take effect immediately
The shop keeps pages cached. Clear the cache under Settings → System → Caches & indexes if a change does not show up.
Frequently asked questions
How many symbols can I assign to a article? As many as you like. Keep the article page readable though — more than a handful of symbols quickly looks cluttered.
Can I show symbols in only one of several shops? Yes. Select the sales channel in the configuration and set Enable plugin for this sales channel accordingly.
What happens to my assignments when I deactivate the plugin? They are kept in full. After activating it again everything appears as before.
What happens when I uninstall? On uninstall Shopware asks whether your data should be kept. Answer yes and symbols and assignments survive for a later reinstallation.
Can I use the same explanatory text on several articles? Yes, that is exactly what the symbols are for: you maintain image and text once and assign the symbol to any number of articles. Changing the text later takes effect everywhere.
Do the symbols appear in a second language as well? Yes, provided you maintained name, group and description in that language. If a translation is missing, Shopware falls back to the main language.
For administrators
This section is aimed at technical staff.
| Topic | Detail |
|---|---|
| Technical name | SwpProductIconsSix |
| Composer name | swp/producticons-six |
| Version | 6.7.1 |
| Requirements | Shopware 6.7.11 or newer, PHP 8.2 or newer |
Data storage: The plugin creates the tables swp_product_icons and swp_product_icons_translation.
Shopware’s own tables are not modified. The link between article and symbol lives in the custom
field set product_icons_six on the article.
Configuration keys (readable via the SystemConfigService, each per sales channel):
SwpProductIconsSix.config.active, …ShowIconsInListing, …OpenOnDefault, …OpenOnDefaultWidth.
Uninstalling: Uninstalling without keeping data removes both tables and the custom field set. Merely deactivating deletes nothing.
Template customisation: Output happens through the Twig blocks swp_product_icons_six (buy
area) and component_product_icons_custom_icons (article tile). Both can be overridden in your own
theme.
More manuals
Age Check
Tobacco, spirits, knives: visitors who do not confirm their age never see the restricted items at all. You tick a box per product, the plugin hides it everywhere.
Open manual Shopware 6AI SEO All-in-One: SEO and GEO suite for Shopware 6
Google finds your shop, ChatGPT never mentions it. This plugin checks both in one run, fills empty meta fields from templates and turns the findings into a to-do list.
Open manual Shopware 6Area Calculation
Area calculation on the product page: your customer knows the square metres, not the number of packs. The plugin works it out, adds the offcut and fills the quantity field.
Open manualNeed a team that keeps your shop running?
We have been maintaining Shopware shops for more than 20 years, including updates, hotfixes and the plugins you are configuring right now.