Polls
Create polls with several questions and answers, place them on any page via a shopping experiences block and evaluate the results as charts right in the administration.
On this page
- Introduction
- What you get out of this plugin
- Who is this plugin for?
- Installation
- Getting started
- Settings
- Enable plugin for this sales channel
- Hide cookie notice when using a cookie consent managing plugin
- How to use the features
- How to create answers
- How to create questions and assign answers to them
- How to create a poll
- How to put the poll on a page of your shop
- What your customers see in the shop
- How to evaluate the results
- Troubleshooting
- The poll does not appear in the shop
- The poll is there, but no answer can be selected
- Visitors without an account only see the cookie notice
- The plugin does not appear in the admin menu
- FAQ
- For administrators / technical details
- System requirements
- Data storage
- Installation from the command line (Composer)
Introduction
Polls lets you ask your customers for their opinion right inside your shop and shows you the answers, already evaluated, in your administration.
You build a poll from three parts: answers, questions and the poll itself. You then place it on any page of your shop through Shopping Experiences. The votes you collect are shown as a table, a bar chart or a pie chart.
What you get out of this plugin
- You ask your customers about satisfaction, product wishes or support quality without paying for an external survey tool.
- You put several questions into one poll, with single or multiple choice.
- You decide per poll whether it applies to every visitor or only to one customer group.
- You set a period during which the poll runs, so you do not have to switch it off by hand.
- You read the results as a table or a chart, without exporting any data.
- Your customers see the overall result right after they submit, and you can thank them with a coupon code.
Who is this plugin for?
For shop owners who want to know what their customers think: about the range, about the service or about a planned extension. You do not need any programming knowledge. Everything you create is maintained in the administration.
Installation
After the purchase the plugin is available directly in your administration, there is nothing to download.
- Log in to your Shopware administration (
YourShop.com/admin) - Open Extensions → My extensions
- Click Install next to Polls
- Activate the plugin with the toggle next to the entry, done.
If Polls does not appear in the list, your Shopware account is not yet connected to the shop. You can do that under Extensions → My extensions by signing in with your Shopware account.
Getting started
-
Open the settings: Extensions → My extensions → Polls → Configuration (the three dots next to the entry)
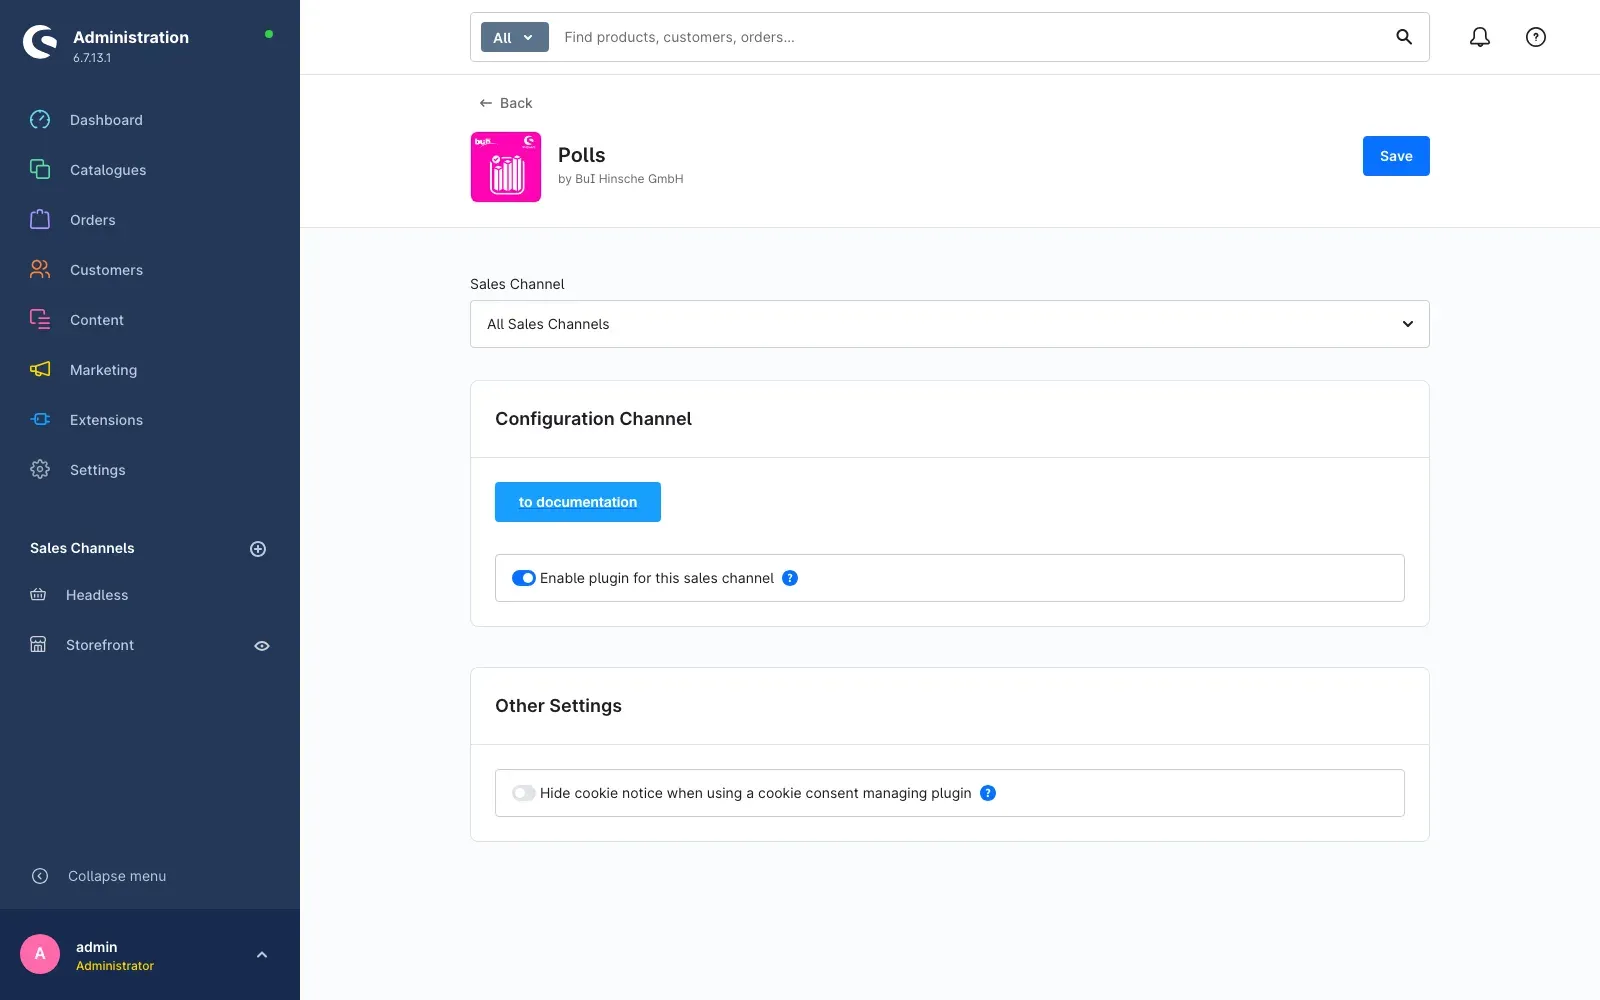 Fig. 1: The configuration with the per sales channel toggle and the documentation button
 -
Pick the sales channel: At the top of the configuration page you select the sales channel. Everything you set below applies to exactly that channel.
-
Build your poll: Create the answers first, then the questions, and the poll last. This order saves you clicks, because you can assign answers and questions as soon as they exist. Chapter 5 shows you how.
-
Check the result: Open the page of your shop where you placed the poll. That is where your customers will find it.
Settings
You find the settings under Extensions → My extensions. Click the three dots next to Polls and choose Configuration.
Fig. 2: All settings live on one page
The button to documentation sits at the very top. It opens this manual in your browser, in the language of your administration.
Enable plugin for this sales channel
Enable plugin for this sales channel decides whether polls appear in the sales channel you selected above. When the toggle is off, no poll is rendered in that channel and no vote is accepted. The toggle is switched on by default.
Why this is useful: You run a B2B and a B2C channel and only want to survey the end customers. Then you leave the toggle on in the B2C channel and switch it off in the B2B channel. The plugin stays installed, and nothing happens in the B2B shop.
Hide cookie notice when using a cookie consent managing plugin
The poll stores a cookie so an anonymous visitor cannot vote twice. Hide cookie notice when using a cookie consent managing plugin hides the notice the plugin shows for that. The toggle is switched off by default, so the notice appears.
Why this is useful: If another plugin in your shop already asks for cookie consent, two notices would sit next to each other. In that case you switch this one off.
How to use the features
You reach every area of the plugin through Marketing → Polls. It holds two entries: Edit polls for the content and Analyze polls for the results.
The Edit polls page shows three tabs at the top: Polls, Questions and Answers. You switch between them while building your poll.
How to create answers
What you get out of it: Answers are the building blocks you can later assign to several questions. An answer such as “Very satisfied” is created once and reused in every question.
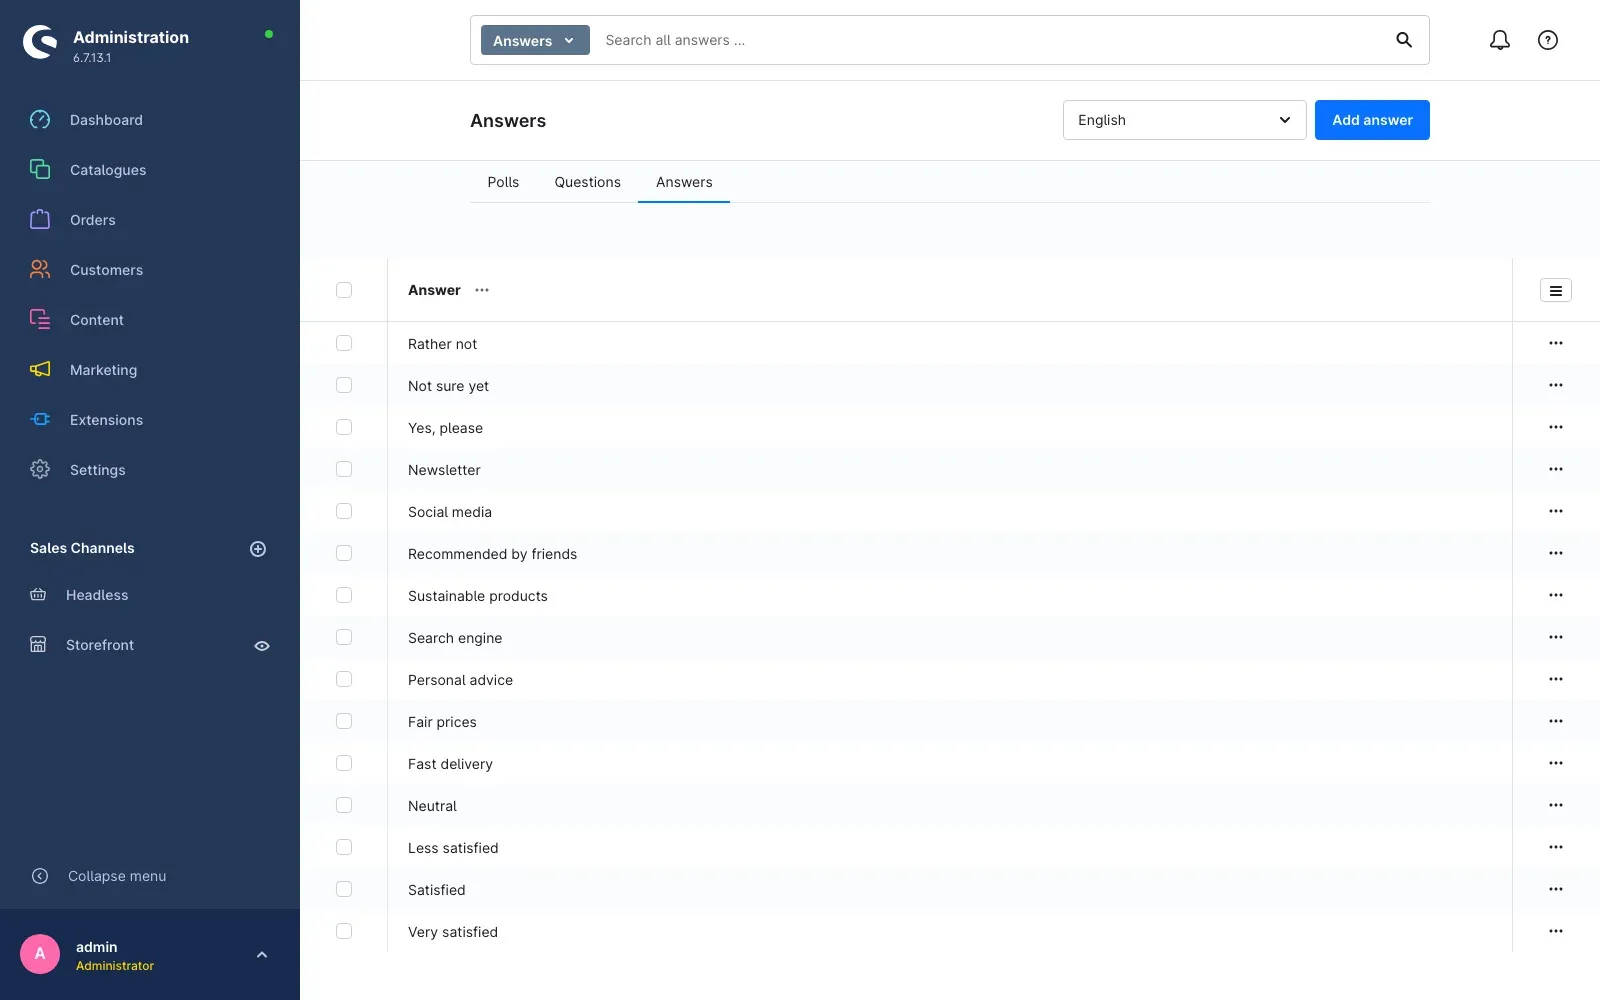 Fig. 3: The overview of all answers you created
Step by step
- Go to Marketing → Polls → Edit polls
- Switch to the Answers tab
- Click Add answer
- Fill in the details:
- Answer: the text your customers can choose in the shop
- Description: an optional explanation
- Click Save
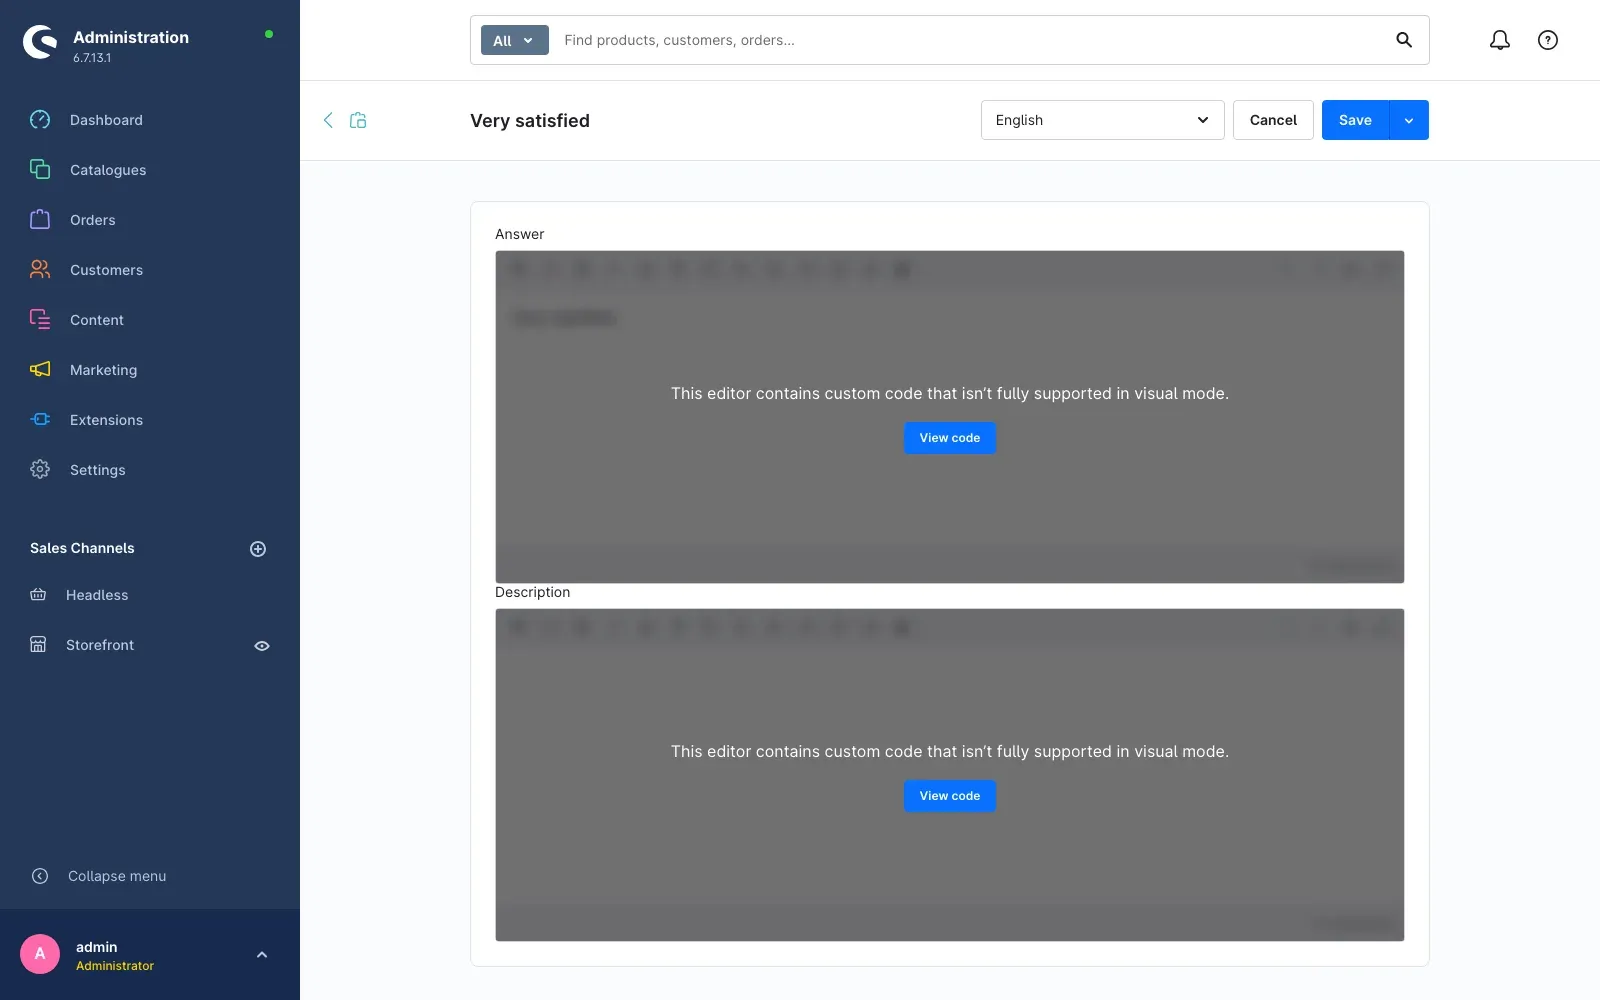 Fig. 4: A single answer with its text
Tip: Start with the answers you need in several questions, a satisfaction scale for example. Save and duplicate then creates the next answer on the same basis in seconds.
How to create questions and assign answers to them
What you get out of it: The question decides what your customers read and how many answers they may pick.
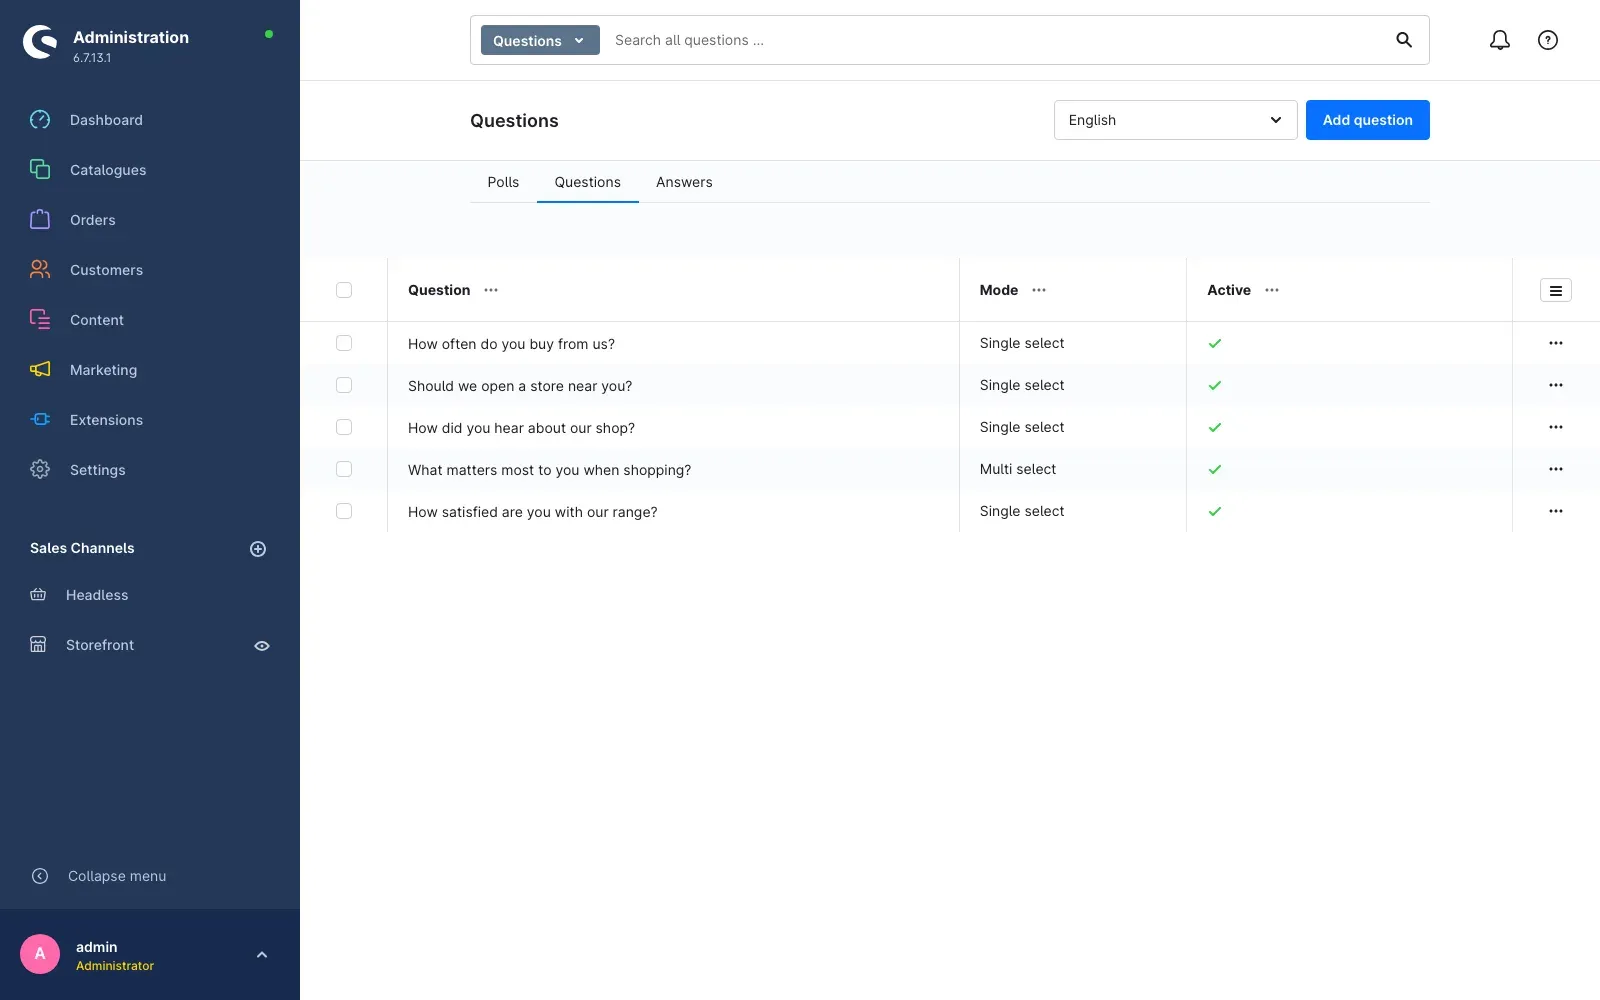 Fig. 5: The overview of all questions with their mode
Step by step
- Switch to the Questions tab
- Click Add question
- Fill in the General tab:
- Question: the text your customers read
- Description: an optional hint below the question. If you leave it empty, the shop shows “Select one answer” or “Multiple answers possible” automatically
- Mode: Single select shows radio buttons, Multi select shows checkboxes
- Answer choices: how many answers your customers may tick at most in multi select
- Active: only active questions appear in the shop
- Click Save
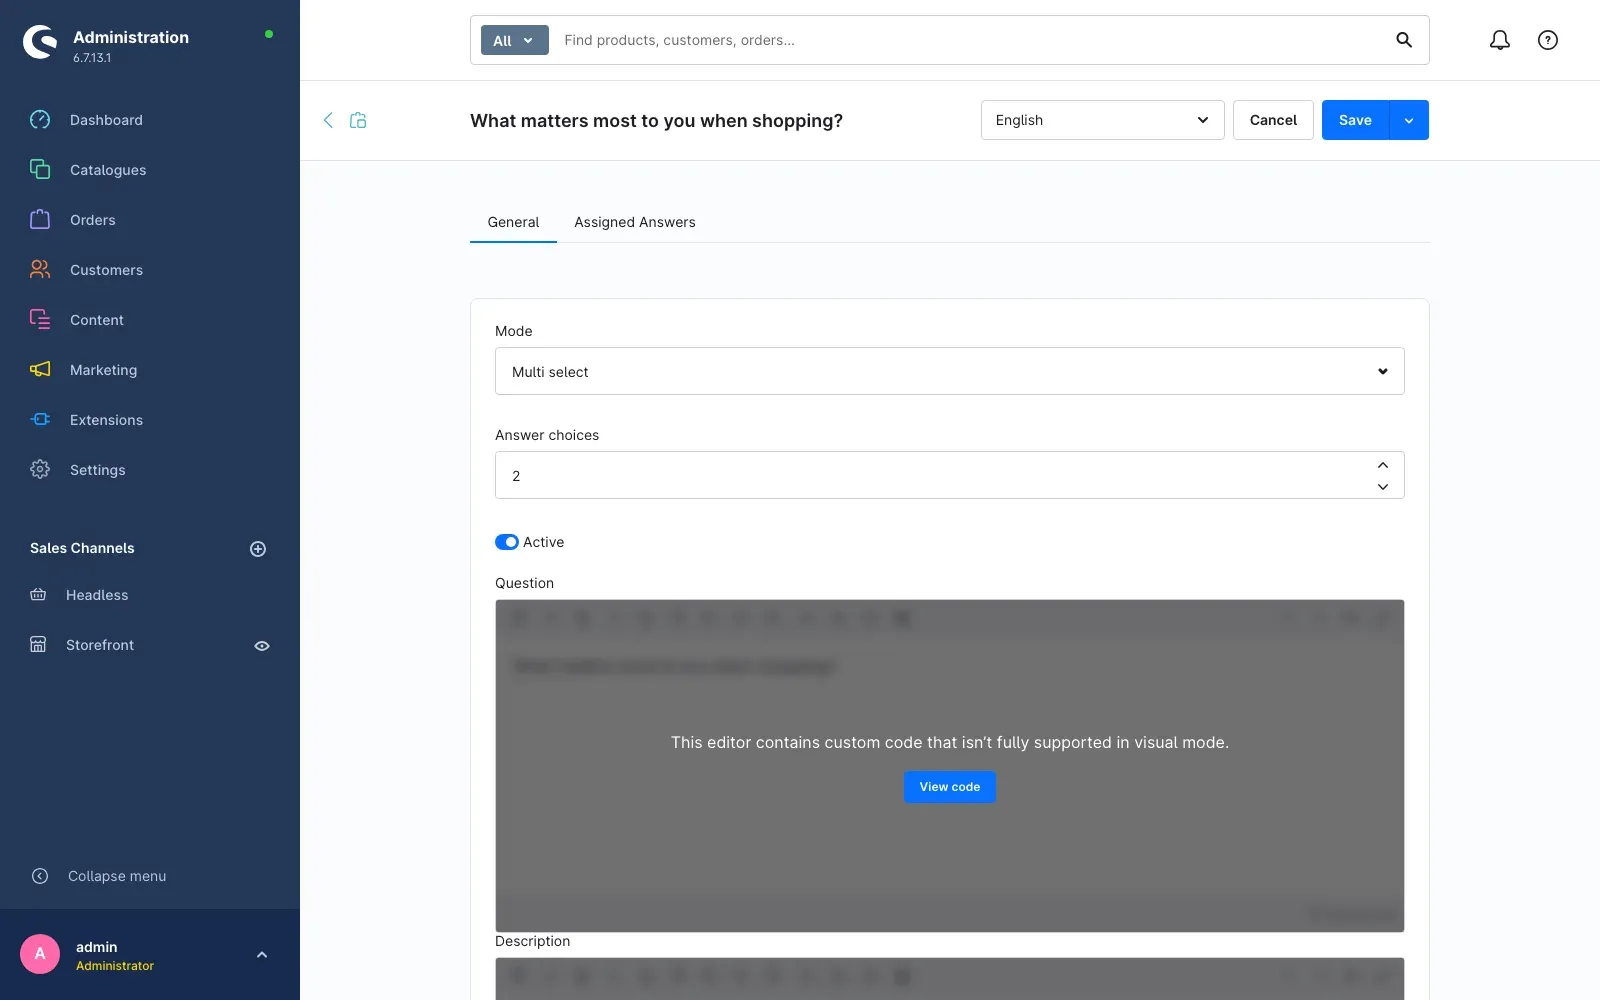 Fig. 6: The question with its mode and the number of answer choices
- Switch to the Assigned Answers tab
- Pick the answers that belong to this question and set their order in Position
- Click Save
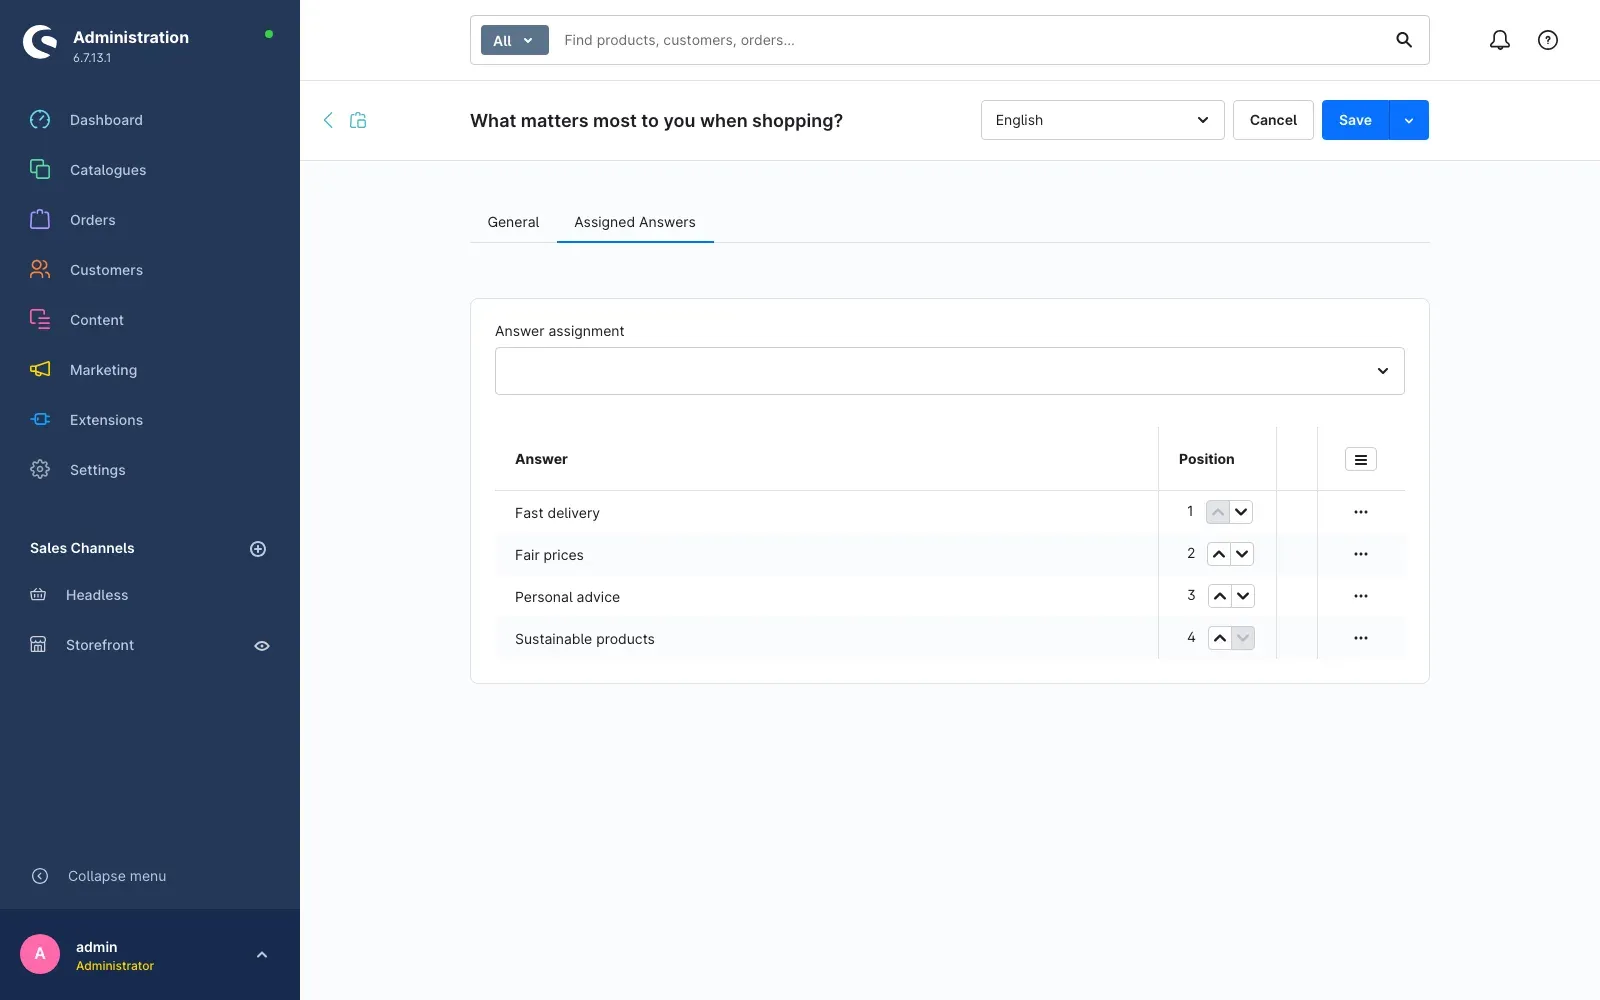 Fig. 7: The answer assignment defines the choices and their order
Important: A question without assigned answers appears in the shop without any choices. Assign at least two answers to every question.
How to create a poll
What you get out of it: The poll bundles your questions and defines who sees it and how long it runs.
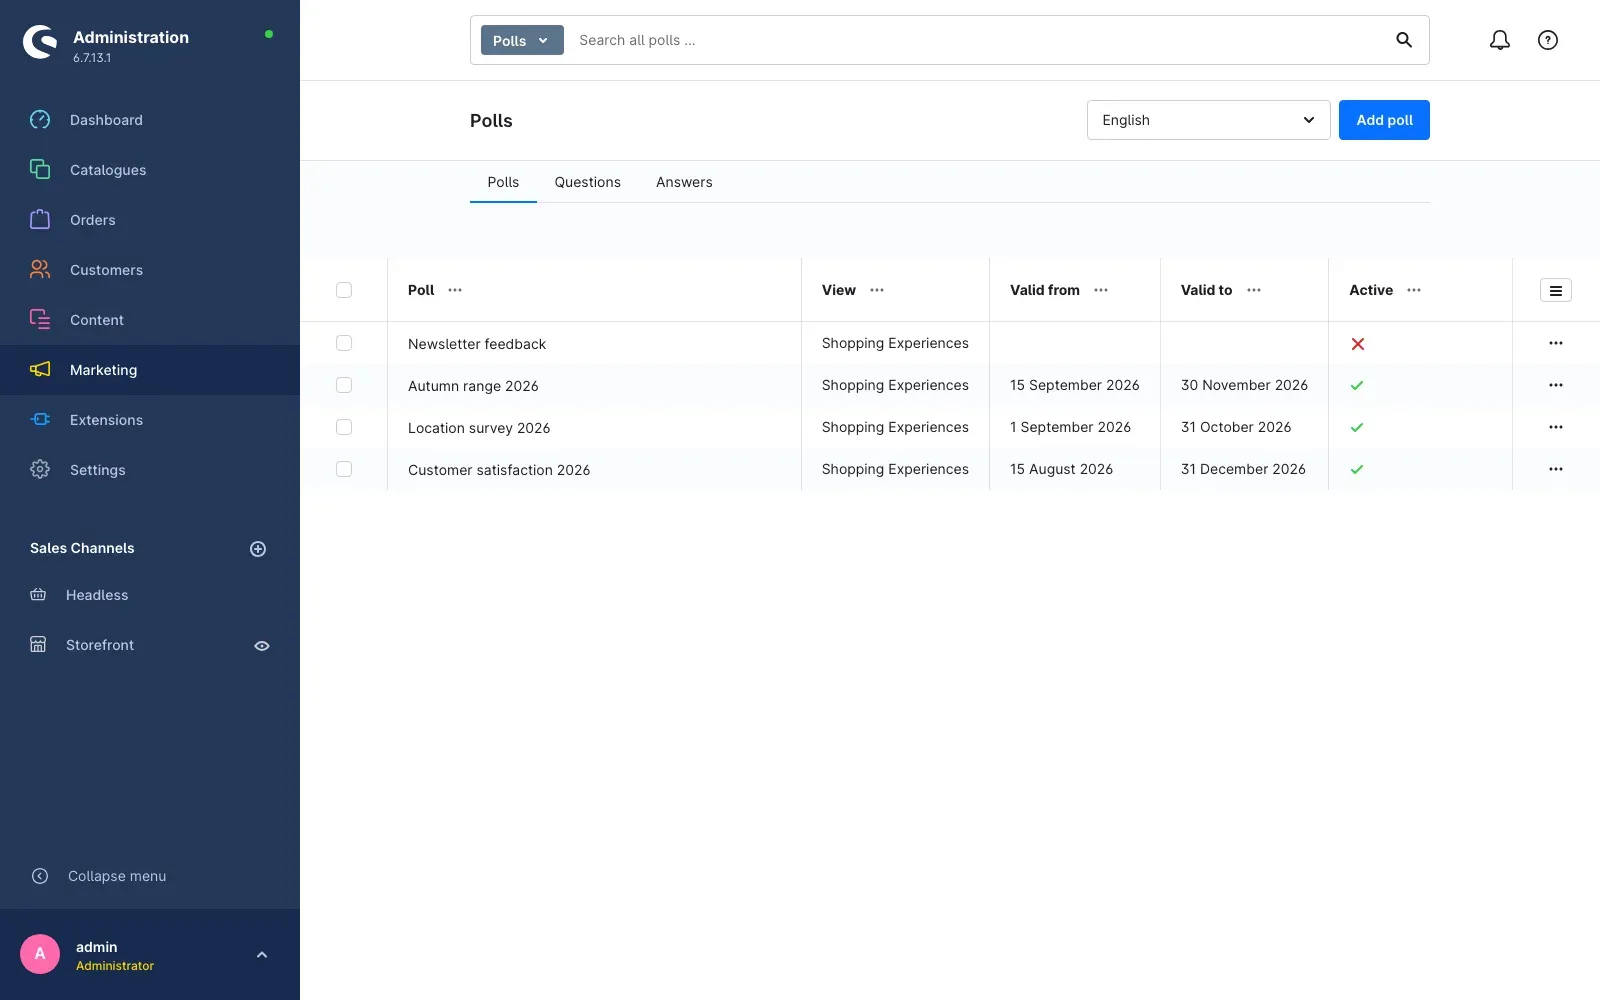 Fig. 8: The overview of all polls with their period and status
Step by step
- Switch to the Polls tab
- Click Add poll
- Fill in the General tab:
- Poll: the title your customers read above the questions
- Description: an introductory text below the title
- View: where the poll is rendered. Currently this is Shopping Experiences
- Public: switched on, visitors without an account may take part; switched off, only logged in customers may
- Valid from and Valid to: the period during which the poll runs
- Customer group: limits the poll to one customer group. Leave it empty and it applies to everyone
- Active: only active polls appear in the shop
- Click Save
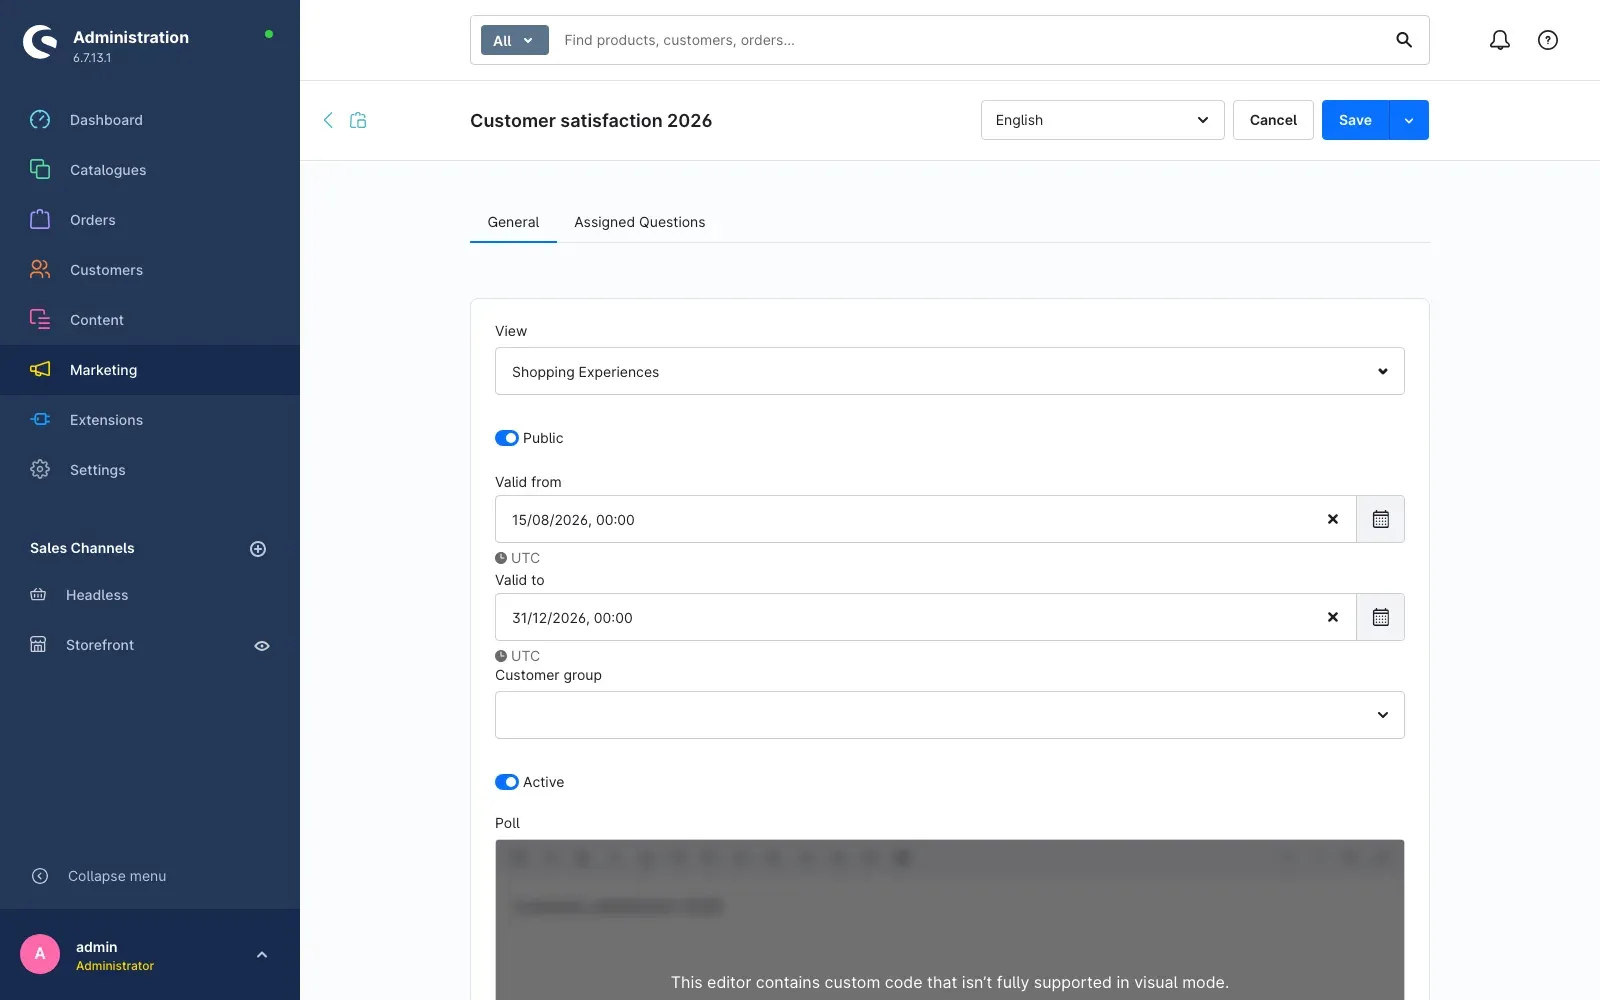 Fig. 9: Title, period, customer group and visibility of a poll
- Switch to the Assigned Questions tab
- Pick the questions that belong to this poll and set their order in Position
- Click Save
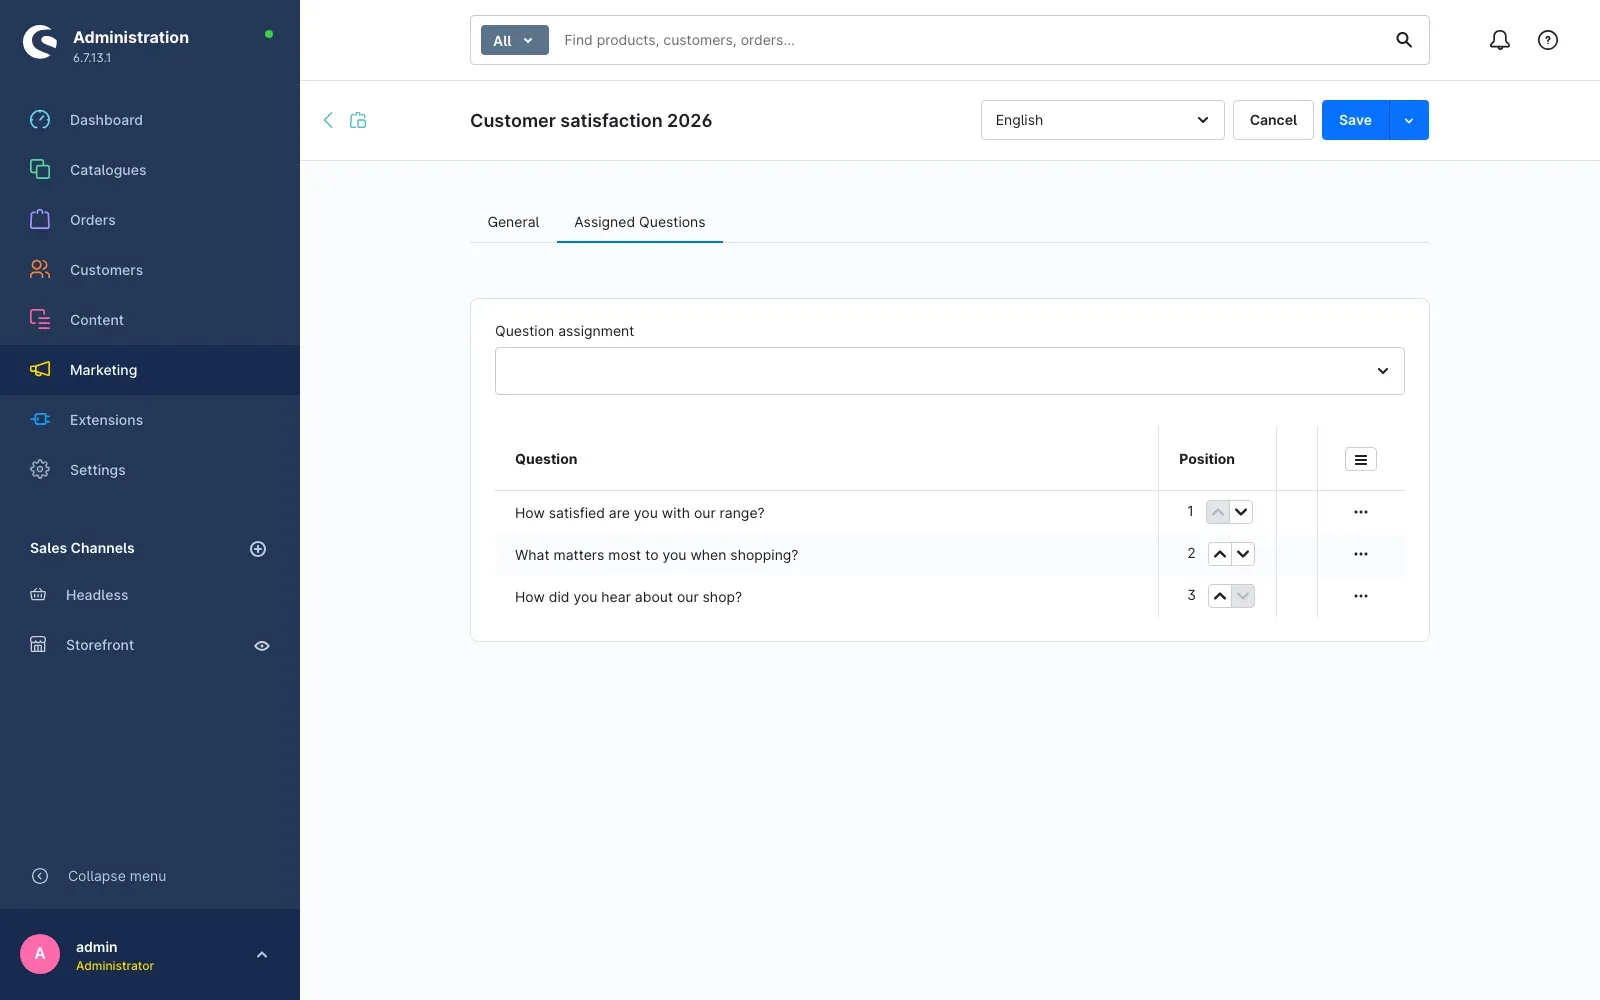 Fig. 10: The question assignment defines the content and order of the poll
How to put the poll on a page of your shop
What you get out of it: Shopping Experiences is what makes the poll visible to your customers. You decide which page it sits on.
Step by step
-
Go to Content → Shopping Experiences
-
Open the layout the poll should appear in, or create a new one
-
Add a section with the plus sign and pick the block Polls from the Commerce category
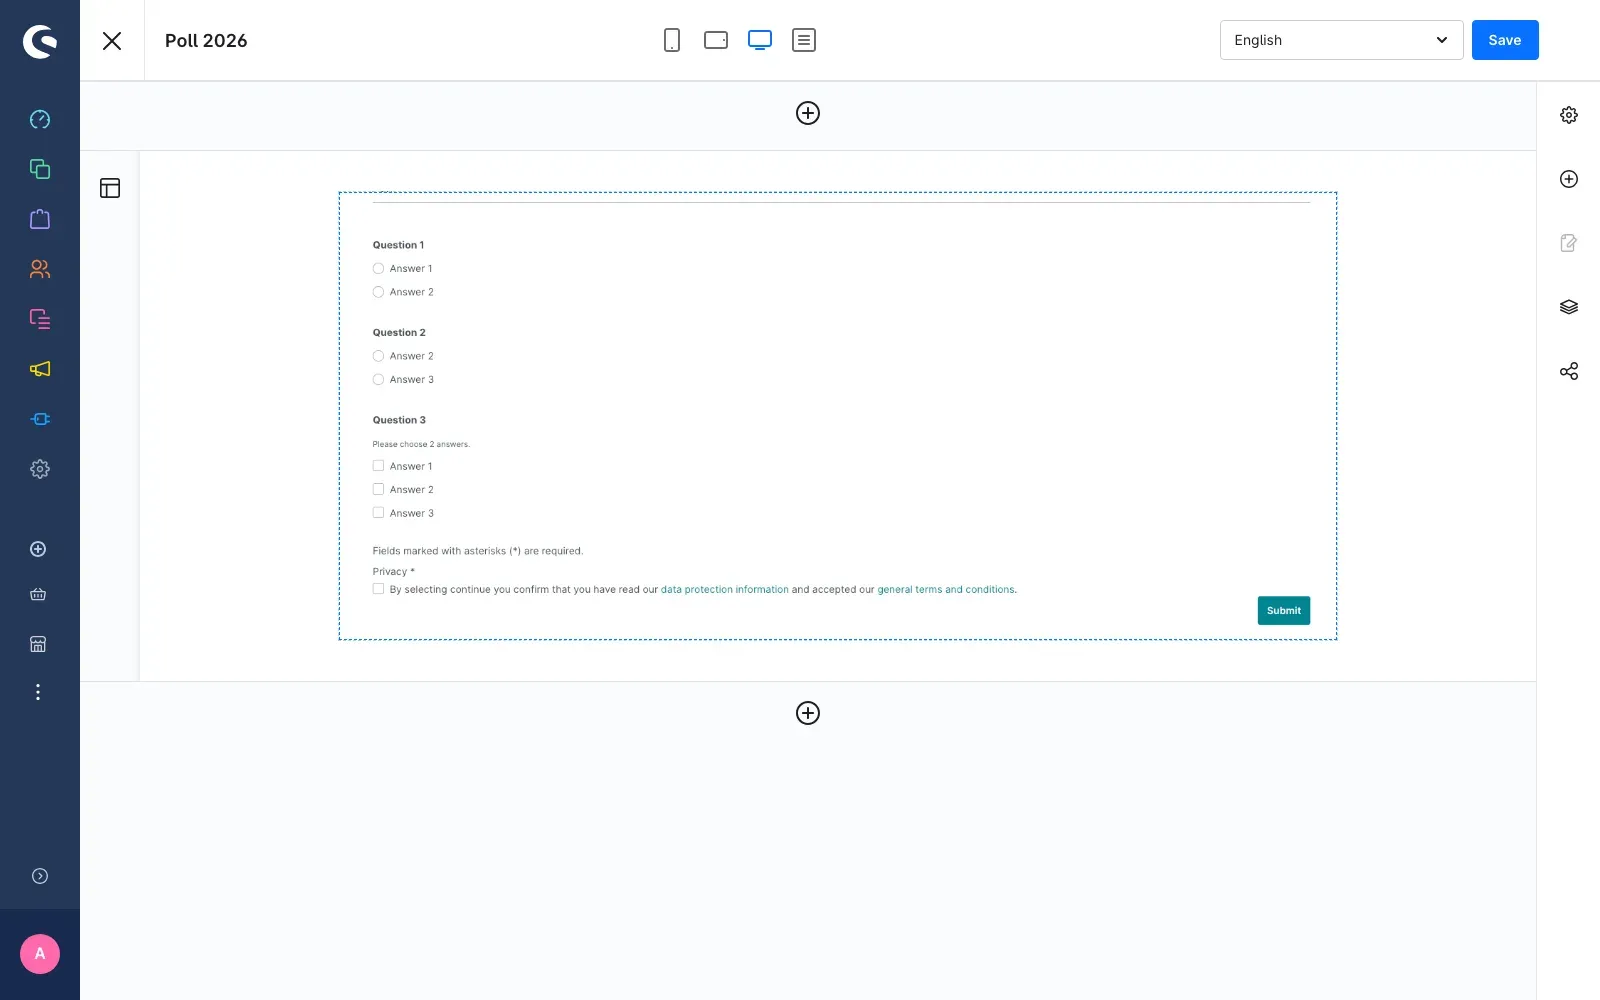 Fig. 11: The Polls block inside a layout. The preview shows sample text, the shop will show your own questions later
 -
Hover over the block and click the cog of the Poll - Element element
-
Set the following in the Content tab:
- Polls: pick the poll that should run on this page. You may pick several, your customers then work through them one after another
- Hide result page: switched on, your customers see no overall result after they submit
- Show coupon: switched on, a thank you with a code appears after they submit
- Coupon: the code shown in that thank you
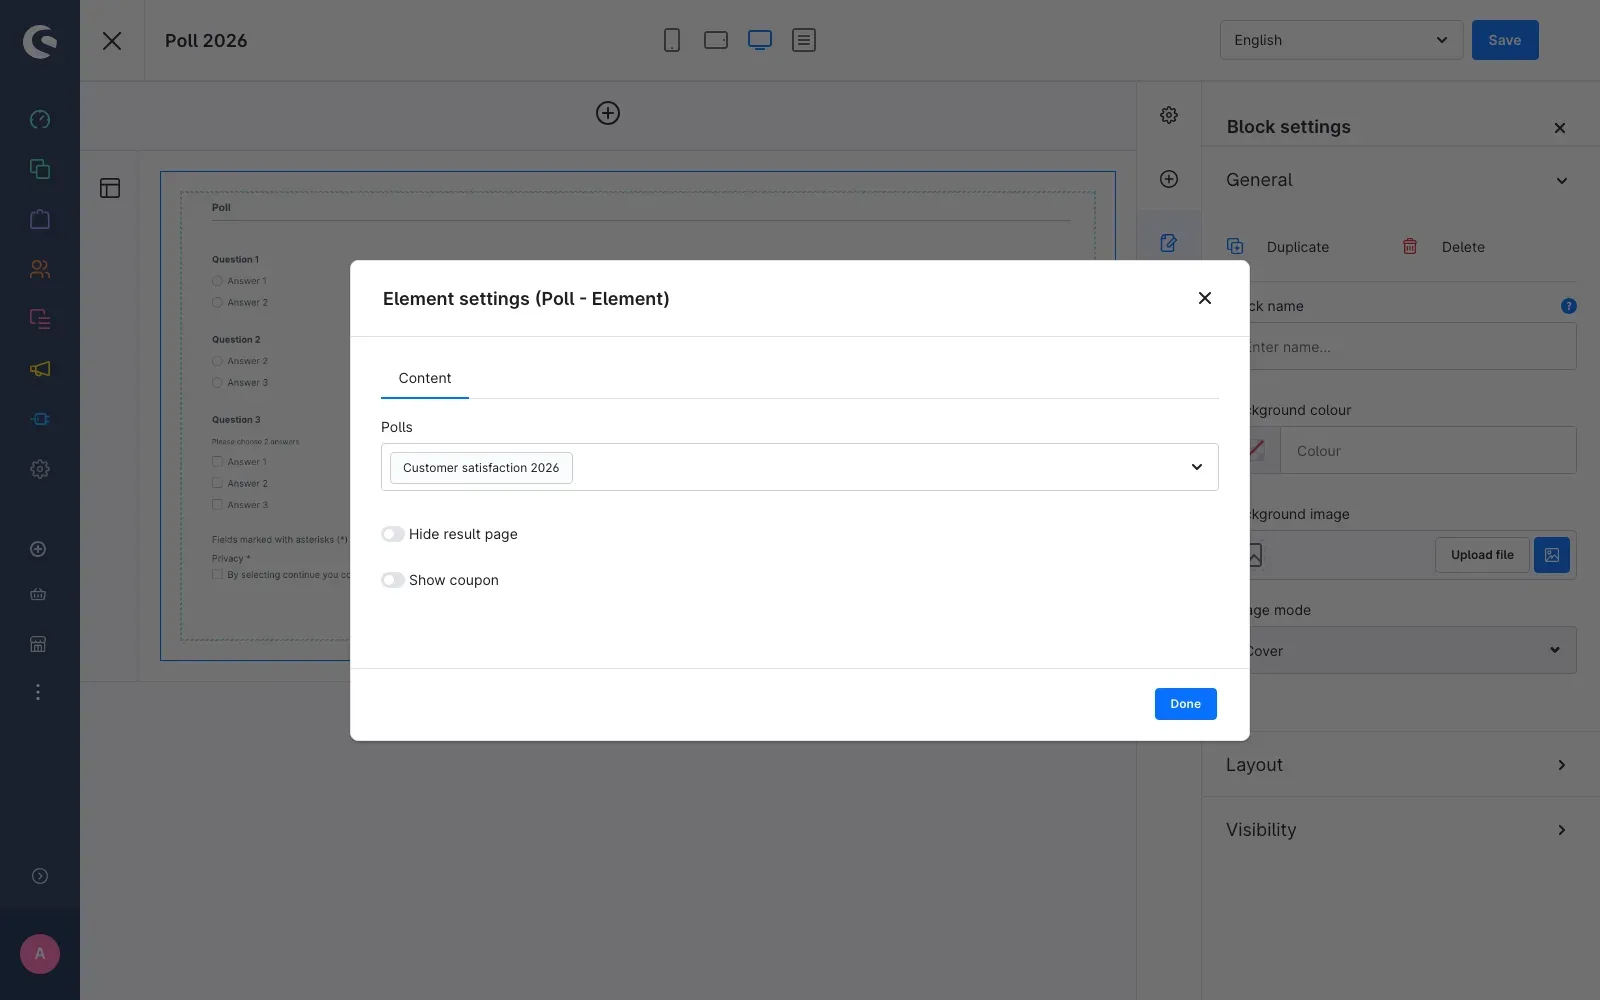 Fig. 12: The element is where you pick the poll and decide about result page and coupon
 -
Click Done and then Save
-
Assign the layout to a category or a landing page so it shows up in the shop
Tip: The coupon code is plain text. Create it under Marketing → Promotions first so it can actually be redeemed in the cart.
What your customers see in the shop
What you get out of it: You know how the poll comes across before you publish it.
A logged in customer sees the poll straight away. A visitor without an account first gets a notice about the cookie the participation needs.
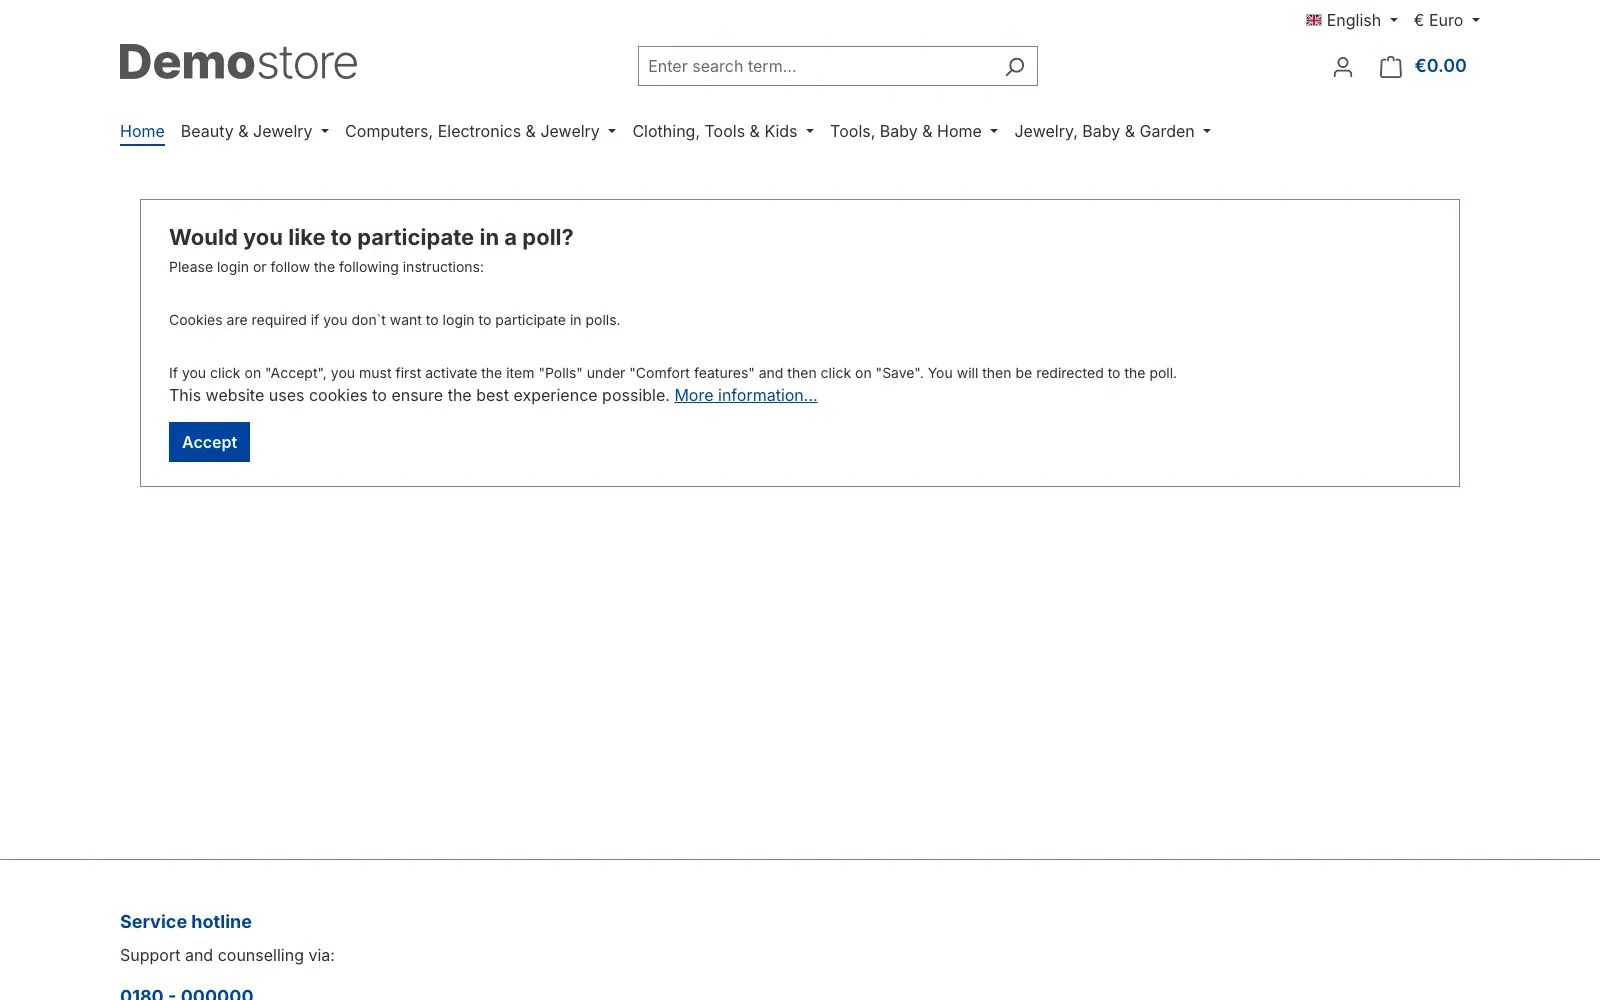 Fig. 13: Without an account the shop asks for consent to the poll cookie first
Once consent is given, the poll is ready.
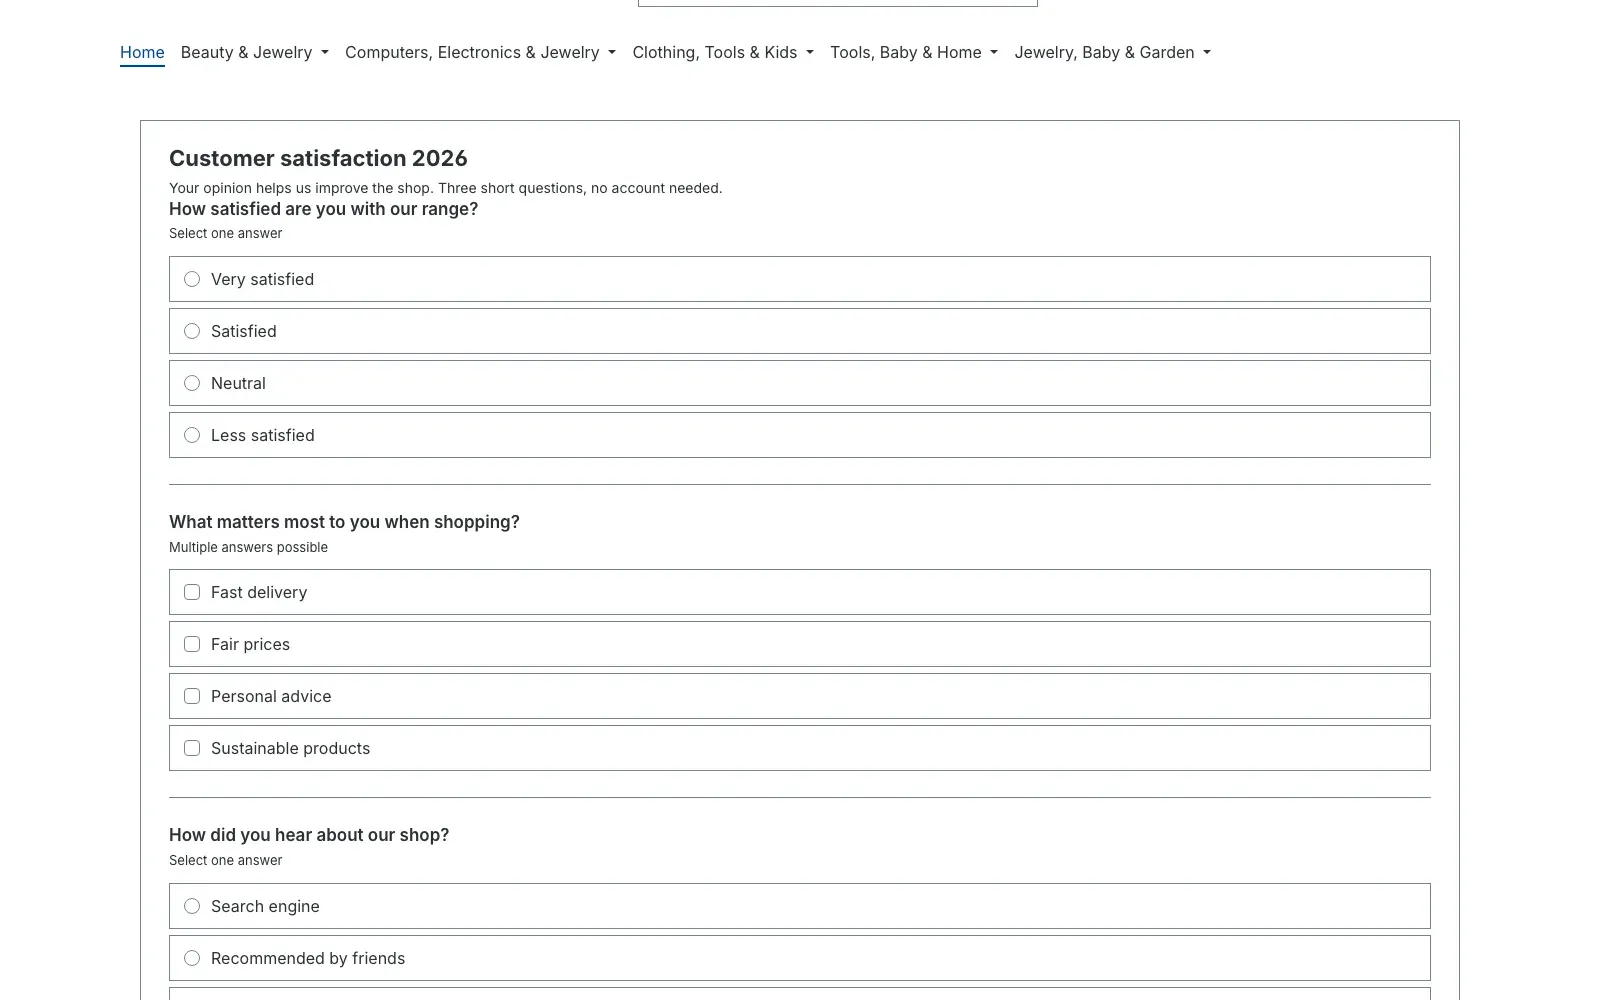 Fig. 14: Title, description and the first question
With Single select your customer picks exactly one answer.
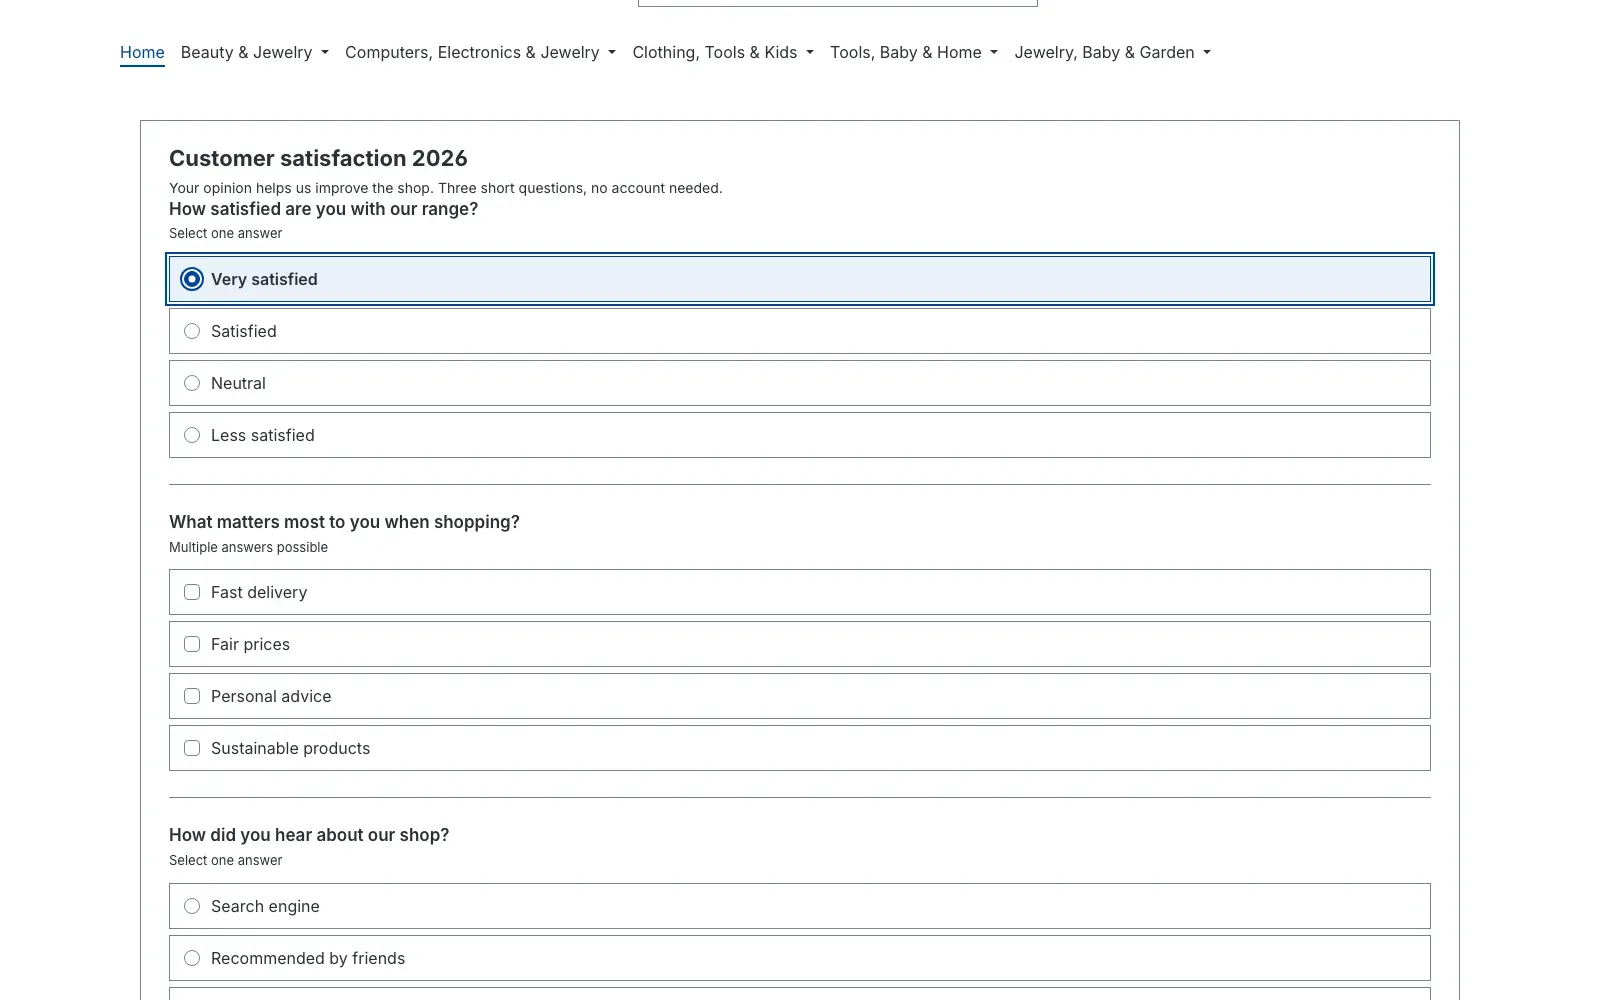 Fig. 15: A single select question
With Multi select they tick as many answers as you allowed in the question. The hint “Multiple answers possible” sits above the choices.
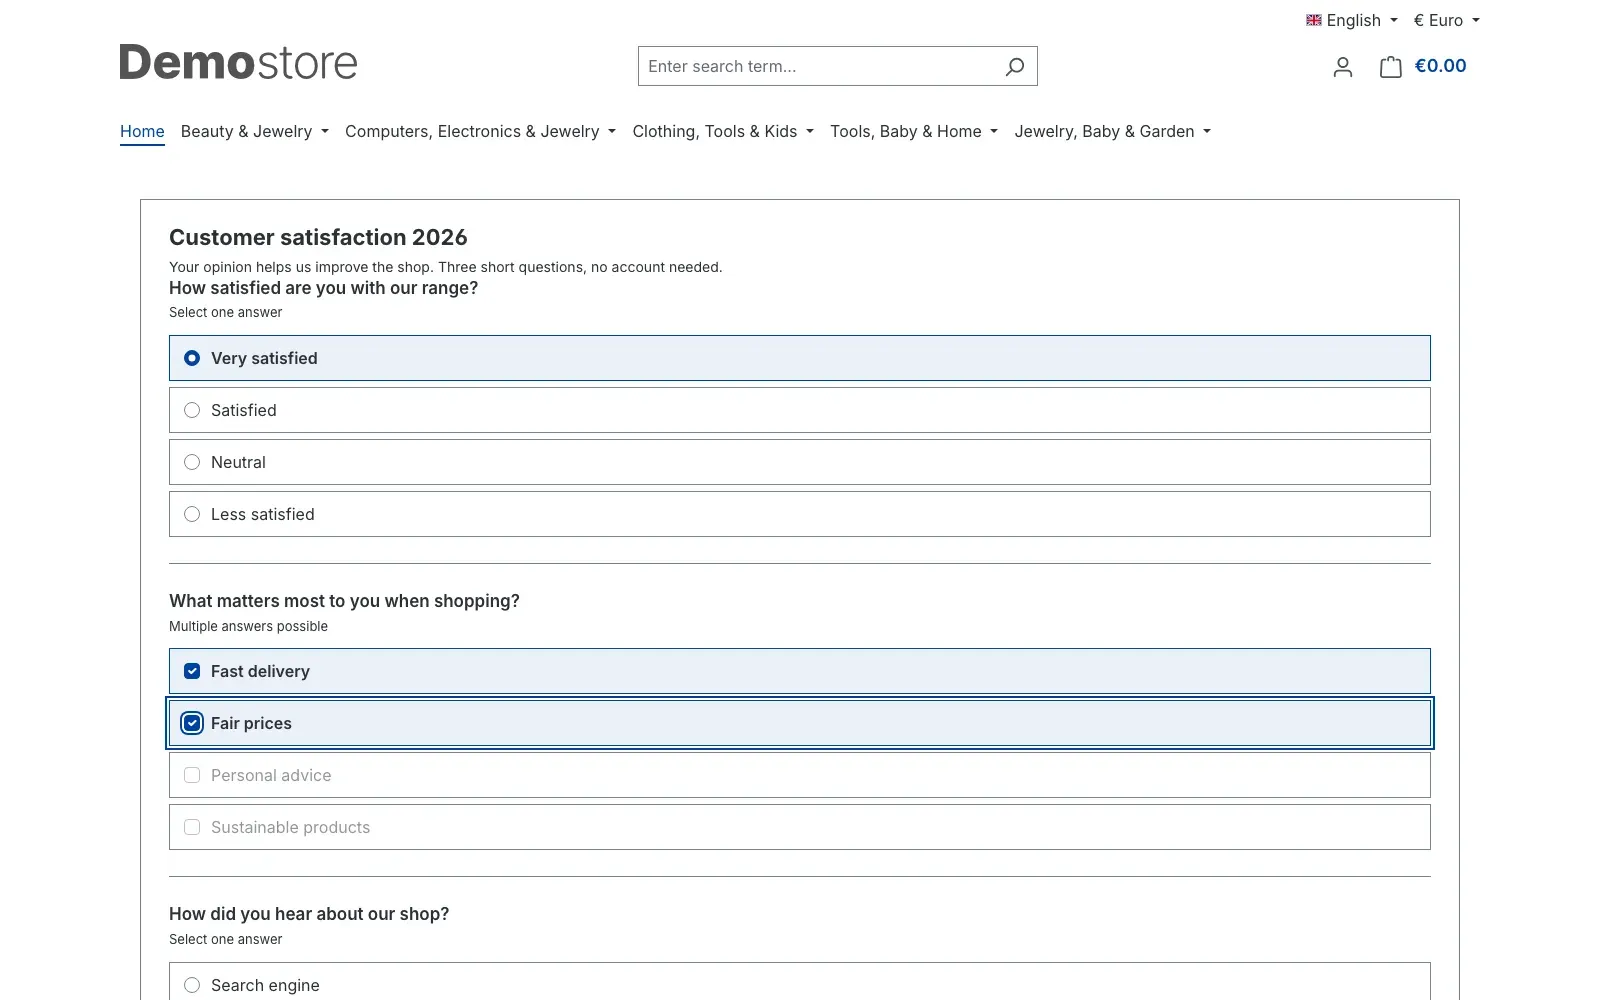 Fig. 16: A multi select question
The Submit survey button closes the poll.
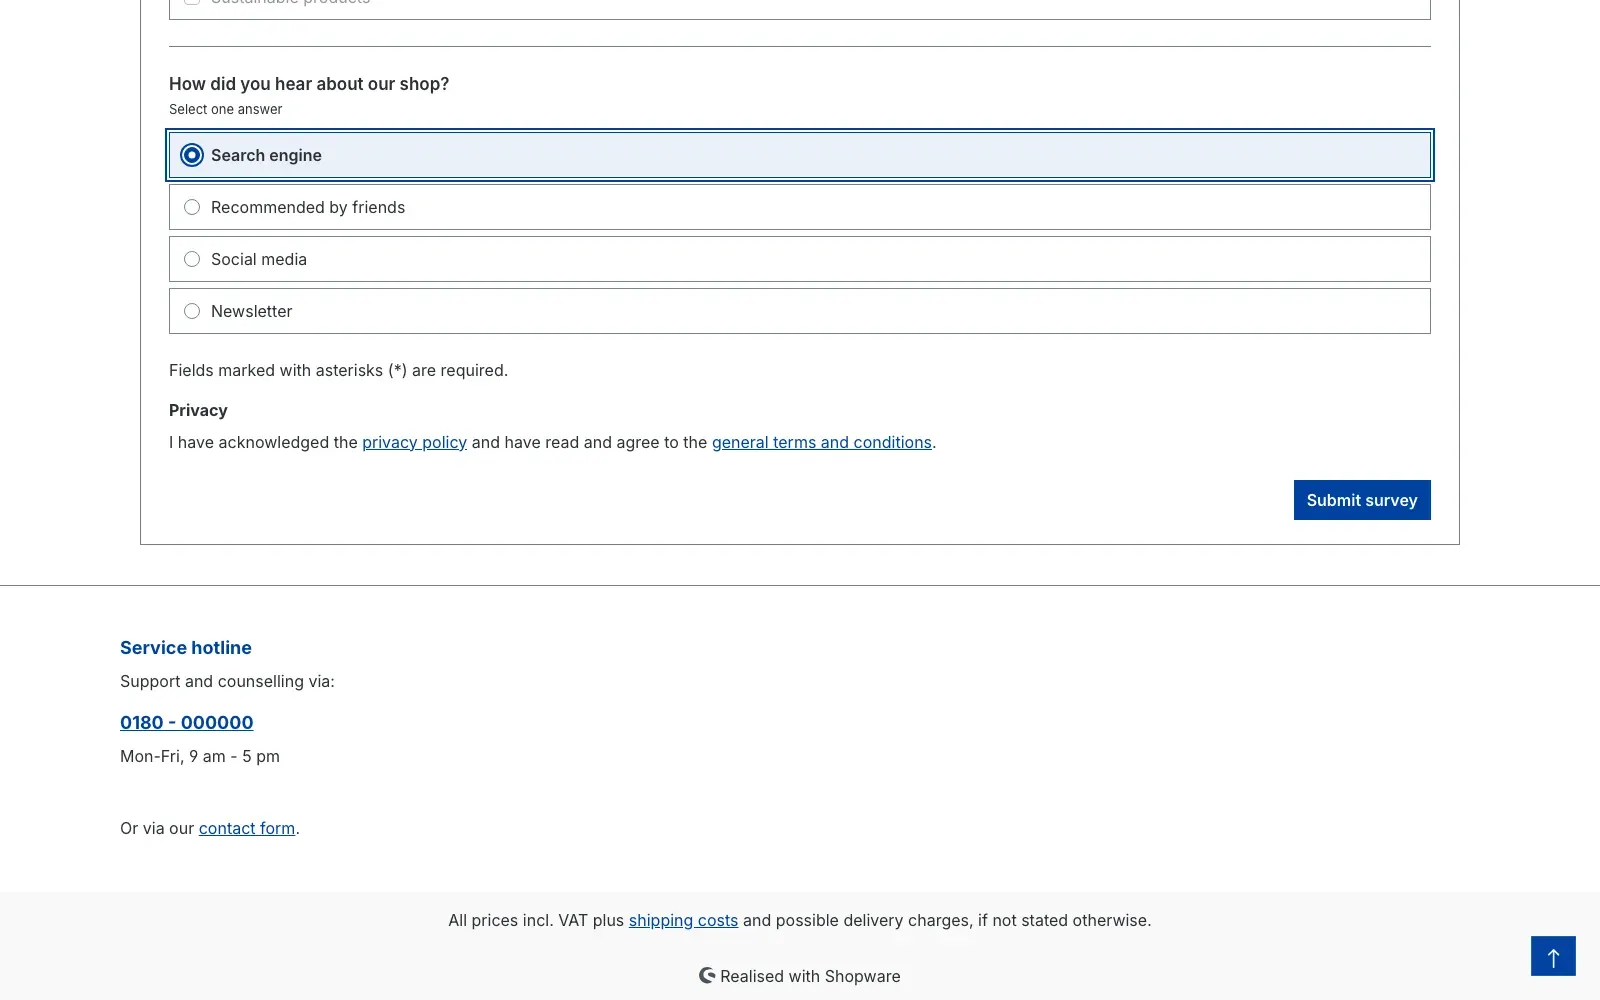 Fig. 17: The poll can only be submitted after the privacy confirmation
Right afterwards your customer sees the overall result and can switch the view.
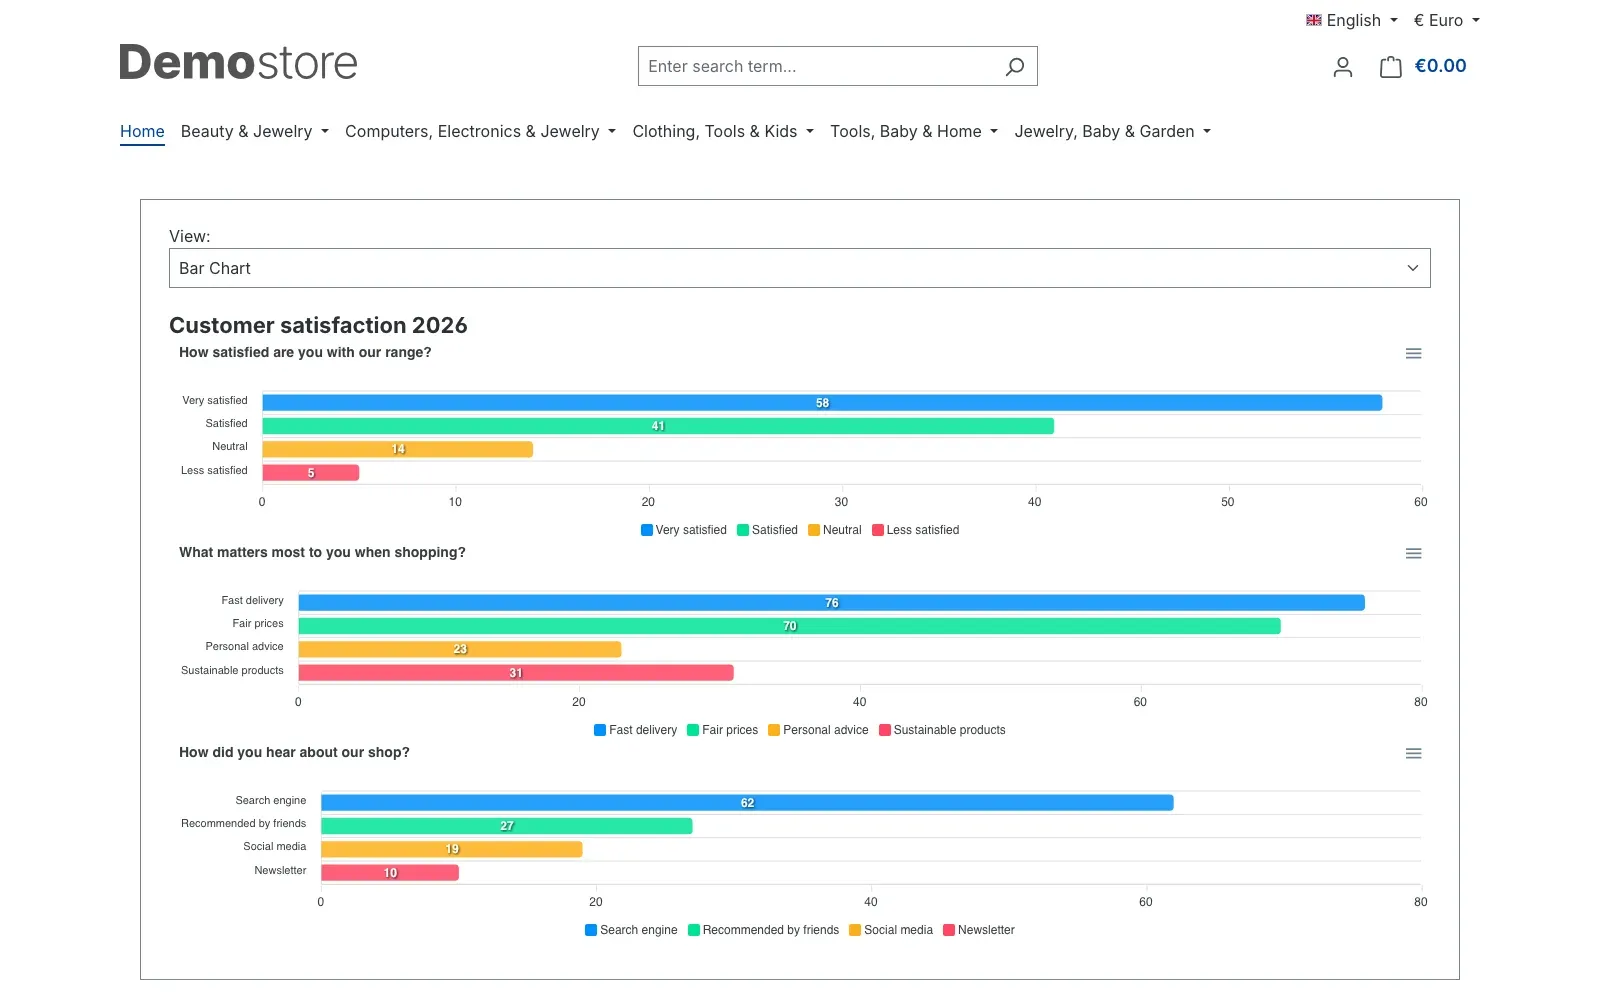 Fig. 18: The result as a bar chart
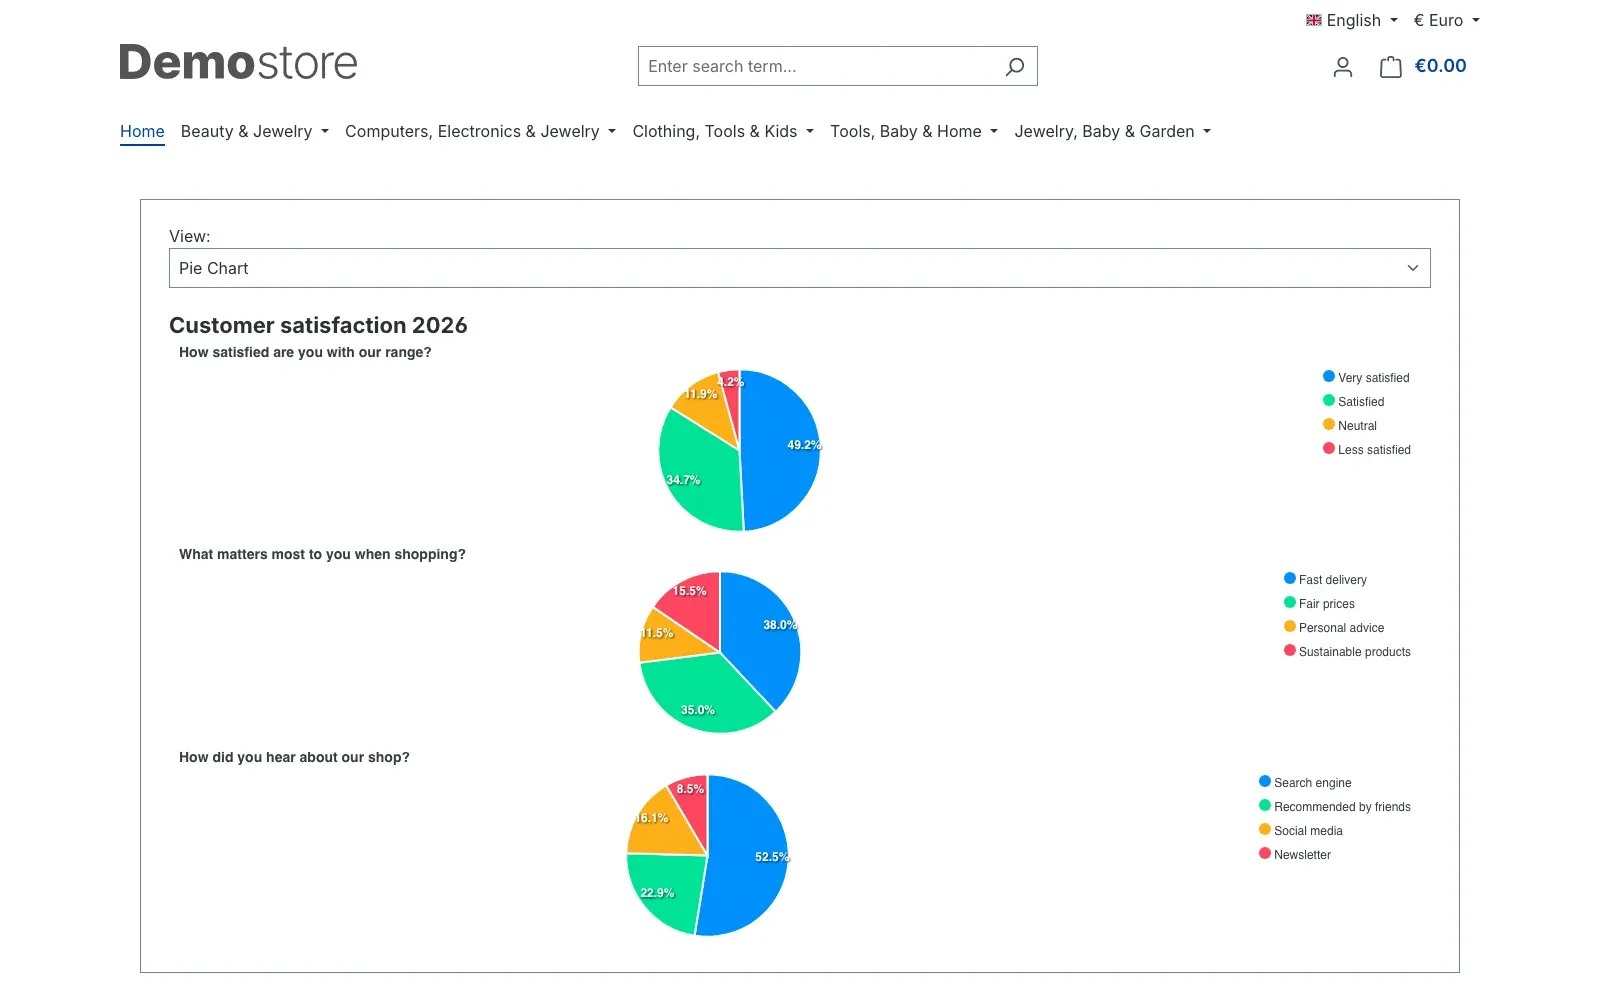 Fig. 19: The same result as a pie chart
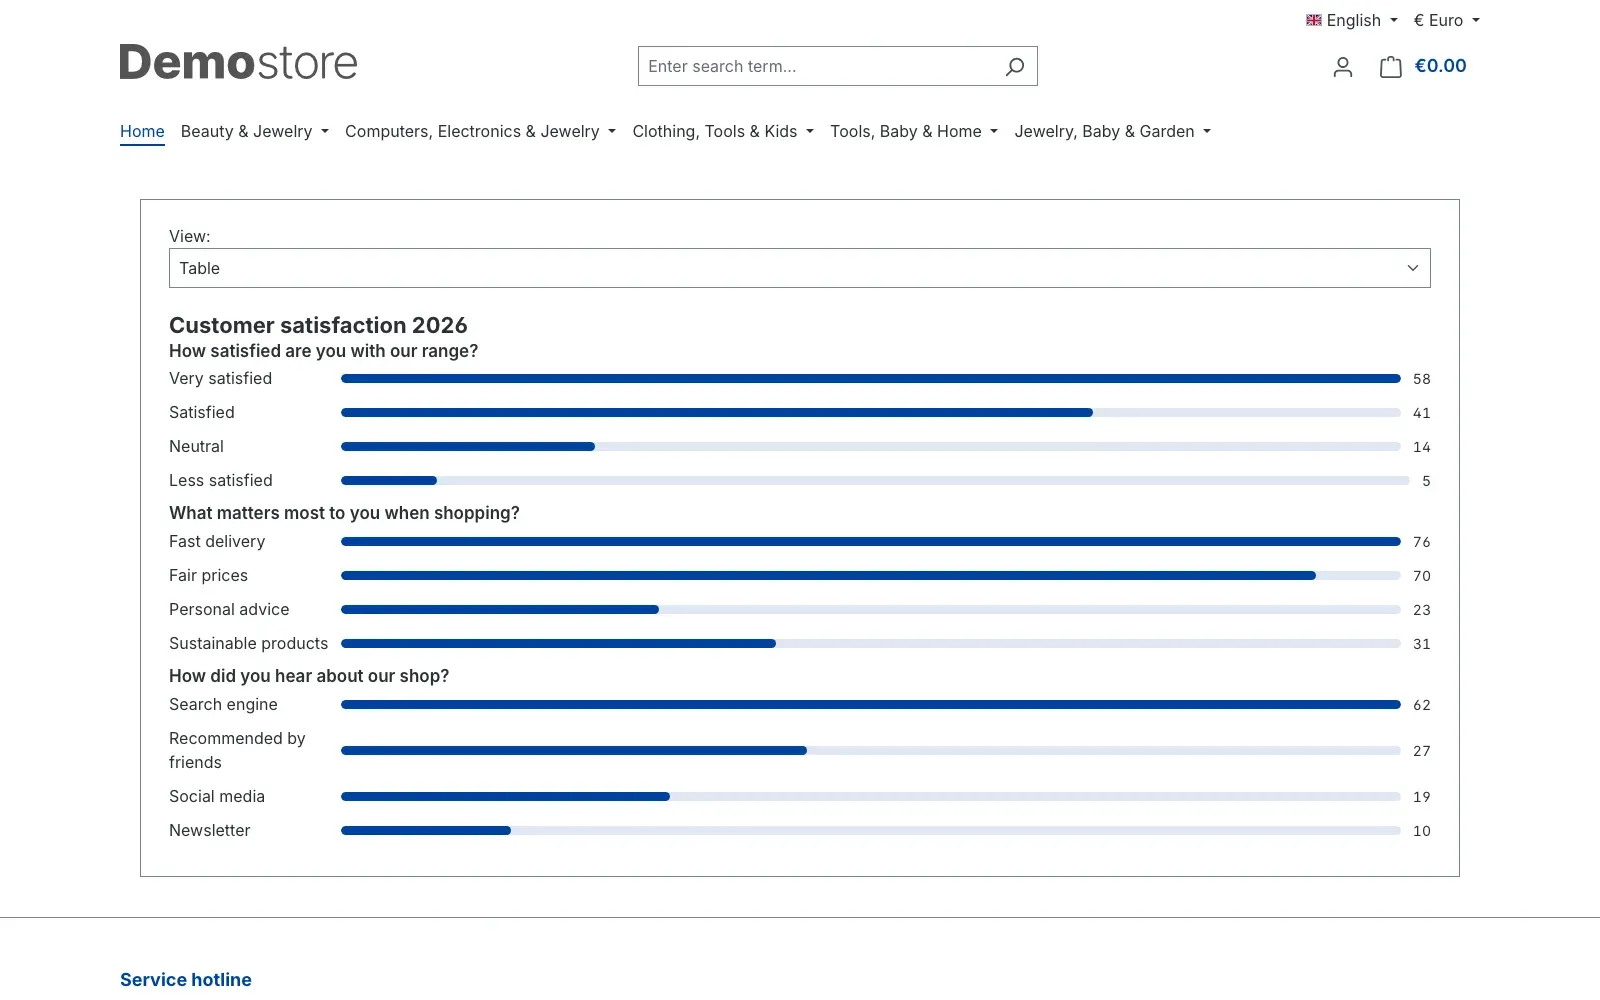 Fig. 20: And as a table with the absolute votes
Important: If you switched on Hide result page in the element, this view is skipped. Your customer then only sees the confirmation or the coupon.
How to evaluate the results
What you get out of it: You see at a glance how the votes are distributed, with nothing to export.
Step by step
- Go to Marketing → Polls → Analyze polls
- Pick the poll you want to look at under Poll:
- Switch between Table, Bar Chart and Pie Chart under View:
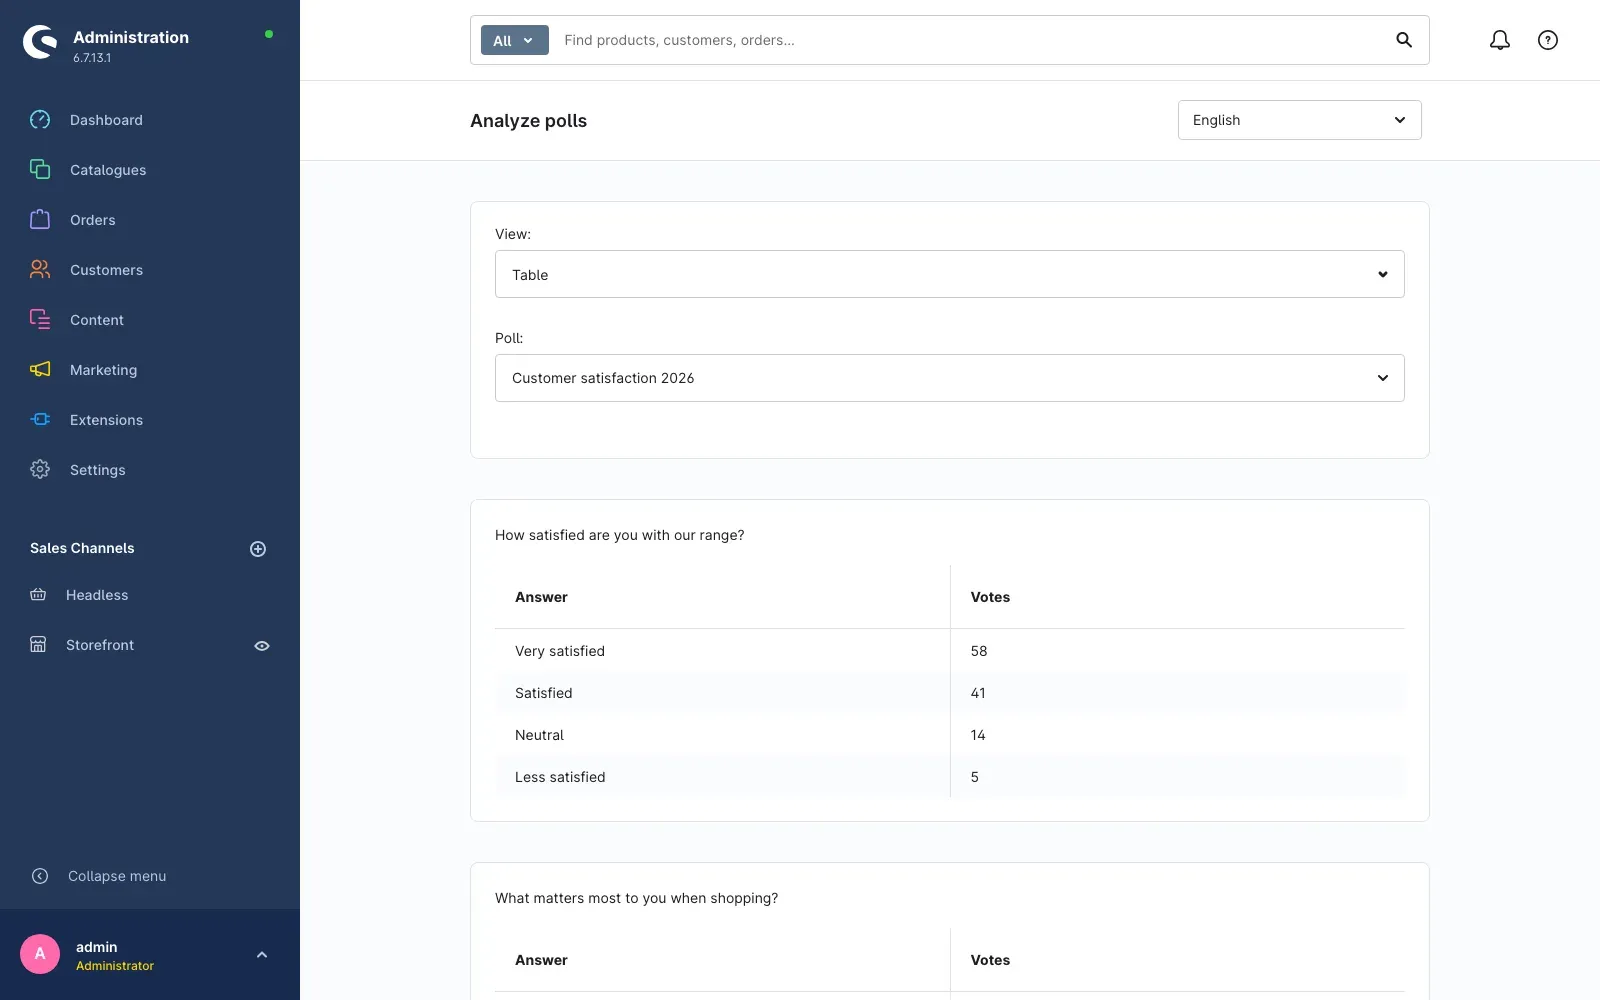 Fig. 21: The table lists the answers and their votes per question
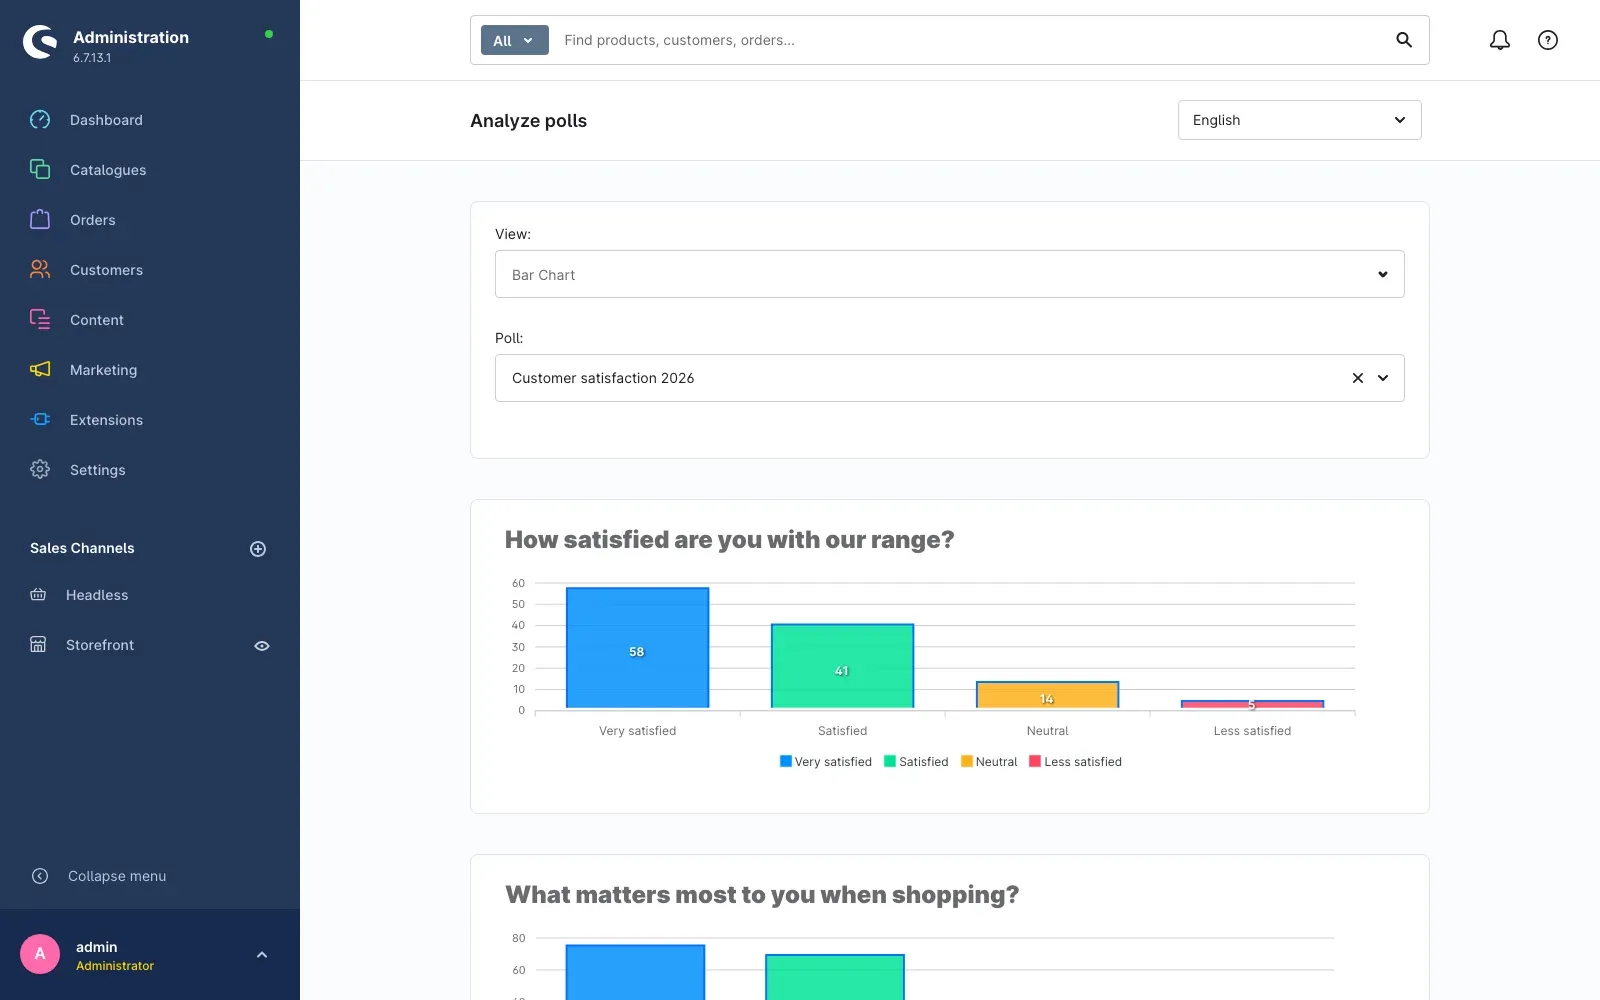 Fig. 22: The bar chart compares the answers of one question
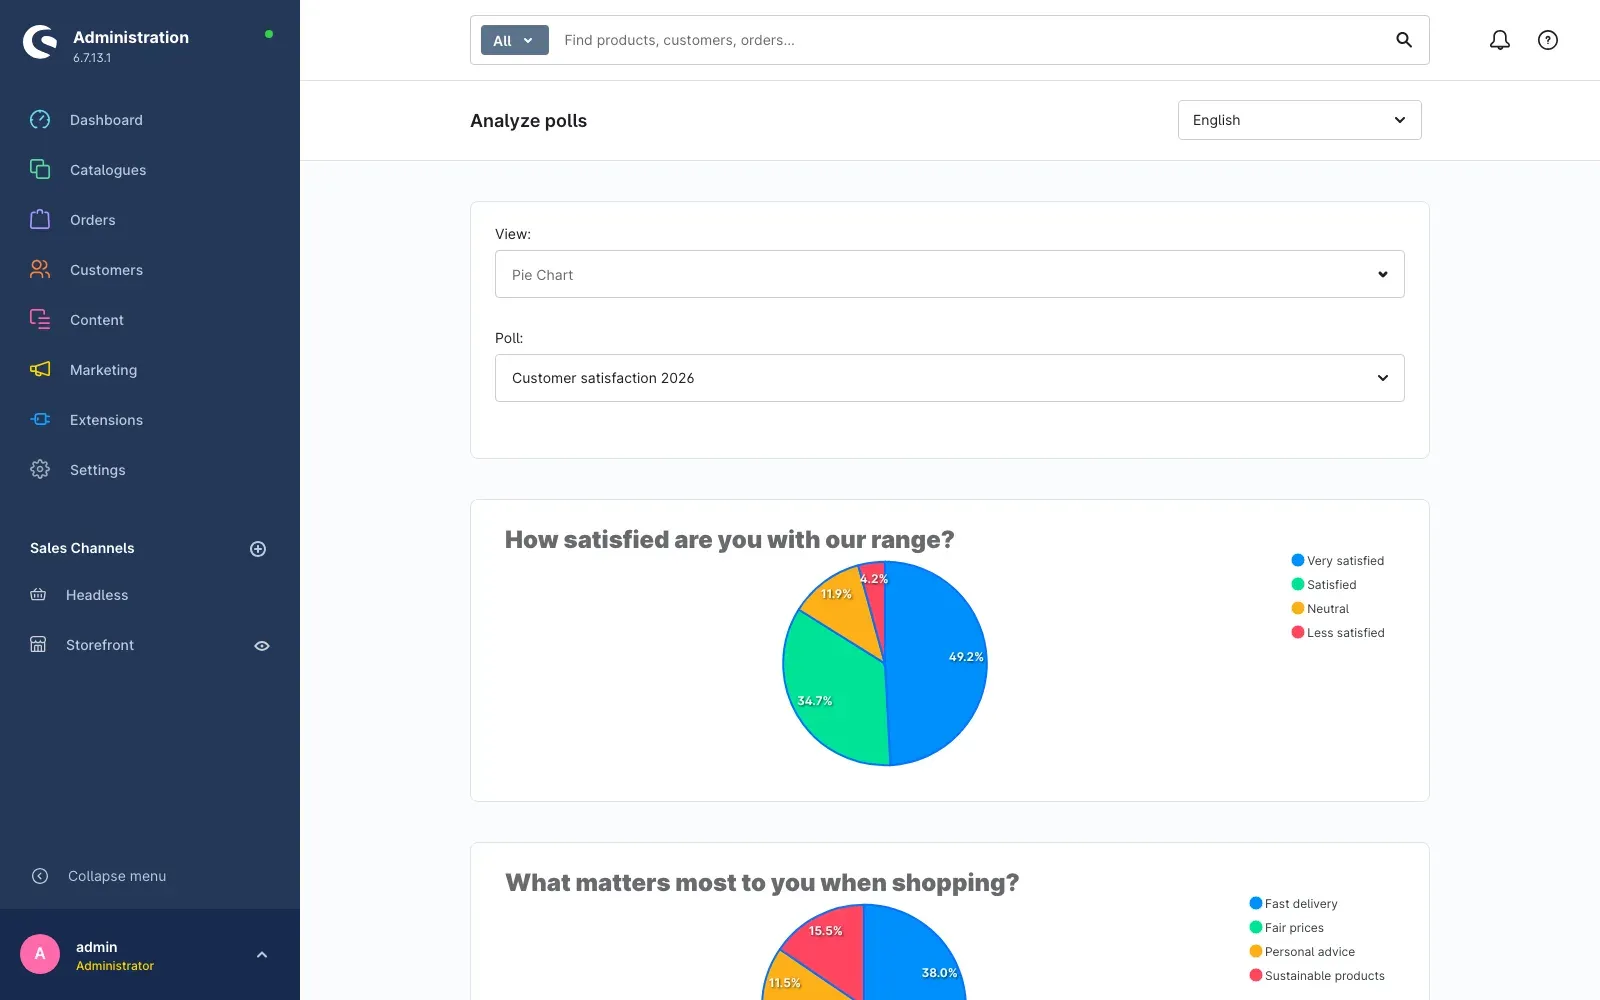 Fig. 23: The pie chart shows the shares
Tip: The evaluation always shows the sum of all votes. Individual participants are never listed.
Troubleshooting
The poll does not appear in the shop
What causes it: Usually one of the toggles is off, or the period has expired.
How to fix it:
- Check under Marketing → Polls → Edit polls whether Active is switched on for the poll
- Check Valid from and Valid to. If today is outside that period, the poll rests
- Check in the configuration whether Enable plugin for this sales channel is switched on for the channel in question
- Check that the layout holding the Polls block is actually assigned to a category or landing page
The poll is there, but no answer can be selected
What causes it: No answers are assigned to the question.
How to fix it: Open the question under Marketing → Polls → Edit polls → Questions, switch to Assigned Answers and assign at least two answers.
Visitors without an account only see the cookie notice
What causes it: That is intended. Without an account the plugin needs a cookie to prevent double voting.
How to fix it: The visitor clicks Accept, enables Polls under Comfort features and saves. The poll then appears. If you do not want anonymous participation at all, switch Public off in the poll.
The plugin does not appear in the admin menu
What causes it: The plugin is probably not activated yet, or the cache is stale.
How to fix it:
- Open Extensions → My extensions
- Check that the plugin has the status Active
- Clear the cache: Settings → System → Caches & indexes → Clear cache
FAQ
Q: Can a customer take part in the same poll twice?
A: No. For logged in customers the plugin remembers the participation on the customer account, for anonymous visitors it uses a cookie. Anyone who already voted goes straight to the result.
Q: Can I run several polls at the same time?
A: Yes. You can create several polls and even pick more than one in the Shopping Experiences element. Your customers then work through them one after another.
Q: Does this work with my theme?
A: Yes. The poll uses the standard building blocks of the Shopware storefront and picks up the fonts and colours of your theme.
Q: Can I place the poll outside Shopping Experiences, in the footer for example?
A: No. The output runs exclusively through the Shopping Experiences block. In return you can place it on every page that uses a layout.
Q: Are the results evaluated per sales channel?
A: No. The evaluation adds up all votes of a poll. If you want to evaluate channels separately, create one poll per channel.
Q: Can my customers see who voted for what?
A: No. Both in the shop and in the administration you only see the total votes per answer, never individual participants.
Q: What happens to my polls when I uninstall the plugin?
A: Shopware asks whether your data should be kept. If you keep it, polls, questions, answers and votes stay in the database and are back after a reinstall. Without that choice the plugin removes its tables completely.
Q: Does the plugin send data to external servers?
A: No. All polls and votes stay in your Shopware database.
Q: Which languages can I maintain my polls in?
A: In every language of your shop. Title, description, questions and answers are translatable, you switch the language in the top right corner. The plugin interface itself comes in German, English and Dutch.
For administrators / technical details
This chapter is aimed at technical administrators. You do not need it for everyday use.
System requirements
- Shopware: 6.7.0 or newer
- PHP: 8.2 or newer
- Database: MySQL 8.0 / MariaDB 10.11 or newer
Data storage
The plugin creates its own tables and does not change any Shopware core table. It stores polls, questions, answers, their assignments and the votes cast. A vote only carries a customer ID if the participant was logged in.
Installation from the command line (Composer)
composer require swp/poll-six
php bin/console plugin:refresh
php bin/console plugin:install SwpPollSix --activate
php bin/console cache:clear
This manual was written for Polls version 6.7.2.
More manuals
Admin Password Reminder
Admin Password Reminder: your backend users renew their passwords on time, prompted after login and by a daily email. Premium locks expired accounts until the password is changed.
Open manual Shopware 6Age Check
Tobacco, spirits, knives: visitors who do not confirm their age never see the restricted items at all. You tick a box per product, the plugin hides it everywhere.
Open manual Shopware 6AI Media Labelling
AI labelling for images and videos: flag a media item once in the media manager and the badge with your notice appears wherever it shows up in your shop. No template work needed.
Open manualNeed a team that keeps your shop running?
We have been maintaining Shopware shops for more than 20 years, including updates, hotfixes and the plugins you are configuring right now.