
Product configurator image mapping
Your customer picks an option in the configurator and the matching product image appears at once. You map image and options once on the product, the storefront does the rest.
On this page
- Introduction
- What this plugin does for you
- Who is this plugin for?
- Requirements
- Installation
- Getting started
- Settings
- Sales Channel
- Enable plugin for this sales channel
- to documentation
- How to map images
- Map an image to an option
- Change an existing mapping
- Delete a mapping
- What your customers see in the shop
- Troubleshooting
- The “Product configurator” tab is missing on the product
- The “Assign images” button is missing
- The image does not change in the shop
- Nothing happens on a product with variants
- The mapped image looks blurred or distorted
- FAQ
- For administrators / Technical details
- System requirements
- Installation from the command line
- Data storage
- Logging
- Languages
Introduction
Important: Add-on plugin – requires the Product Configurator (
SwpProductOptionsSix). This plugin is an extension of the base plugin Product Configurator and only works together with it. Without the installed, active and separately purchased Product Configurator from version 6.7.12, this plugin has no function.
Product configurator image mapping makes sure your customers immediately see what they are configuring: as soon as they pick an option in the configurator, the large product image switches to the image you stored for that option.
What this plugin does for you
- You store a matching product image for each configurator option — for example per colour, material or finish.
- Your customers see their choice right on the image, without scrolling or browsing the gallery themselves.
- The image change applies to the large view, to the thumbnail above it and to the full-screen view.
- You maintain everything directly on the product — no extra area, no duplicate data entry.
- Fewer questions and fewer returns, because the image shown and the selected version match.
Who is this plugin for?
For every shop that uses the Product configurator and whose options visibly change the look of the product: furniture, textiles, print products, technical equipment versions, promotional items.
Requirements
This plugin is an extension. It requires the Product configurator plugin and only works together with it.
Both appear under Extensions → My extensions and have to be active there:
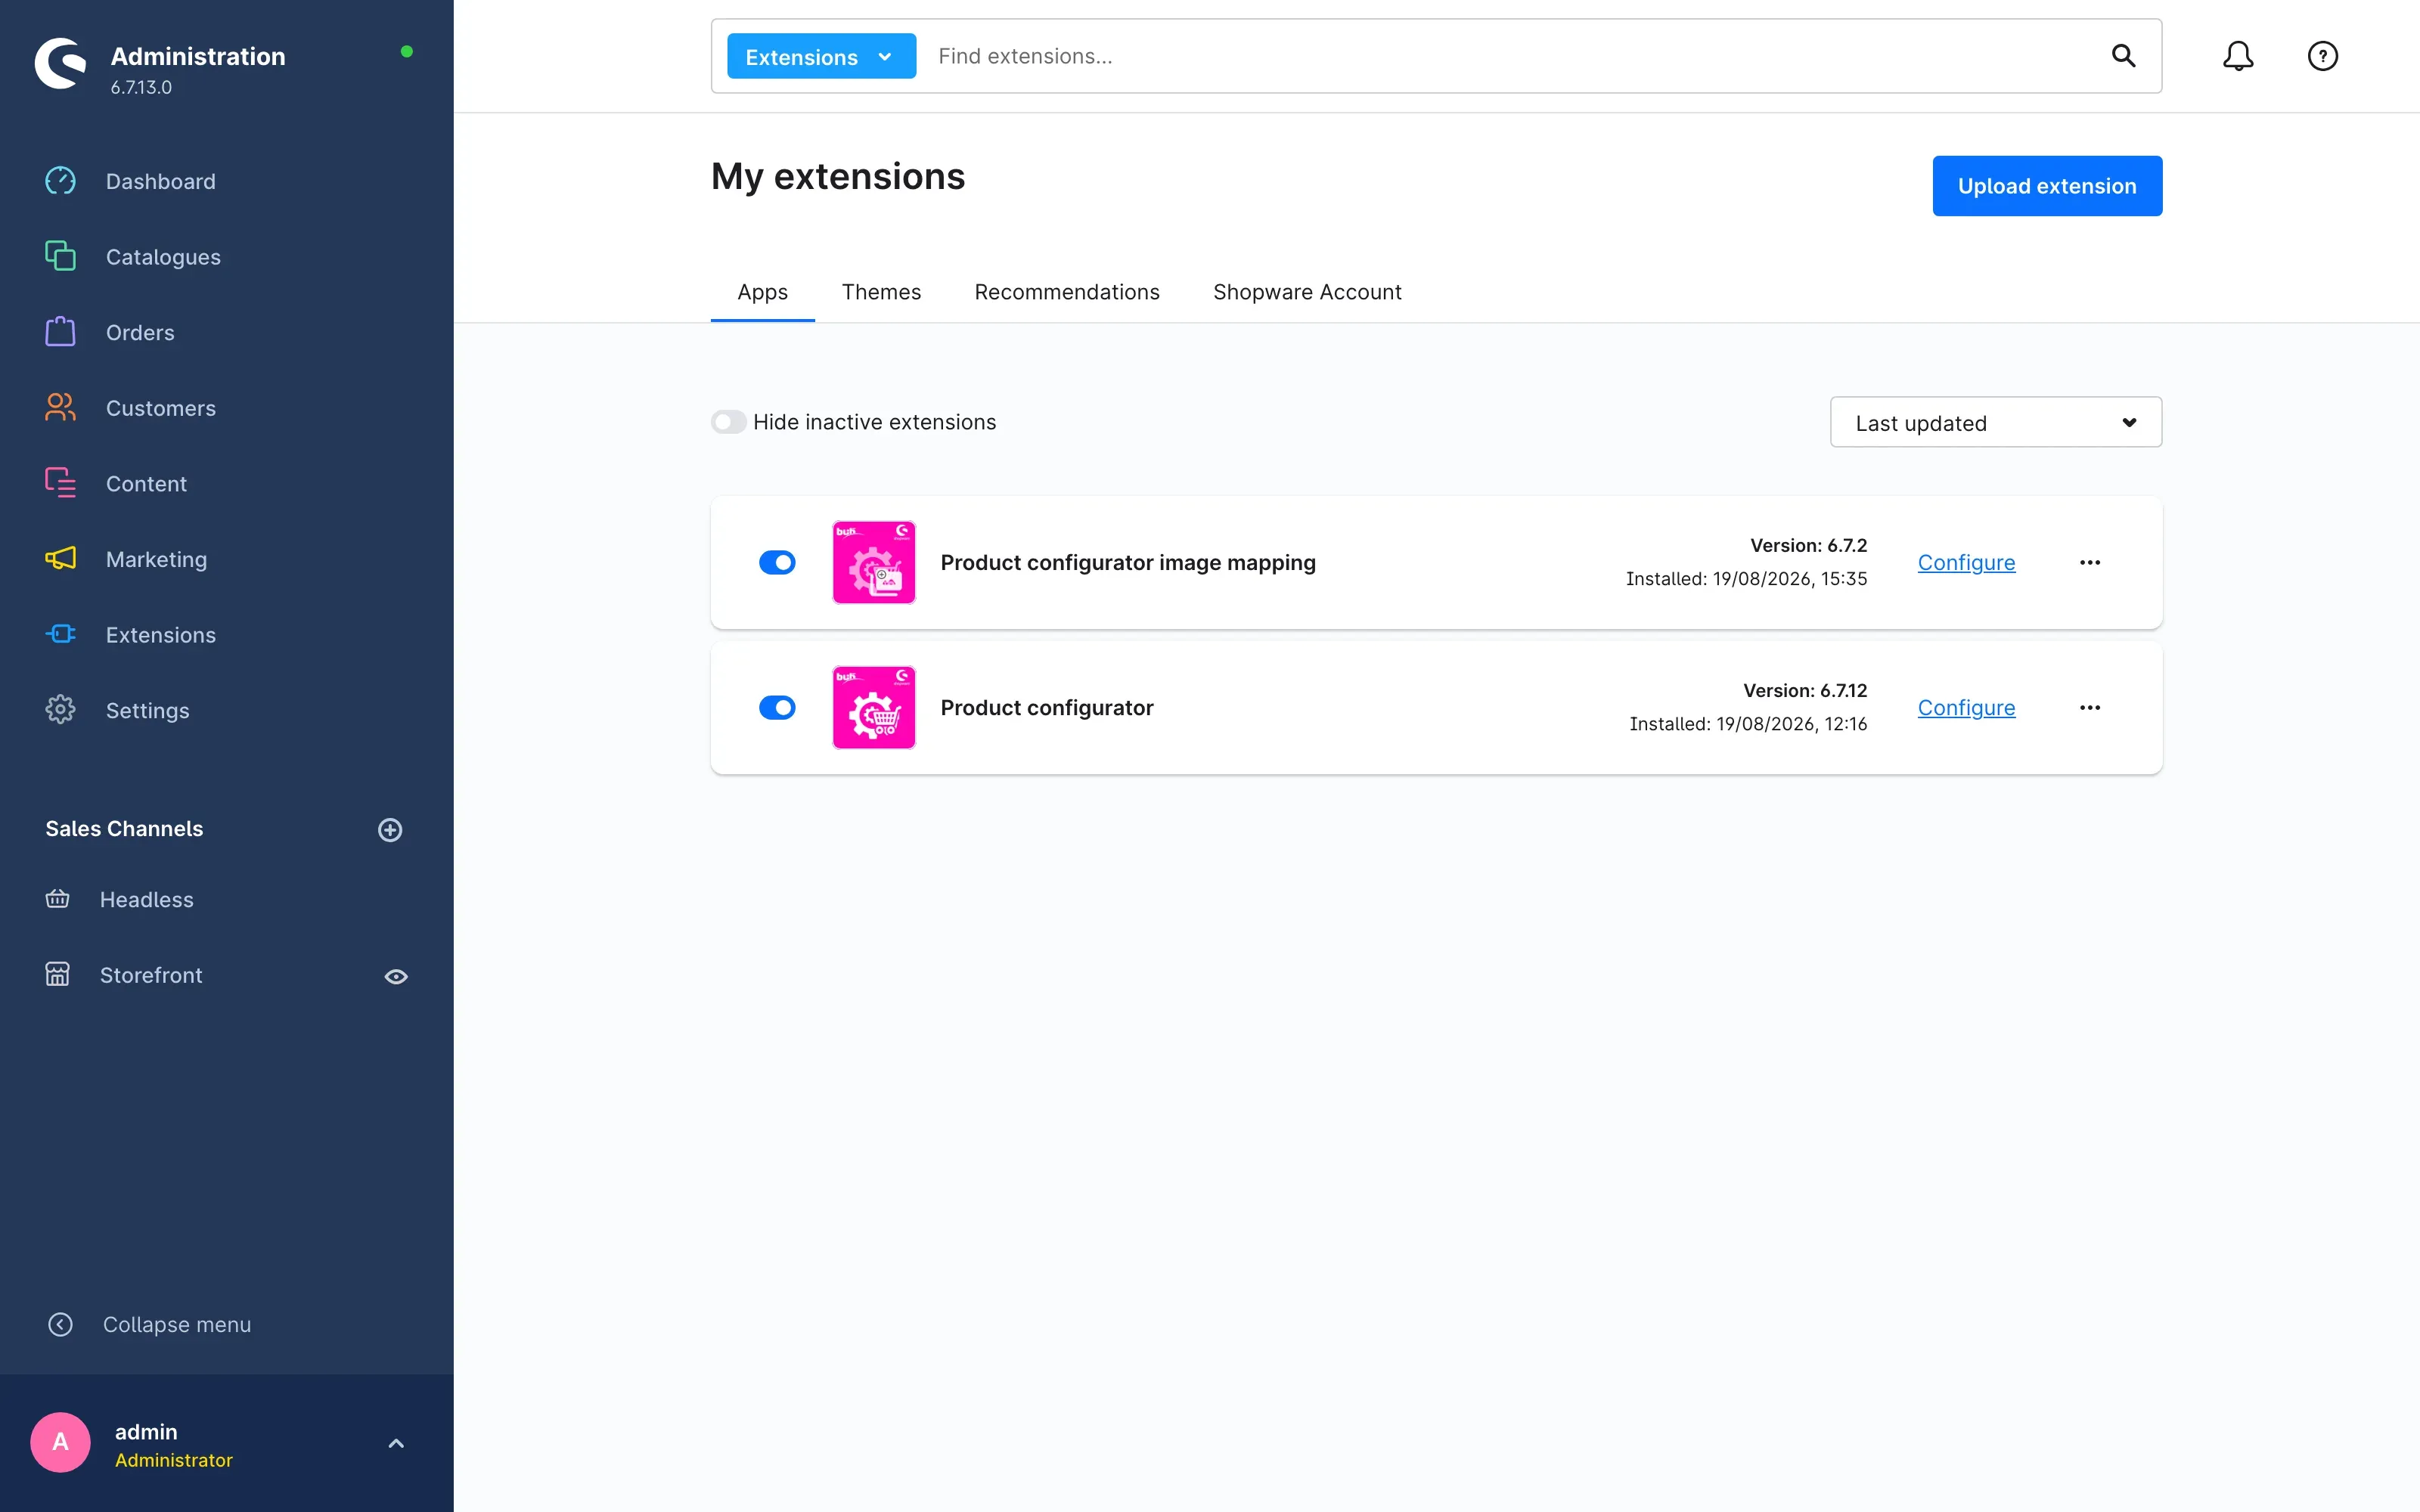 Fig. 1: “Product configurator image mapping” and “Product configurator” are installed and active.
You also need:
- at least one product that already has options assigned in the Product configurator tab,
- the images you want to show — either already in your media library or as a file to upload.
Note: The images do not have to be attached to the product beforehand. You pick them directly from the media library while mapping, or upload them there.
Installation
After the purchase the plugin is available directly in your administration — there is nothing to download.
-
Sign in to your Shopware administration.
-
Open Extensions → My extensions.
-
Next to Product configurator image mapping, click Install.
-
Then activate the plugin using the switch to the left of the entry.
Fig. 2: The switch on the left is blue — the plugin is active.
That is all. The plugin does not add a menu entry of its own; you work with it directly on the product (see How to map images).
If Product configurator image mapping does not appear in the list, your Shopware account is not yet connected to the shop. You can do that under Extensions → My extensions in the Shopware Account tab.
Getting started
Three steps and you can see the result in the shop:
-
Check the settings: Open Extensions → My extensions and click Configure to the right of Product configurator image mapping.
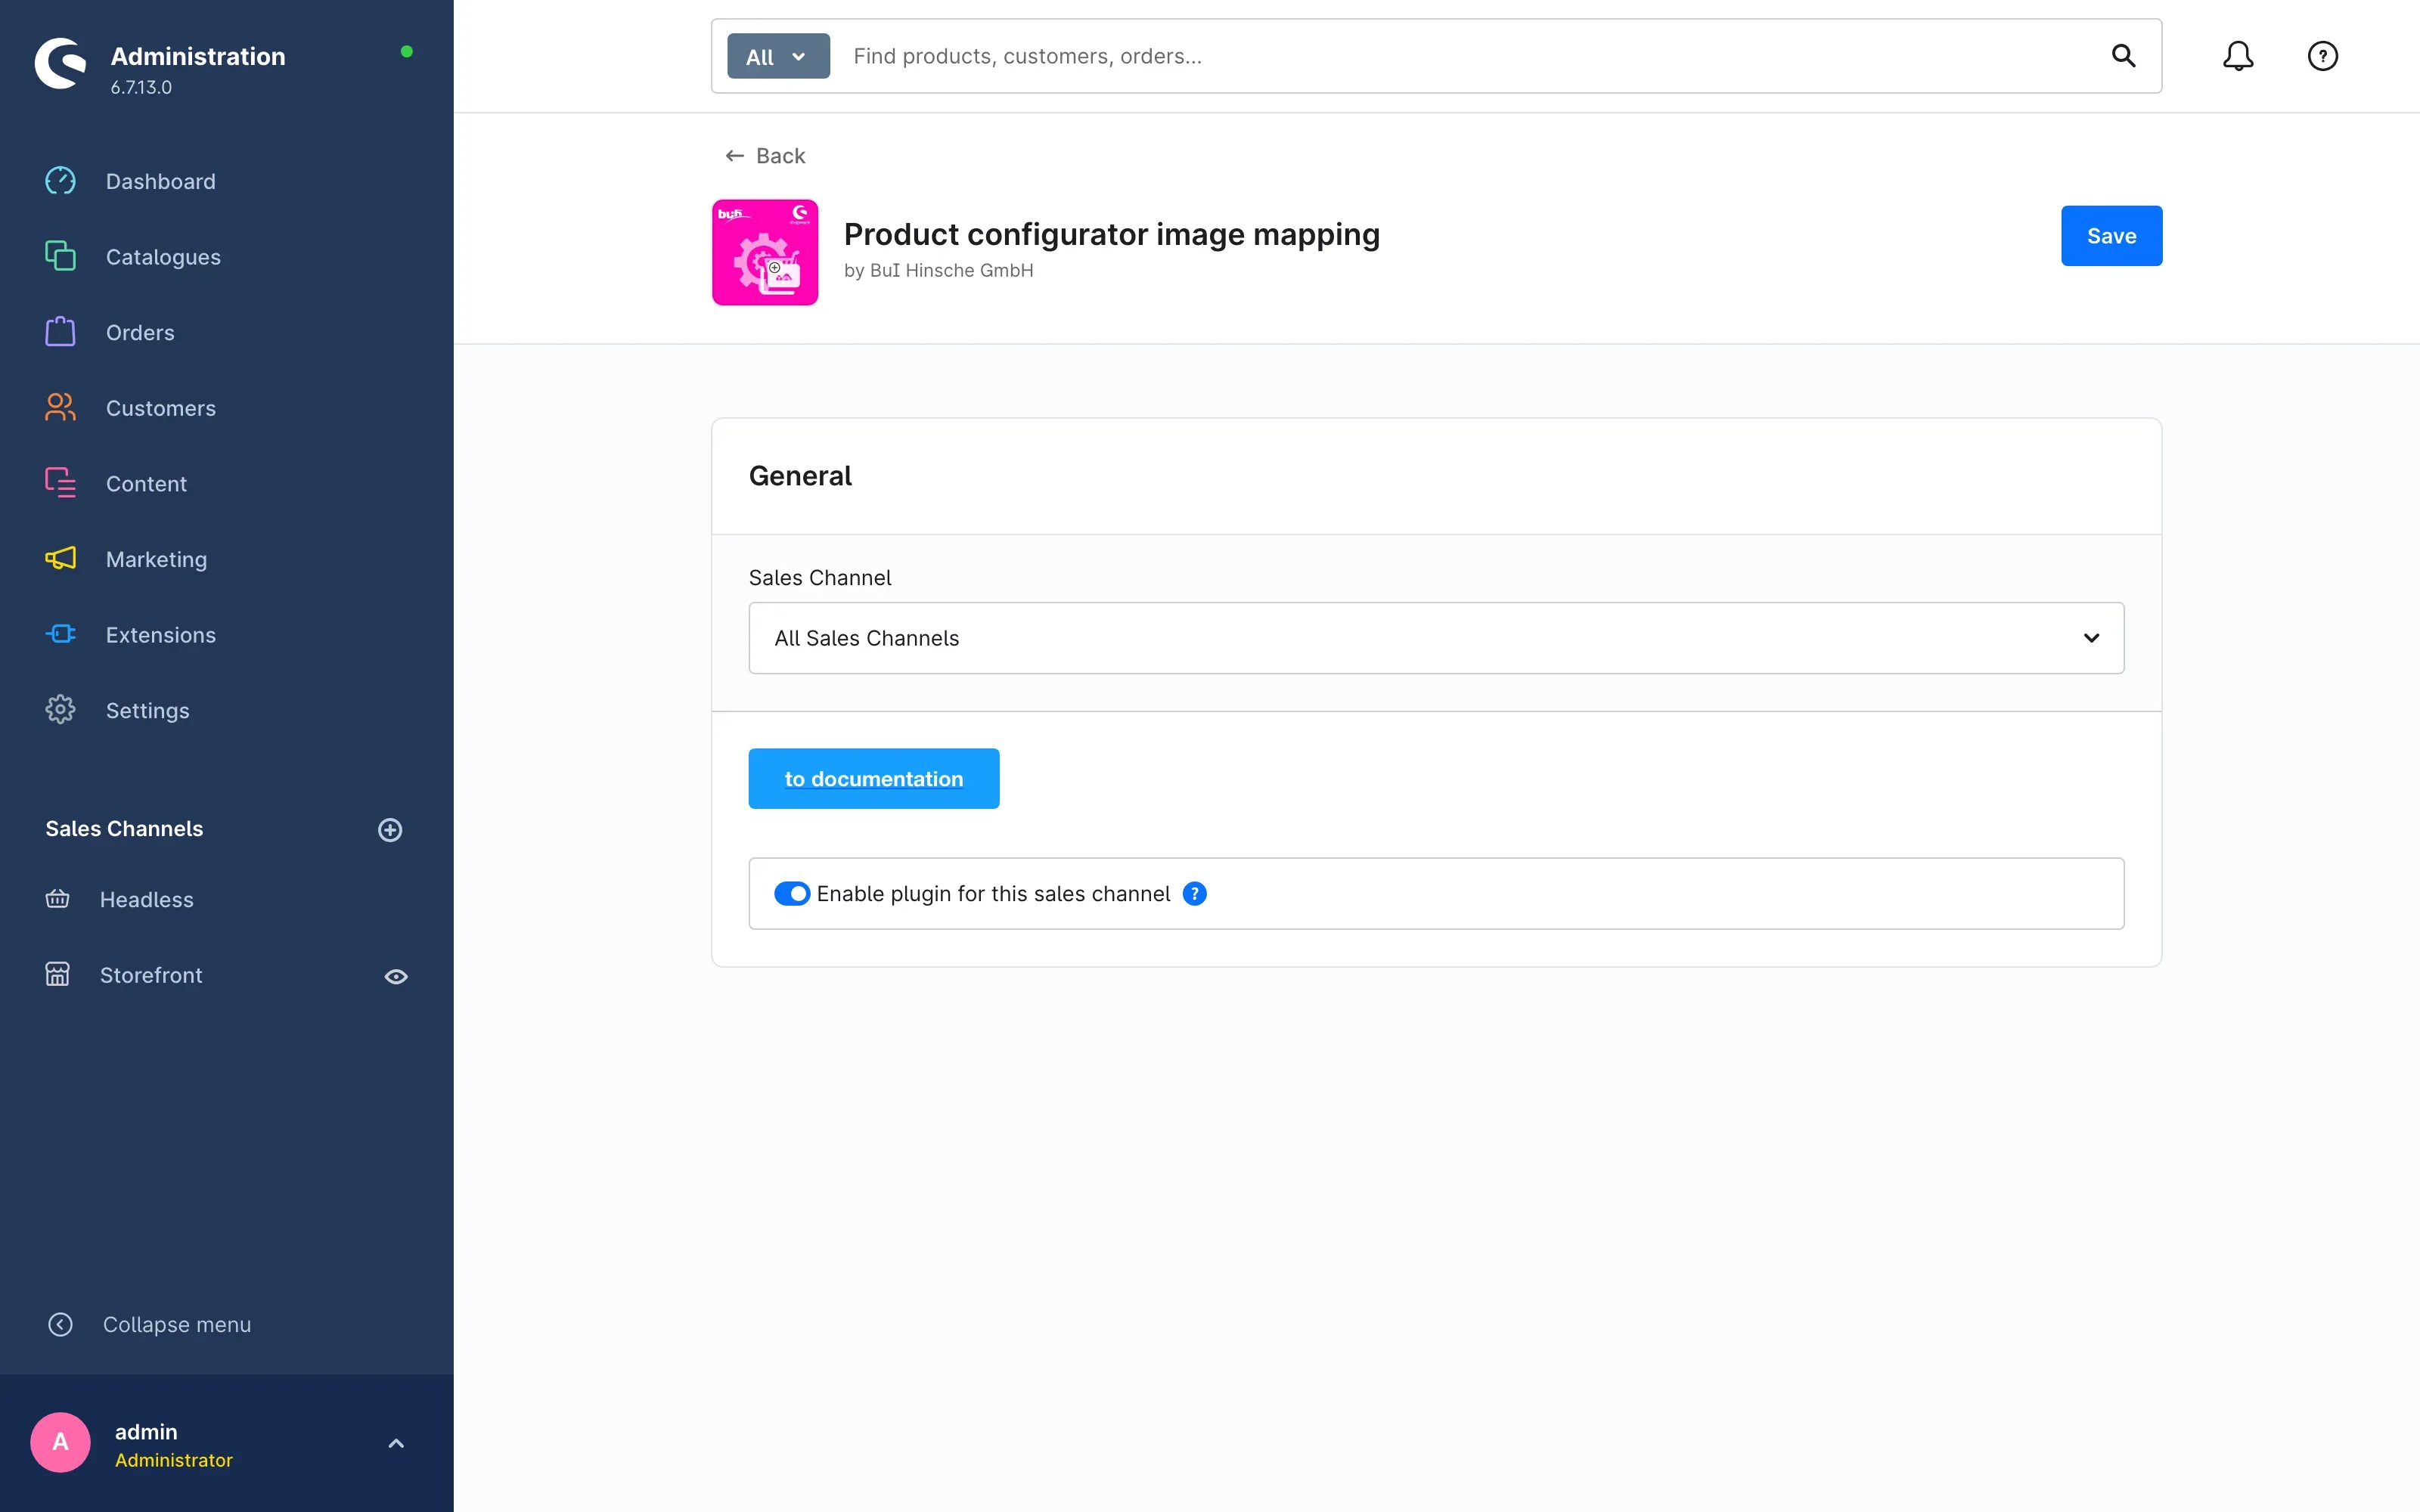 Fig. 3: The settings page with the sales channel selector and the “Enable plugin for this sales channel” switch.
The Enable plugin for this sales channel switch is on by default. You do not have to change anything here to get started.
-
Map your first image: Open a product that has configurator options and switch to the Product configurator tab. Click Assign images there.
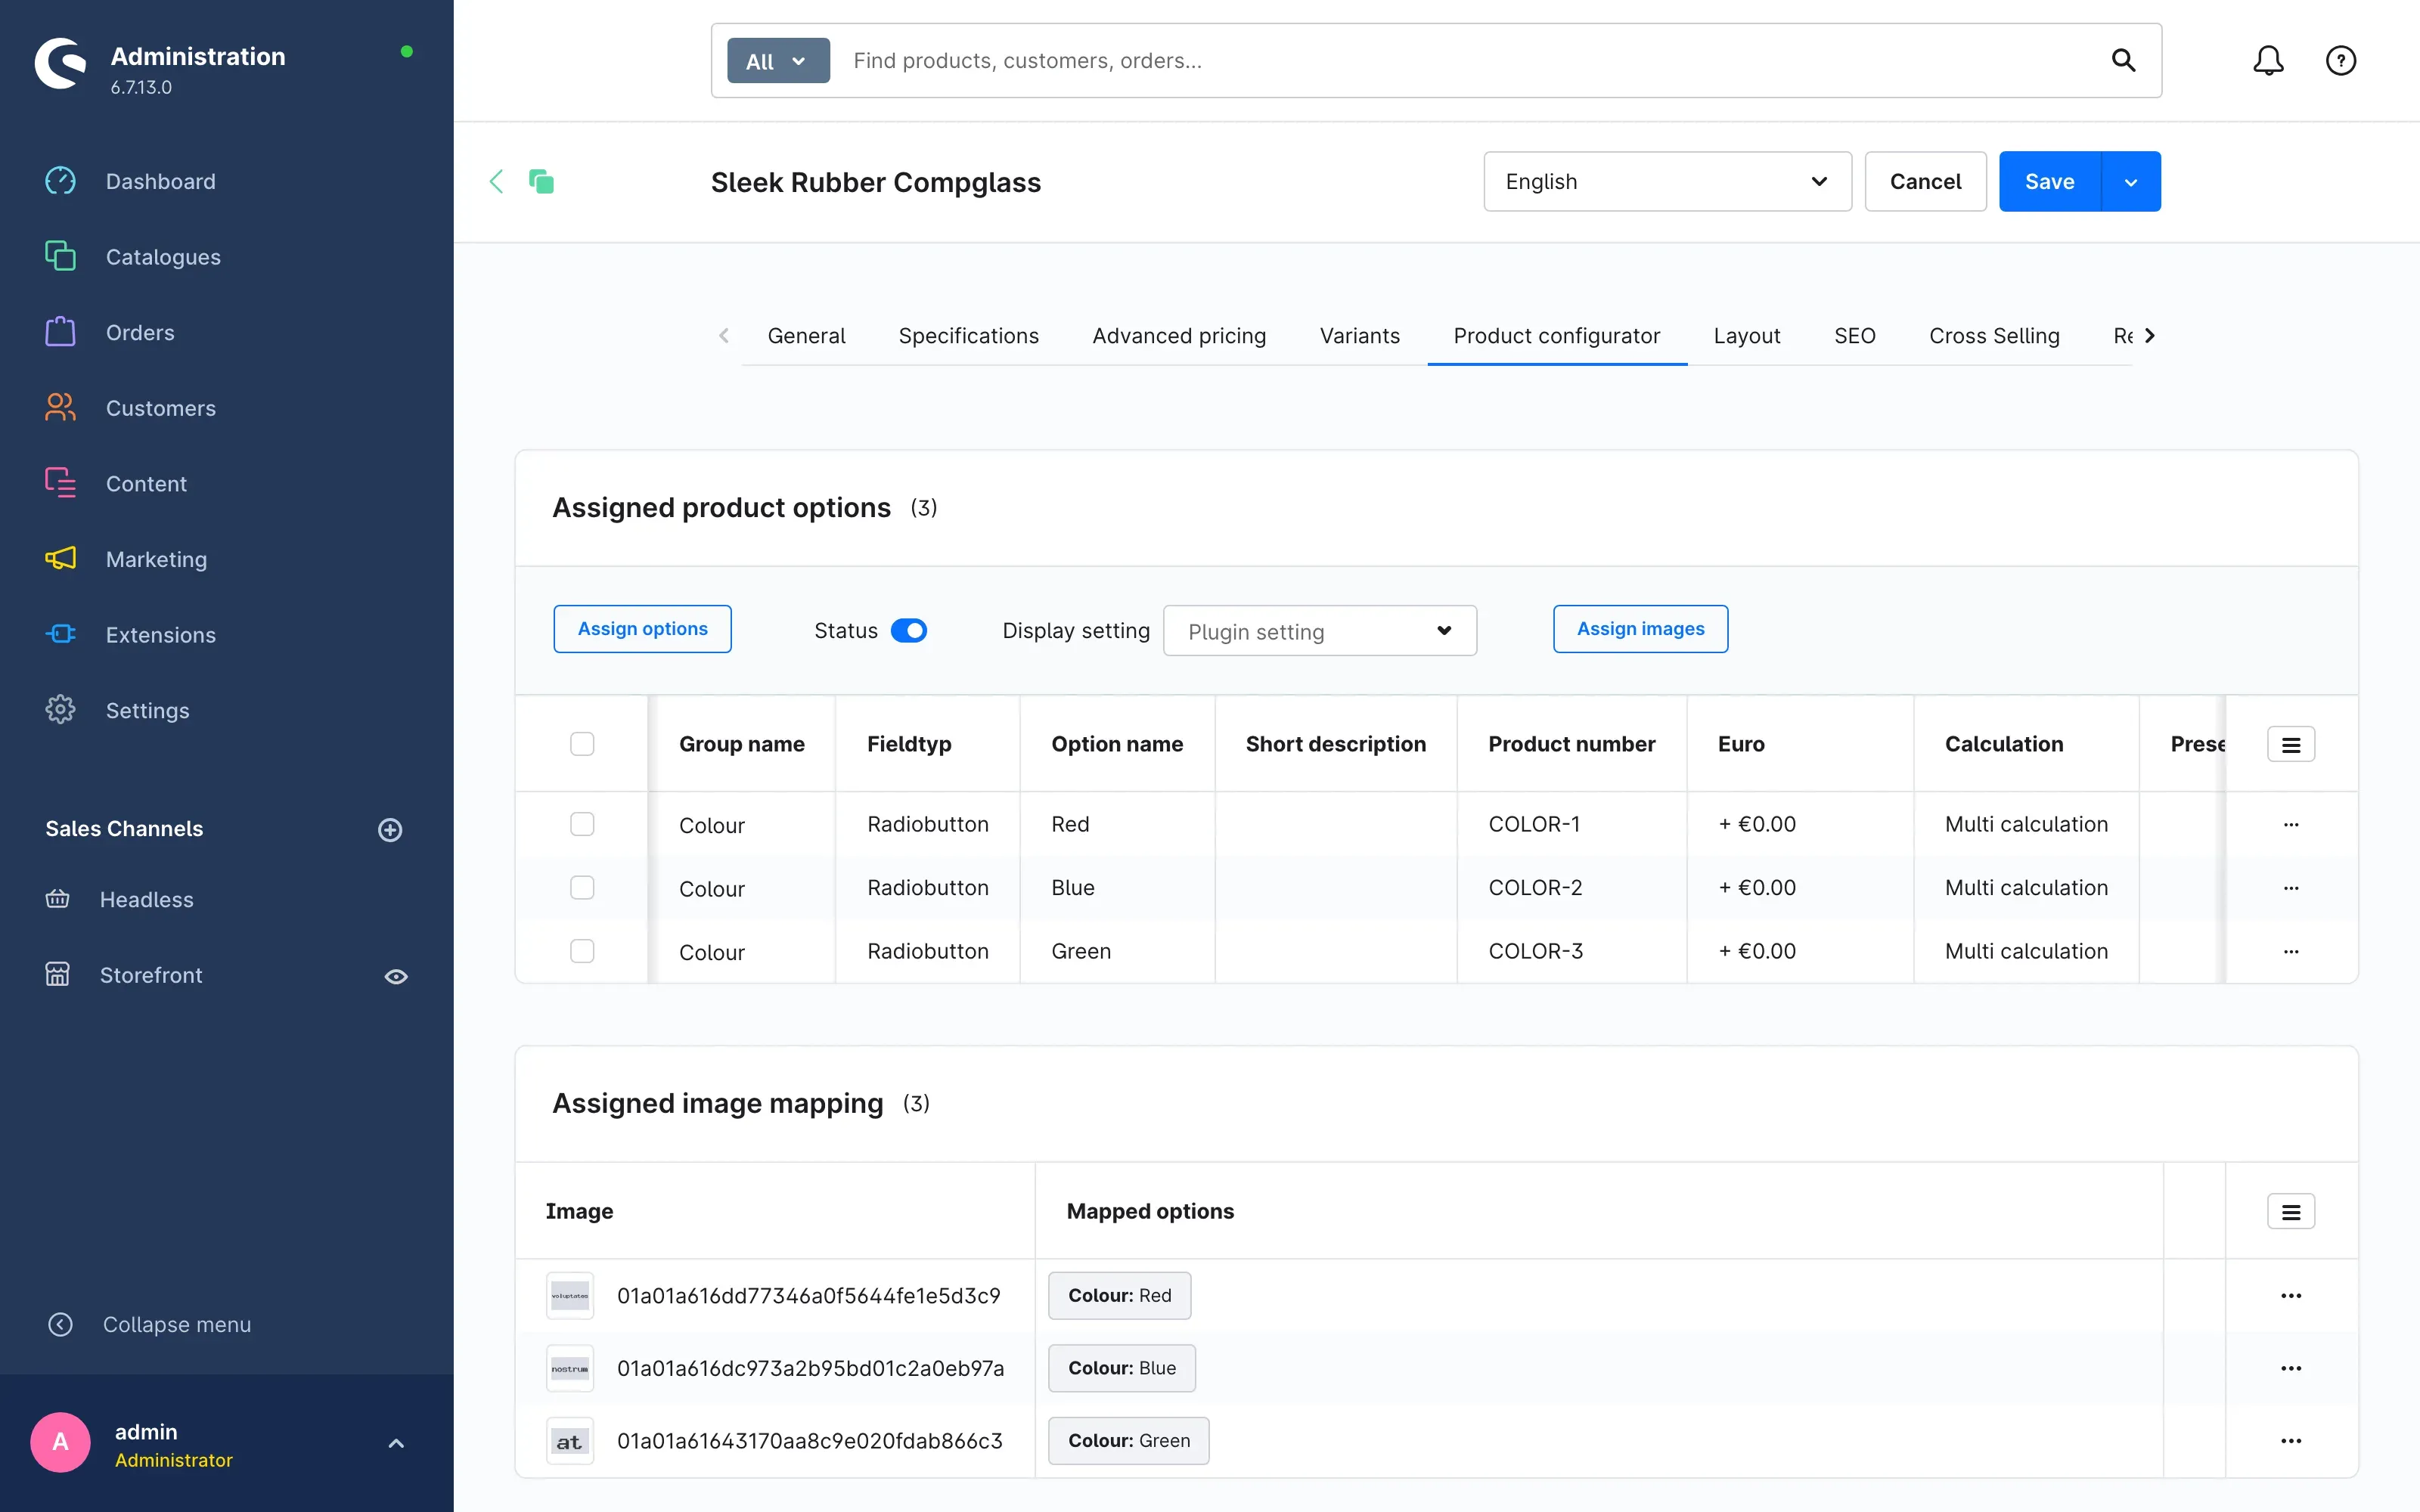 Fig. 4: The “Assign images” button sits at the top right above the list of assigned configurations.
 -
Check the result: Open the product page in the shop and select the option you have just mapped an image to. The product image changes immediately.
Settings
You find the settings under Extensions → My extensions via Configure next to Product configurator image mapping.
Fig. 5: The “General” card contains everything you can set here.
Sales Channel
At the top you choose which sales channel the setting below applies to. All Sales Channels is the basic setting and applies everywhere you have not stored anything different.
Why this is useful: If you run several shops — for example one for consumers and one for retailers — you can use the image change in one of them only.
Enable plugin for this sales channel
The Enable plugin for this sales channel switch determines whether the product image in the selected sales channel changes automatically along with the selected option. It is switched on by default.
If you switch it off, everything else stays as it is: the configurator keeps working, the product gallery keeps showing your product images, and your saved mappings are kept. Only the automatic image change is skipped in that channel.
Why this is useful: You can pause the feature at any time — for instance while you are updating your images — without uninstalling the plugin or losing any mappings.
Tip: After every change, do not forget the Save button at the top right.
to documentation
The to documentation button opens this manual in your browser. It does not change any setting.
How to map images
Map an image to an option
What you get: After this mapping your customers see exactly the image that belongs to the selected option — without you having to create a separate product per option.
Step by step
-
Open the product in the administration and switch to the Product configurator tab.
-
Above the list, click Assign images on the right.
Fig. 6: “Assign images” opens the mapping dialog. -
The Map image and options dialog opens.
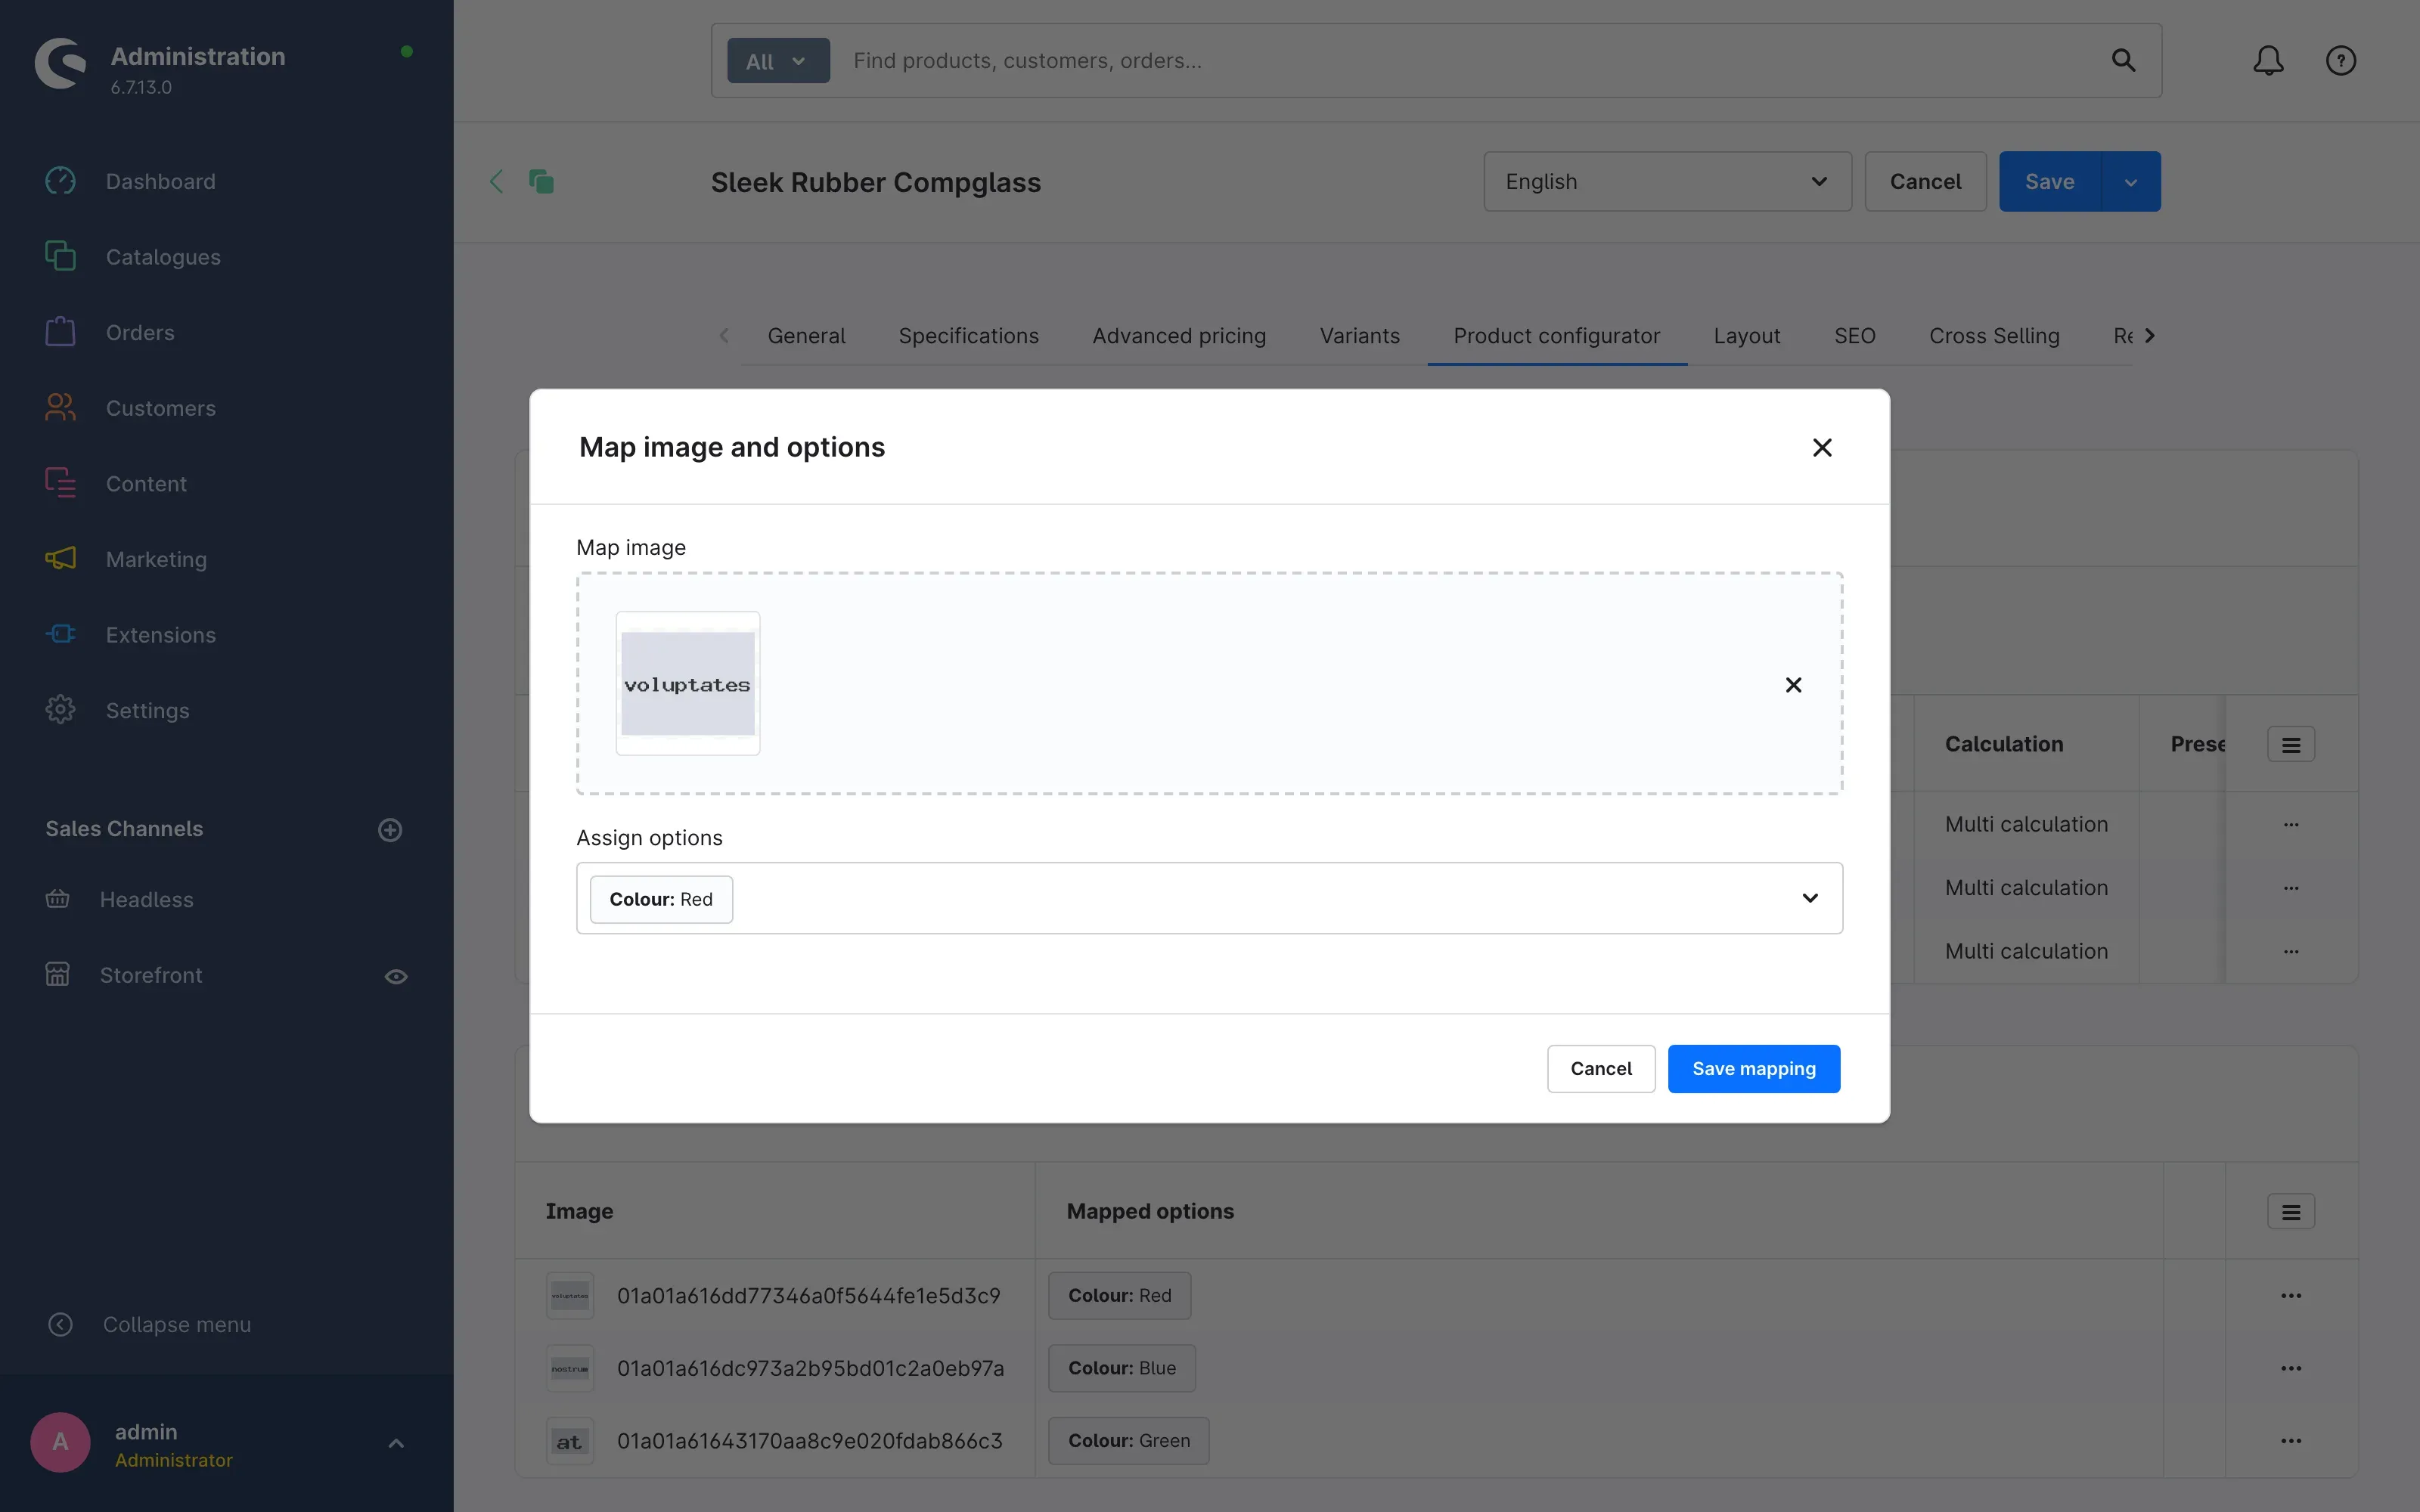 Fig. 7: The image at the top, the matching options below.
 -
Under Map image you choose the image. You can drag a file into the dashed area with your mouse, or select an existing image from your media library.
-
Under Assign options you choose the option this image should appear for. Every option is listed with its group in front of it, for example Colour: Red.
-
Click Save mapping.
-
Then save the product with Save at the top right.
The saved mapping appears in the Assigned image mapping card below the configuration list. The number in brackets after the title tells you how many mappings this product has.
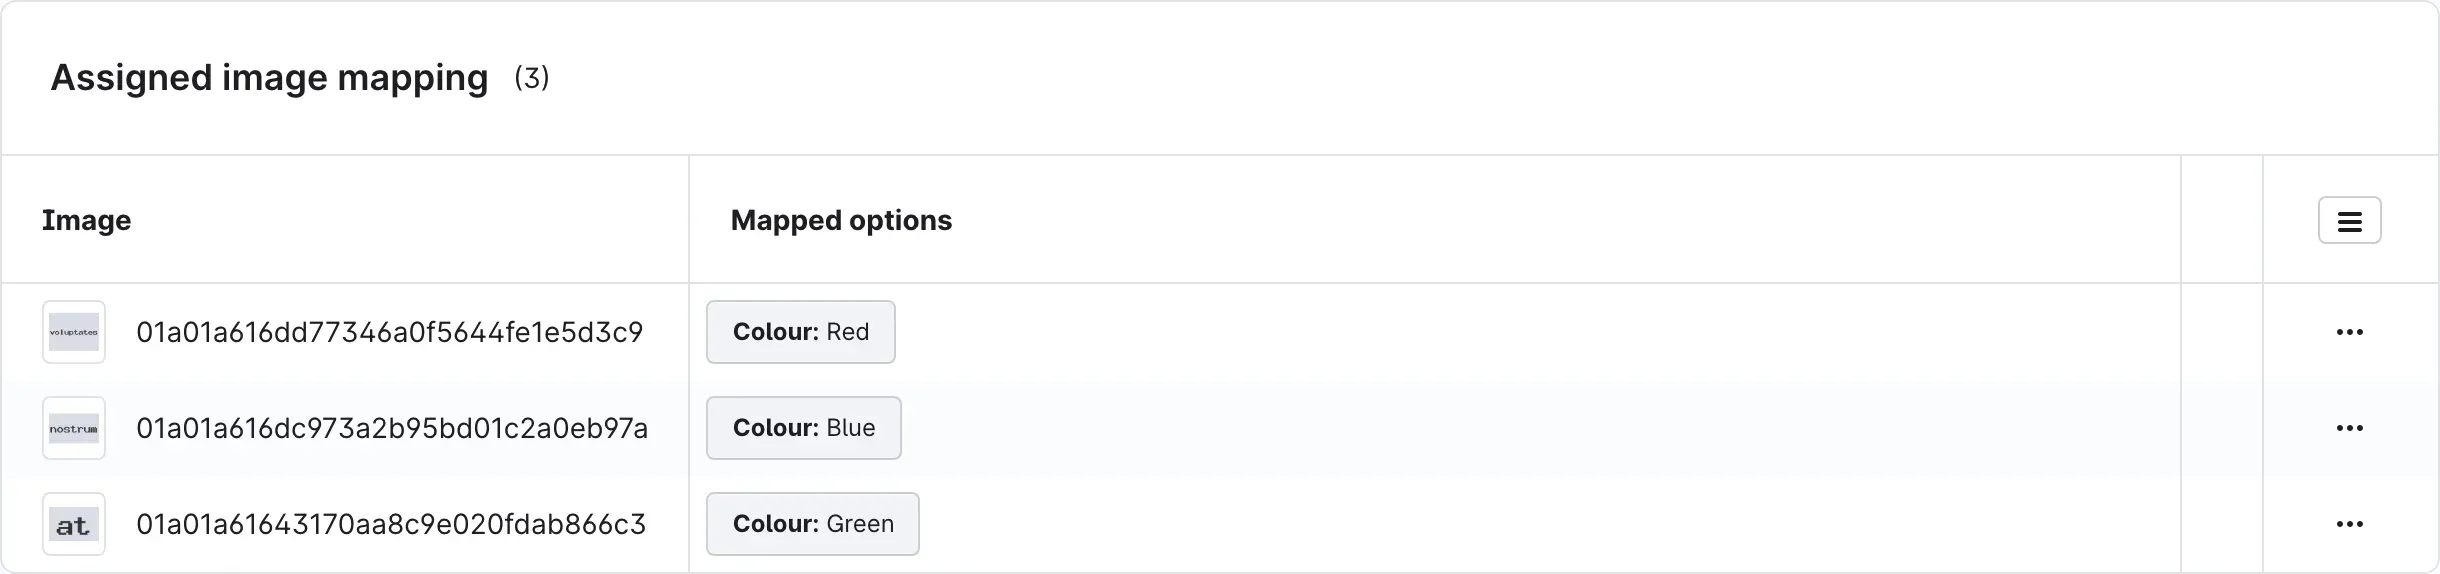 Fig. 8: The image on the left, the options it applies to on the right.
Tip: Create one mapping per option. Simply repeat steps 2 to 7.
Important: A single mapping can also cover several options at once. The image then only appears when your customer has selected exactly that combination — not already when one of them is picked. So for “one image per colour”, select exactly one option.
Change an existing mapping
What you get: You can swap an image or correct the mapped options without creating the mapping again.
-
In the Assigned image mapping card, click the three dots at the right end of the row.
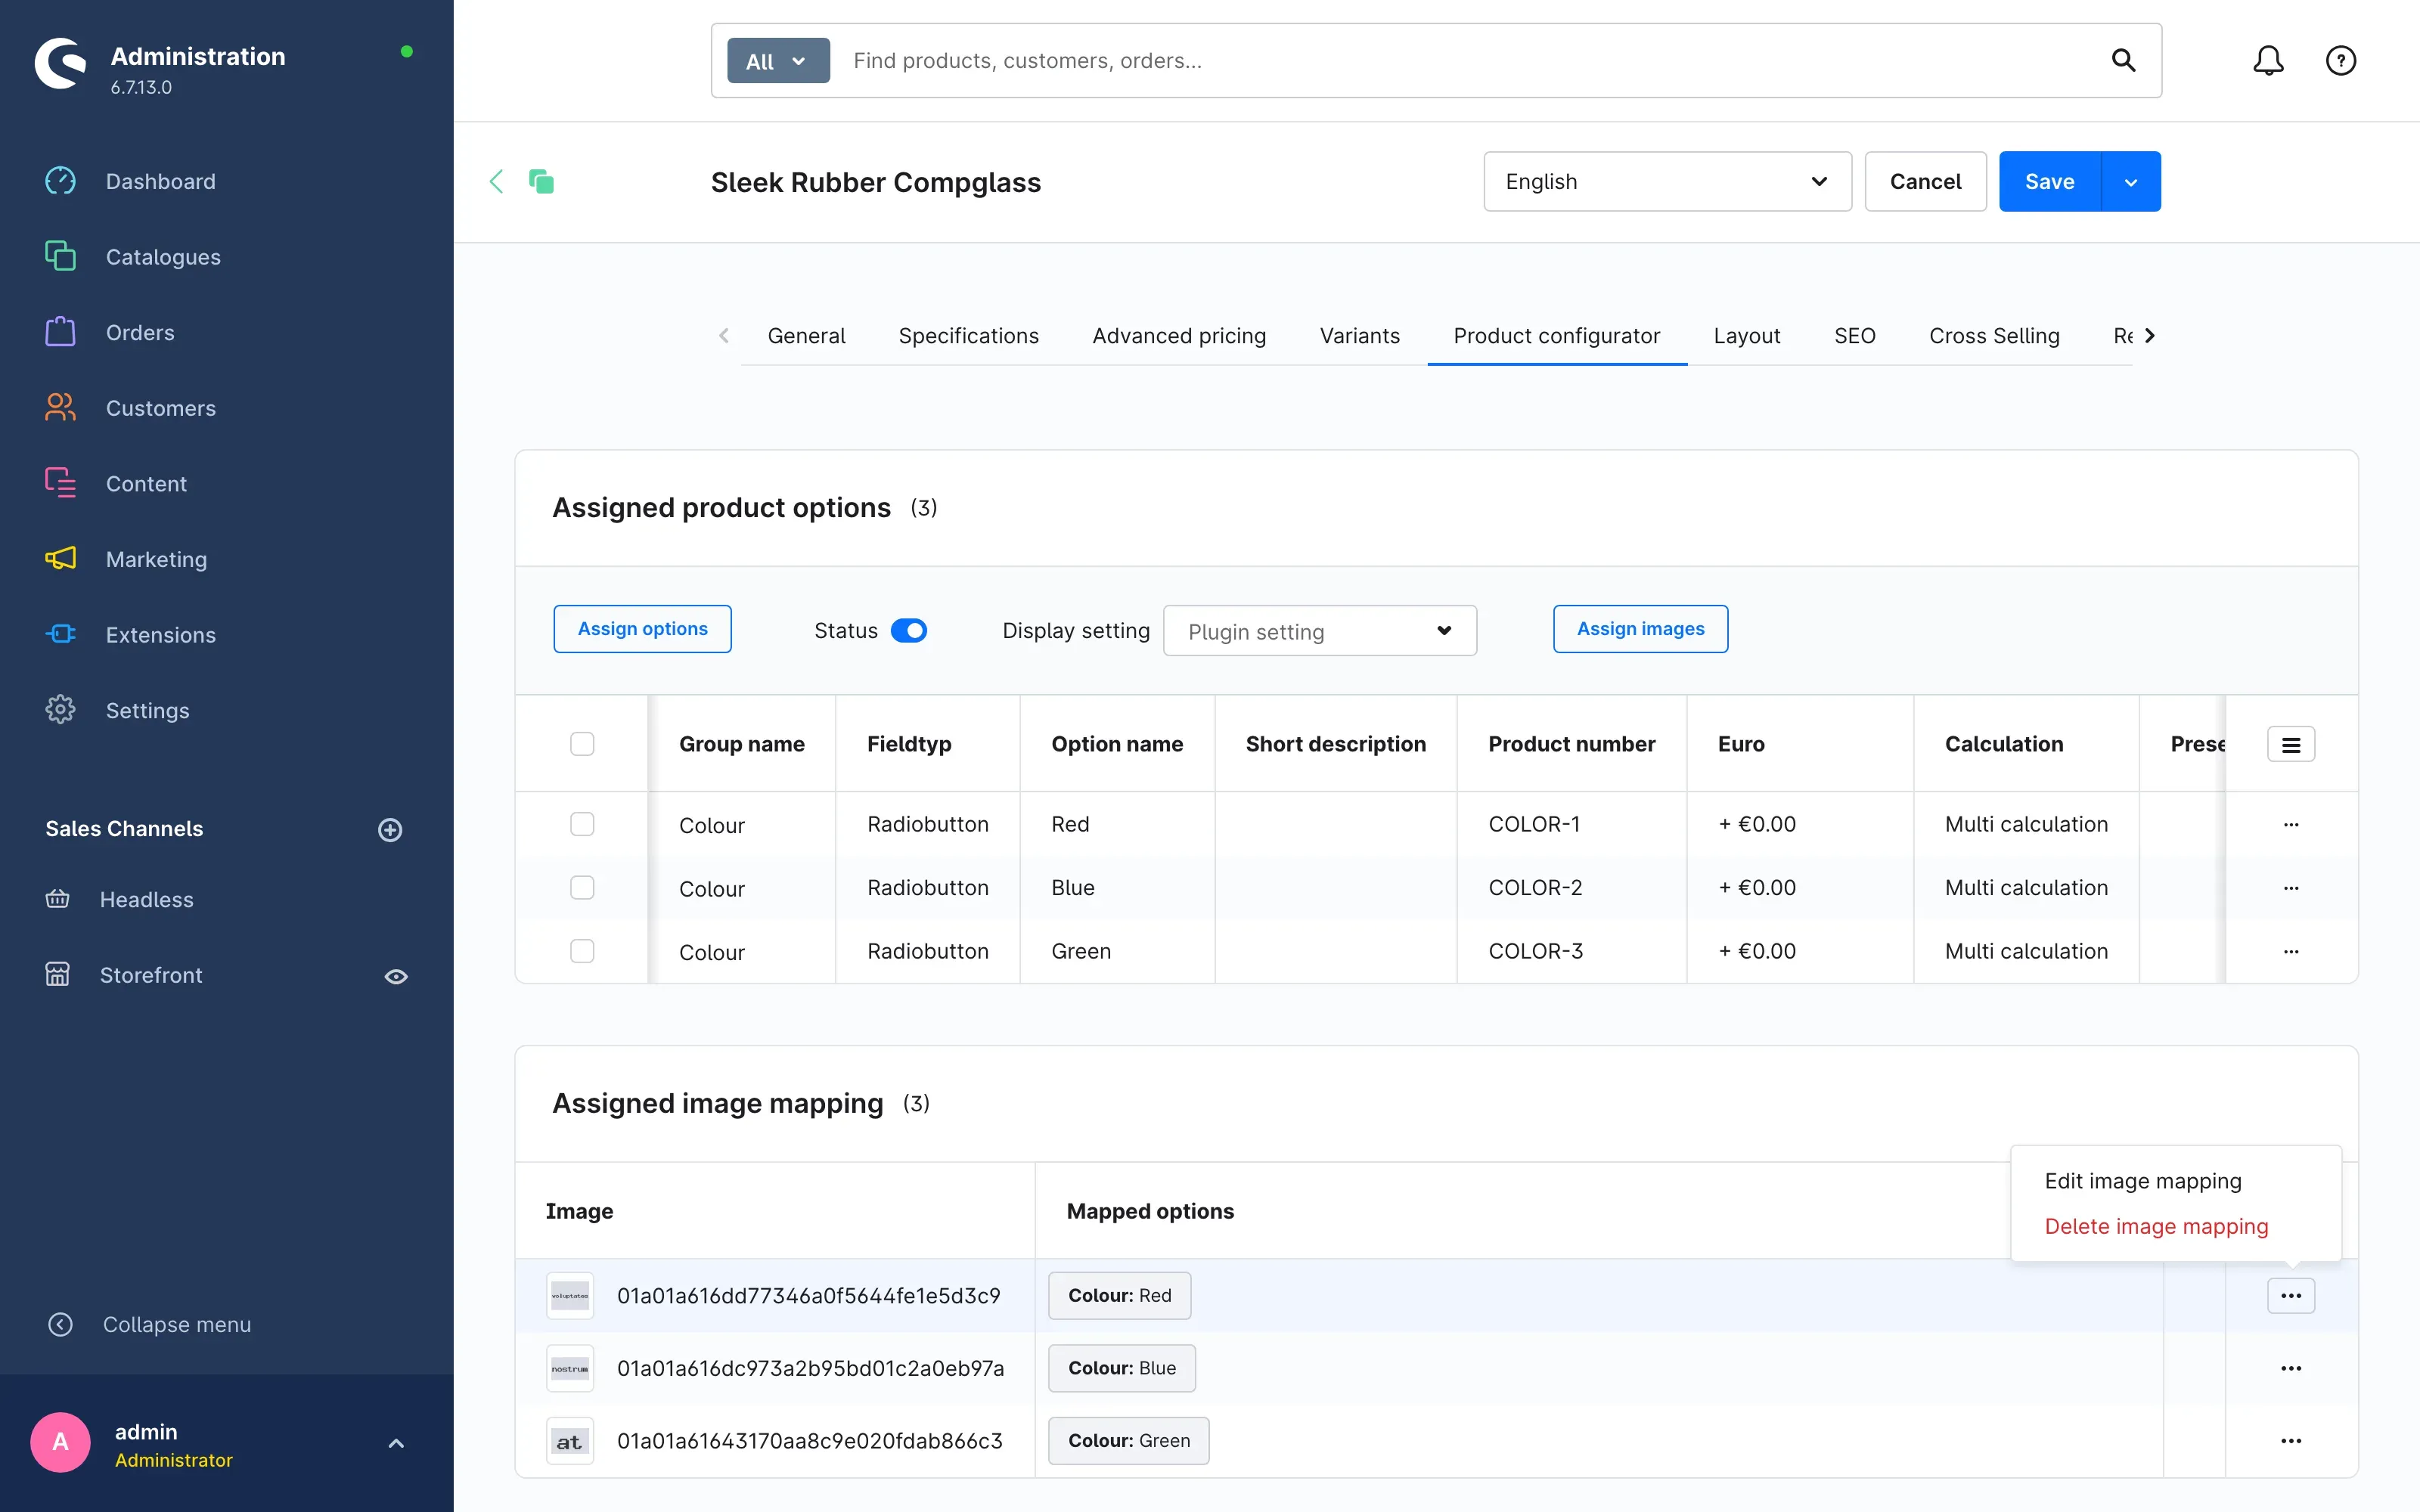 Fig. 9: The context menu with “Edit image mapping” and “Delete image mapping”.
 -
Choose Edit image mapping.
-
In the dialog, change the image, the options or both.
-
Click Save mapping and then Save at the top right.
Delete a mapping
-
Click the three dots in the row and choose Delete image mapping.
-
Confirm with Delete mapping.
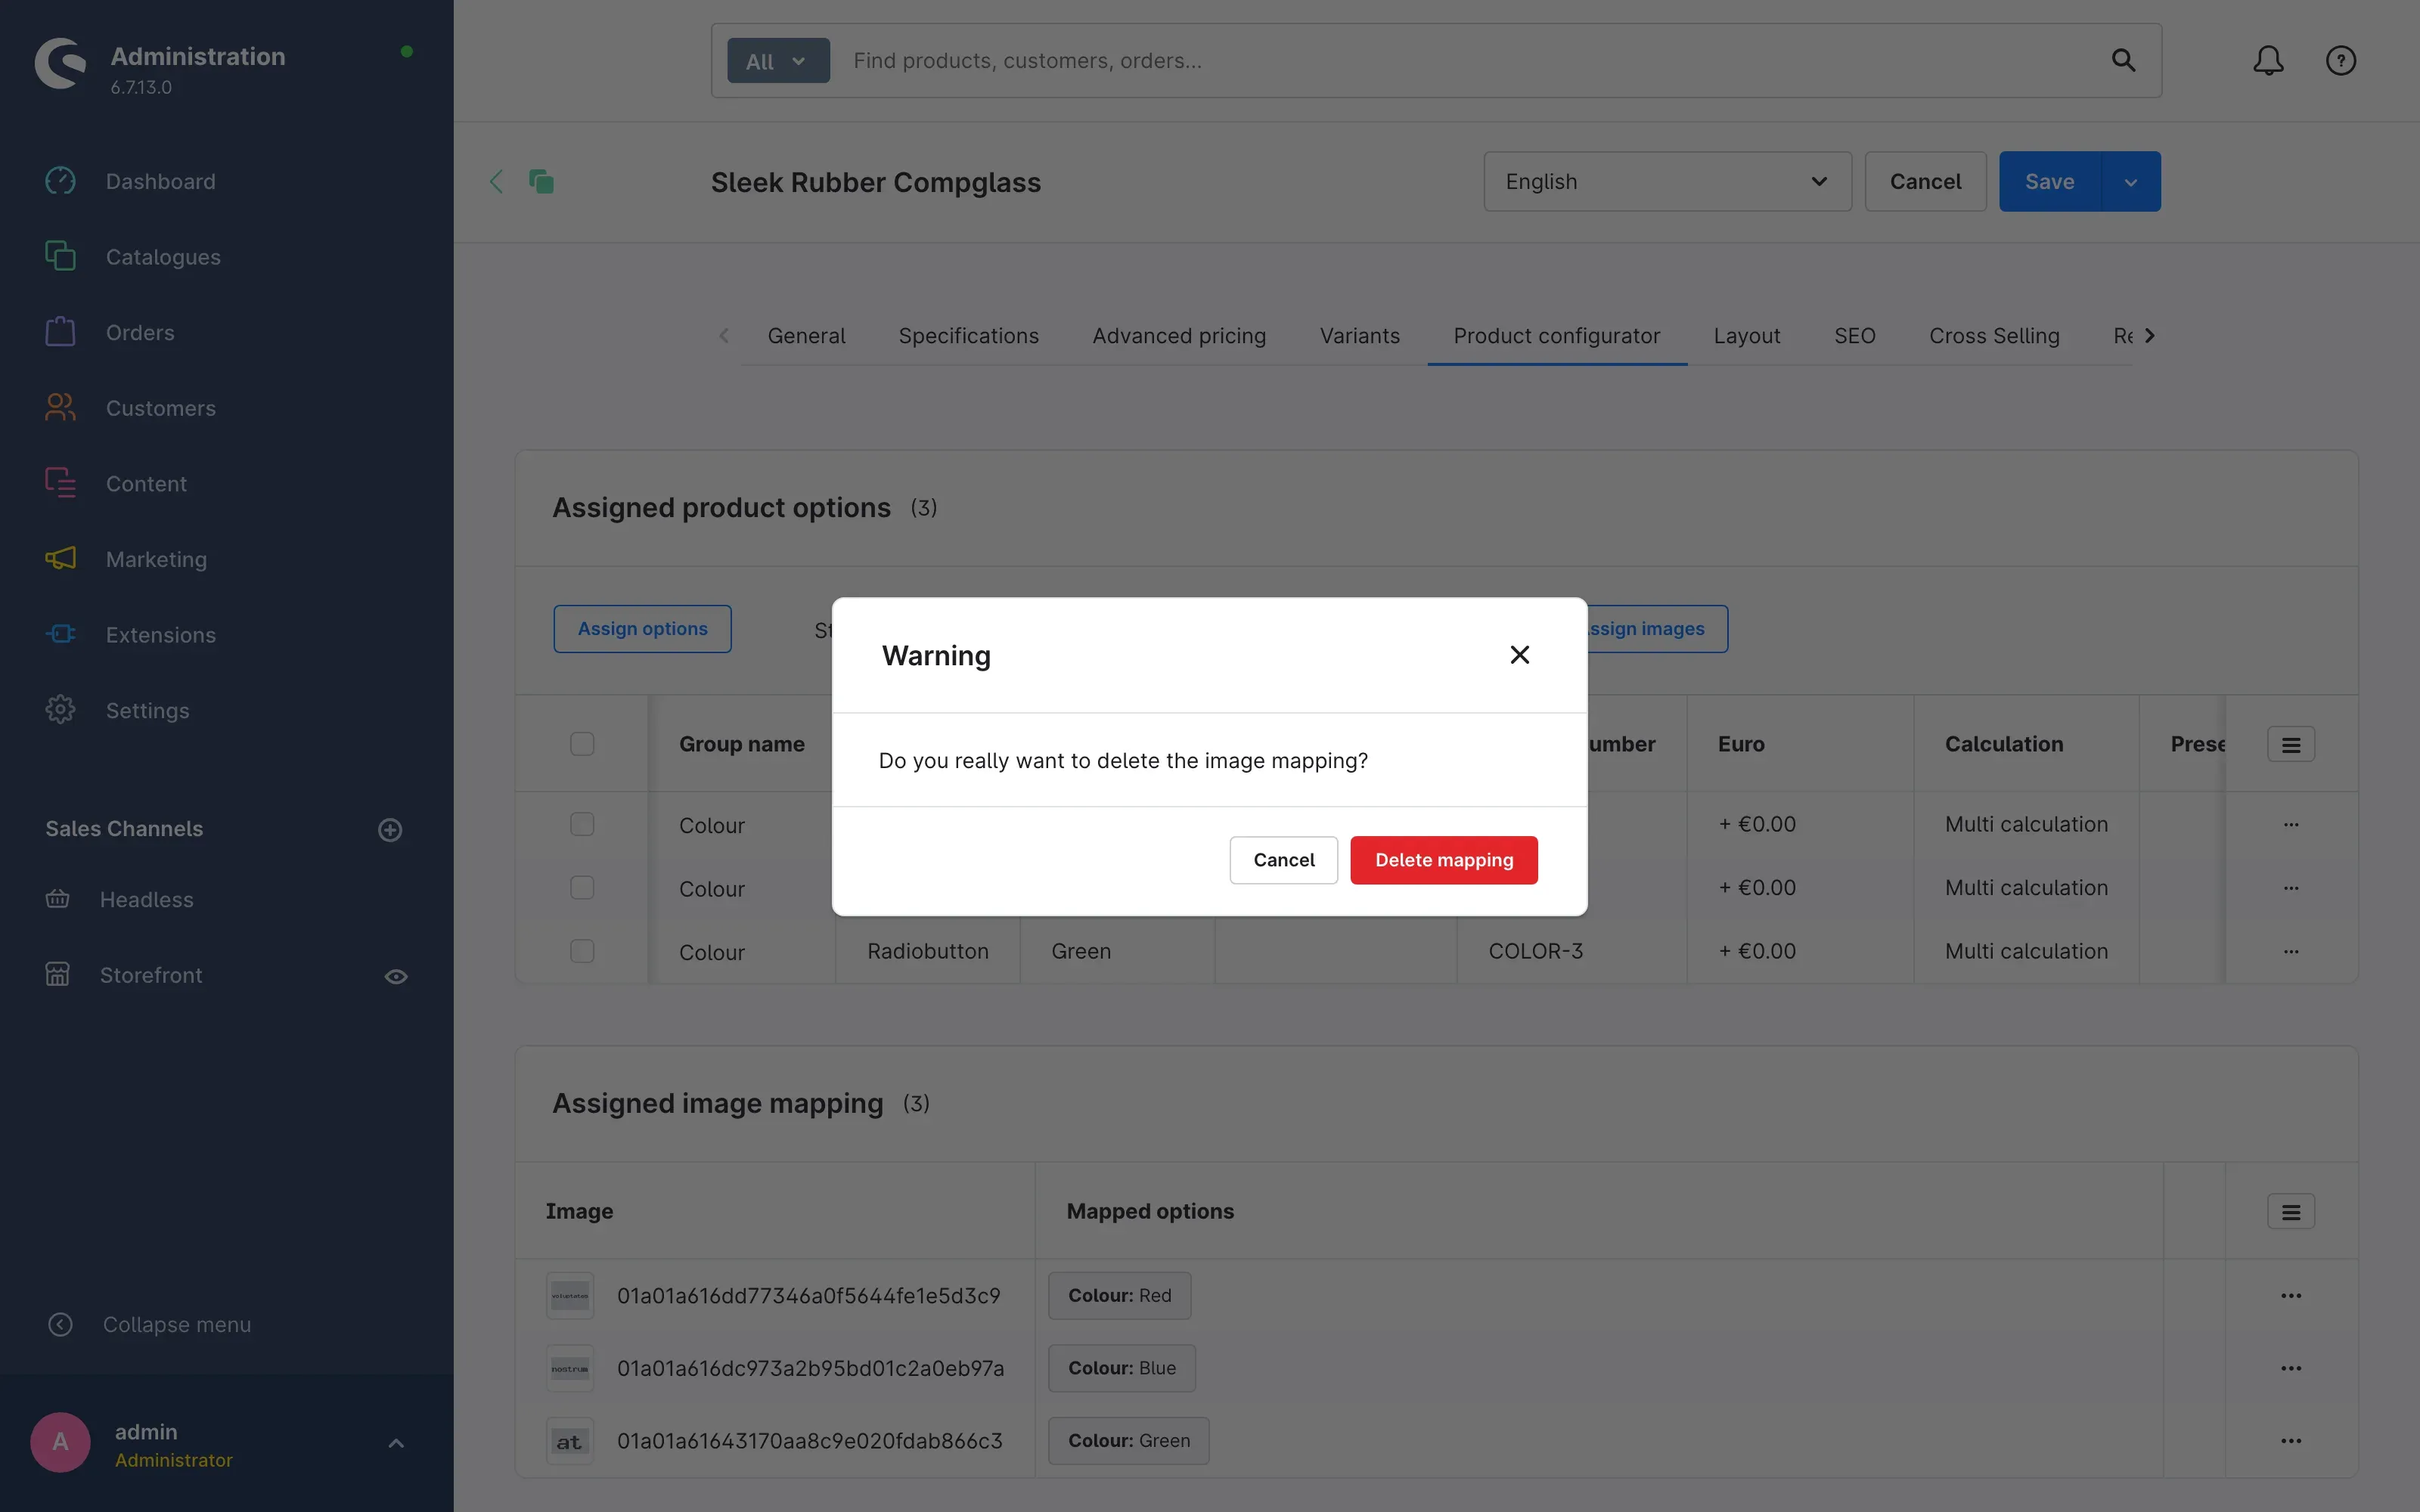 Fig. 10: Shopware asks for confirmation before deleting.
Only the mapping is deleted. The image itself stays in your media library and the configurator option remains unchanged.
Tip: If you only want to fall back to the default image for a while, you do not have to delete anything — switch off the setting from Settings for the affected sales channel instead.
What your customers see in the shop
On the product page the option selection sits next to the image gallery as usual. When the page is opened, no special choice has been made yet:
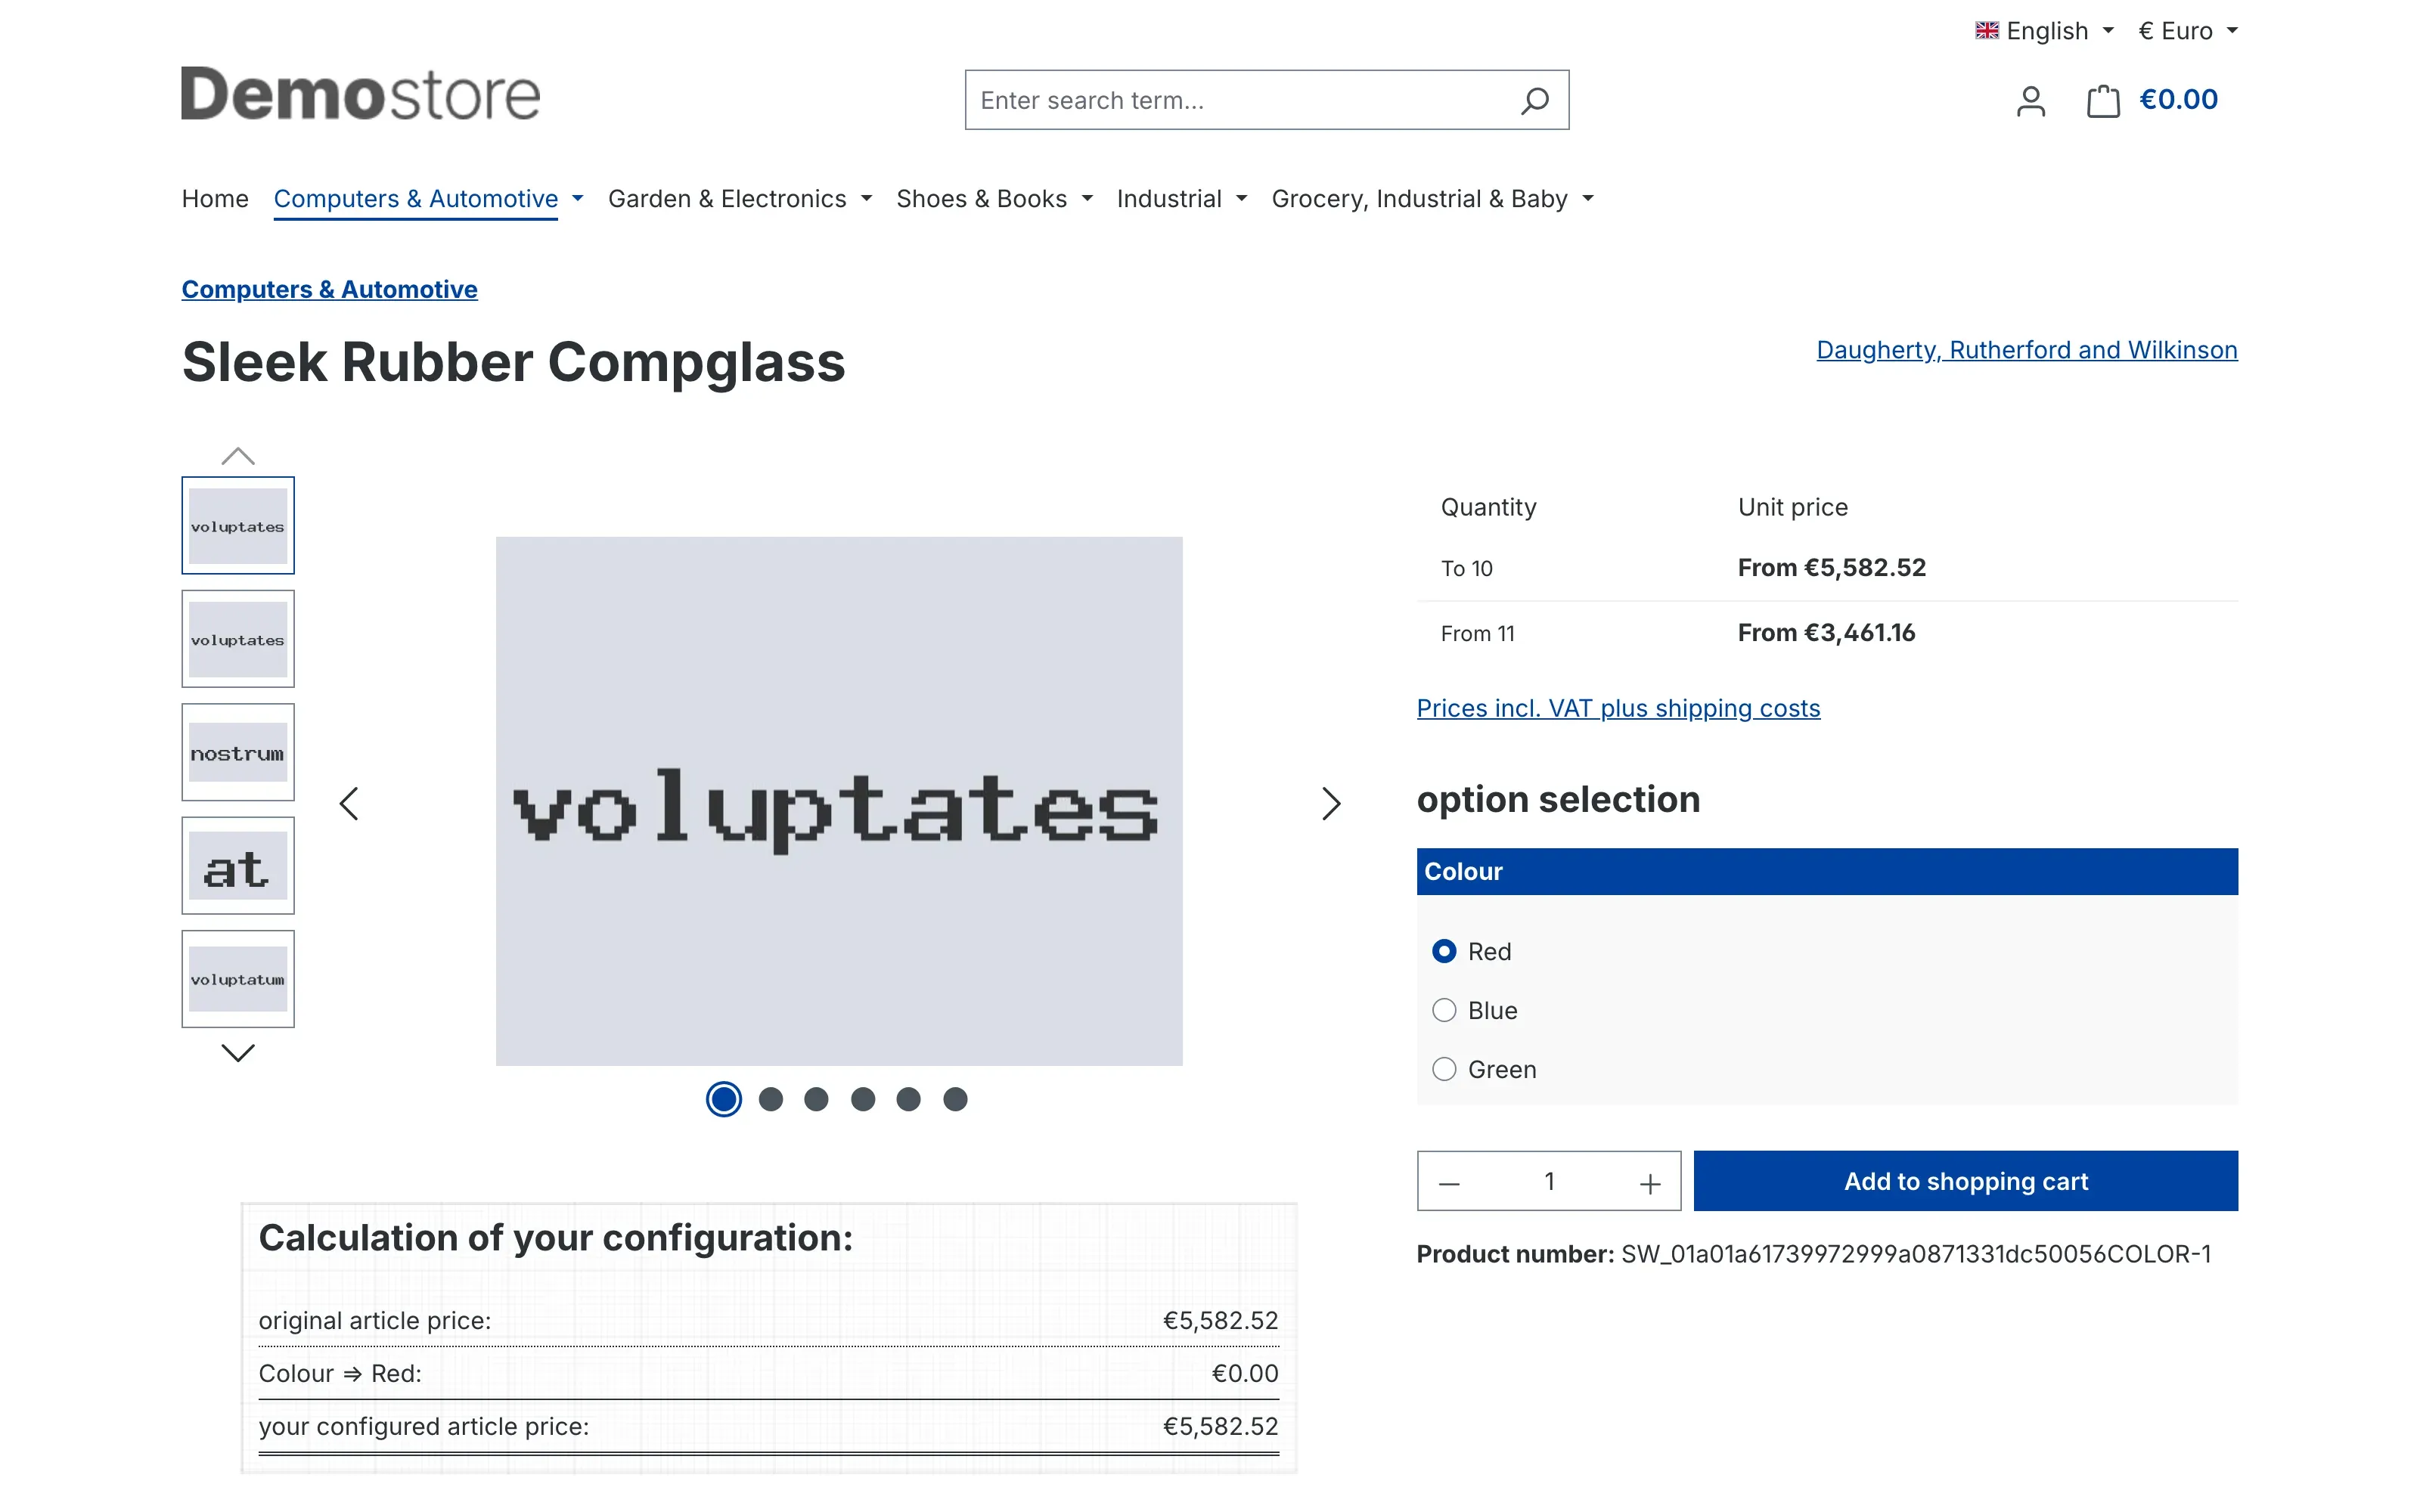 Fig. 11: Product page with the “Colour” option selection.
As soon as an option with a mapped image is selected, the large image and the thumbnail above it change:
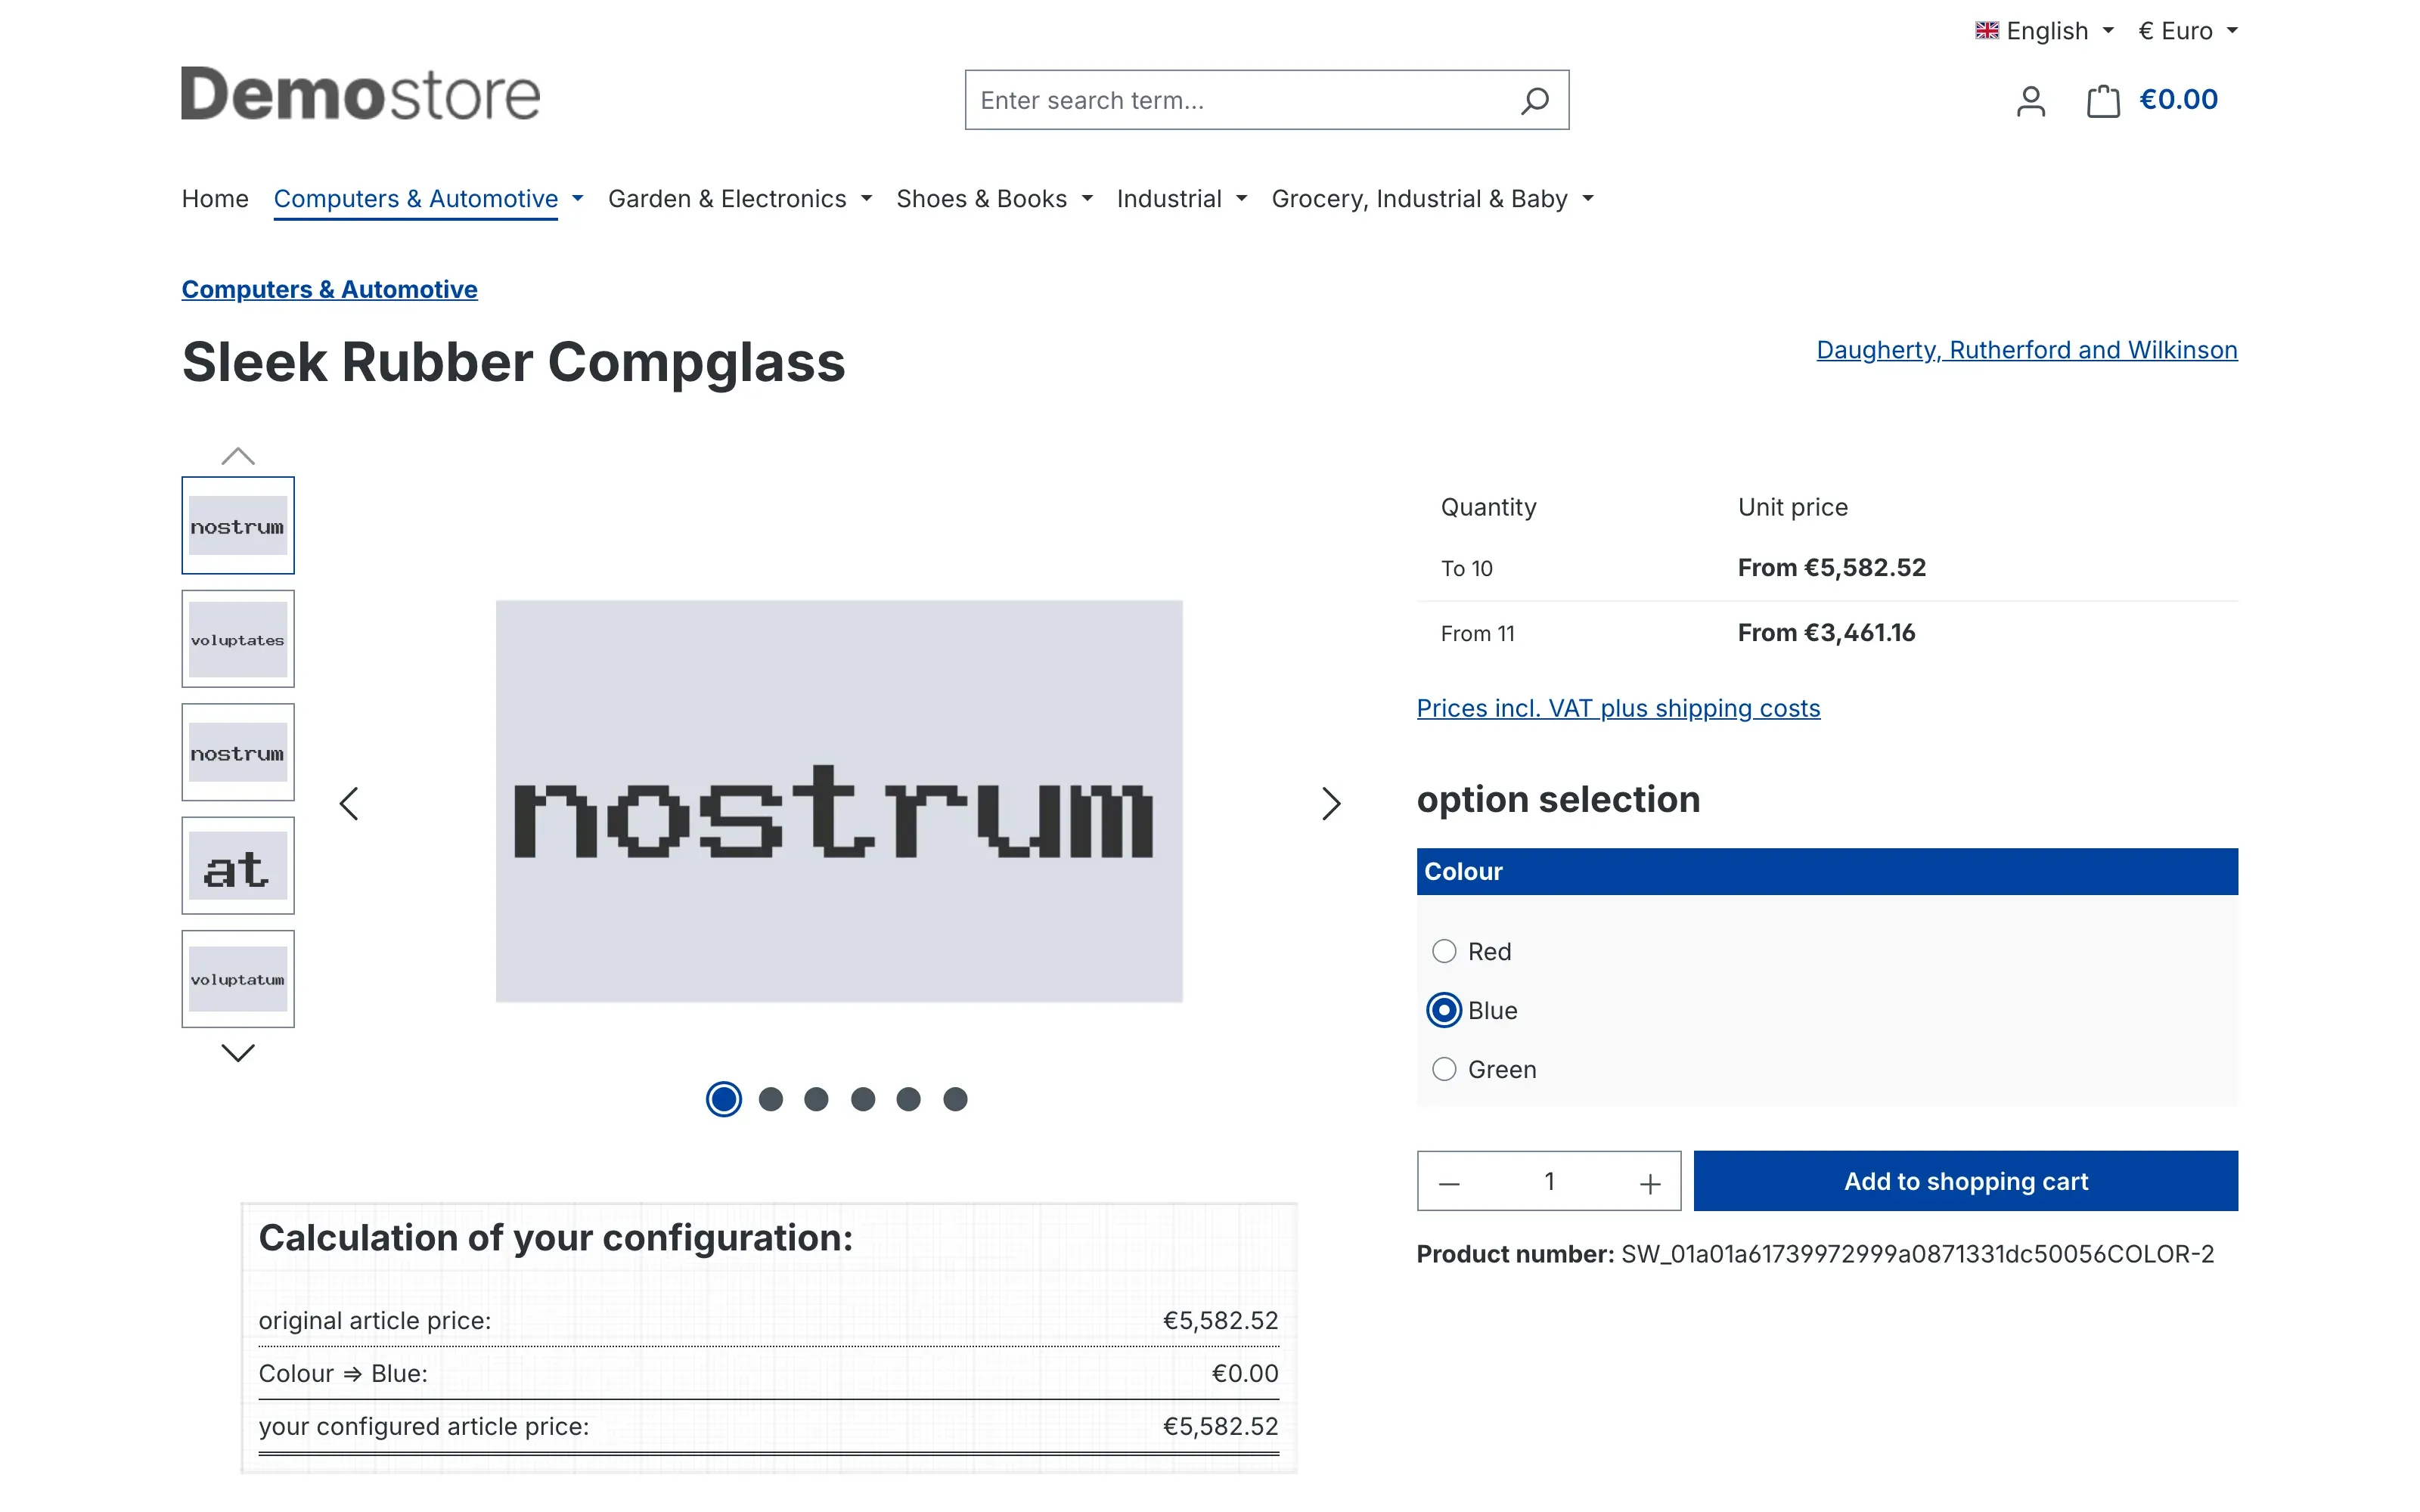 Fig. 12: After selecting “Blue”, the gallery shows the mapped image.
If someone picks an option without a mapped image, the original product image reappears. So there is never an empty spot.
The image change also applies to the full-screen view: if someone opens the image in the enlarged view, the mapped image is shown there too.
Troubleshooting
The “Product configurator” tab is missing on the product
What causes it: The Product configurator plugin is not installed or not active. Without it there is no tab, and therefore no place to map images.
How to fix it:
- Open Extensions → My extensions.
- Check that Product configurator is listed and that the switch on the left is on.
- Reload the product page in the administration.
The “Assign images” button is missing
What causes it: Either Product configurator image mapping is not active, or your user account is not allowed to edit products.
How to fix it:
- Check under Extensions → My extensions whether the plugin is active.
- Ask someone with administrator rights to grant you the right to edit products.
- Then clear the cache under Settings → Caches & indexes.
The image does not change in the shop
What causes it: Usually it is one of these three points.
How to fix it:
- On the settings page, check that Enable plugin for this sales channel is switched on for the affected sales channel (see Settings).
- Check that the mapping is really saved: it has to appear in the Assigned image mapping card, and the product itself has to be saved with Save.
- Check whether you accidentally selected several options in one mapping. In that case the image only appears once exactly that combination has been selected.
- Then clear the cache under Settings → Caches & indexes.
Nothing happens on a product with variants
What causes it: Mappings always apply to exactly the product you created them on. A variant does not inherit them from the main product.
How to fix it: Create the mapping on the variant that is actually opened in the shop.
The mapped image looks blurred or distorted
What causes it: The mapped image has a different aspect ratio or a lower resolution than the other product images.
How to fix it: Use the same format and the same edge length for all images of a product. Then swap the image via Edit image mapping.
FAQ
Q: Do I have to create a separate product for every option?
A: No. That is exactly what this plugin saves you. You stay with one product and store one image per option.
Q: Does the image have to be in the product gallery beforehand?
A: No. You select it from your media library while mapping, or upload it there directly.
Q: How many images can I map?
A: As many as you have options. There is no practical upper limit for a product.
Q: Can one image apply to several options?
A: Yes — but then exactly that combination has to be selected for the image to appear. If the same image should appear for several options individually, create one mapping per option.
Q: Do I lose my mappings if I switch the plugin off for a while?
A: No. The switch only controls whether the image change happens in the shop. Your mappings stay saved.
Q: Does this also work on Shopping Experiences pages?
A: Yes. If a Shopping Experiences page shows a product with an image gallery and a buy area, the image changes there as well.
Q: Do my customers also see the changed image when they enlarge it?
A: Yes. The full-screen view shows the mapped image too.
Q: Do I have to change anything in my theme?
A: No. The plugin works with the standard Shopware product gallery.
For administrators / Technical details
This section is aimed at technical administrators. You do not need it for normal use.
System requirements
- Shopware: 6.7
- PHP: 8.2 or newer
- Storefront: the Shopware storefront bundle has to be active
- Dependency: the Product configurator plugin (
swp/productoptions-six) from version 6.7.12
Installation from the command line
composer require swp/productoptions-six-mapping
php bin/console plugin:refresh
php bin/console plugin:install --activate SwpProductOptionsSixMediaMapping
php bin/console assets:install
php bin/console theme:compile
php bin/console cache:clear
Data storage
The plugin creates a table of its own for the mappings and does not change any standard Shopware tables. When uninstalling you decide as usual whether your data should be kept.
Logging
If loading the mappings for a page fails, the product page is still delivered in full; the incident is written to a dedicated log channel of the plugin under var/log/. The shop stays reachable in any case.
Languages
The plugin interface is available in German, English and Dutch.
This manual was created for Product configurator image mapping version 6.7.1.
More manuals
Admin Password Reminder
Admin Password Reminder: your backend users renew their passwords on time, prompted after login and by a daily email. Premium locks expired accounts until the password is changed.
Open manual Shopware 6Age Check
Tobacco, spirits, knives: visitors who do not confirm their age never see the restricted items at all. You tick a box per product, the plugin hides it everywhere.
Open manual Shopware 6AI Media Labelling
AI labelling for images and videos: flag a media item once in the media manager and the badge with your notice appears wherever it shows up in your shop. No template work needed.
Open manualNeed a team that keeps your shop running?
We have been maintaining Shopware shops for more than 20 years, including updates, hotfixes and the plugins you are configuring right now.