Contact Person
Contact person on every page: assign staff to products, categories, customers and customer groups, with contact ways from phone to WhatsApp and a vCard to save.
On this page
- Introduction
- What you achieve with this plugin
- Who is this plugin for?
- Installation
- Getting started
- Settings
- Channel configuration
- Other settings
- vCard download
- Creating and maintaining contact persons
- The overview
- Name
- Profile and picture
- Contact ways
- Address and email
- Visibility and sales channels
- Creating a new person
- Maintaining details in several languages
- Protection against unsaved changes
- Creating and maintaining groups
- The group overview
- Creating or editing a group
- Group names in several languages
- Assigning contact persons
- On the product
- On the category
- On the customer
- On the customer group
- Showing contact persons in Shopping Experiences
- Adding the block to your layout
- Setting source and headline
- What your customers see
- Saving a contact as a vCard
- Contact persons in the customer account
- Access rights for your team
- Troubleshooting
- No contact person appears in the storefront
- All contact persons are missing in a new sales channel
- The “Contact person” entry is missing in the customer account
- The page in the customer account is empty
- The “Save contact” button is missing
- A contact way does not appear in the storefront
- The email address appears twice in the contact section
- The contact person’s picture is missing
- Group name, job title or availability appear in the wrong language
- Changes are not visible in the storefront right away
- FAQ
- For administrators / Technical details
- System requirements
- Headless frontend (Store API)
- Data storage
- Address of the customer account page
- Uninstalling
- Customisation via theme or own plugin
Introduction
Contact Person puts a face to your product range: you maintain your contact persons once, centrally in the Administration, and show them exactly where your customers need them — on the product, in the category and in the customer account.
What you achieve with this plugin
- You maintain all contact persons in one place: with salutation, title, name, job title, availability, spoken languages, address and picture.
- You add as many contact ways per person as you like — from phone and mobile through WhatsApp, Microsoft Teams, Signal and Telegram to LinkedIn, Xing, a website and a link for booking an appointment.
- You assign persons to products, categories, customers and customer groups — several at once if needed.
- Your customers see on product and category pages who can help them, and logged-in customers find their personal contacts in their customer account.
- With Save contact, your customers add a person to their address book in one click.
- Per sales channel you decide whether the plugin is active, which details appear, and in which sales channels a person shows up at all.
- Group names, job titles and availability can be maintained in every shop language.
Who is this plugin for?
For shops where advice is part of the product: B2B merchants with dedicated area or account managers, products that need explaining, manufacturers with specialist advisers. Wherever a customer should not call “someone”, but a specific person.
Installation
After purchase, the plugin is available directly in your Administration — there is nothing to download.
- Log in to your Shopware Administration (
YourShop.com/admin). - Open Extensions → My extensions.
- Click Install next to Contact Person.
- Activate the plugin with the switch next to the entry — done.
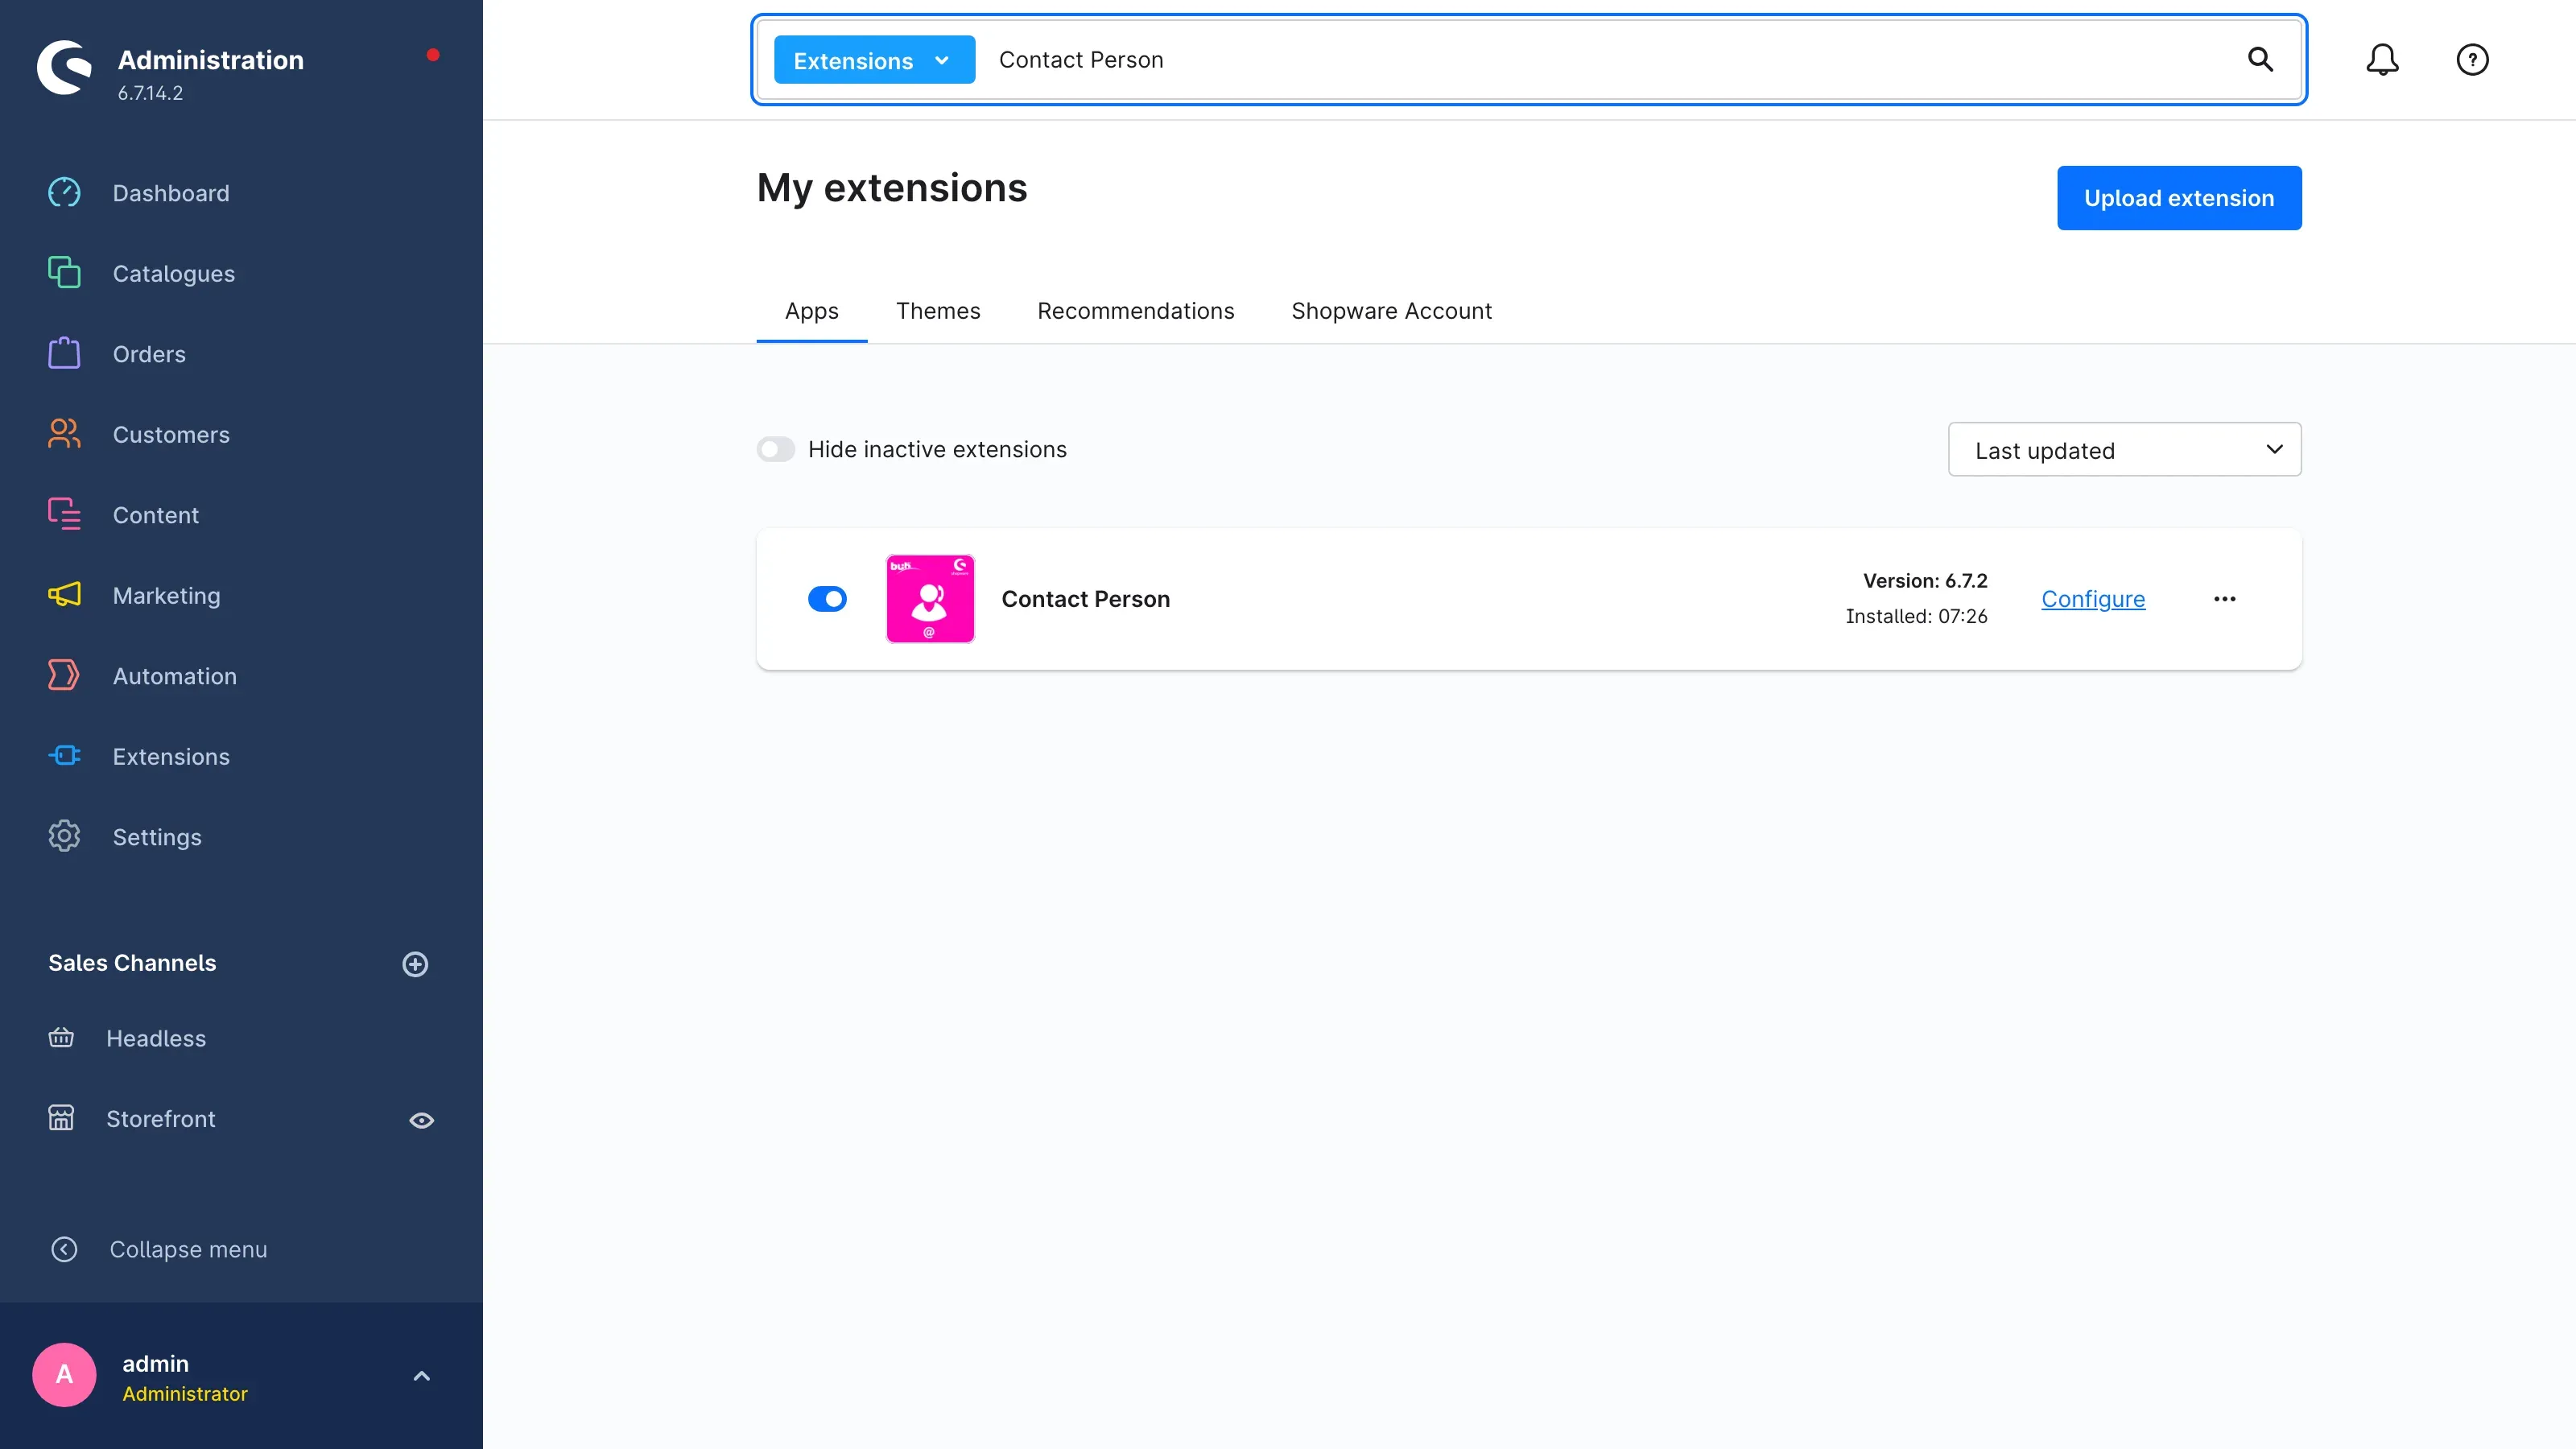 Fig. 1: The activated plugin in My extensions, with switch, version and the Configure link.
Tip: If Hide inactive extensions is switched on, a plugin that has not been activated yet does not appear in the list.
If Contact Person does not appear in the list, your Shopware account is not yet connected to the shop. You can do that under Extensions → My extensions by logging in with your Shopware account.
As soon as the plugin is active, the following happens automatically:
- The new entry Contact person appears under Customers.
- Products, categories, customers and customer groups get a new Contact person section in their Custom fields.
- Shopping Experiences offer the new block Contact person in the Commerce category.
- The customer account of your shop shows the menu entry Contact person.
Getting started
This is how you get your first contact person into your shop in a few minutes:
- Check the settings: Under Extensions → My extensions, click Configure next to Contact Person and make sure Enable plugin for this sales channel is switched on (chapter 4).
- Create a person: Open Customers → Contact person, click Add contact person, enter at least the last name and the email address and click Save (chapter 5).
- Assign the person: Open a product, go to Custom fields, select the person in the Contact person section and save (chapter 7).
- Add the block to the layout: In Shopping Experiences, add the Contact person block to the layout of your product page (chapter 8).
- Check the result: Open the product in the storefront. Below the heading Contact person the person appears with their details.
Settings
What this gives you: You decide in which sales channel contact persons appear, which details your customers see and whether they can save a person as a vCard. For example, you show the full address in your B2B shop and only name, picture and phone number in your consumer shop.
Open the settings under Extensions → My extensions via Configure next to Contact Person.
All settings apply per sales channel. At the top of the page, choose under Sales Channel which channel you want to change. All Sales Channels sets the default that every channel uses as long as you set nothing specific for it. After each change, click Save at the top right.
Channel configuration
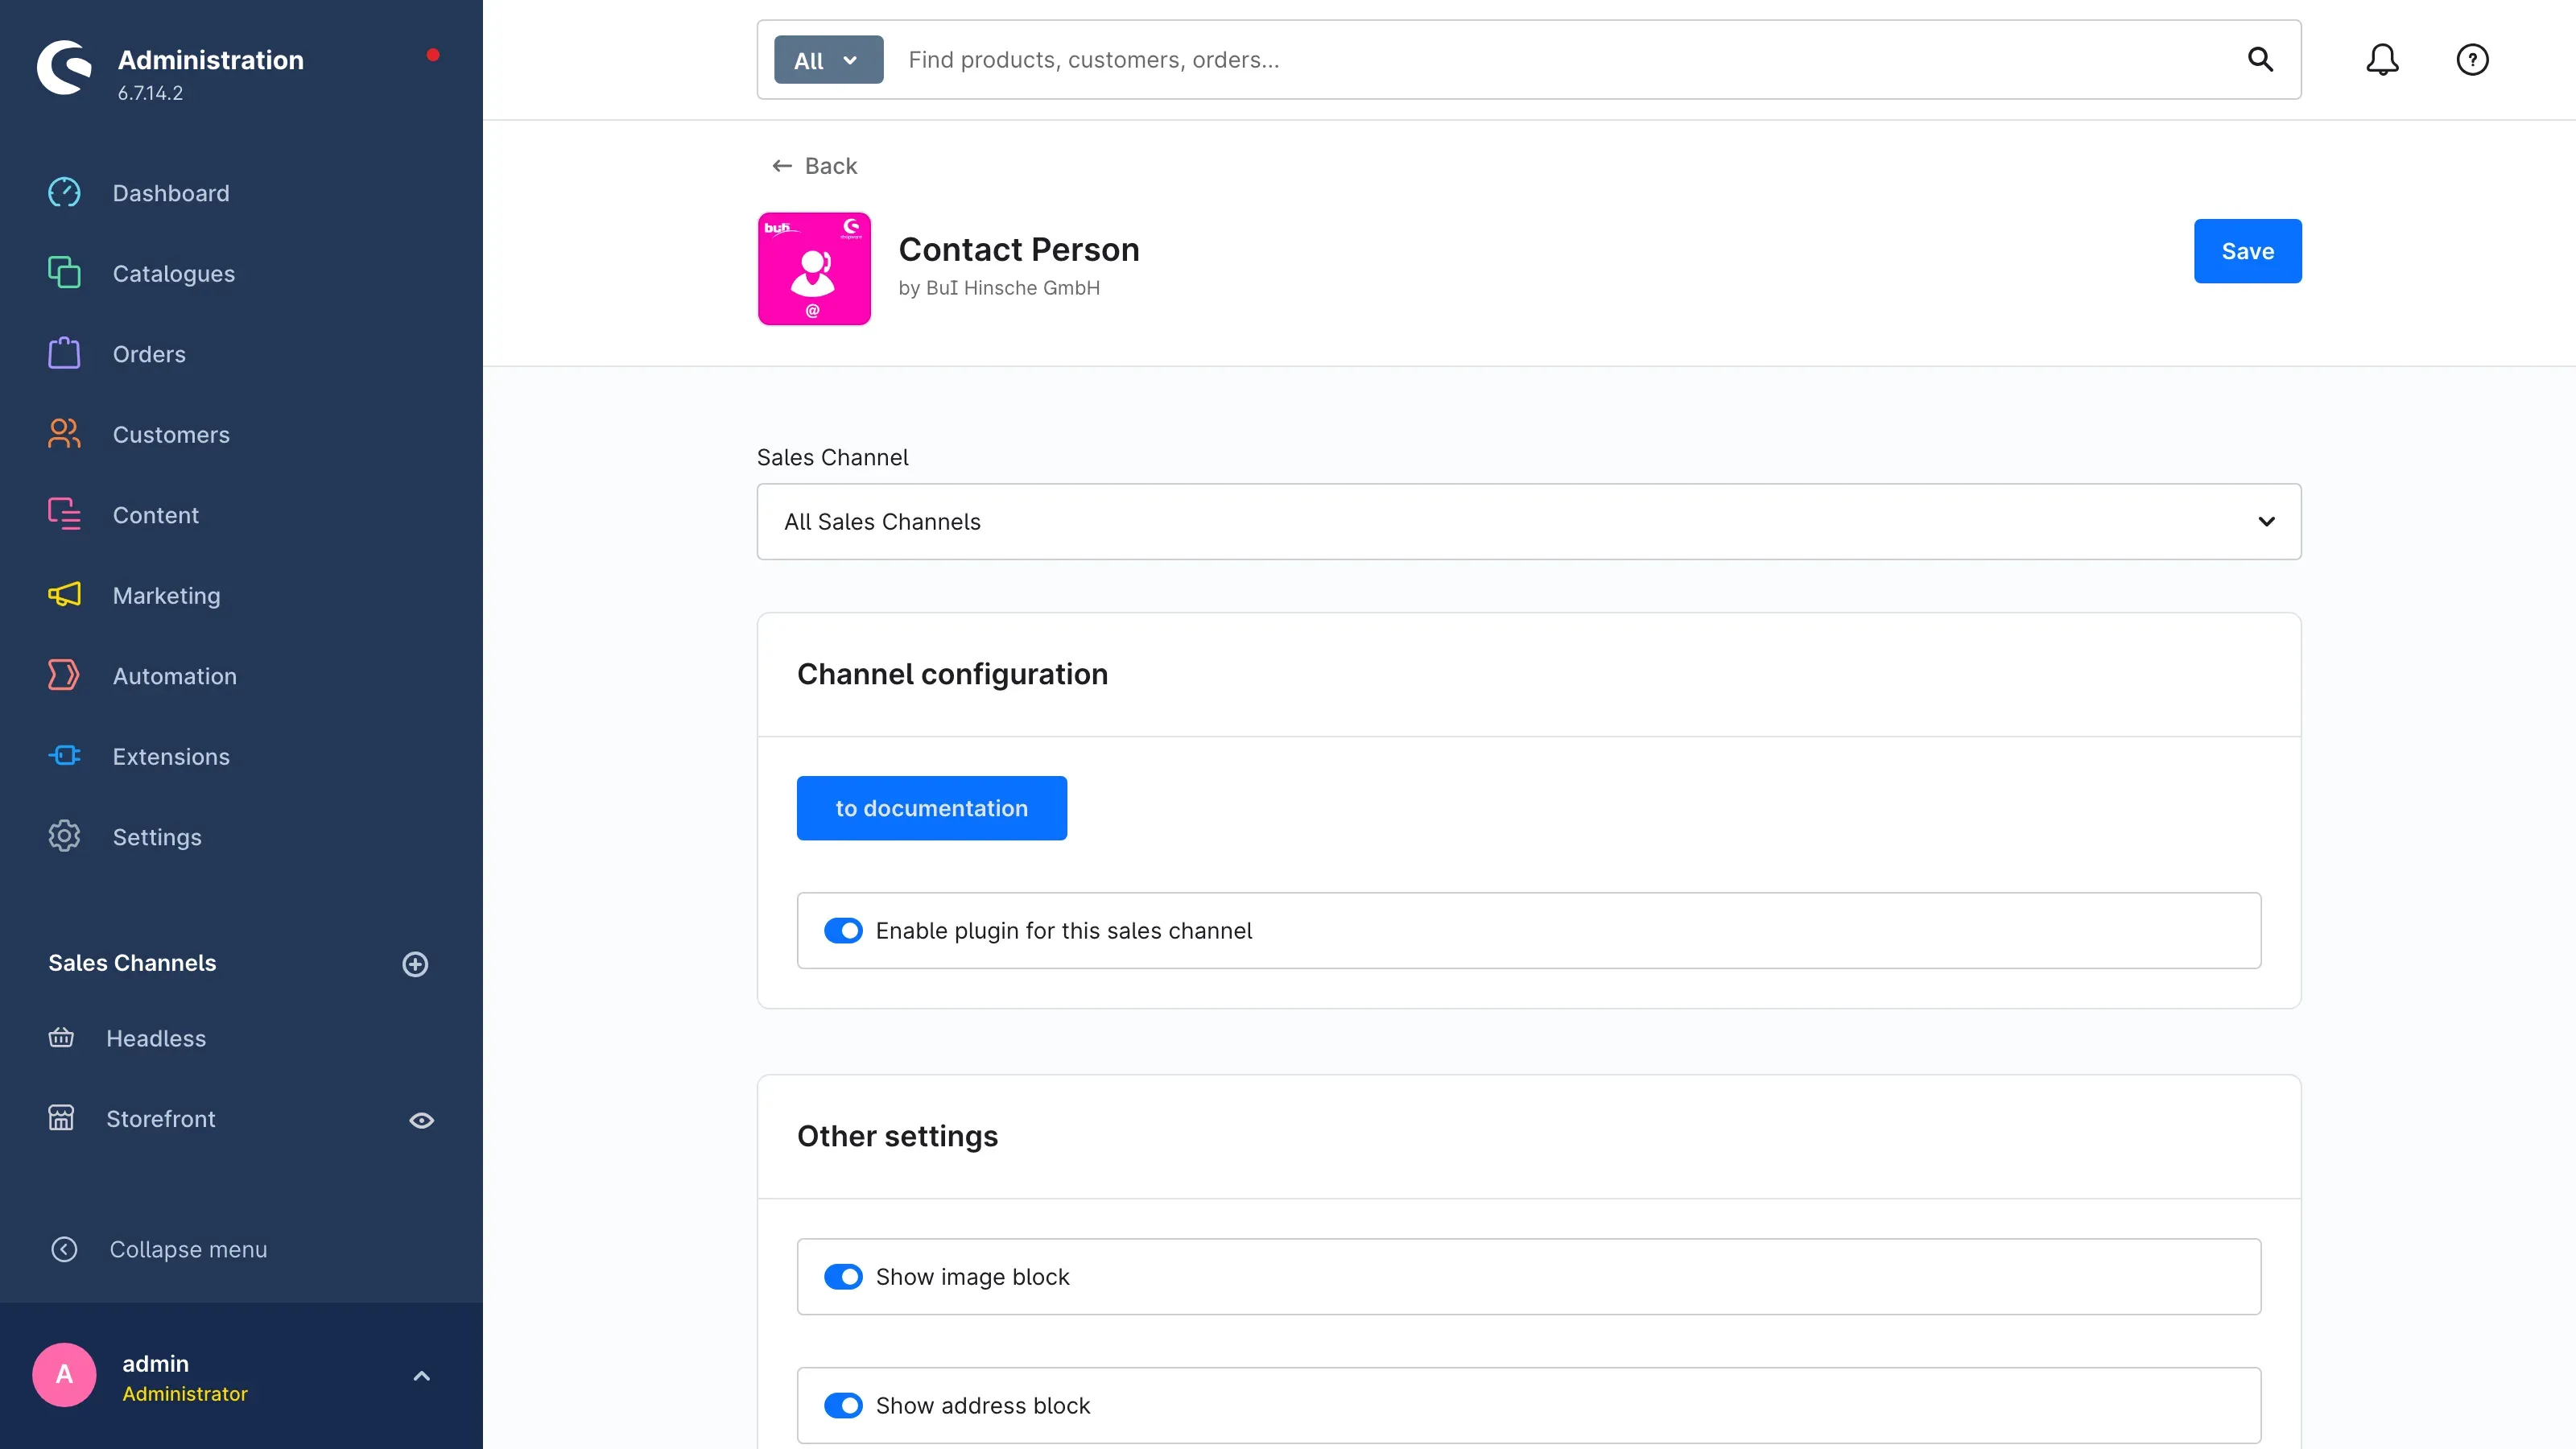 Fig. 2: The sales channel selection, below it the Channel configuration card with the to documentation button and the main switch.
At the very top is the to documentation button. It opens this manual online — in the language you are currently using the Administration in.
Below it is the most important switch: Enable plugin for this sales channel. It decides whether contact persons appear in the selected sales channel at all. It is switched on by default. If you switch it off, everything stays hidden in that channel: the blocks in Shopping Experiences show nothing, the menu entry in the customer account disappears and the customer account page can no longer be reached. Your persons, groups and assignments remain fully intact.
Why this is useful: You can prepare the feature at your own pace and only switch it on once all assignments are in place. Or you use it permanently in your B2B channel only.
Other settings
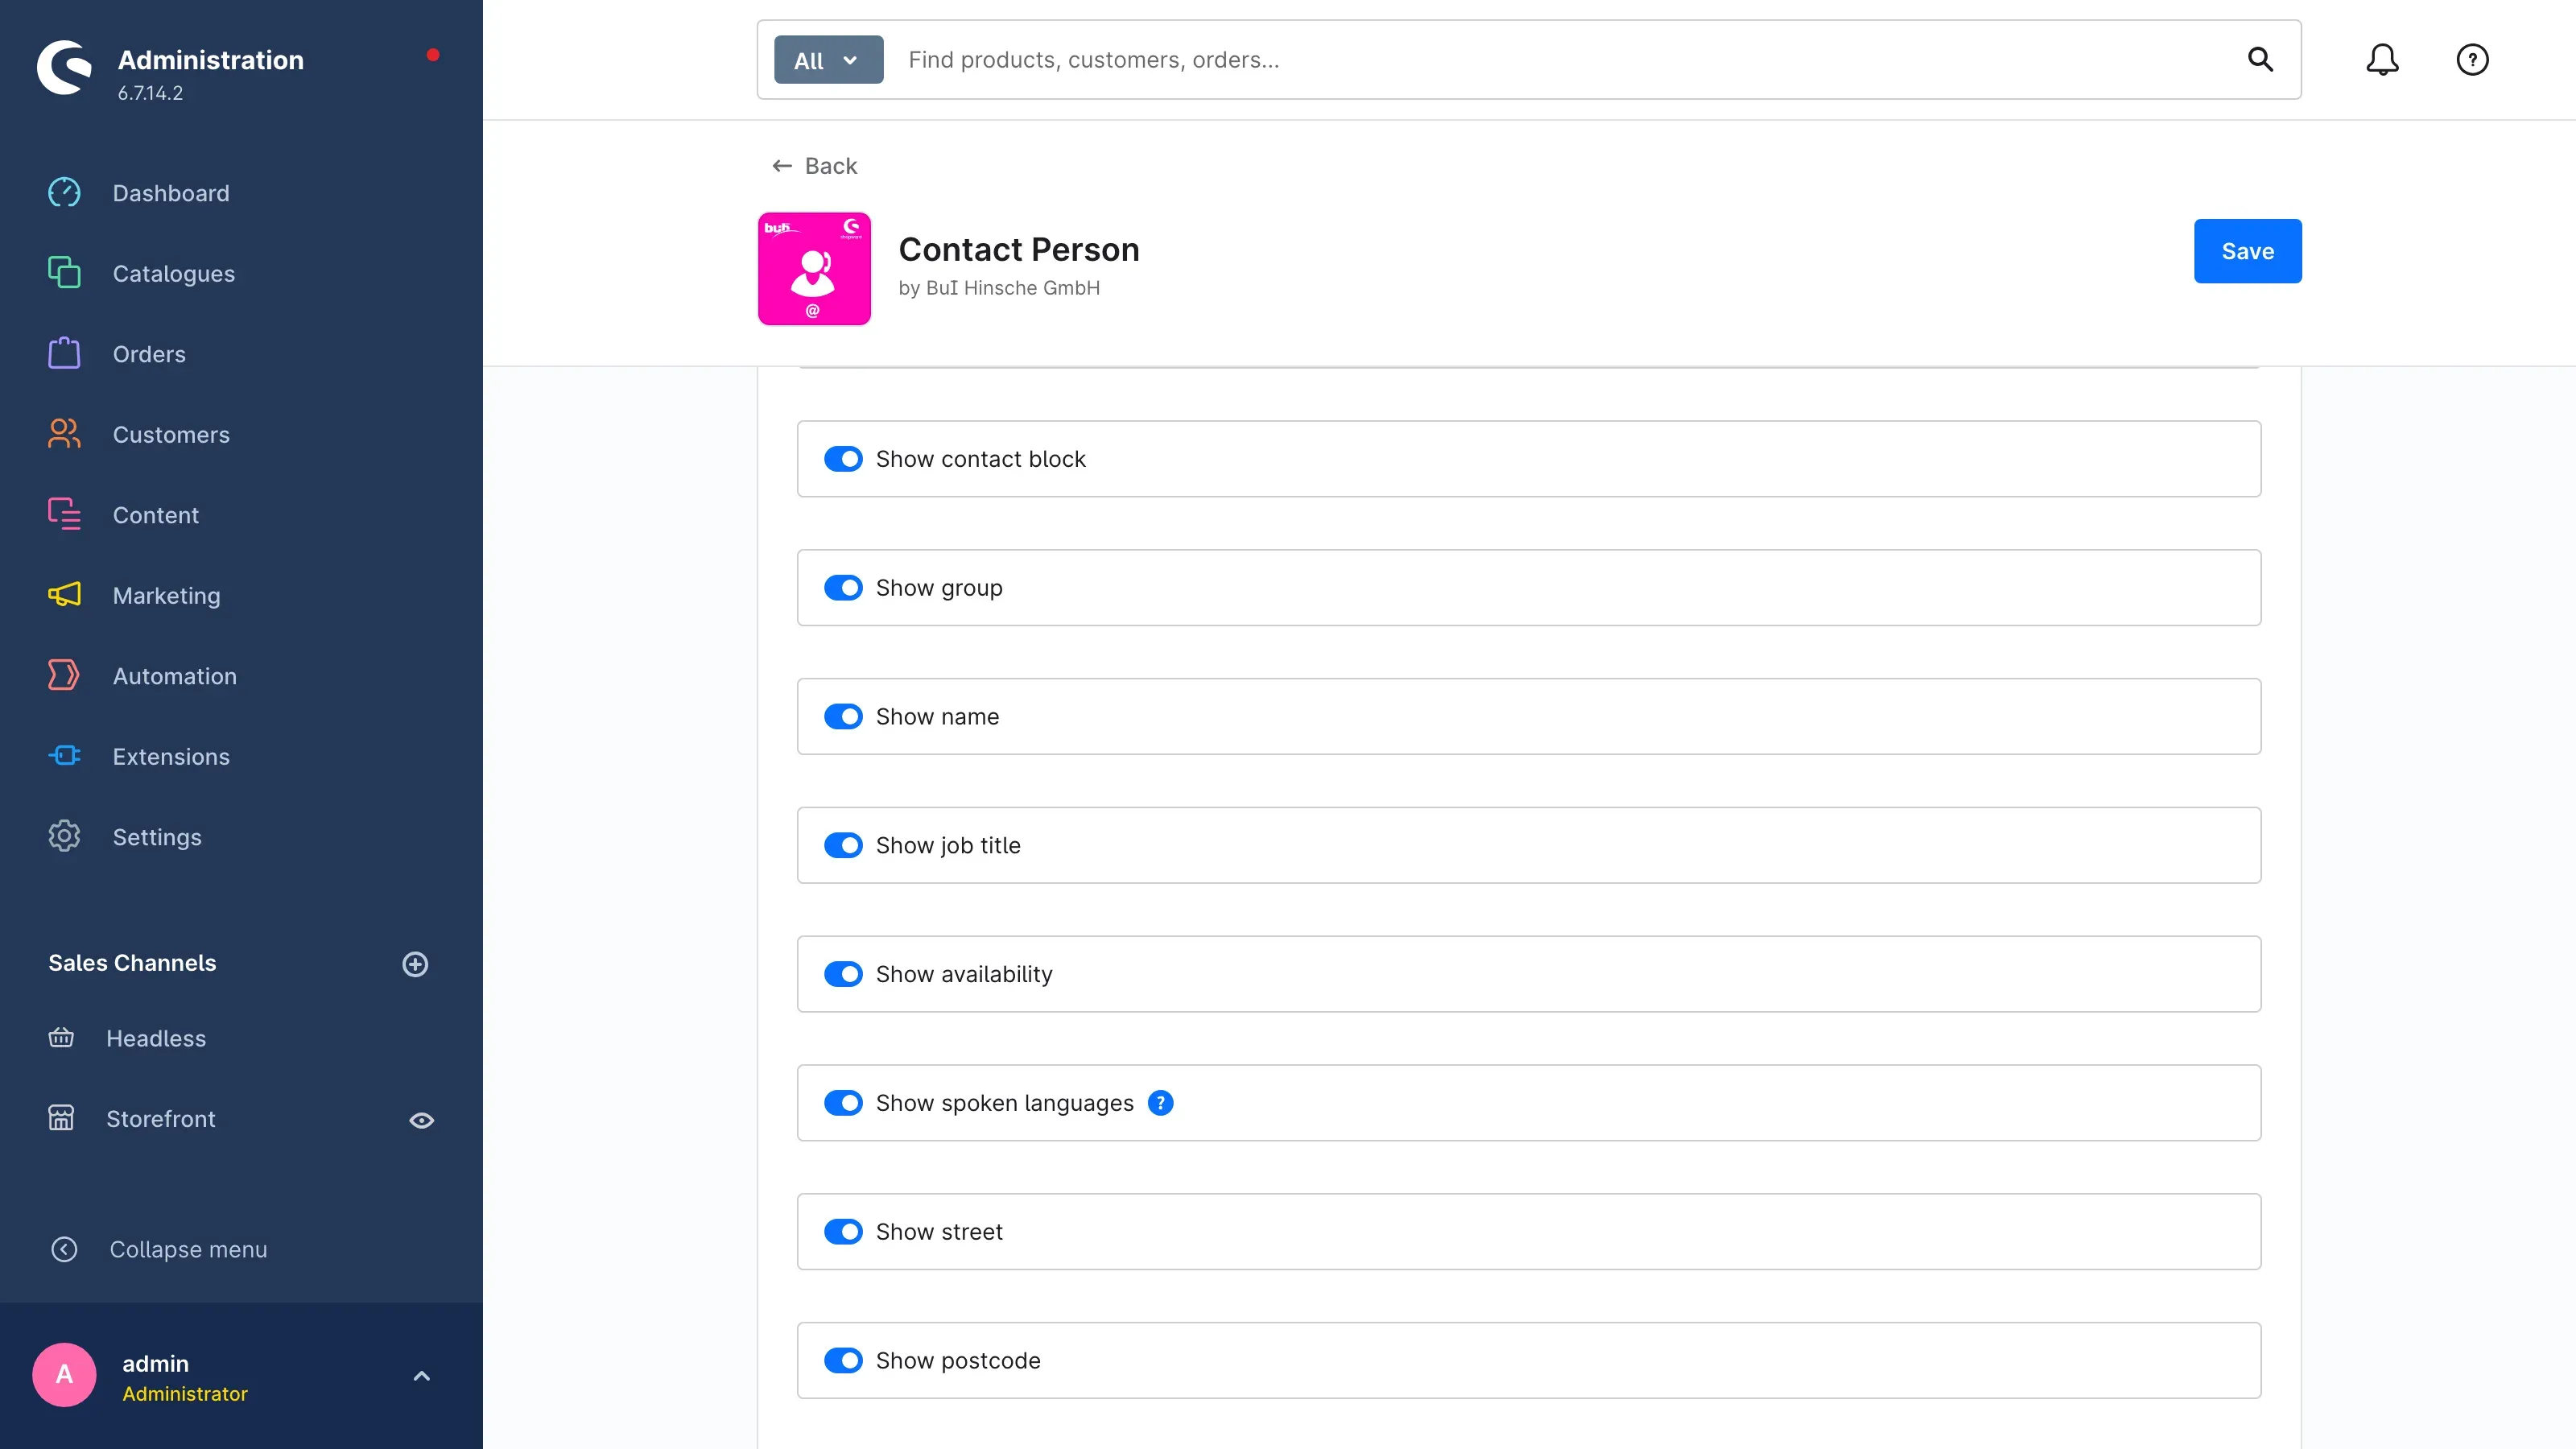 Fig. 3: A section of the Other settings card with the display switches.
Each person appears in the storefront in three sections: on the left picture, group, job title, name, availability and languages, in the middle the Address, on the right the Contact. This card controls whole sections as well as single details. All switches are on by default — you first see everything and then hide exactly what you do not want to show.
Whole sections
- Show image block shows or hides the left section with picture, group, job title, name, availability and languages.
- Show address block removes the whole Address section at once.
- Show contact block removes the whole Contact section — including the email address, the contact ways and the Save contact button.
A section that is switched off overrides the single switches inside it.
Single details in the left section
- Show group shows the group name, for example “Sales”.
- Show name shows the person’s name, together with the salutation if one is maintained.
- Show job title shows the job title, for example “Customer care”.
- Show availability shows the maintained office hours.
- Show spoken languages shows the person’s languages as a list below the availability.
- Show image shows the stored picture.
Single details of the address
Show street, Show postcode, Show country, Show state and Show city each control one line of the address.
Single details in the contact section
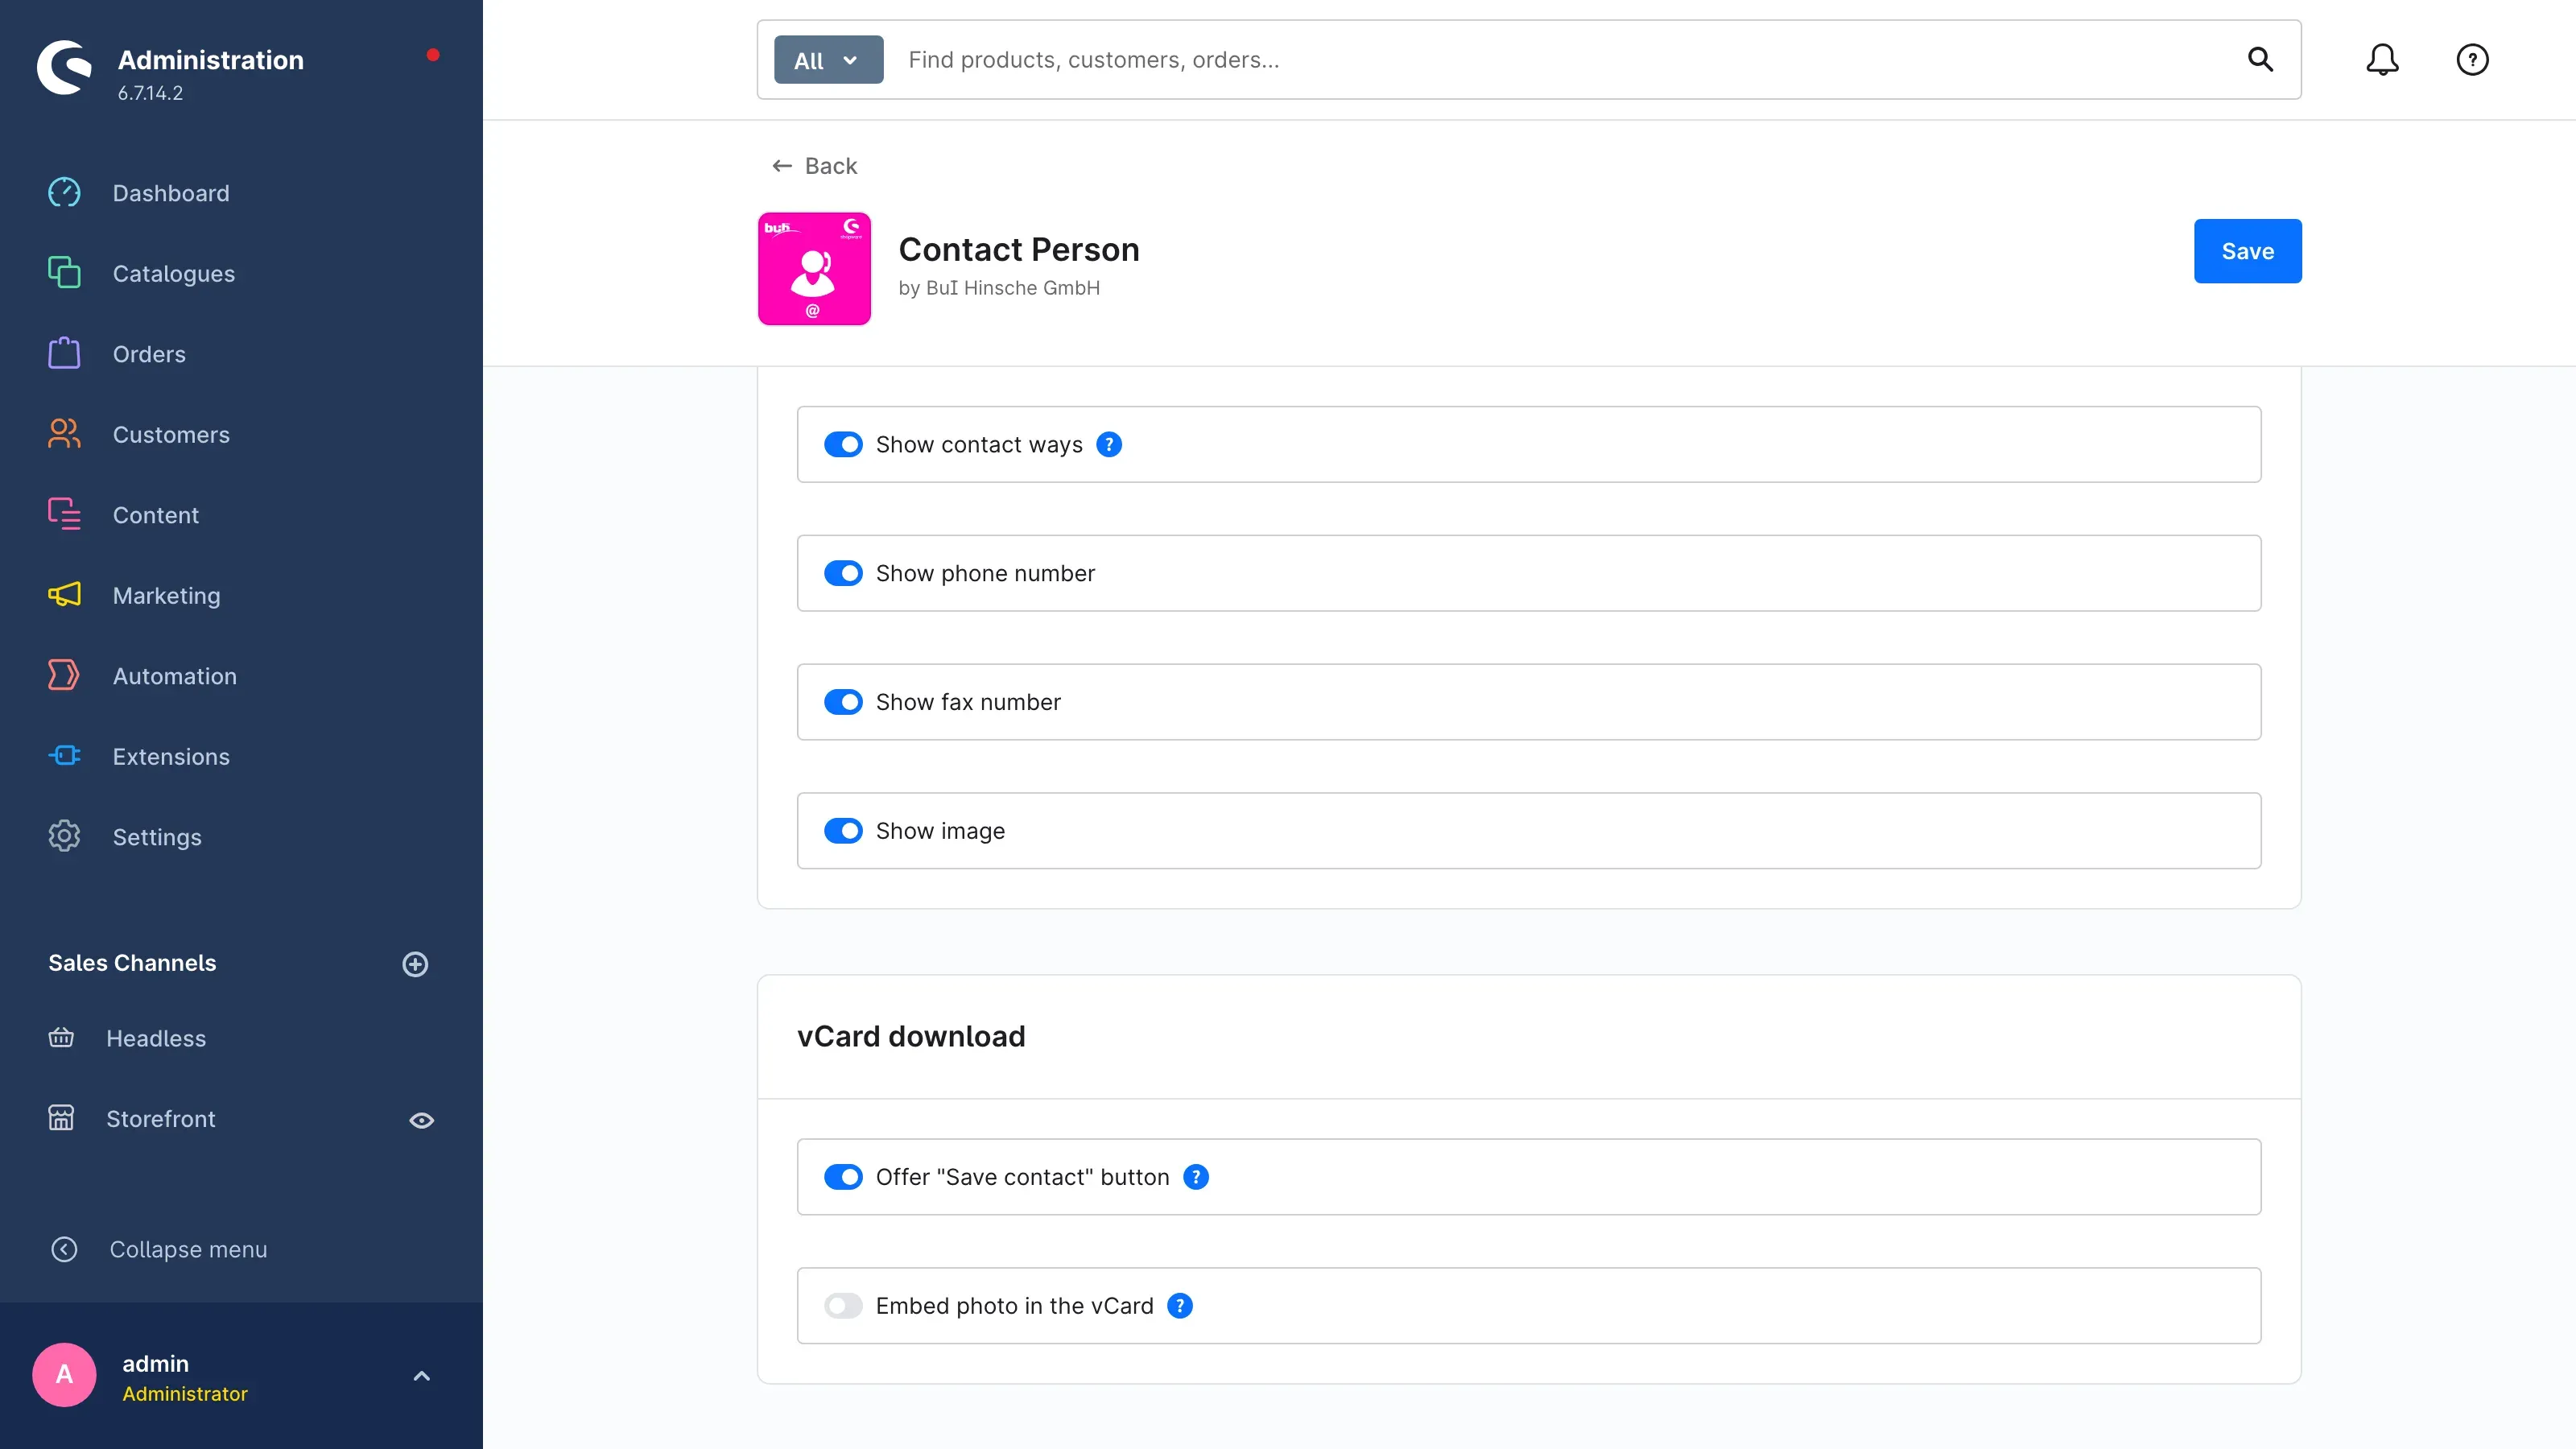 Fig. 4: The end of the Other settings card and the vCard download card.
- Show email address shows the email address from the person’s details.
- Show contact ways shows the list of contact ways — phone, mobile, fax, messengers, profiles and appointment links (section 5.4).
- Show phone number and Show fax number additionally apply to exactly these two kinds of contact way. If you switch off Show fax number, all fax numbers disappear while the other contact ways stay visible.
Why this is useful: You show exactly as much as your customers need to get in touch. A common case: phone and email stay visible, the fax number is hidden.
Important: These switches only control what is displayed. A hidden detail stays stored with the person and reappears as soon as you switch it back on. Hidden details are not included in the vCard either (chapter 9).
vCard download
The vCard download card (fig. 4) controls the Save contact button in the storefront.
- Offer “Save contact” button adds a button to each person’s contact section, which lets your customers download the person as a vCard file and add them to their address book. It is on by default. If you switch it off, the button disappears and the download itself is closed in that channel.
- Embed photo in the vCard includes the person’s picture in the vCard. It is off by default: an embedded picture multiplies the file size, and some address books refuse such files. Pictures larger than 200 KB are always left out.
Why this is useful: Your customers have their contact person’s number straight on their phone — without typing it in.
Creating and maintaining contact persons
What this gives you: This is where your central directory is built. You create each person exactly once and use them as often as you like. If a phone number changes, you update it in one place and it is up to date everywhere in the shop.
You find the directory under Customers → Contact person.
The overview
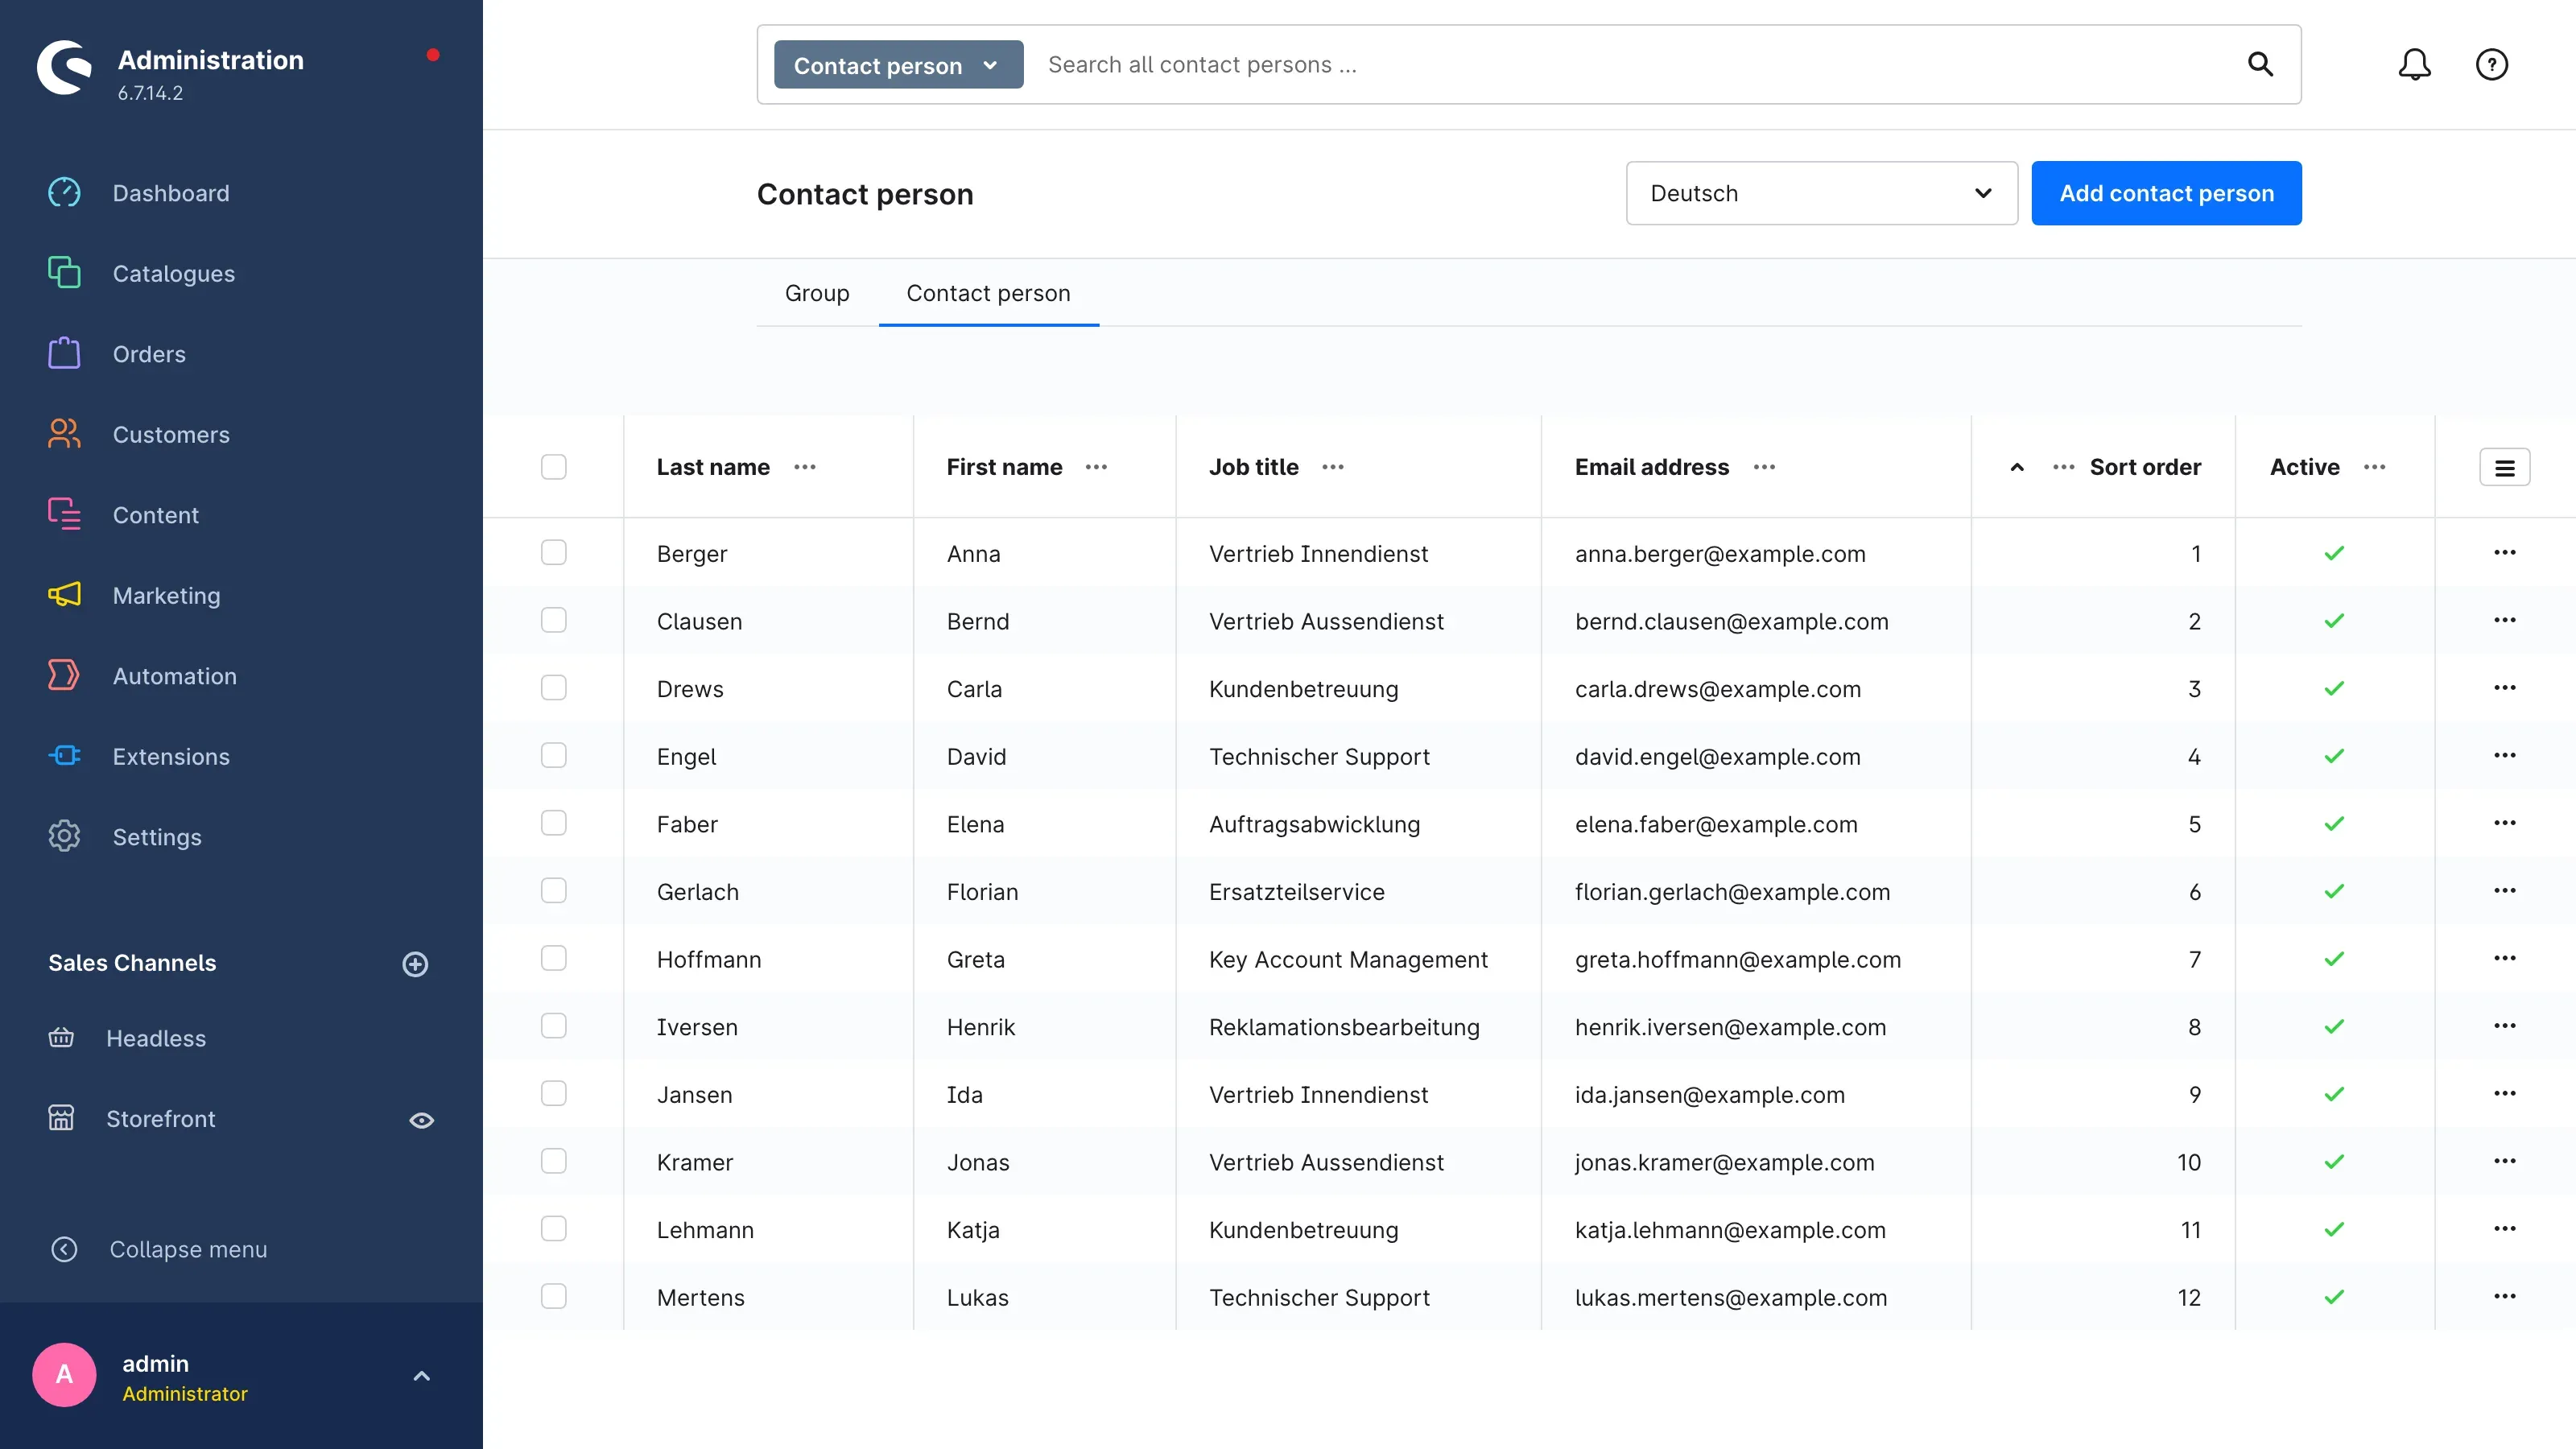 Fig. 5: The Contact person tab with language selection, the Add contact person button and the list of persons.
The page has two tabs: Group and Contact person. The Contact person tab lists all persons with Last name, First name, Job title, Email address, Sort order and Active. Use the search bar at the top to find a person quickly, even in a long directory. The language selection next to Add contact person shows translatable details such as the job title in another shop language.
If you have not created anyone yet, the list reads There are no contact persons yet. Click a row to open the person.
The detail page of a person is divided into the cards Name, Profile, Contact ways, Address and Visibility. You always save with Save at the top right; Cancel takes you back to the overview. After saving, a message confirms: The contact person with the name ”…” was successfully saved.
Name
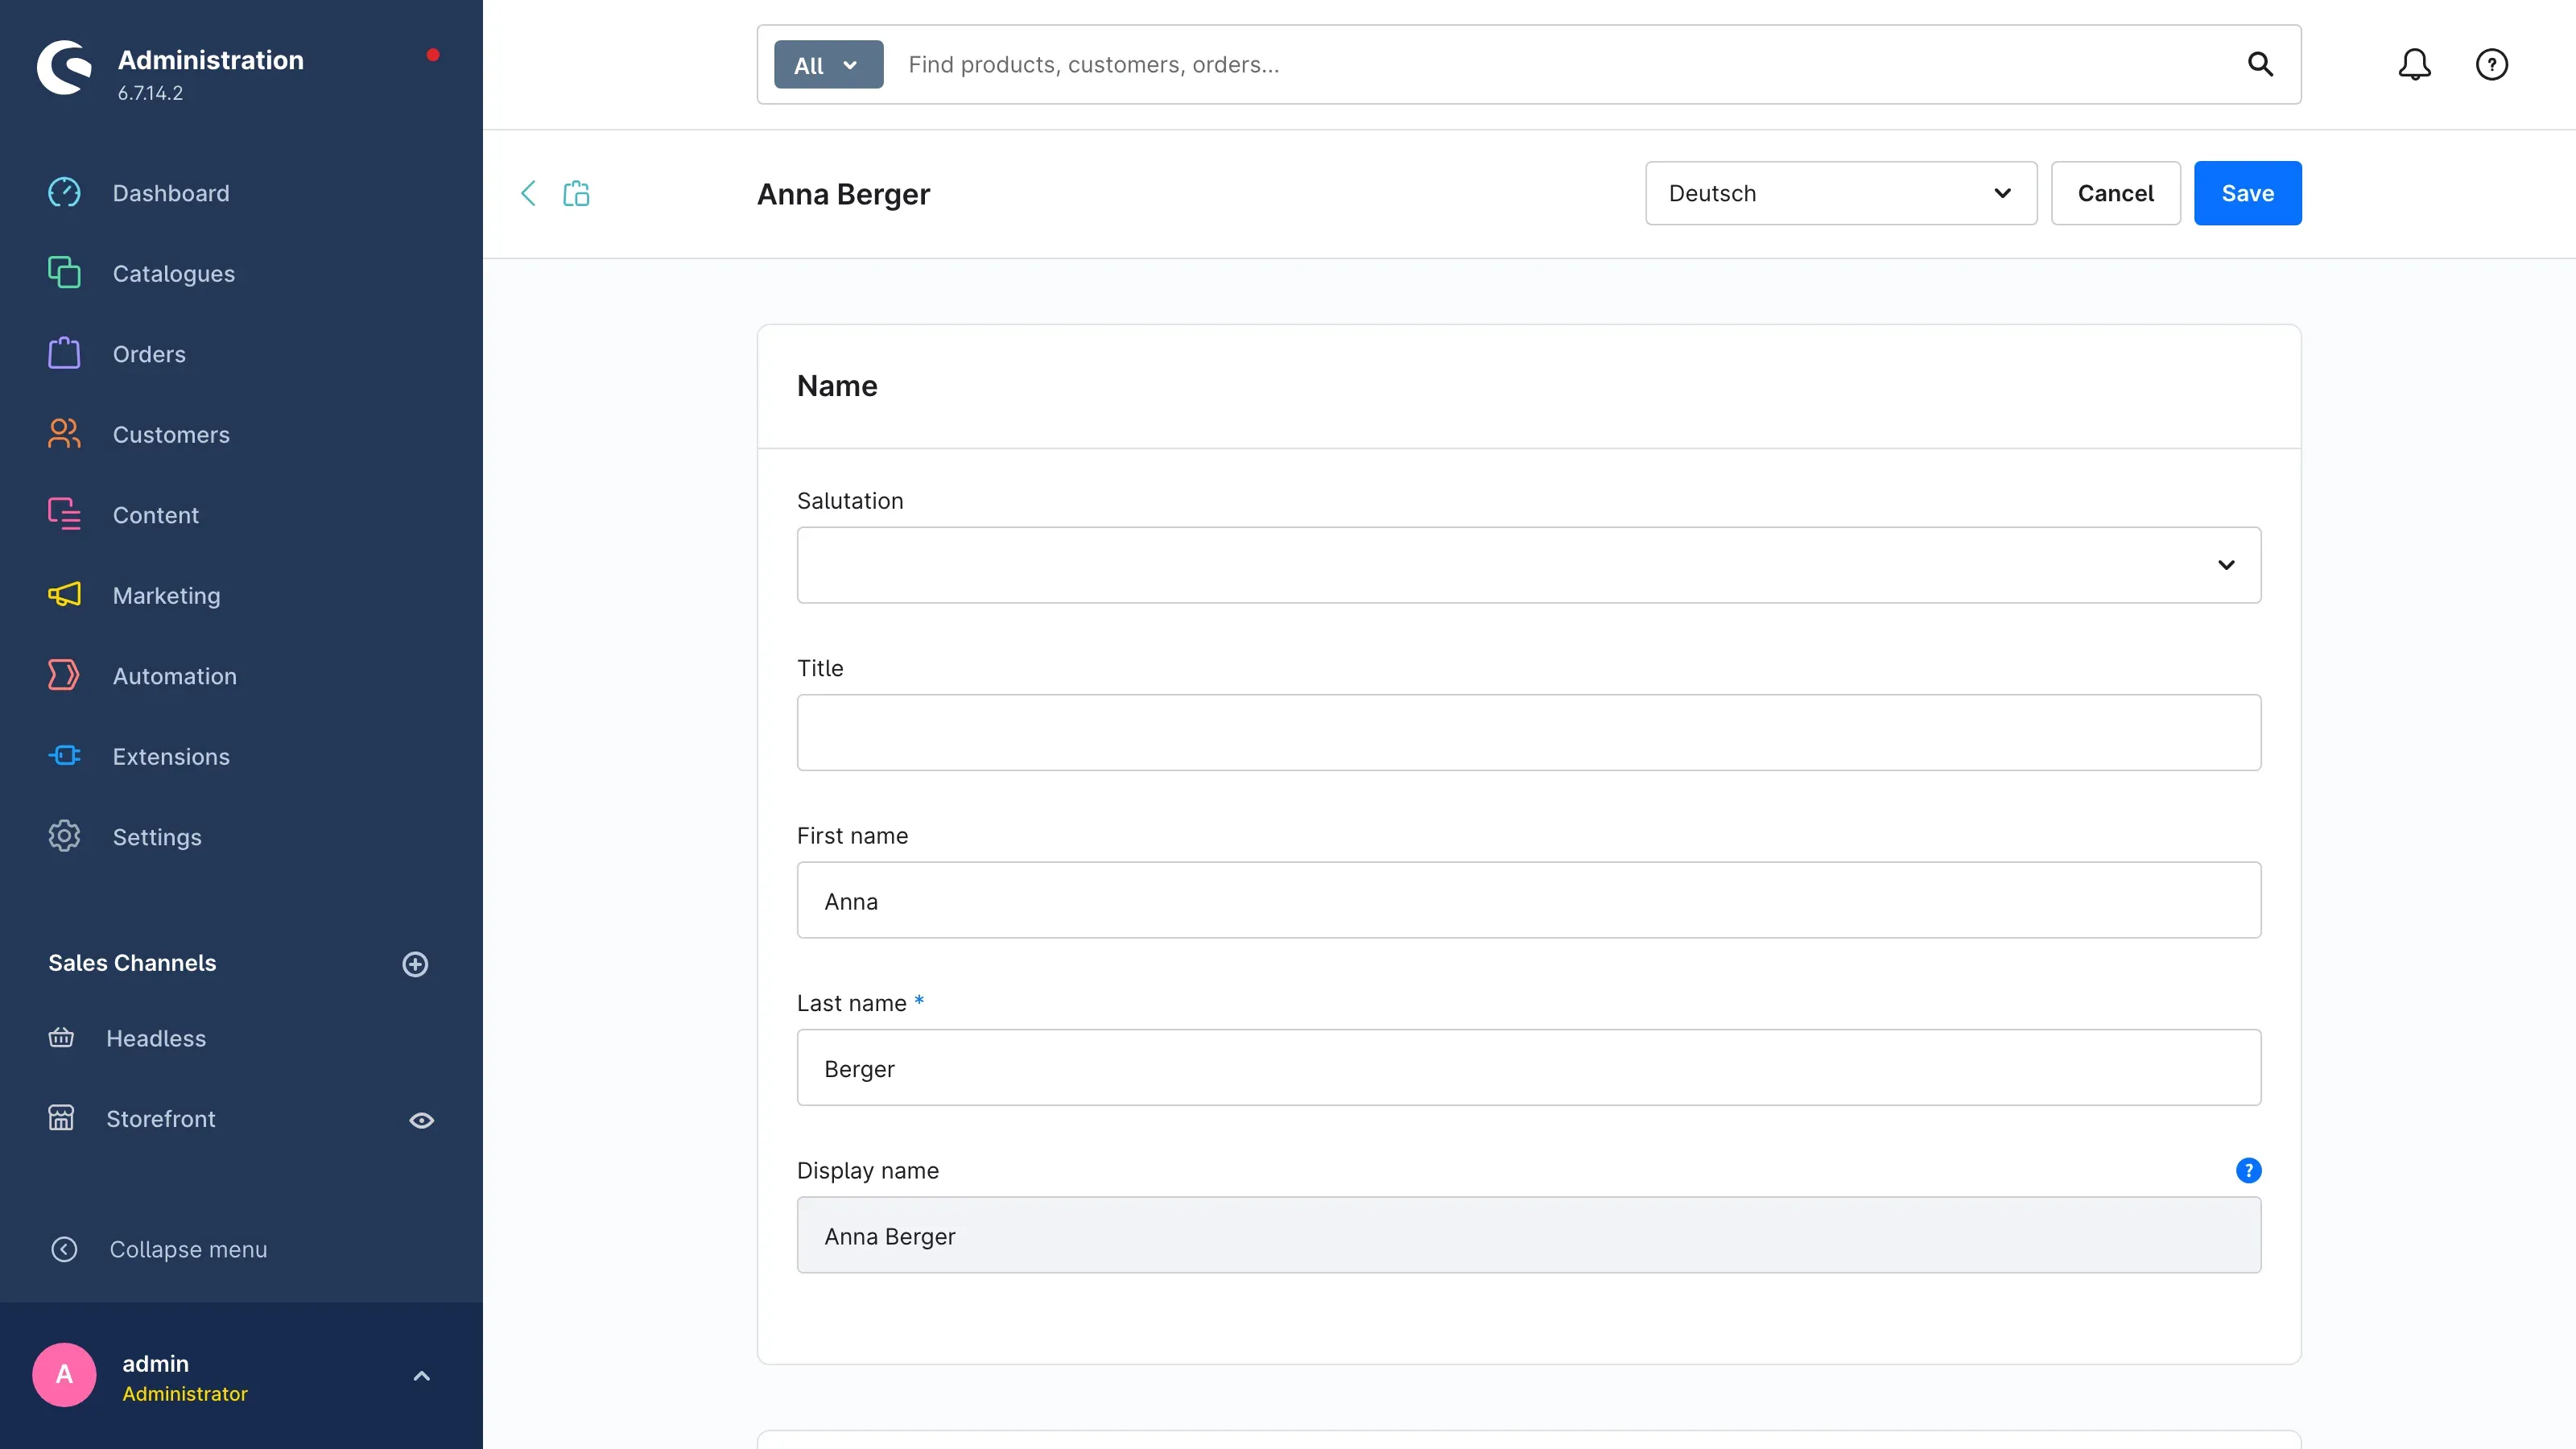 Fig. 6: The Name card with salutation, title, first and last name and the display name.
- Salutation — for example “Mrs.” or “Mr.”. It appears in the storefront before the name.
- Title — for example “Dr.”.
- First name and Last name — the last name is required.
- Display name — the name your customers see. You do not enter it yourself: it is composed from title, first name and last name when you save.
Profile and picture
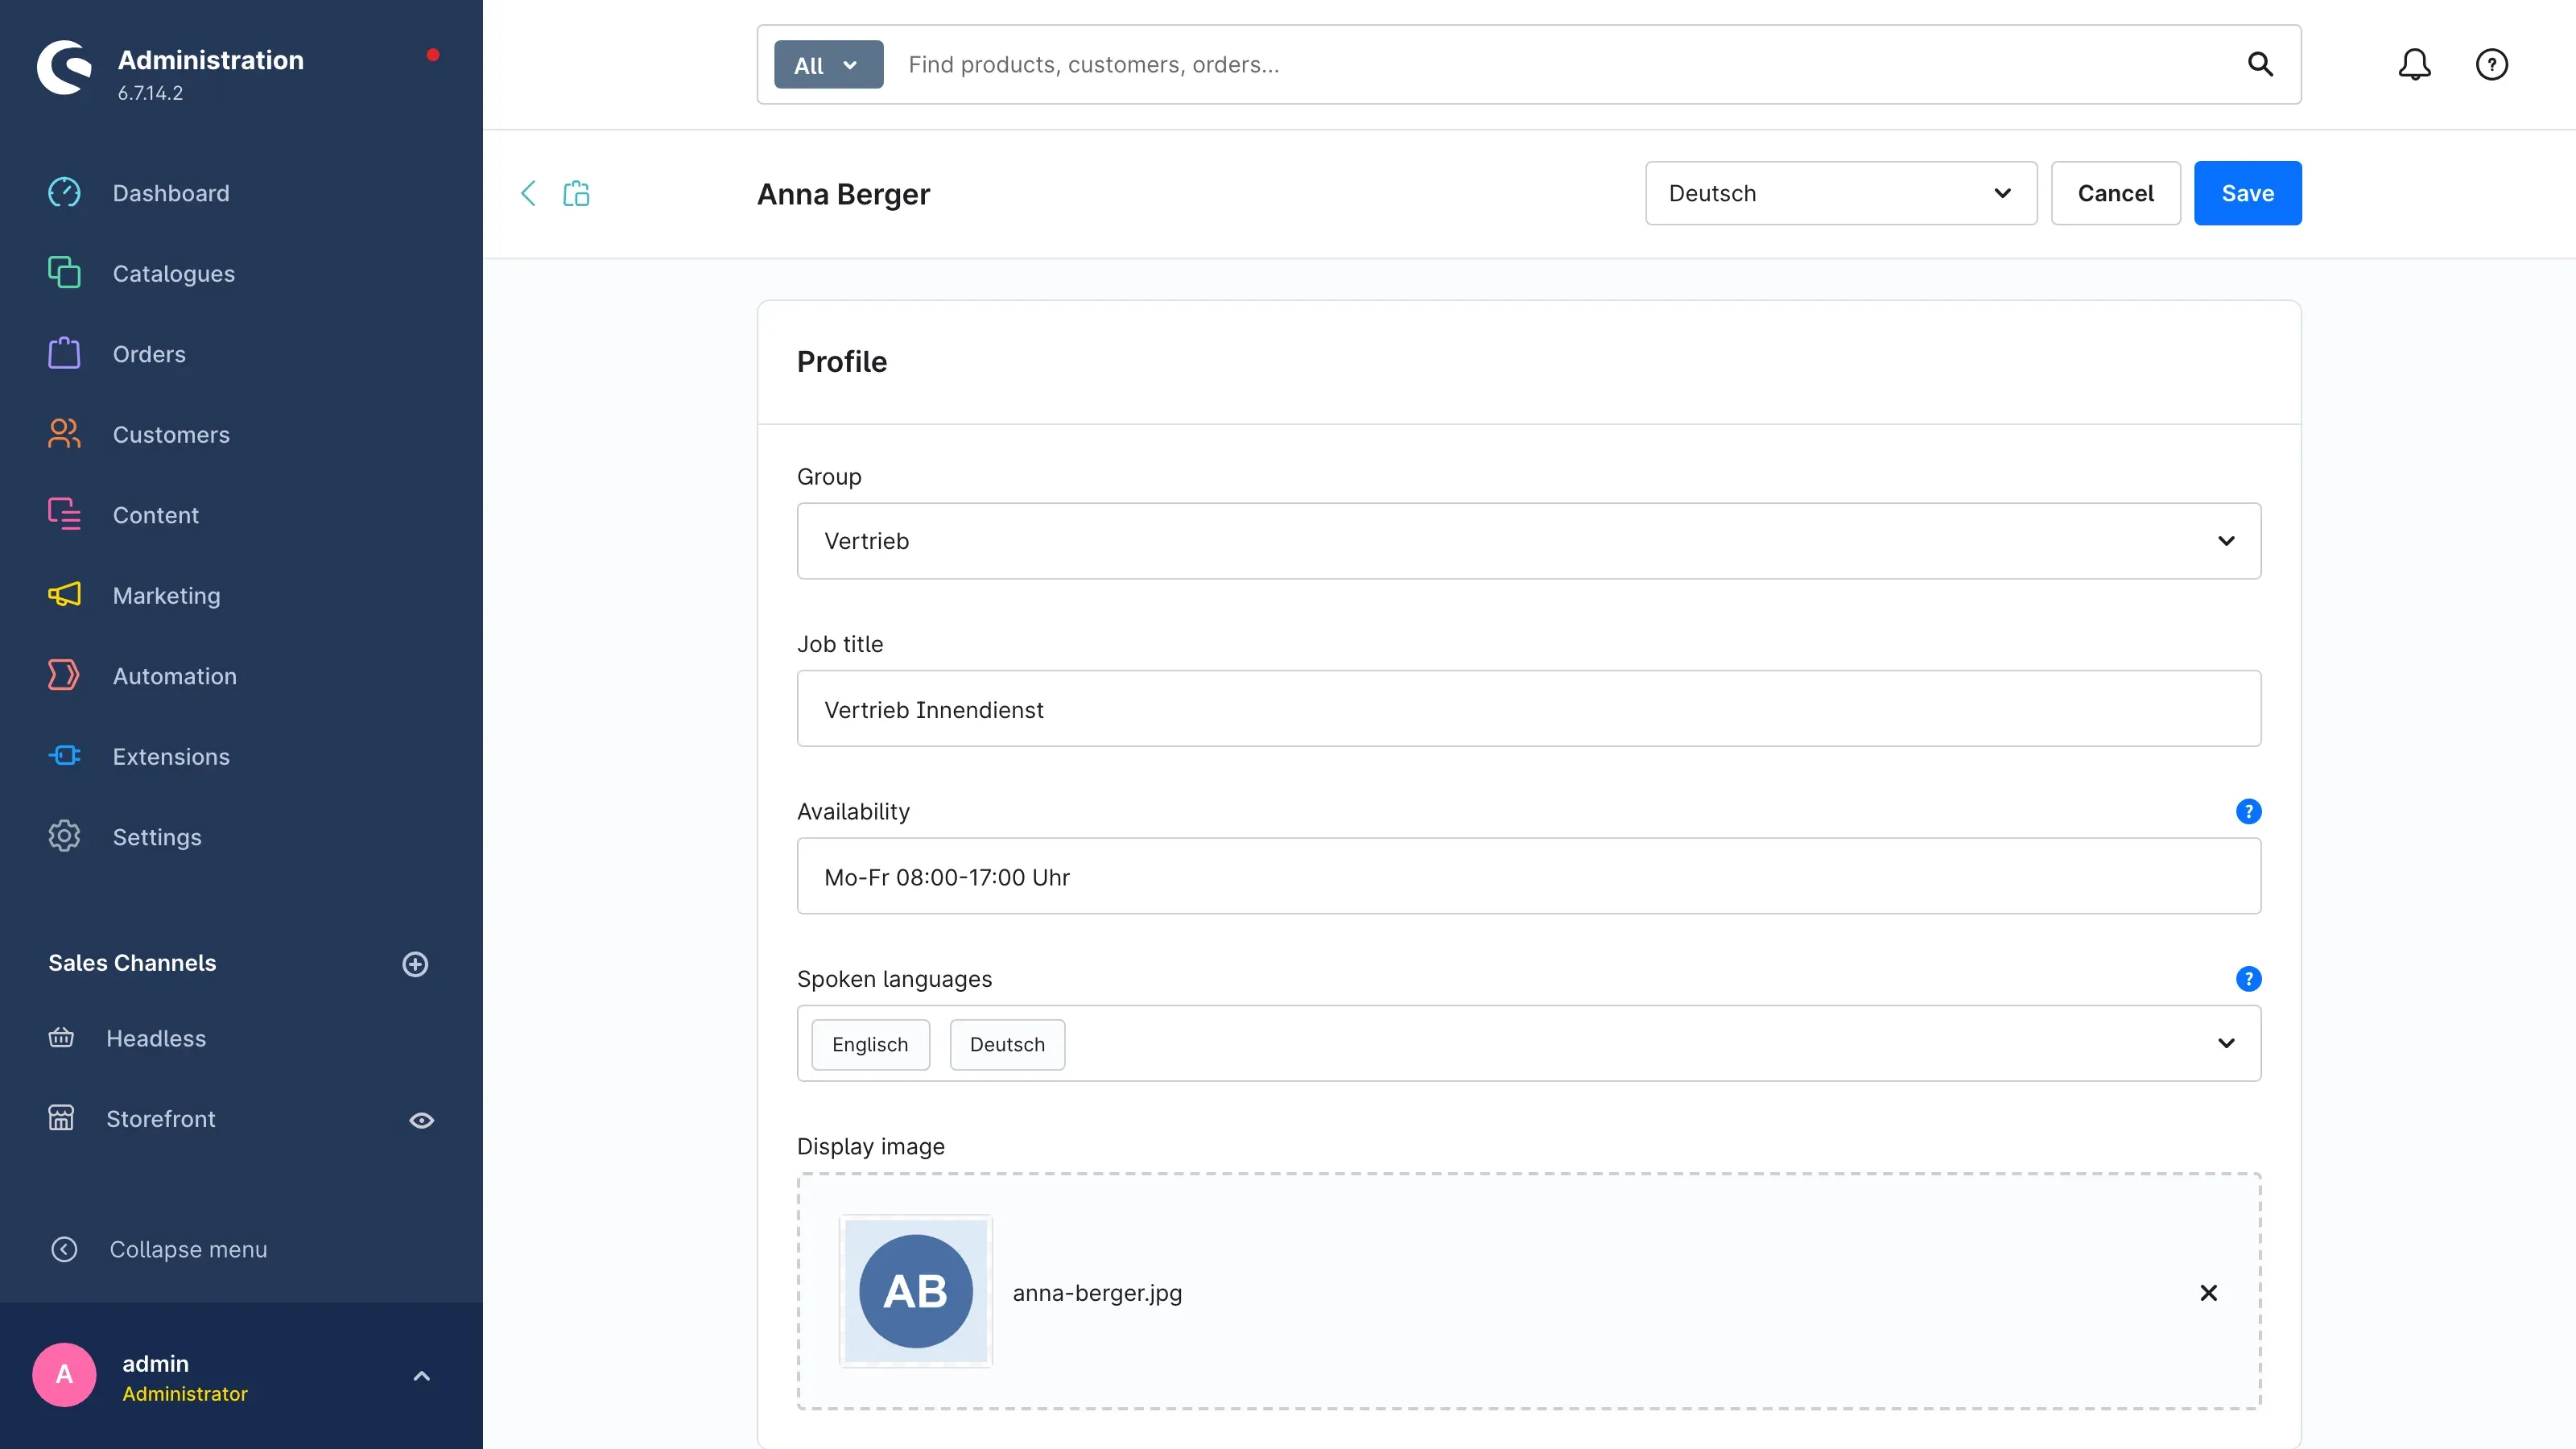 Fig. 7: The Profile card with group, job title, availability, spoken languages and display image.
- Group — assigns the person to a group such as “Sales” (chapter 6). This is optional.
- Job title — the person’s role, for example “Inside sales”.
- Availability — office hours as free text, for example “Mon–Thu 9 am–5 pm, Fri 9 am–1 pm”.
- Spoken languages — select every language the person advises in. In the storefront they appear below the contact person, for example “Languages: English, German”.
- Display image — the person’s photo. Drag a file into the field or upload it. The cross on the right removes the picture again.
Choosing an existing picture from the media library
If the photo is already in your media library, open the Choose media dialog from the picture field.
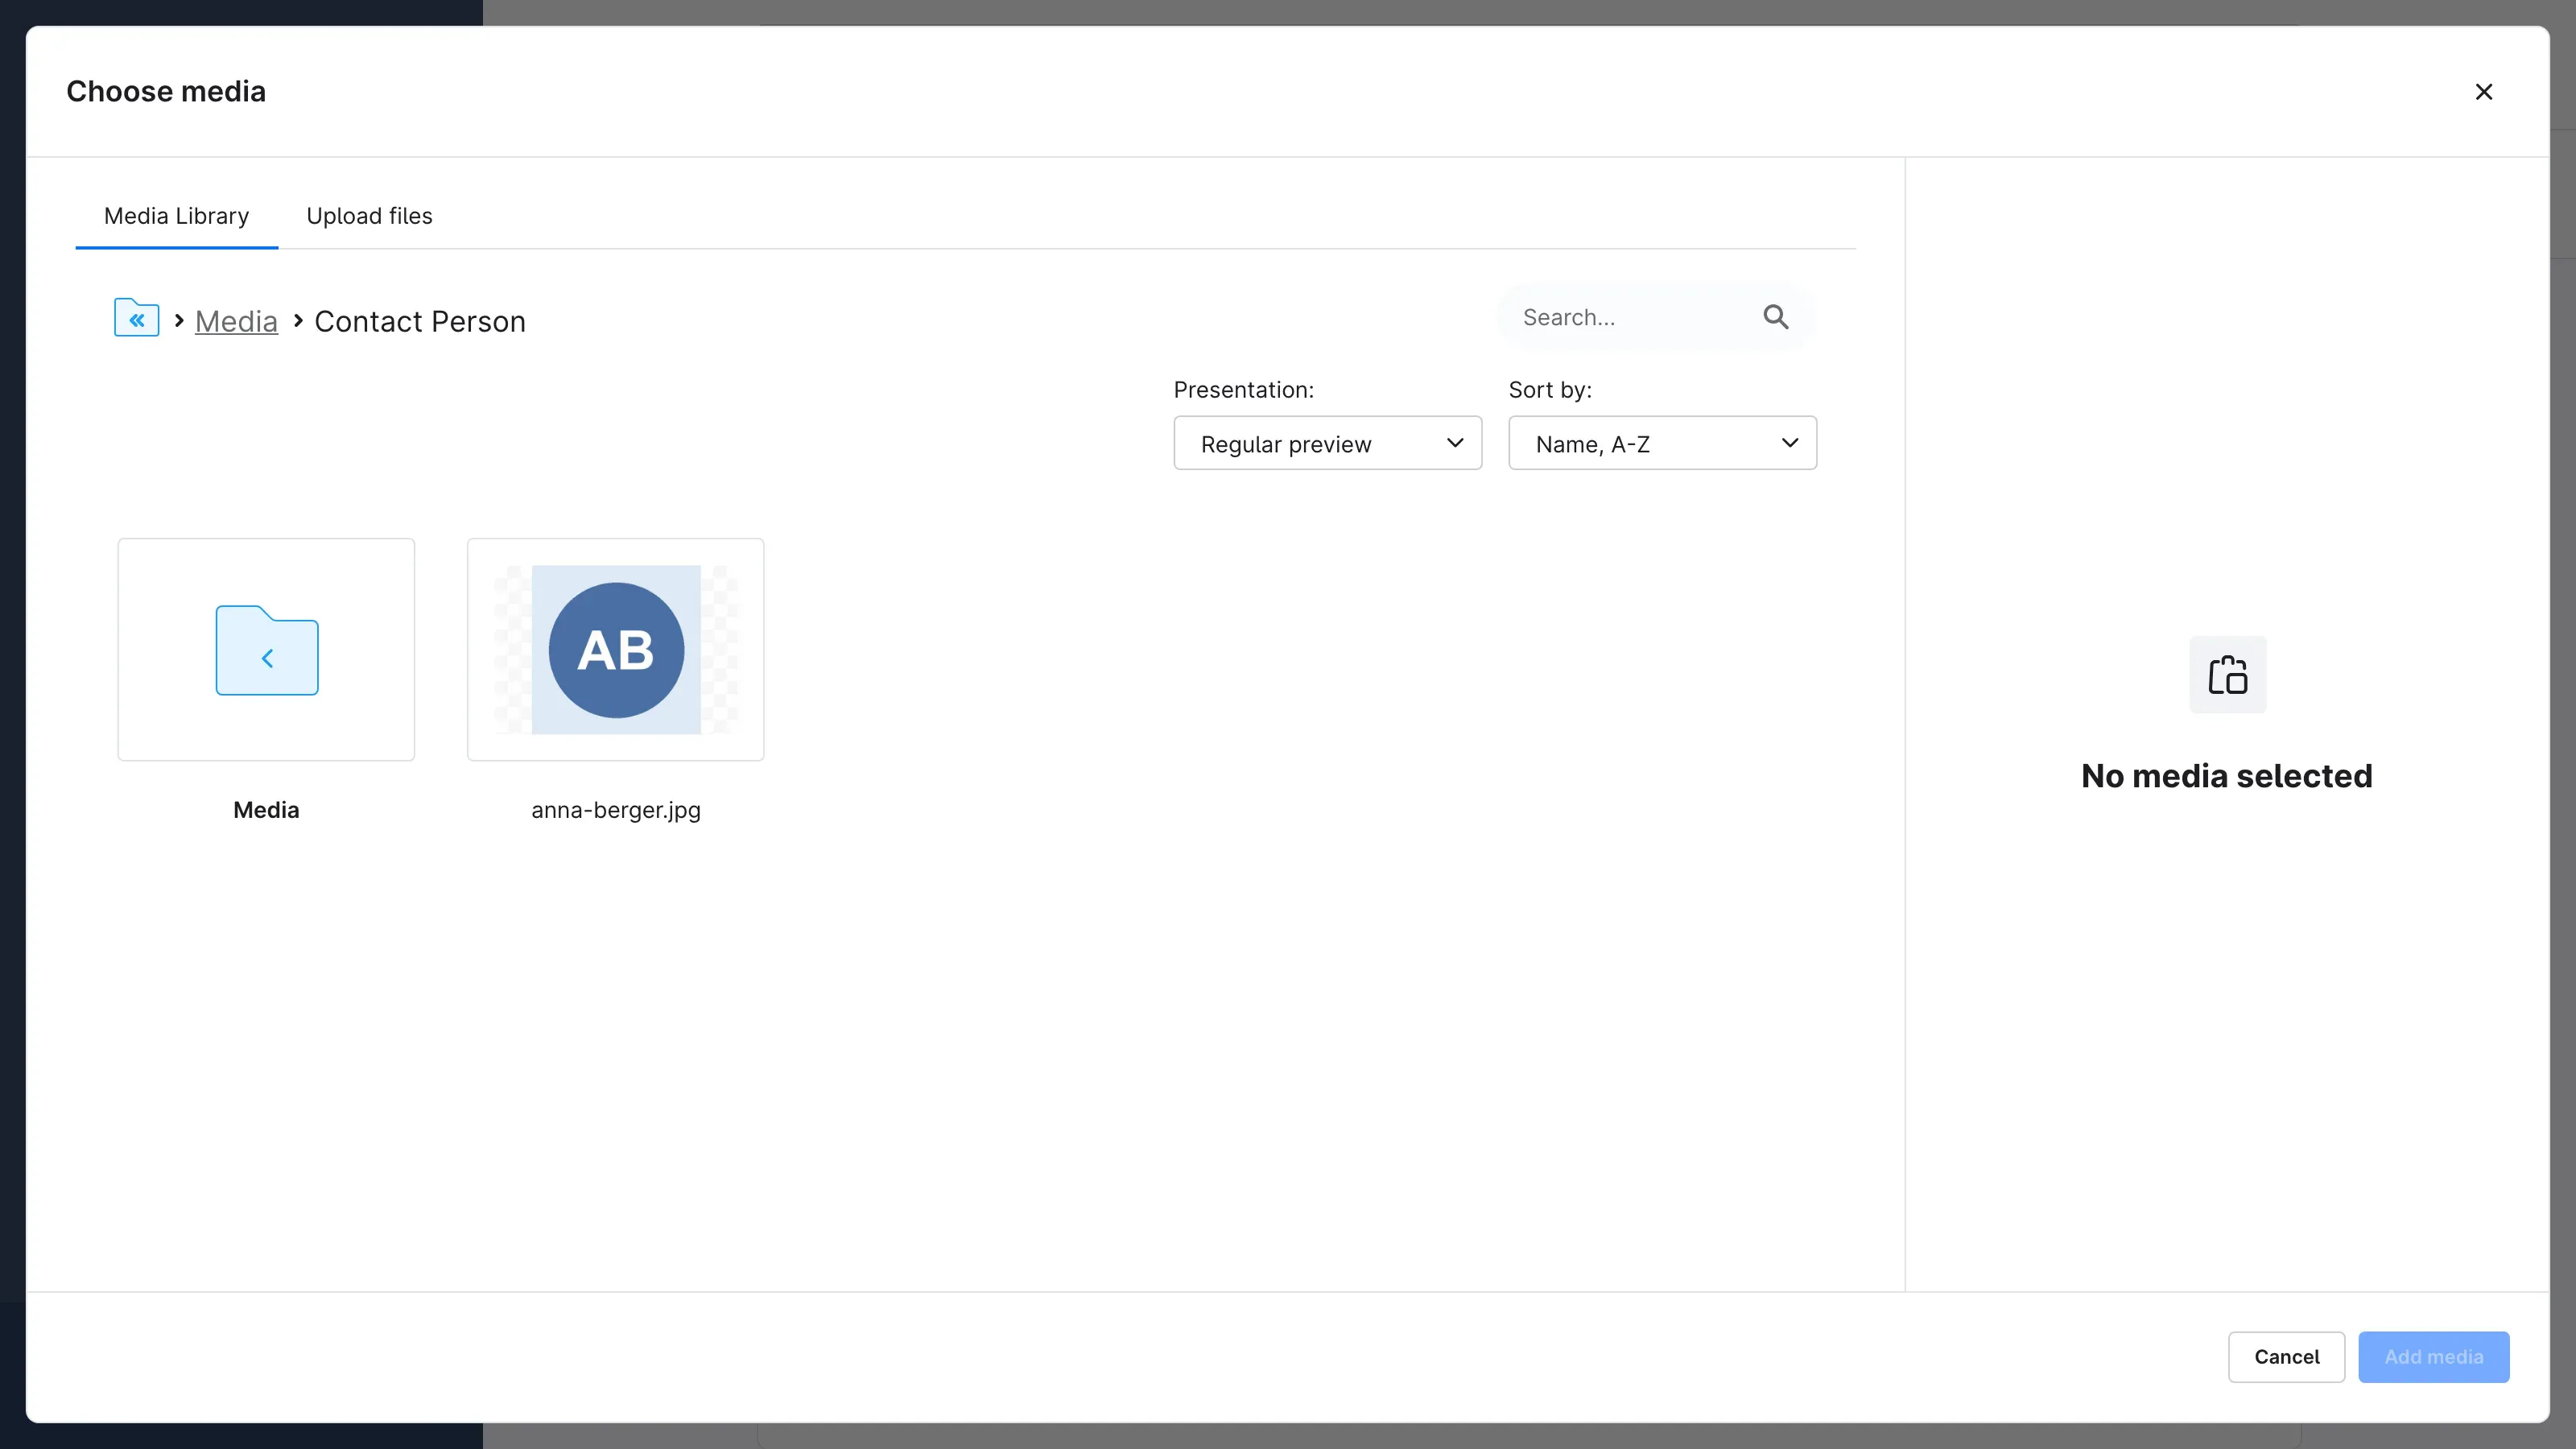 Fig. 8: The Choose media dialog with the tabs Media Library and Upload files.
The dialog opens the plugin’s media folder straight away. Select the picture and click Add media. The Upload files tab lets you upload a new file from here as well.
Tip: Job title and availability are translatable. Section 5.8 explains how to maintain them in further languages.
Contact ways
What this gives you: Your customers reach the person the way they prefer — by phone, via messenger, or with one click on the booking link for an appointment.
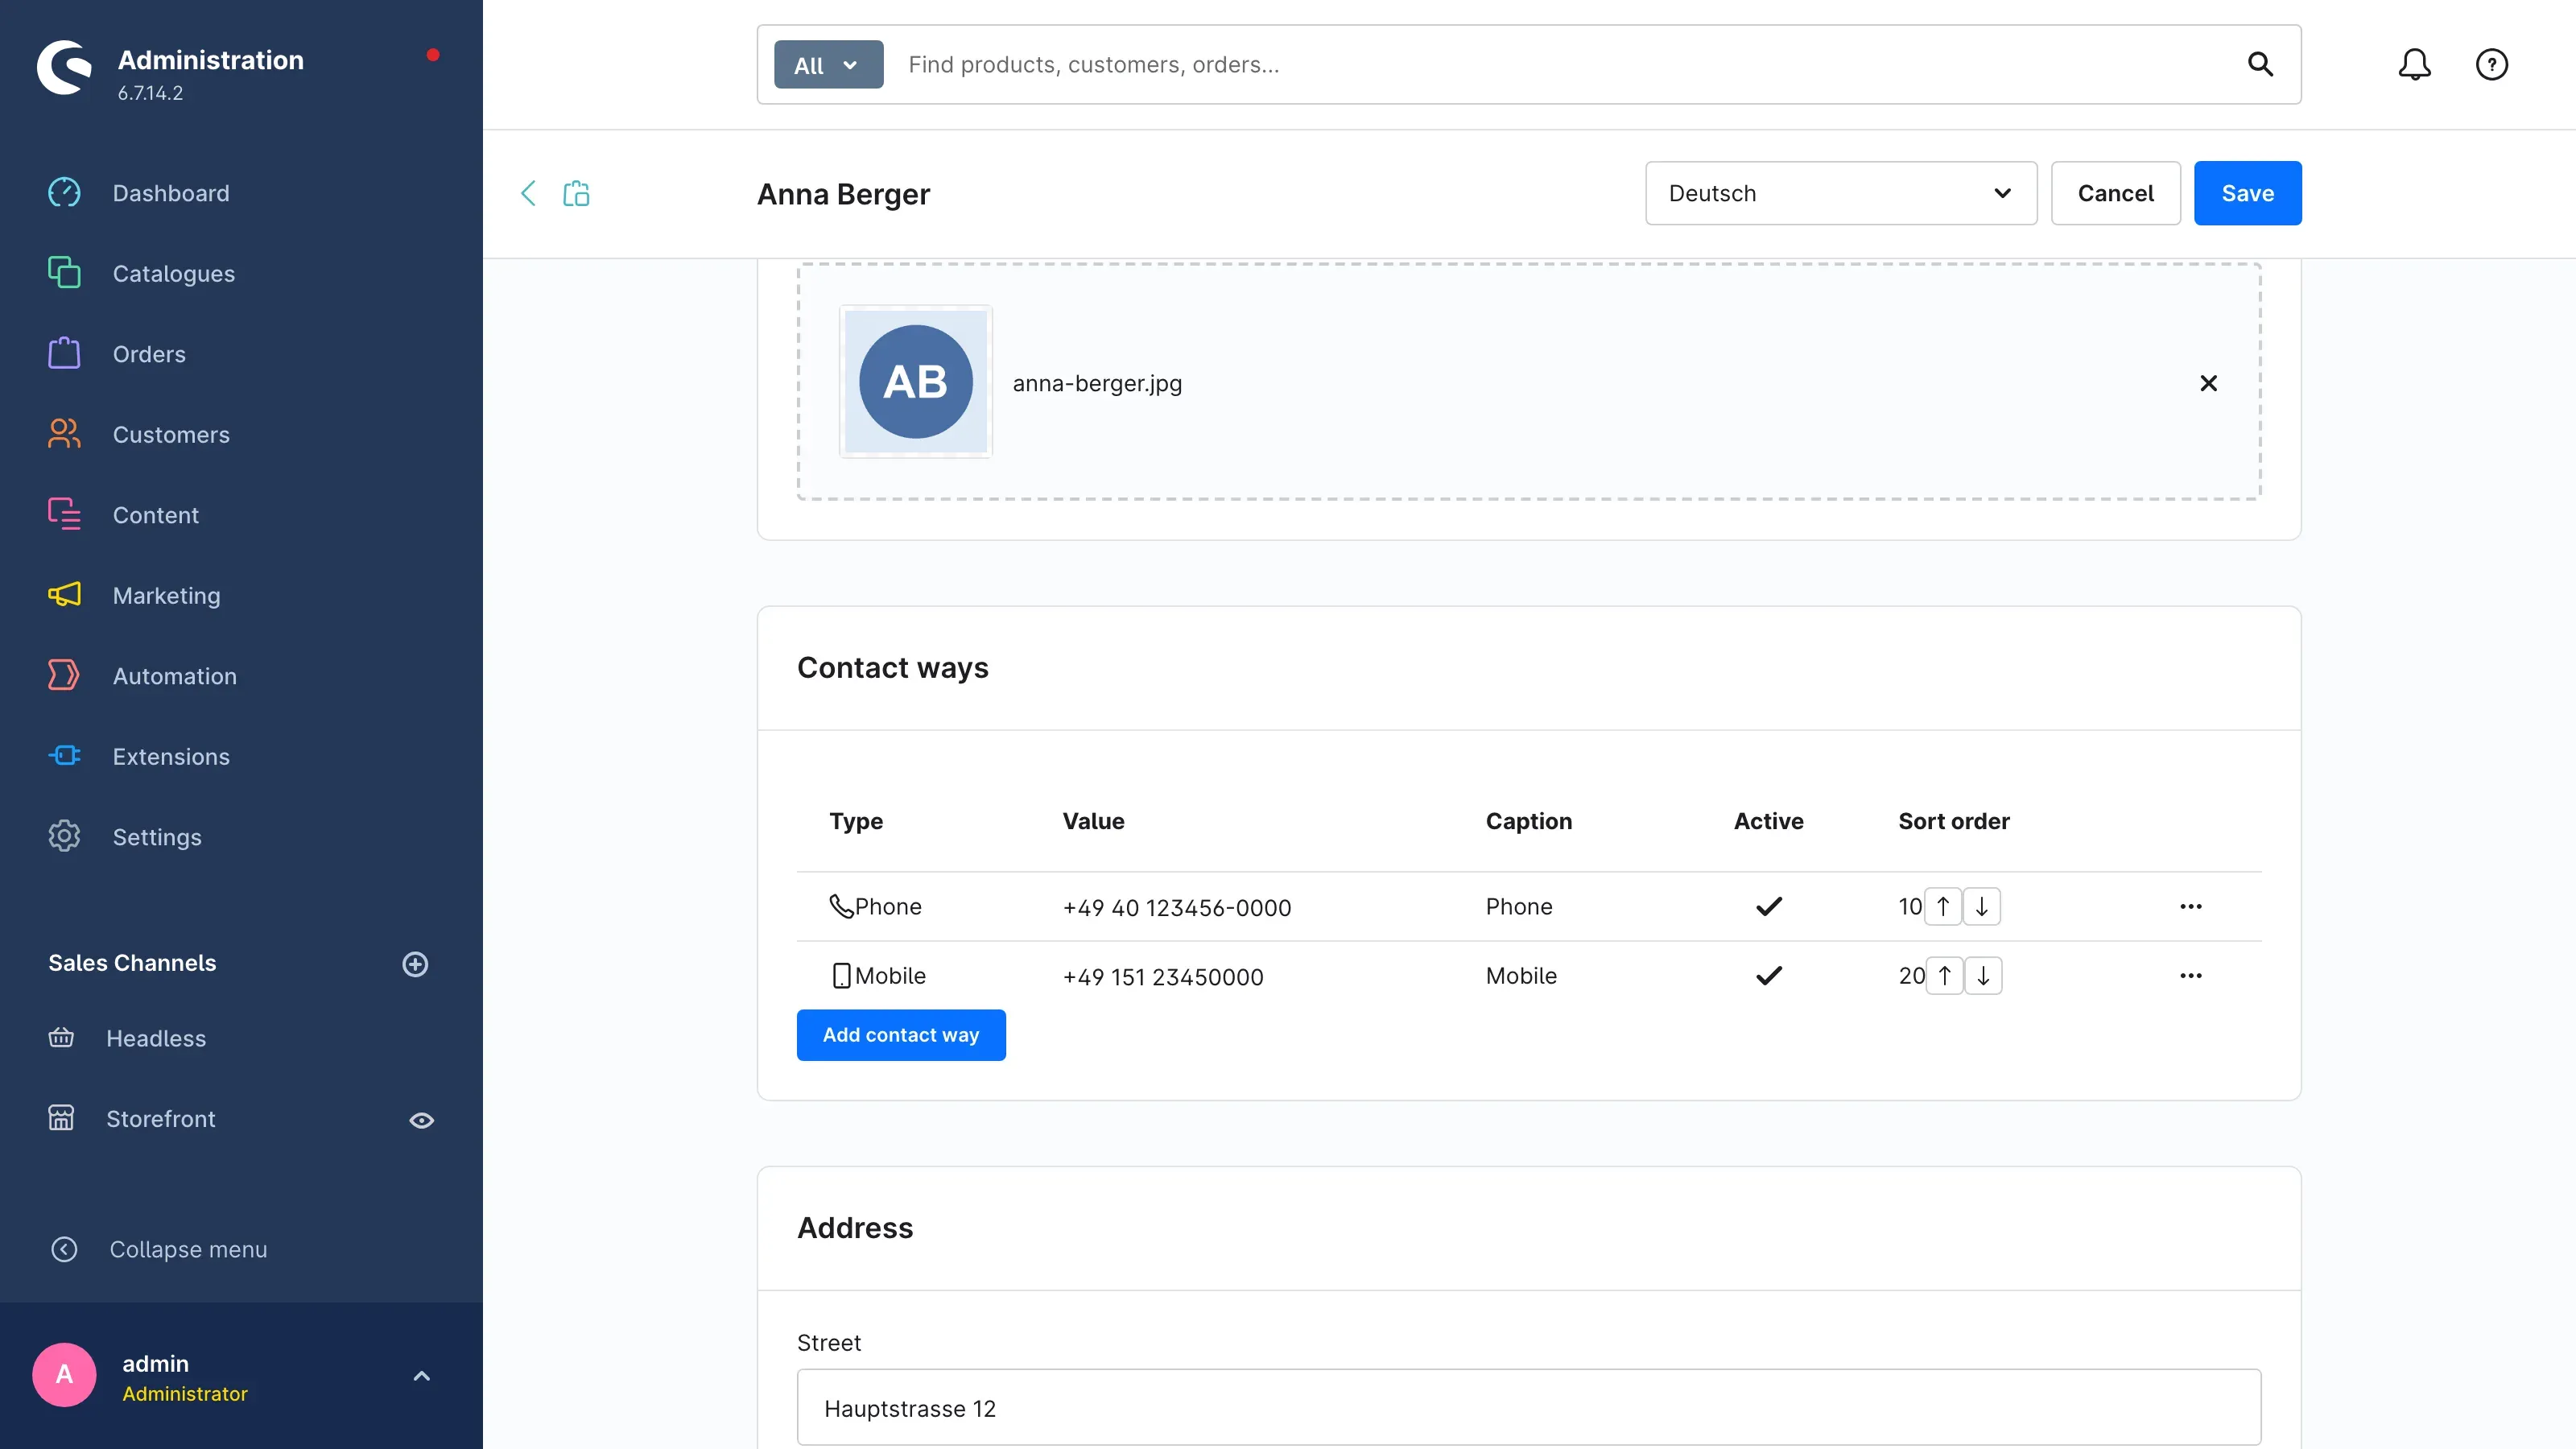 Fig. 9: The Contact ways card with two entries and the Add contact way button.
The list shows Type, Value, Caption, Active and Sort order for each contact way. Use the arrows next to the sort order to move an entry up or down. The … menu at the end of the row lets you edit or delete an entry. If nothing has been set up yet, the card reads No contact way has been set up for this contact person yet.
How to add a contact way
-
Click Add contact way.
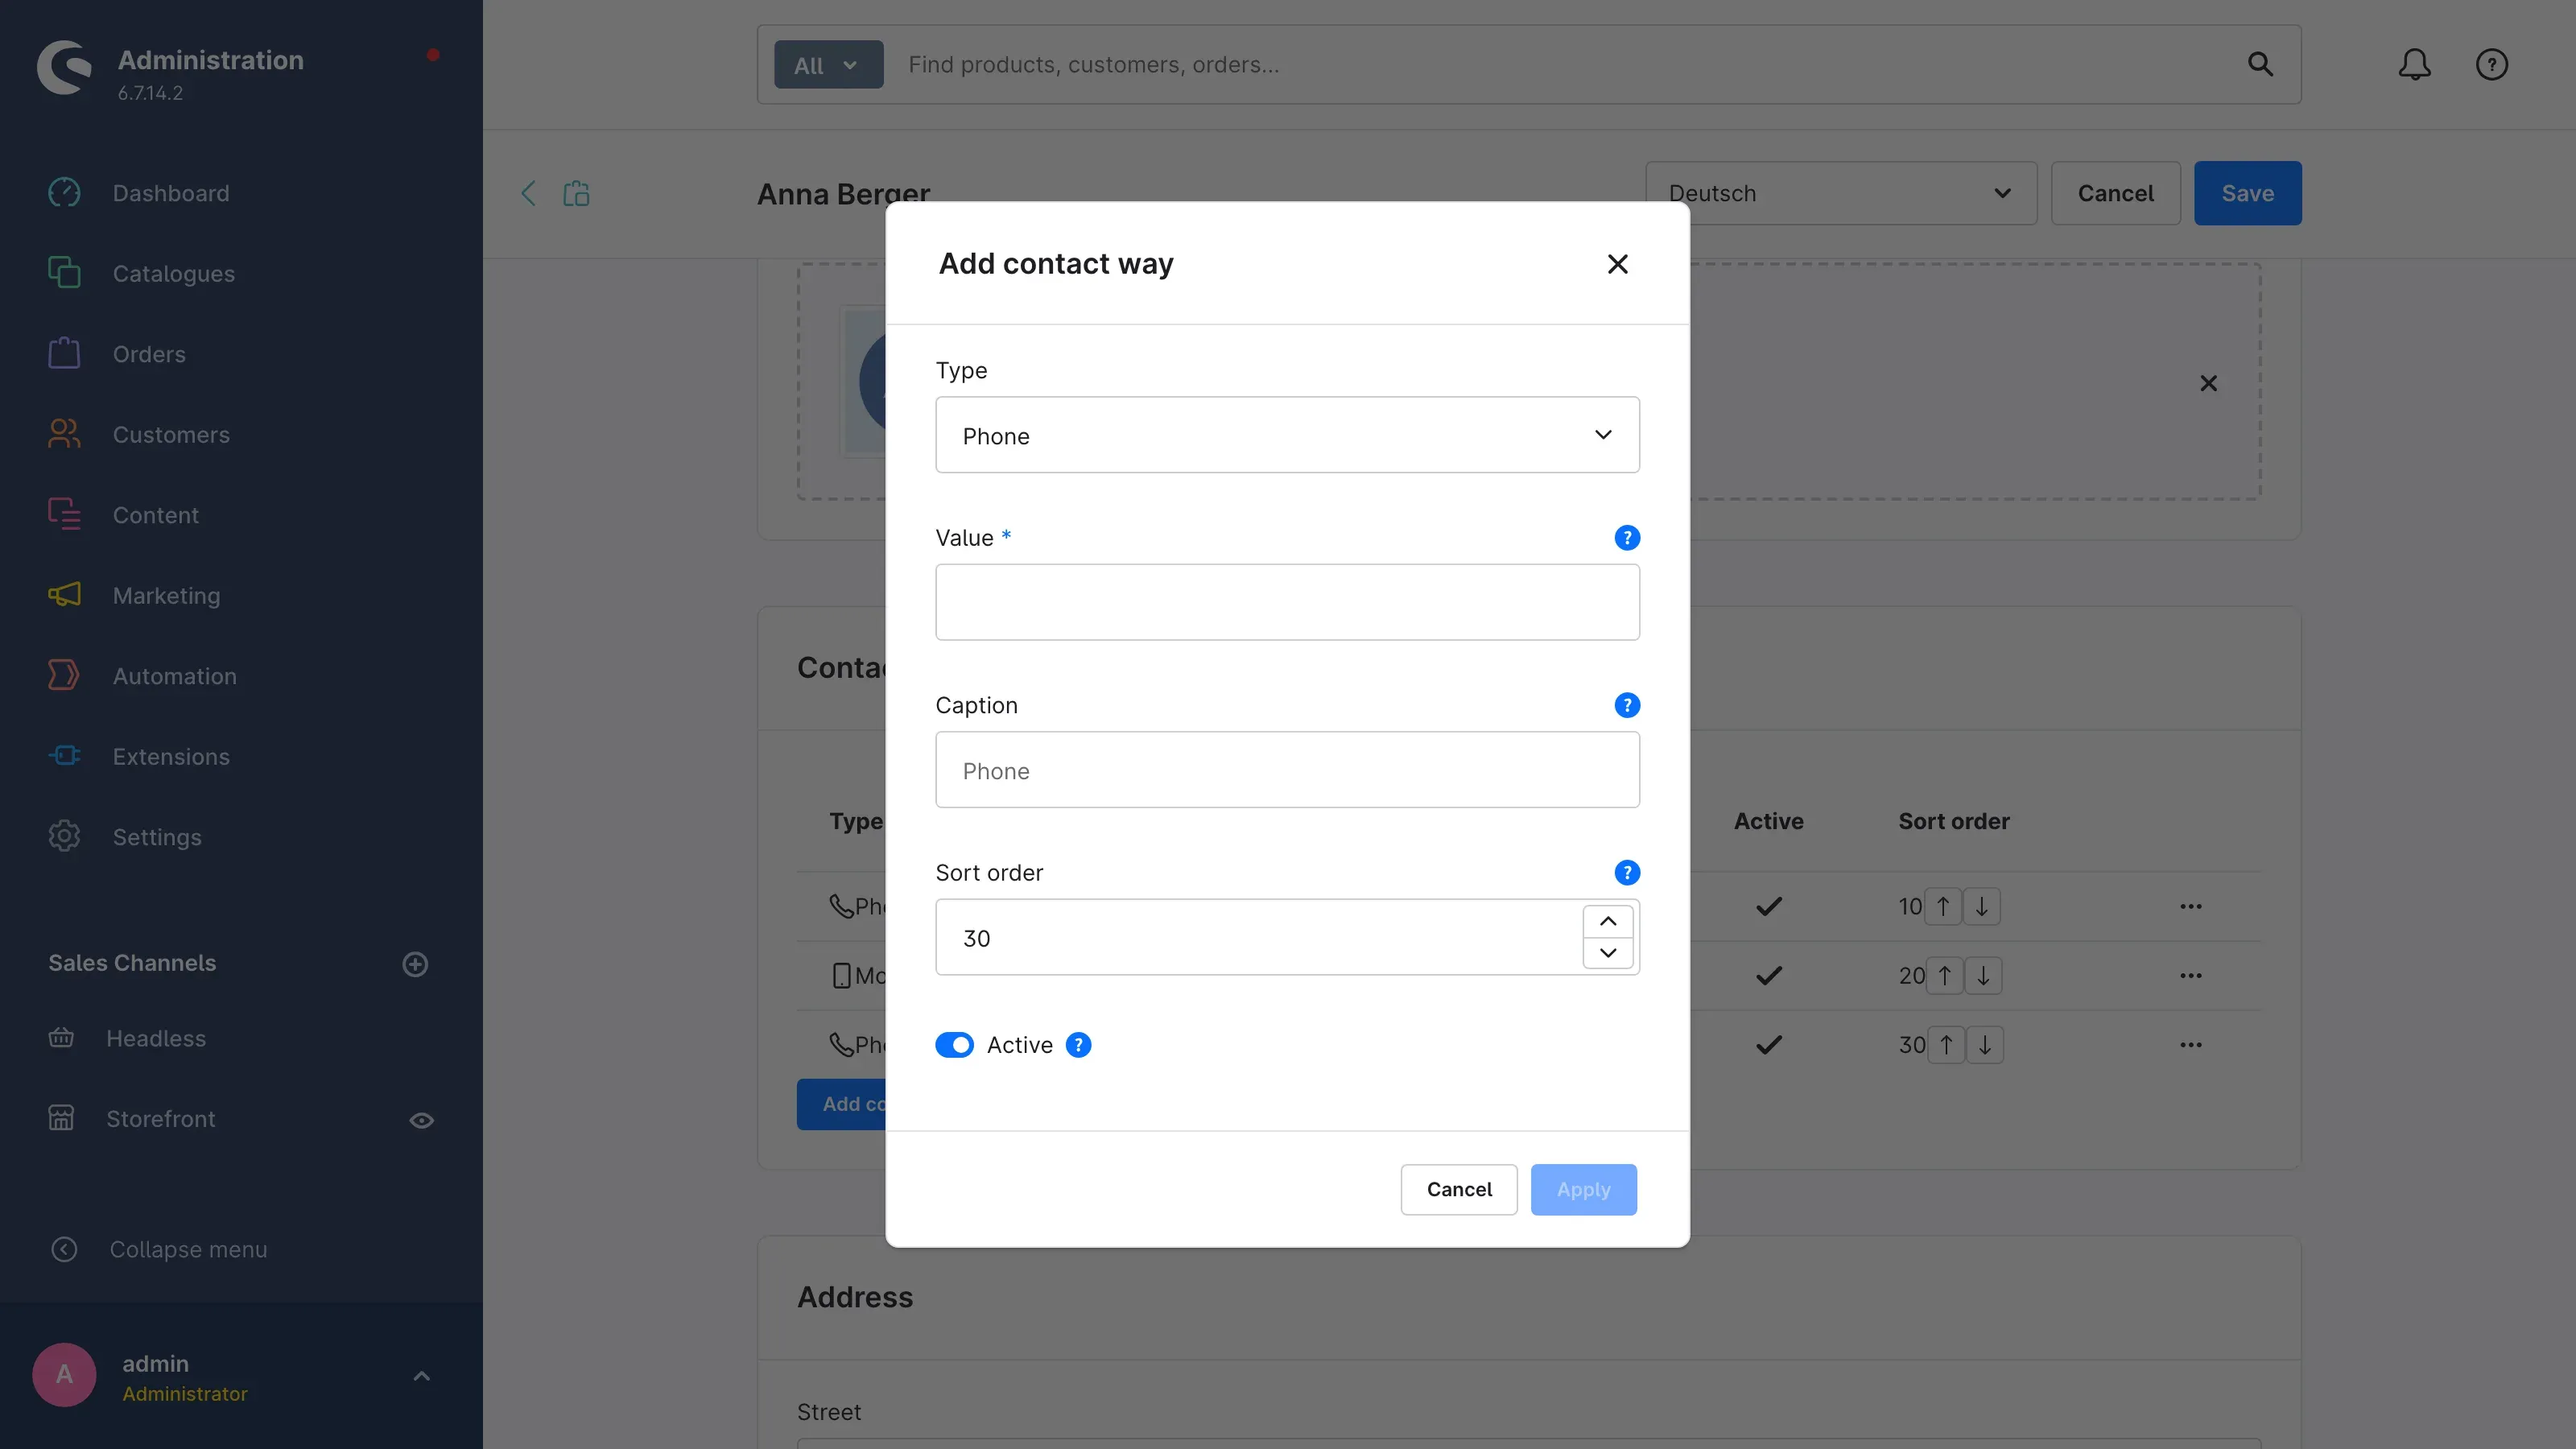 Fig. 10: The Add contact way dialog.
 -
Under Type, choose the kind: Phone, Mobile, Fax, Email, WhatsApp, Microsoft Teams, Signal, Telegram, LinkedIn, Xing, Website or Book an appointment.
-
Enter the details under Value (required). What belongs here depends on the type:
- Phone, Mobile, Fax, WhatsApp, Signal: the phone number, preferably in international format such as
+49 40 1234567. - Email, Microsoft Teams: the email address.
- LinkedIn, Xing, Website, Book an appointment: the full address including
https://. Other addresses are not turned into links. - Telegram: the user name without @.
- Phone, Mobile, Fax, WhatsApp, Signal: the phone number, preferably in international format such as
-
Caption is optional. If it stays empty, the storefront shows the default caption of the type, for example “Phone”. With your own caption you can write “Hotline” or “Book a call”, for instance.
-
Sort order determines the order: lower values appear first.
-
Active — an inactive contact way stays stored but is not shown in the storefront.
-
Click Apply and then Save at the top right.
Important: A deleted contact way is only really removed with the next Save.
In the storefront, phone, mobile, email and website are shown as clickable links, fax as plain text. WhatsApp, Microsoft Teams, Signal, Telegram, LinkedIn, Xing and Book an appointment appear as buttons.
Address and email
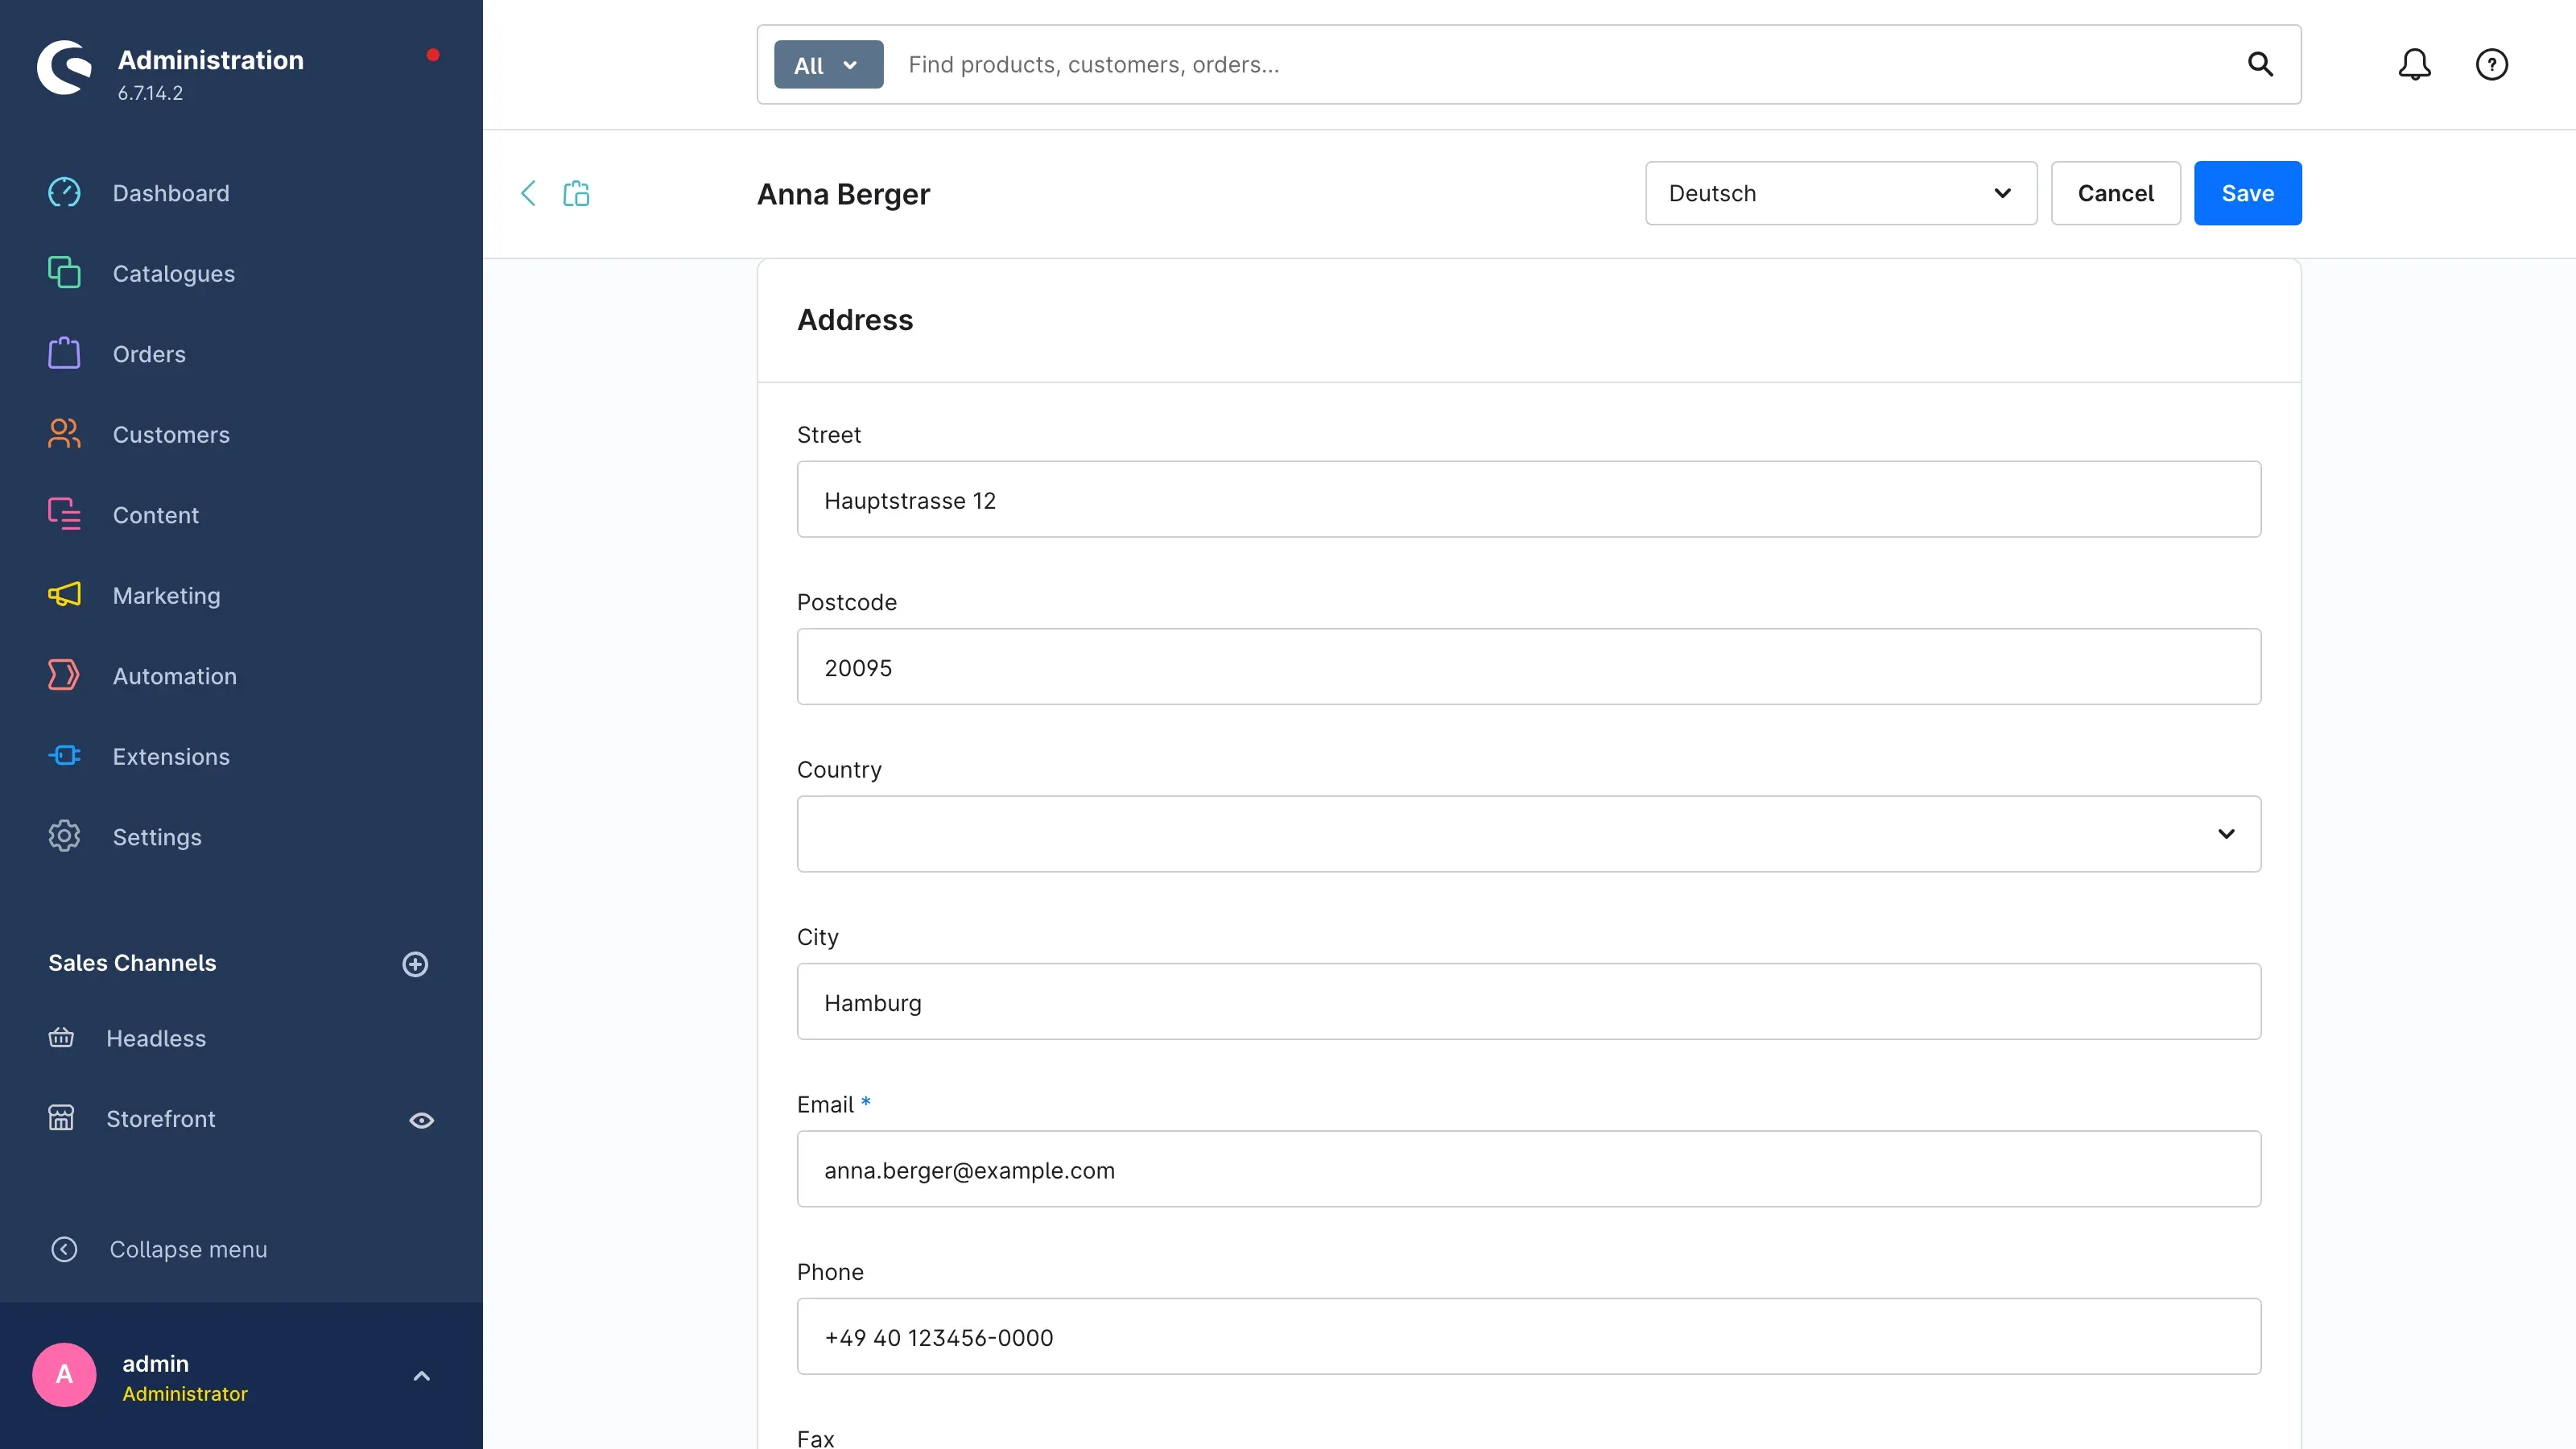 Fig. 11: The Address card with address, email and phone.
- Street, Postcode, City — the address, for example that of the responsible branch.
- Country and State — both are selection fields. State only appears once you have selected a country. In the storefront, the names appear in the language of the sales channel.
- Email — the person’s email address. It is required and appears in the storefront as the first line of the Contact section.
- Phone and Fax — these two fields are filled from your contact ways of the types Phone and Fax. It is best to maintain phone and fax numbers in the Contact ways card.
Tip: The email address from this card always appears in the contact section of the storefront. If you also add a contact way of the type Email, the address appears a second time — as a link.
Visibility and sales channels
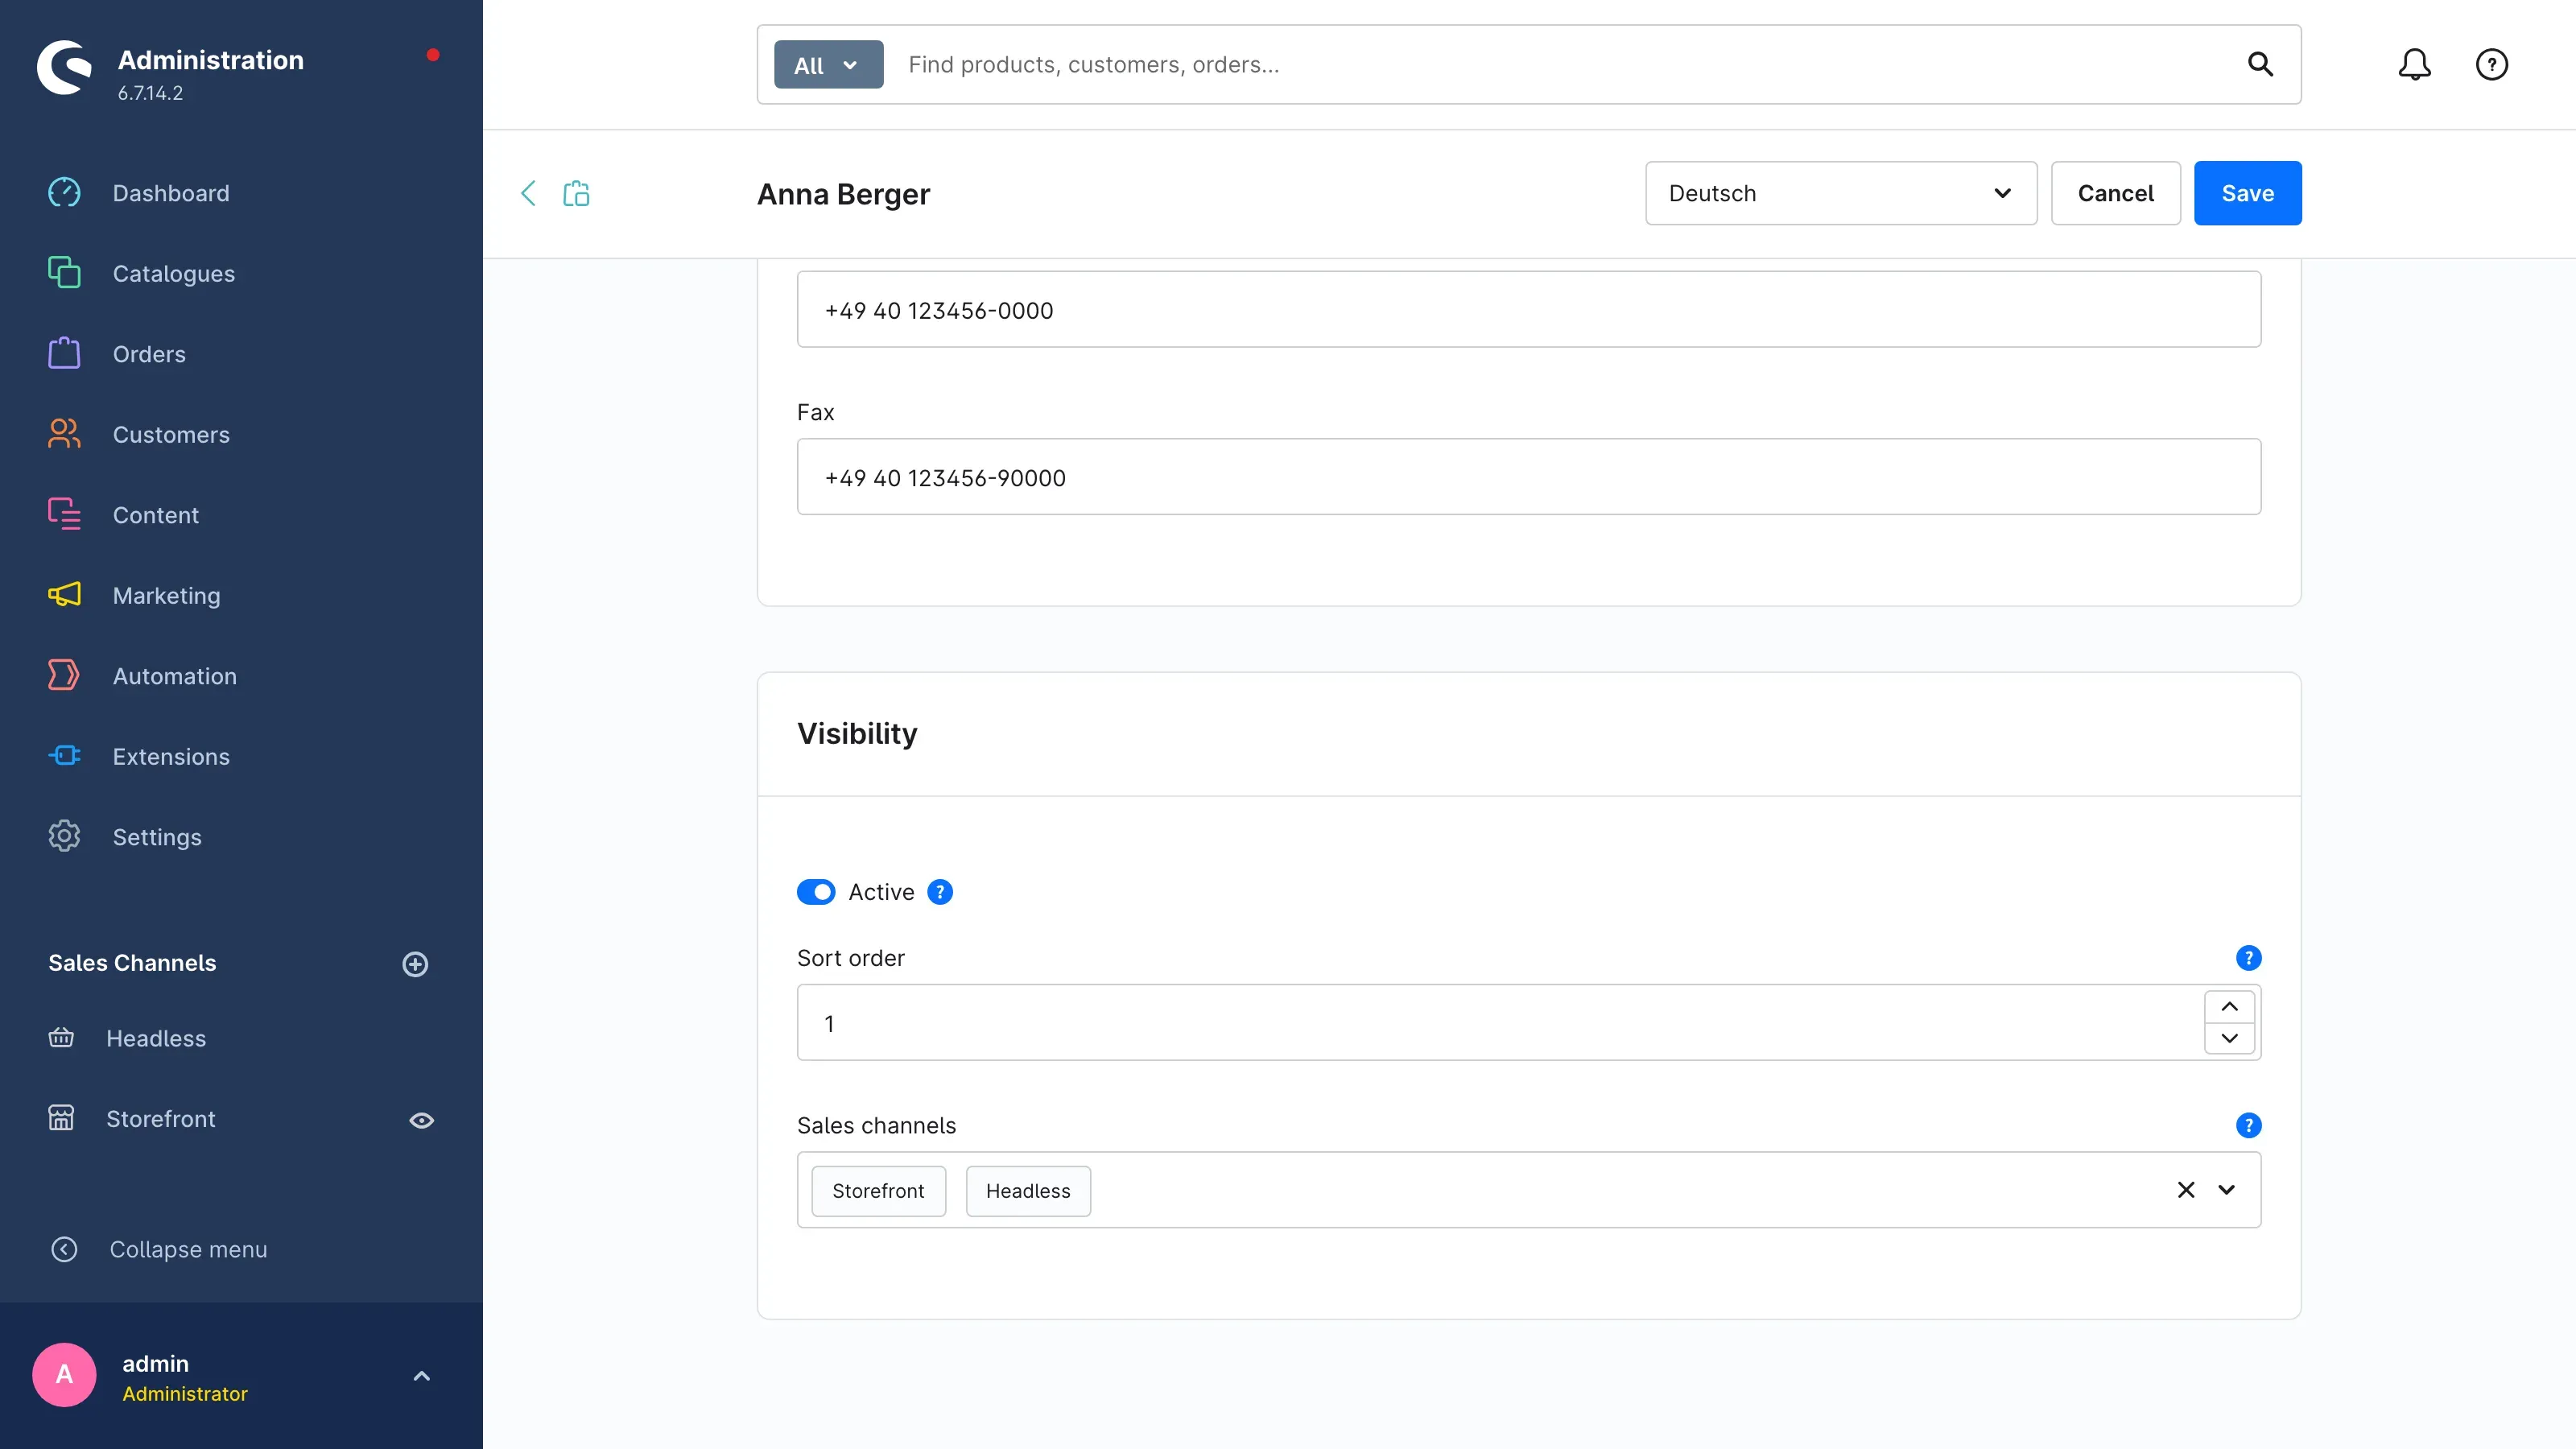 Fig. 12: The Visibility card with the Active switch, the Sort order and the Sales channels.
- Active — an inactive person does not appear anywhere in the storefront. This lets you take someone out temporarily, for example during a holiday, without losing any assignments.
- Sort order — if several persons are assigned to the same place, lower values appear first. With equal values, the order of your selection applies.
- Sales channels — the person only appears in the sales channels selected here.
Important: A newly created sales channel has to be assigned to the persons once. If a person is not assigned to any sales channel, the page warns you with Not assigned to any sales channel — the person is then shown nowhere.
Creating a new person
Click Add contact person in the overview.
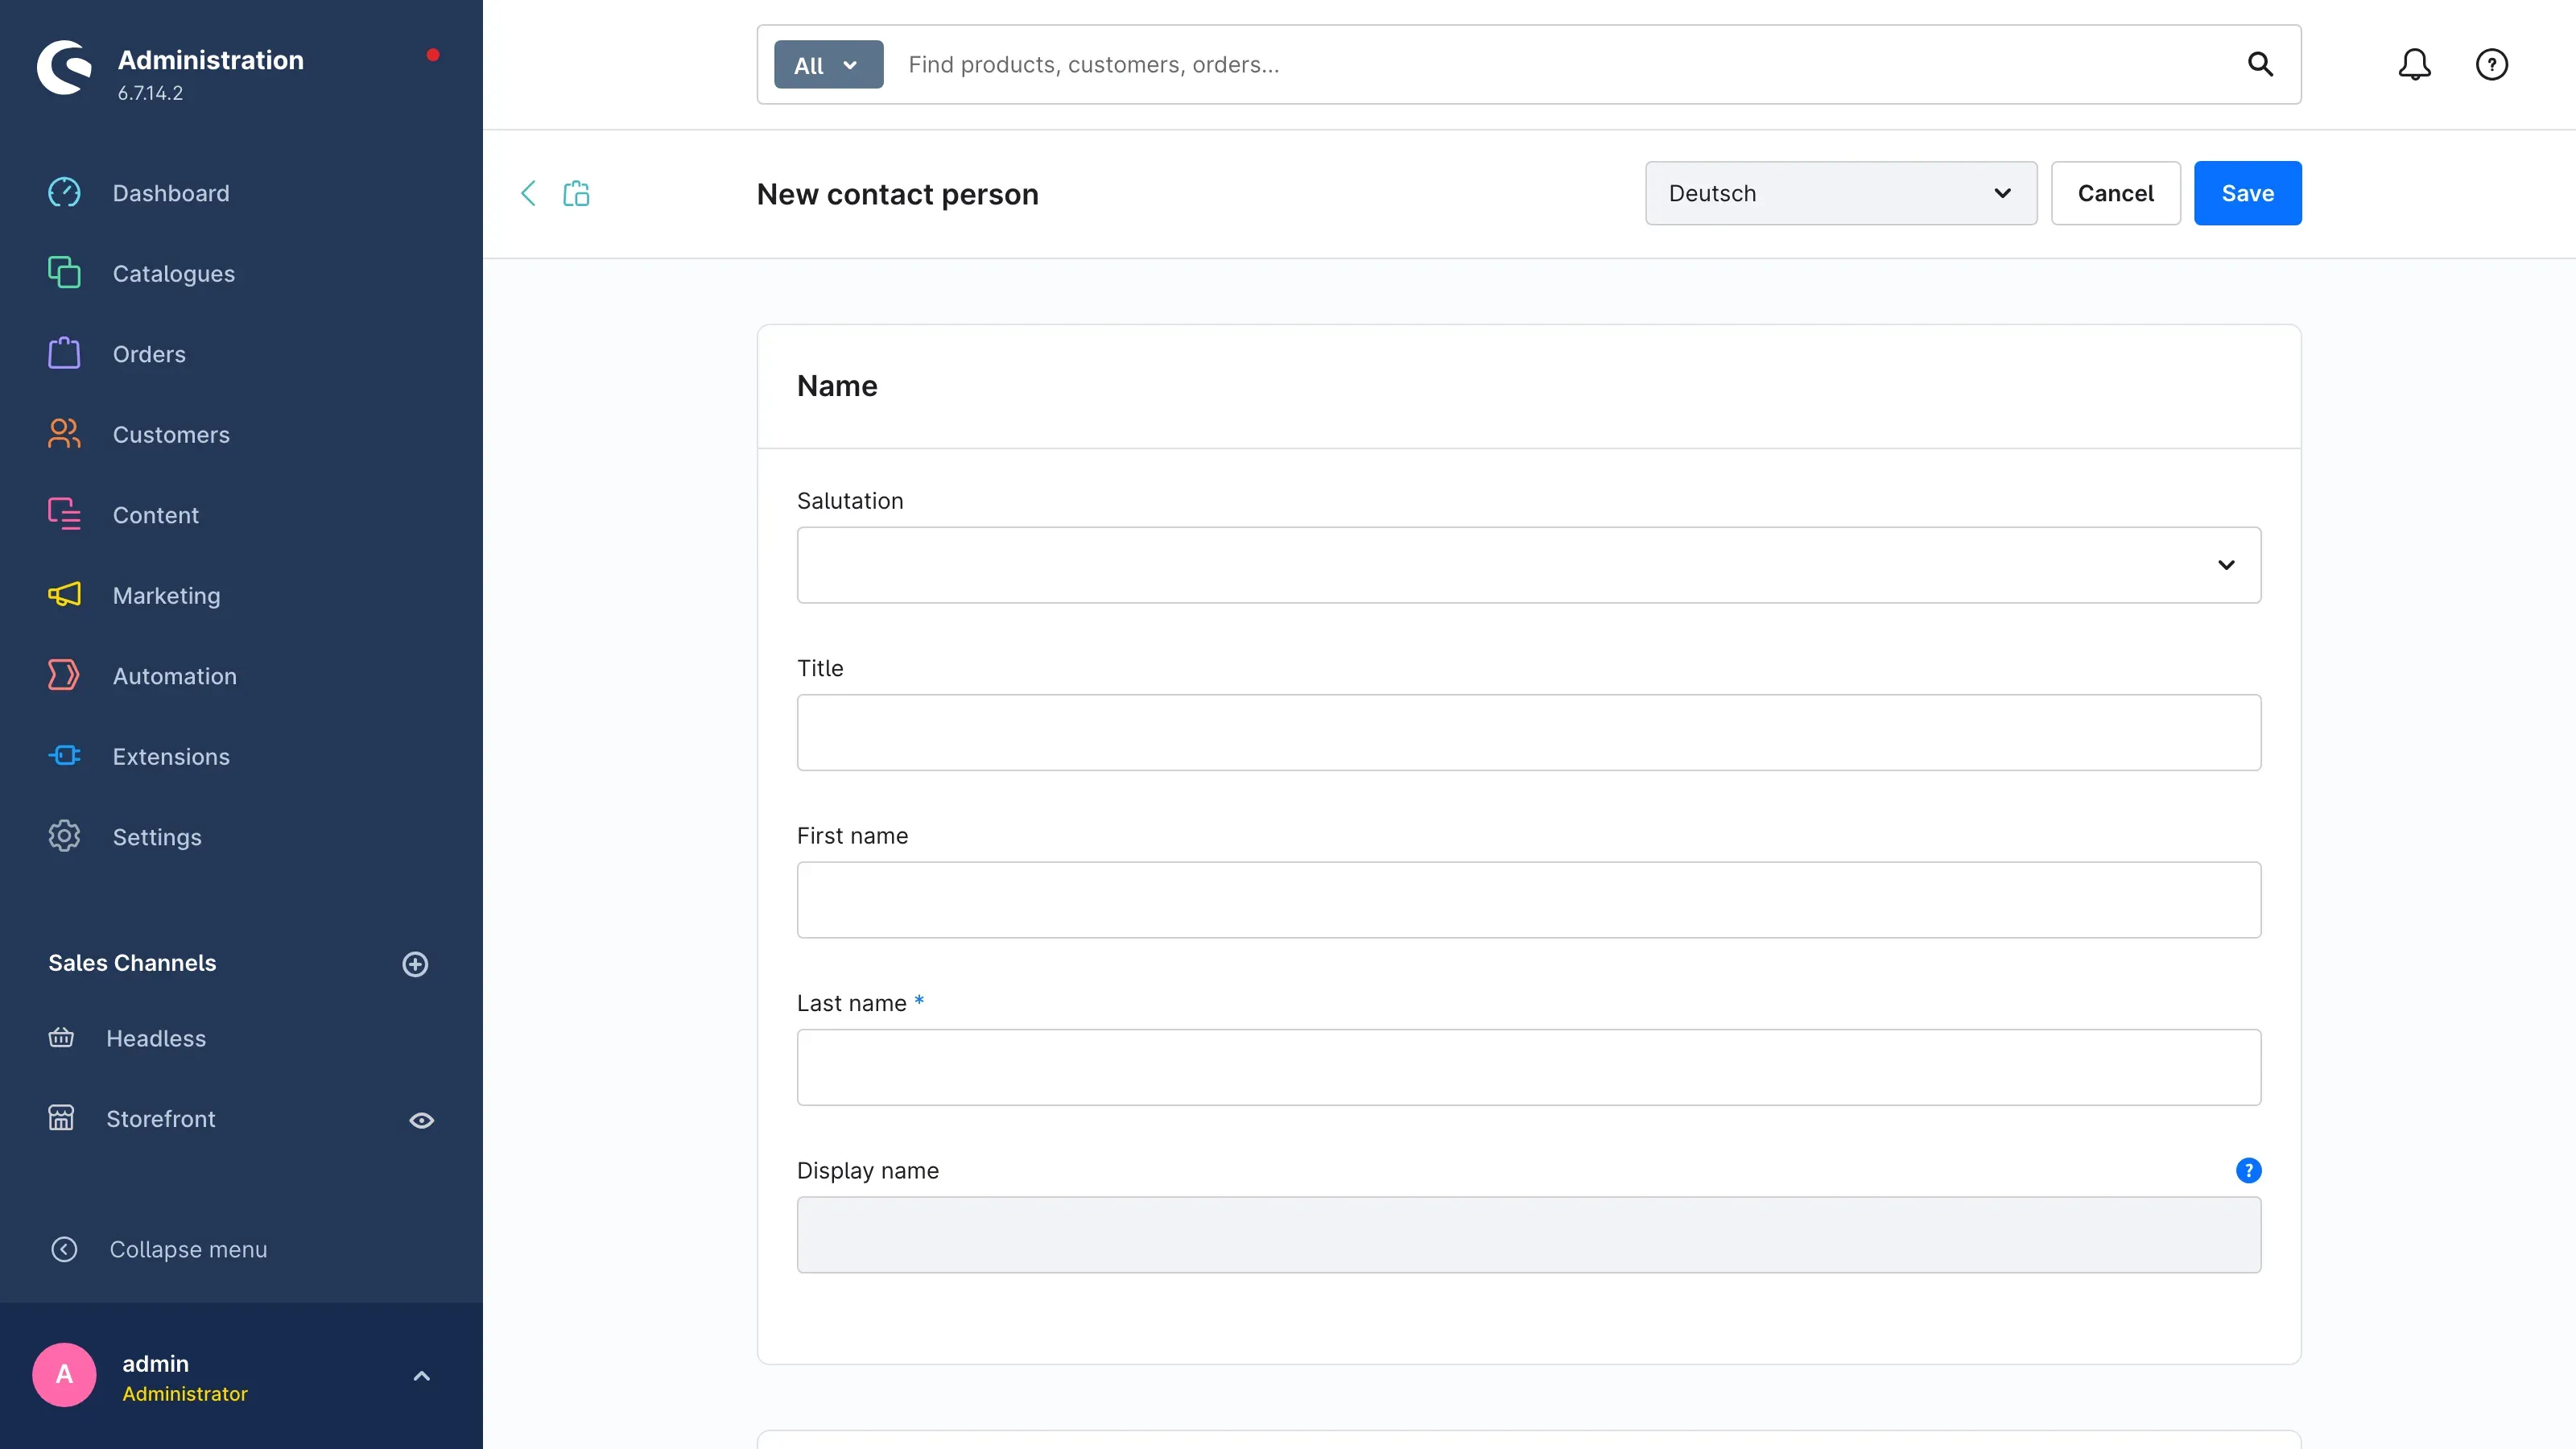 Fig. 13: When creating a person, the page is titled New contact person.
You see the same cards as when editing, just empty. Under Sales channels, all your sales channels are already preselected — remove the channels in which the person should not appear. Fill in at least Last name and Email and click Save. The person is then available in all selection lists straight away.
Tip: Create your groups first (chapter 6), then the persons. That way you can select the group right away.
Maintaining details in several languages
 Fig. 14: The language selection at the top of a person’s detail page.
Job title, availability and the captions of contact ways are translatable. To maintain another language:
- Open the person and save it if it is new — the language selection is locked while creating.
- Choose the language at the top, for example English.
- Enter job title, availability and, if needed, captions in that language.
- Click Save.
The storefront automatically shows the version that matches the language of the sales channel. If a translation is missing, the storefront shows the version from the main language.
Protection against unsaved changes
What this gives you: You no longer lose your input because you clicked away by accident.
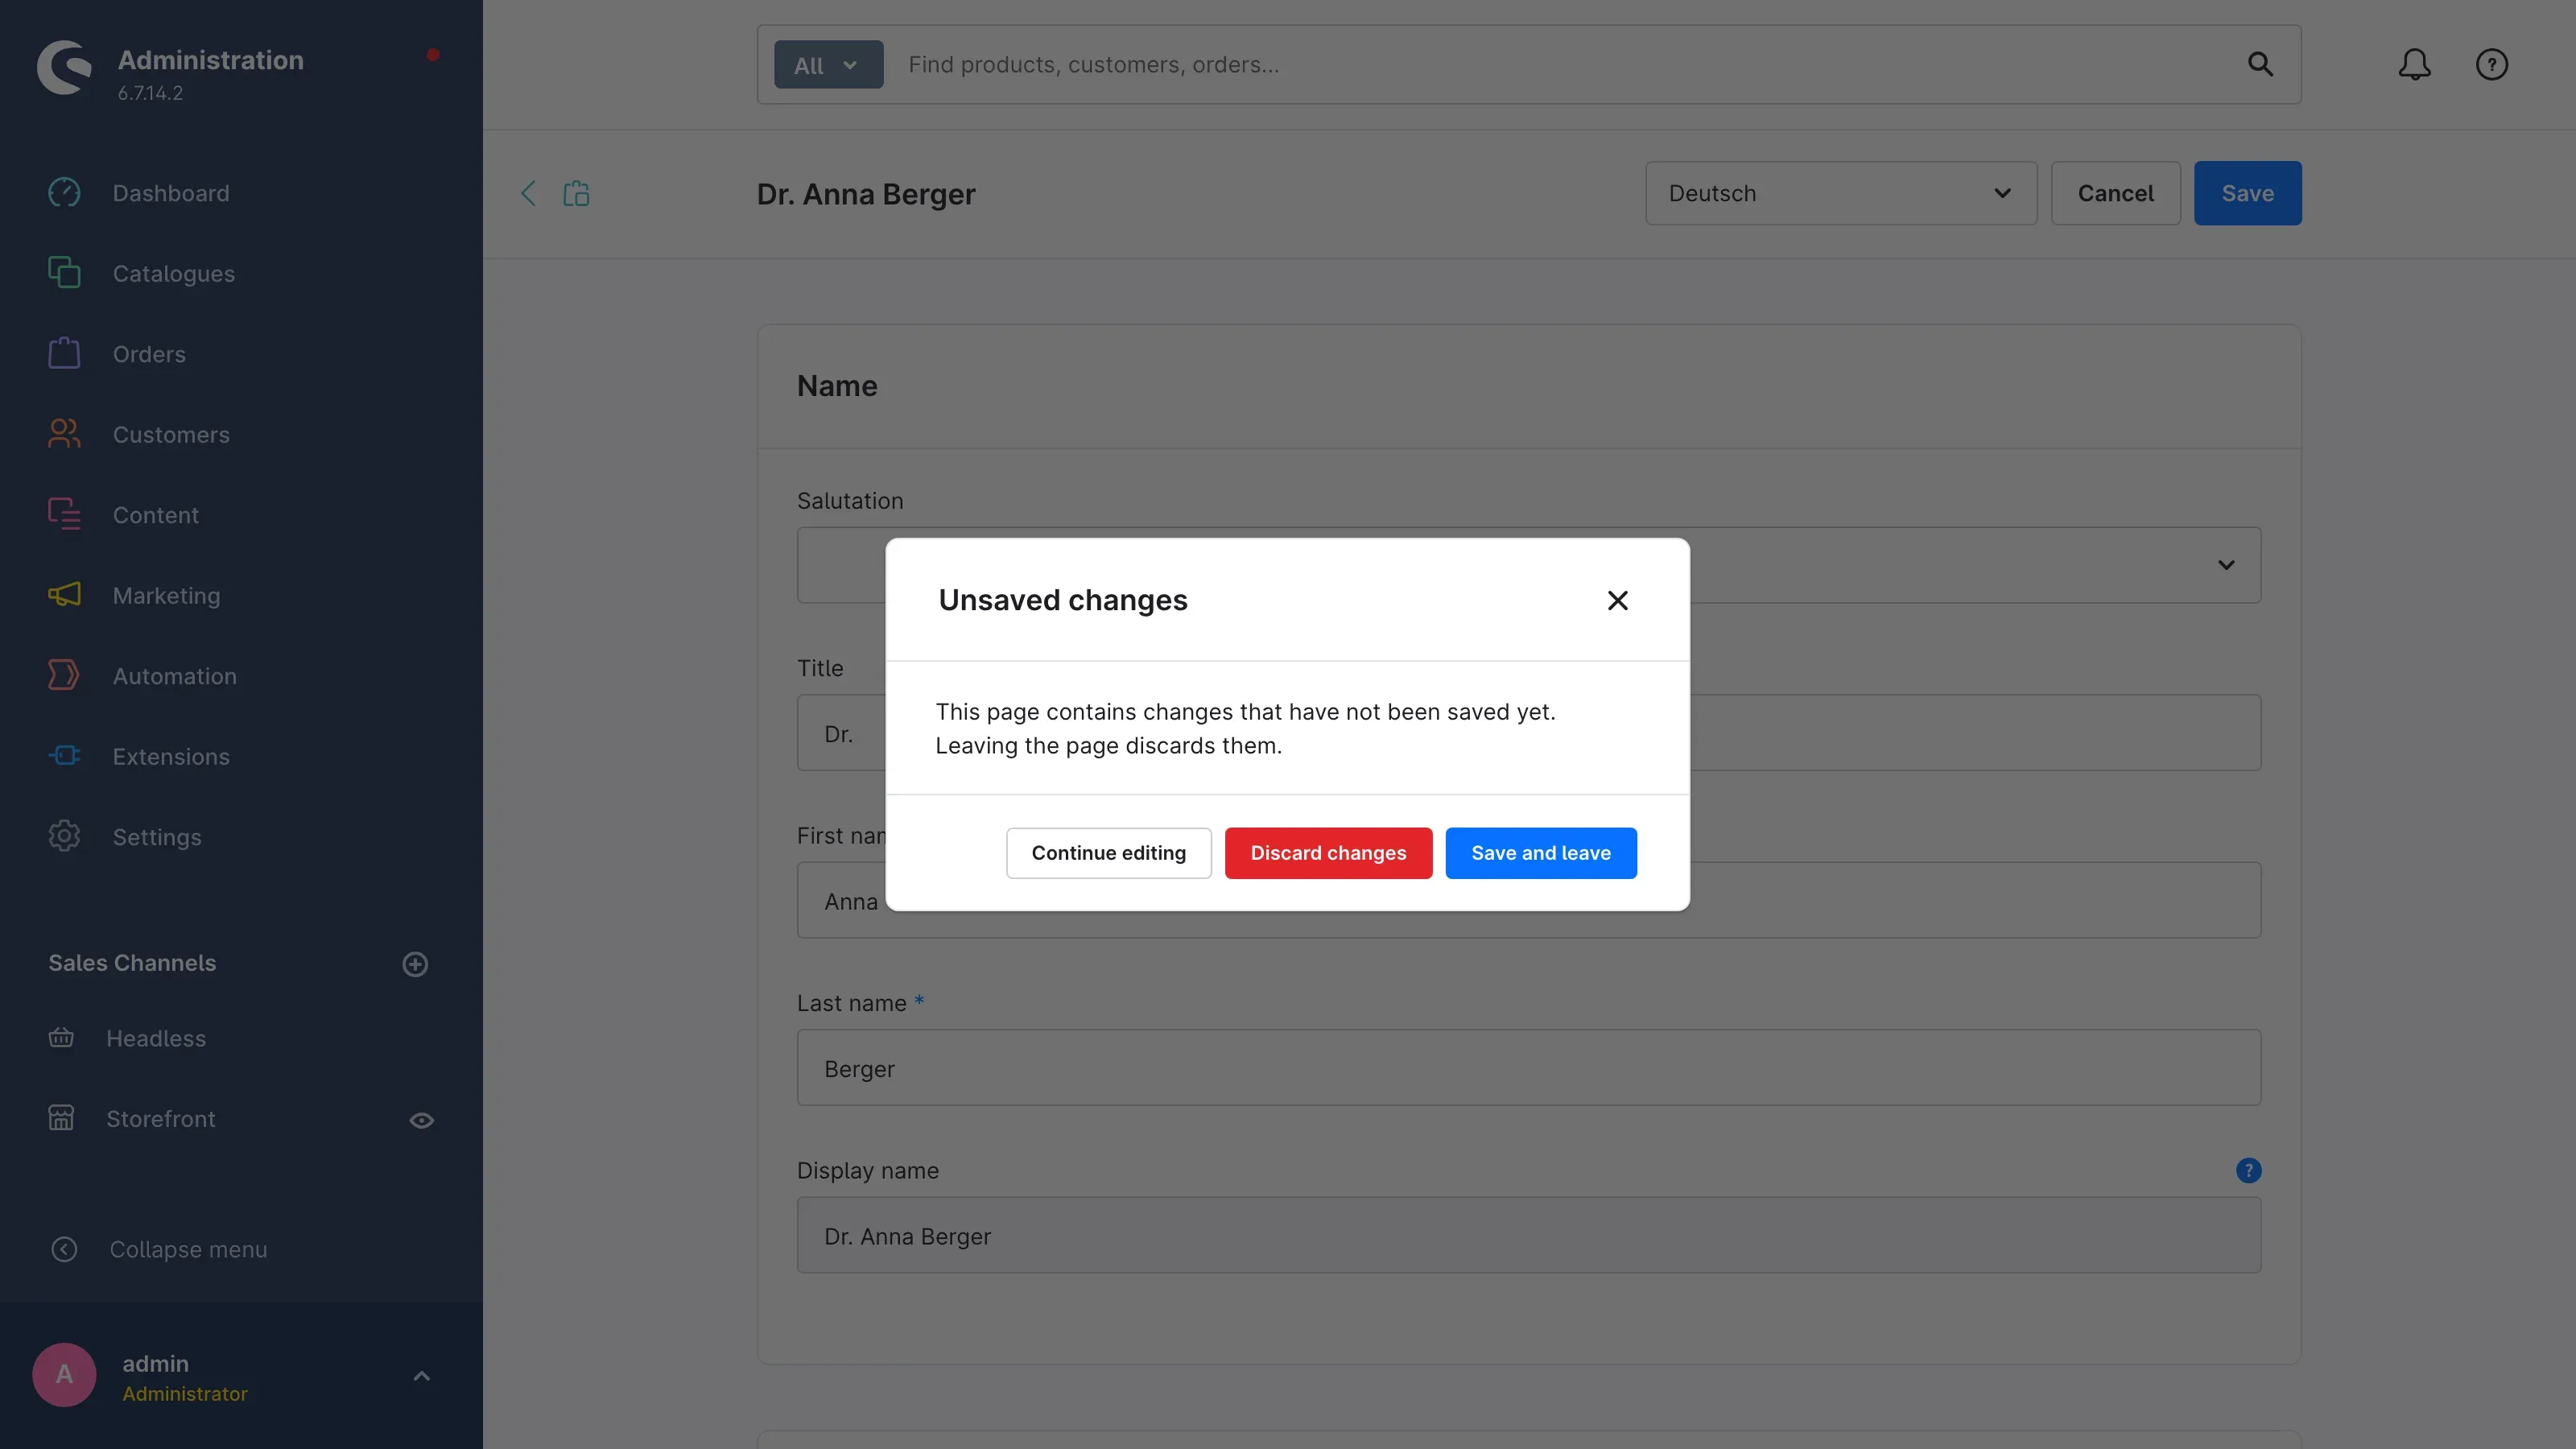 Fig. 15: The Unsaved changes dialog when leaving the page.
If you try to leave the detail page before saving, the Administration asks:
- Continue editing takes you back to your input.
- Discard changes leaves the page without saving.
- Save and leave saves and leaves the page in one step.
Creating and maintaining groups
What this gives you: Groups structure your directory and give your customers orientation. If “Customer service” is shown above a person, the customer knows straight away what they are responsible for.
The group overview
Under Customers → Contact person, switch to the Group tab.
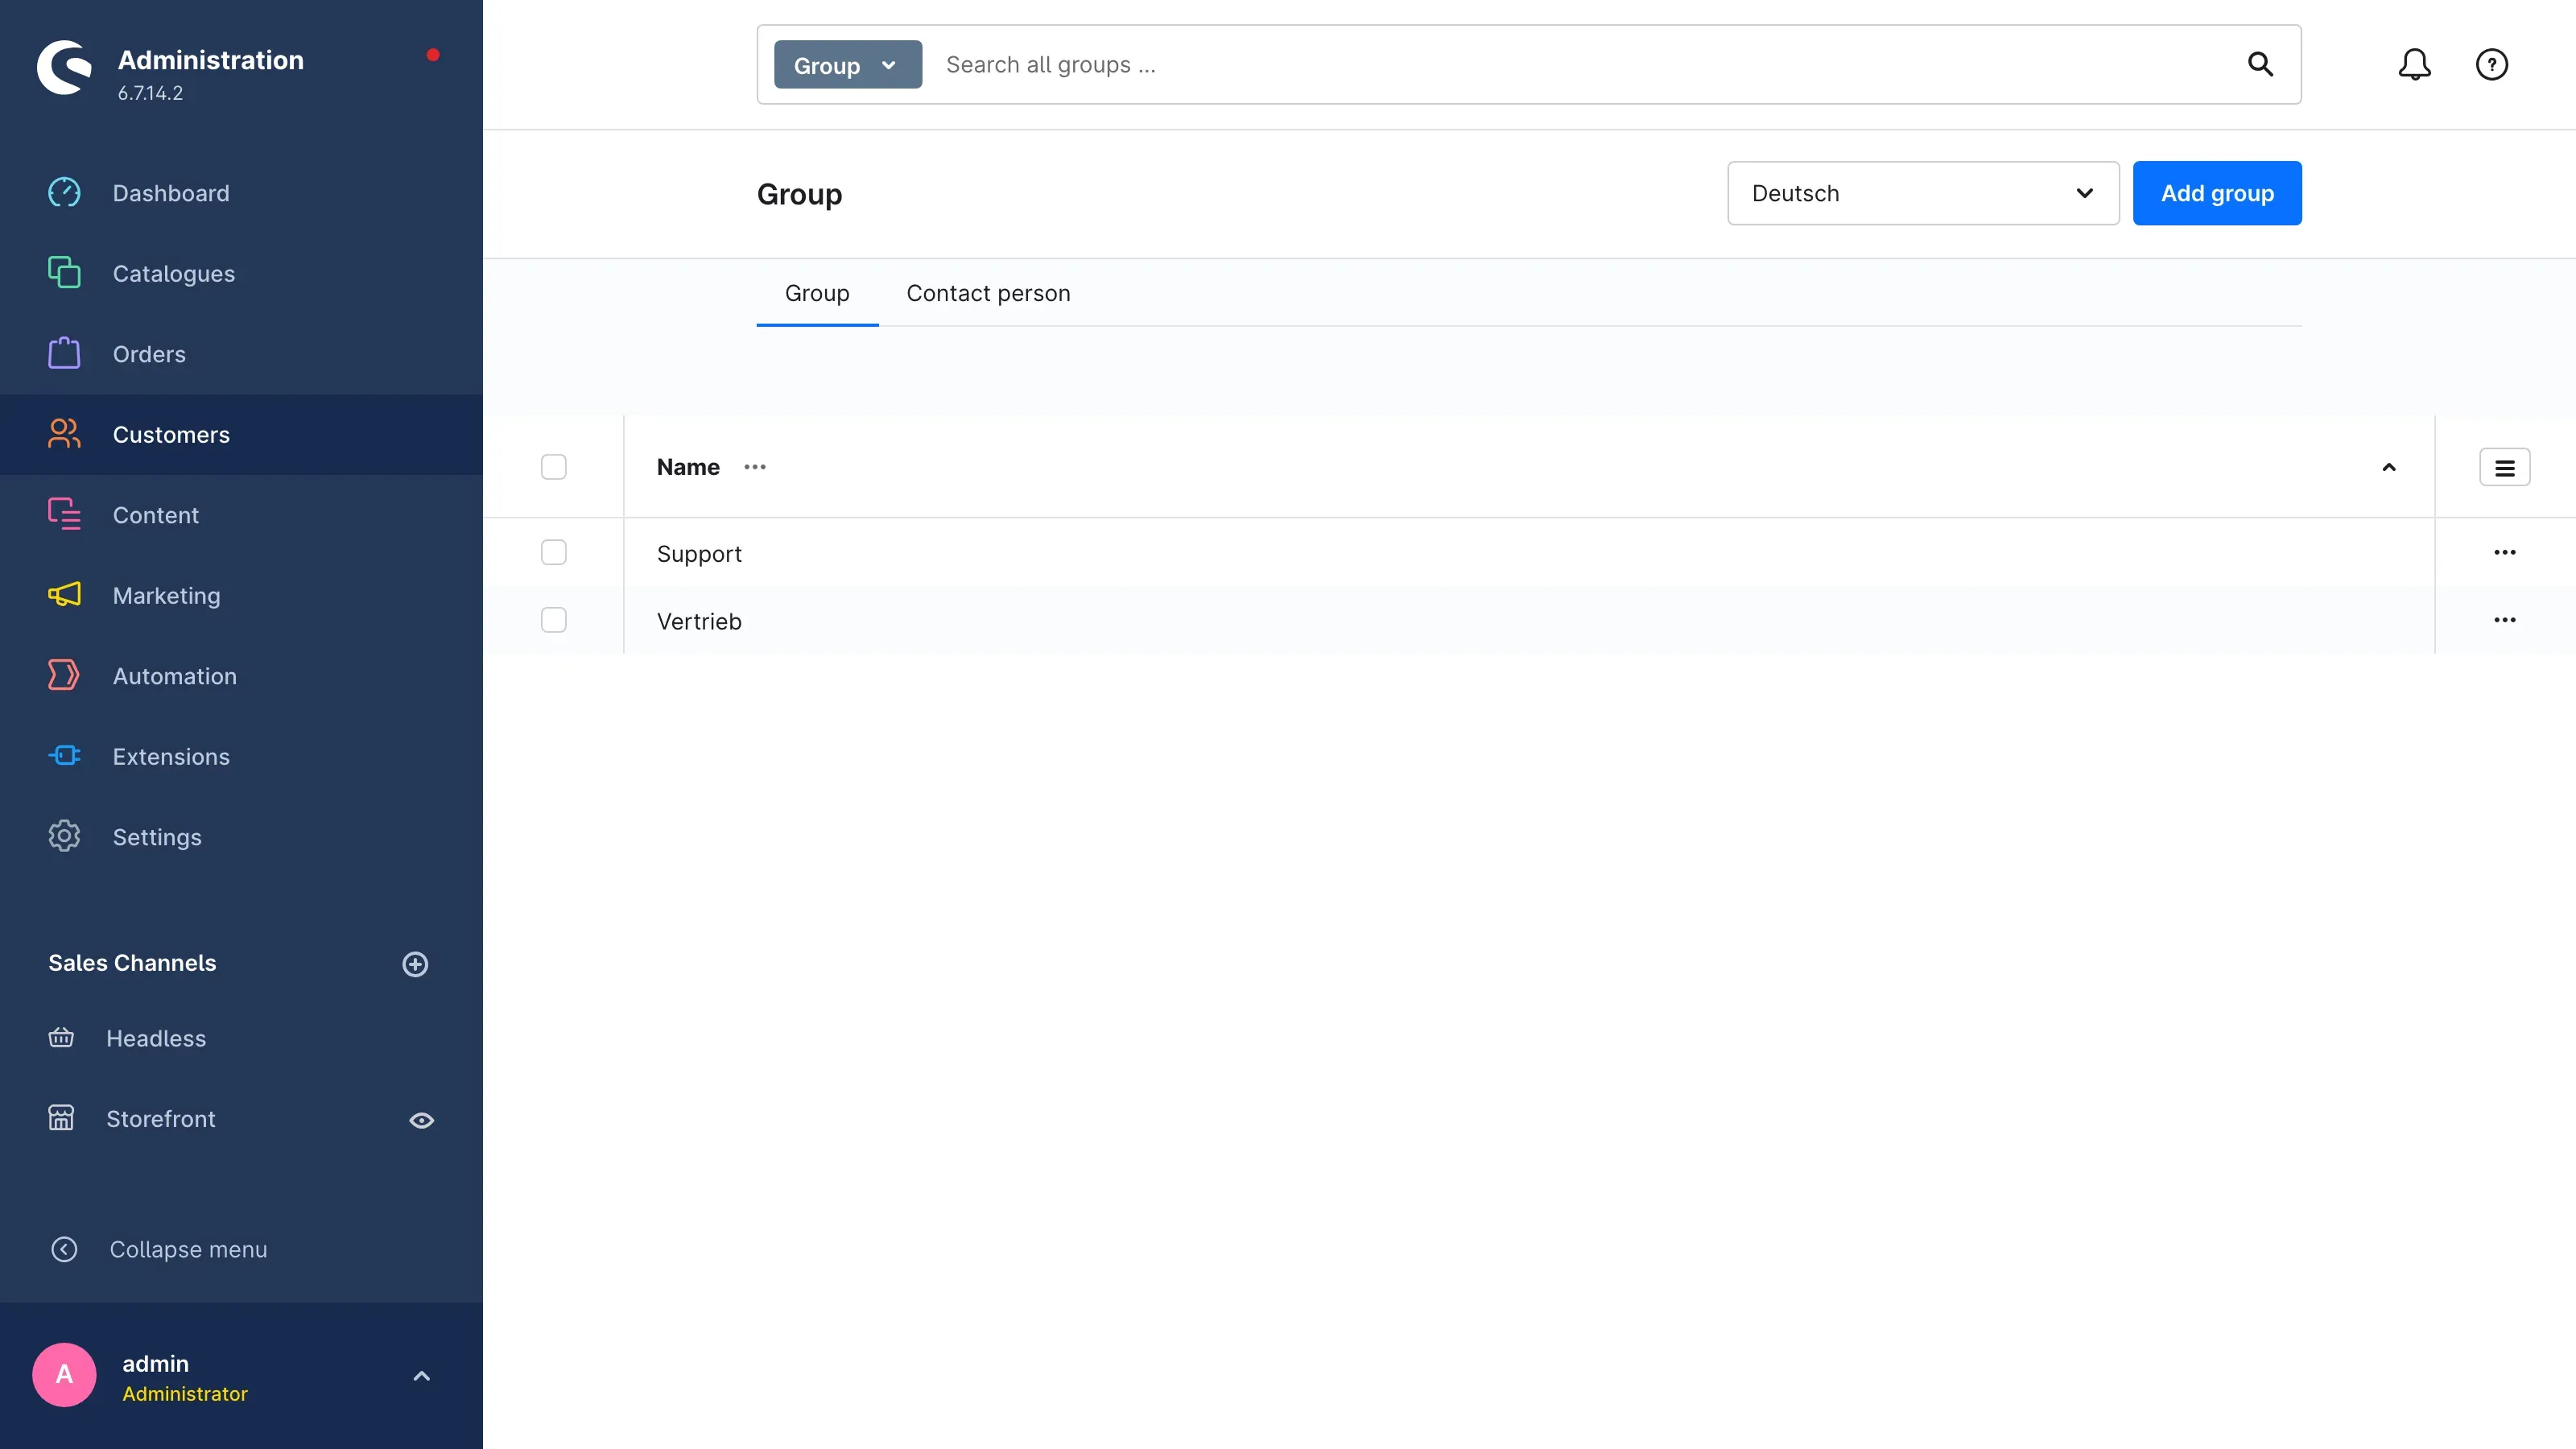 Fig. 16: The Group tab with the Add group button.
The list shows all groups with their name. If there are none yet, it reads There are no groups yet.
Creating or editing a group
Click Add group or open an existing group.
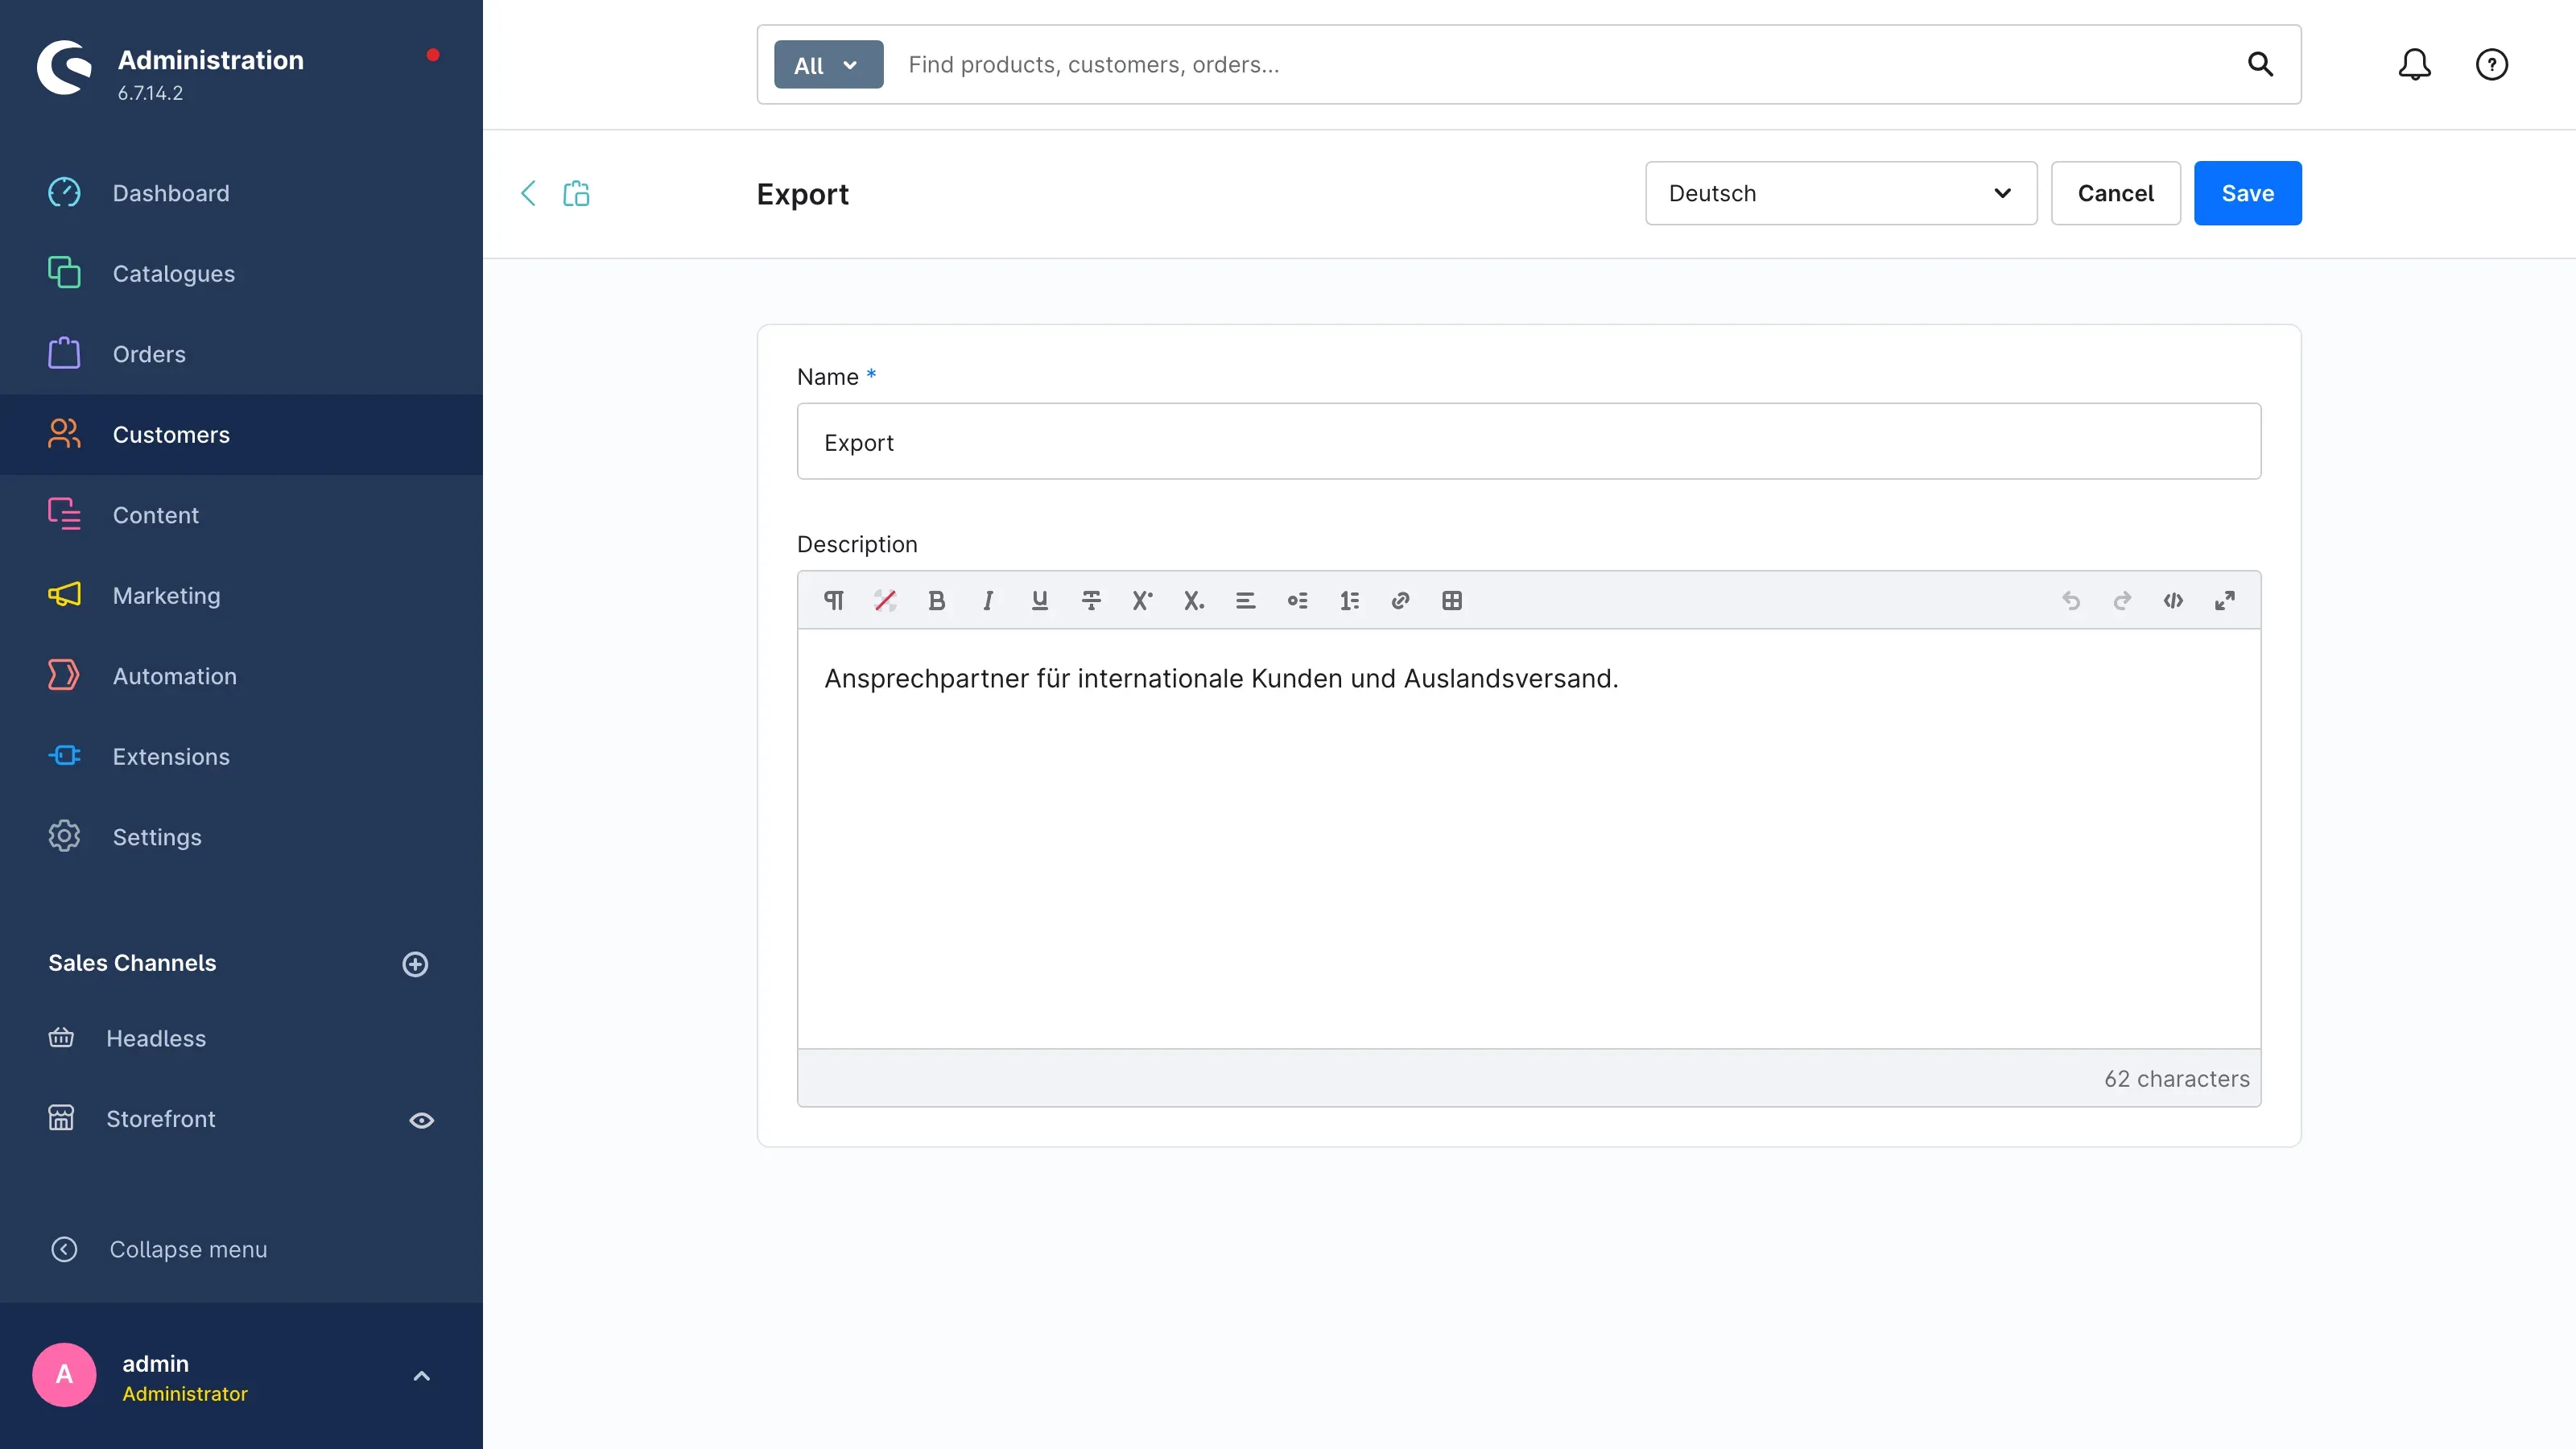 Fig. 17: A group consists of Name and Description.
- Name (required) — the name your customers see above the person, for example “Sales” or “Support”.
- Description — your internal note on what the group is responsible for.
When creating, the page is titled New group. Save with Save.
Group names in several languages
Name and description are translatable. Choose the language at the top of the group’s detail page and enter the matching version — for example “Vertrieb” in German and “Sales” in English. The storefront shows the version that matches the language of the sales channel.
Important: If you only maintain the German version, customers in your English sales channel see the German name. Enter a separate version for each shop language.
Assigning contact persons
What this gives you: The assignment decides who appears where. On a product you store exactly the colleagues who look after it — your customers see nobody else there.
Assigning works the same way everywhere: open the record, go to the Custom fields card, choose the Contact person tab and select one or more persons in the Name field. The cross next to a name removes the person again. Then save.
There are four places where you can assign persons.
On the product
Open the product under Catalogues → Products and scroll to the Custom fields card.
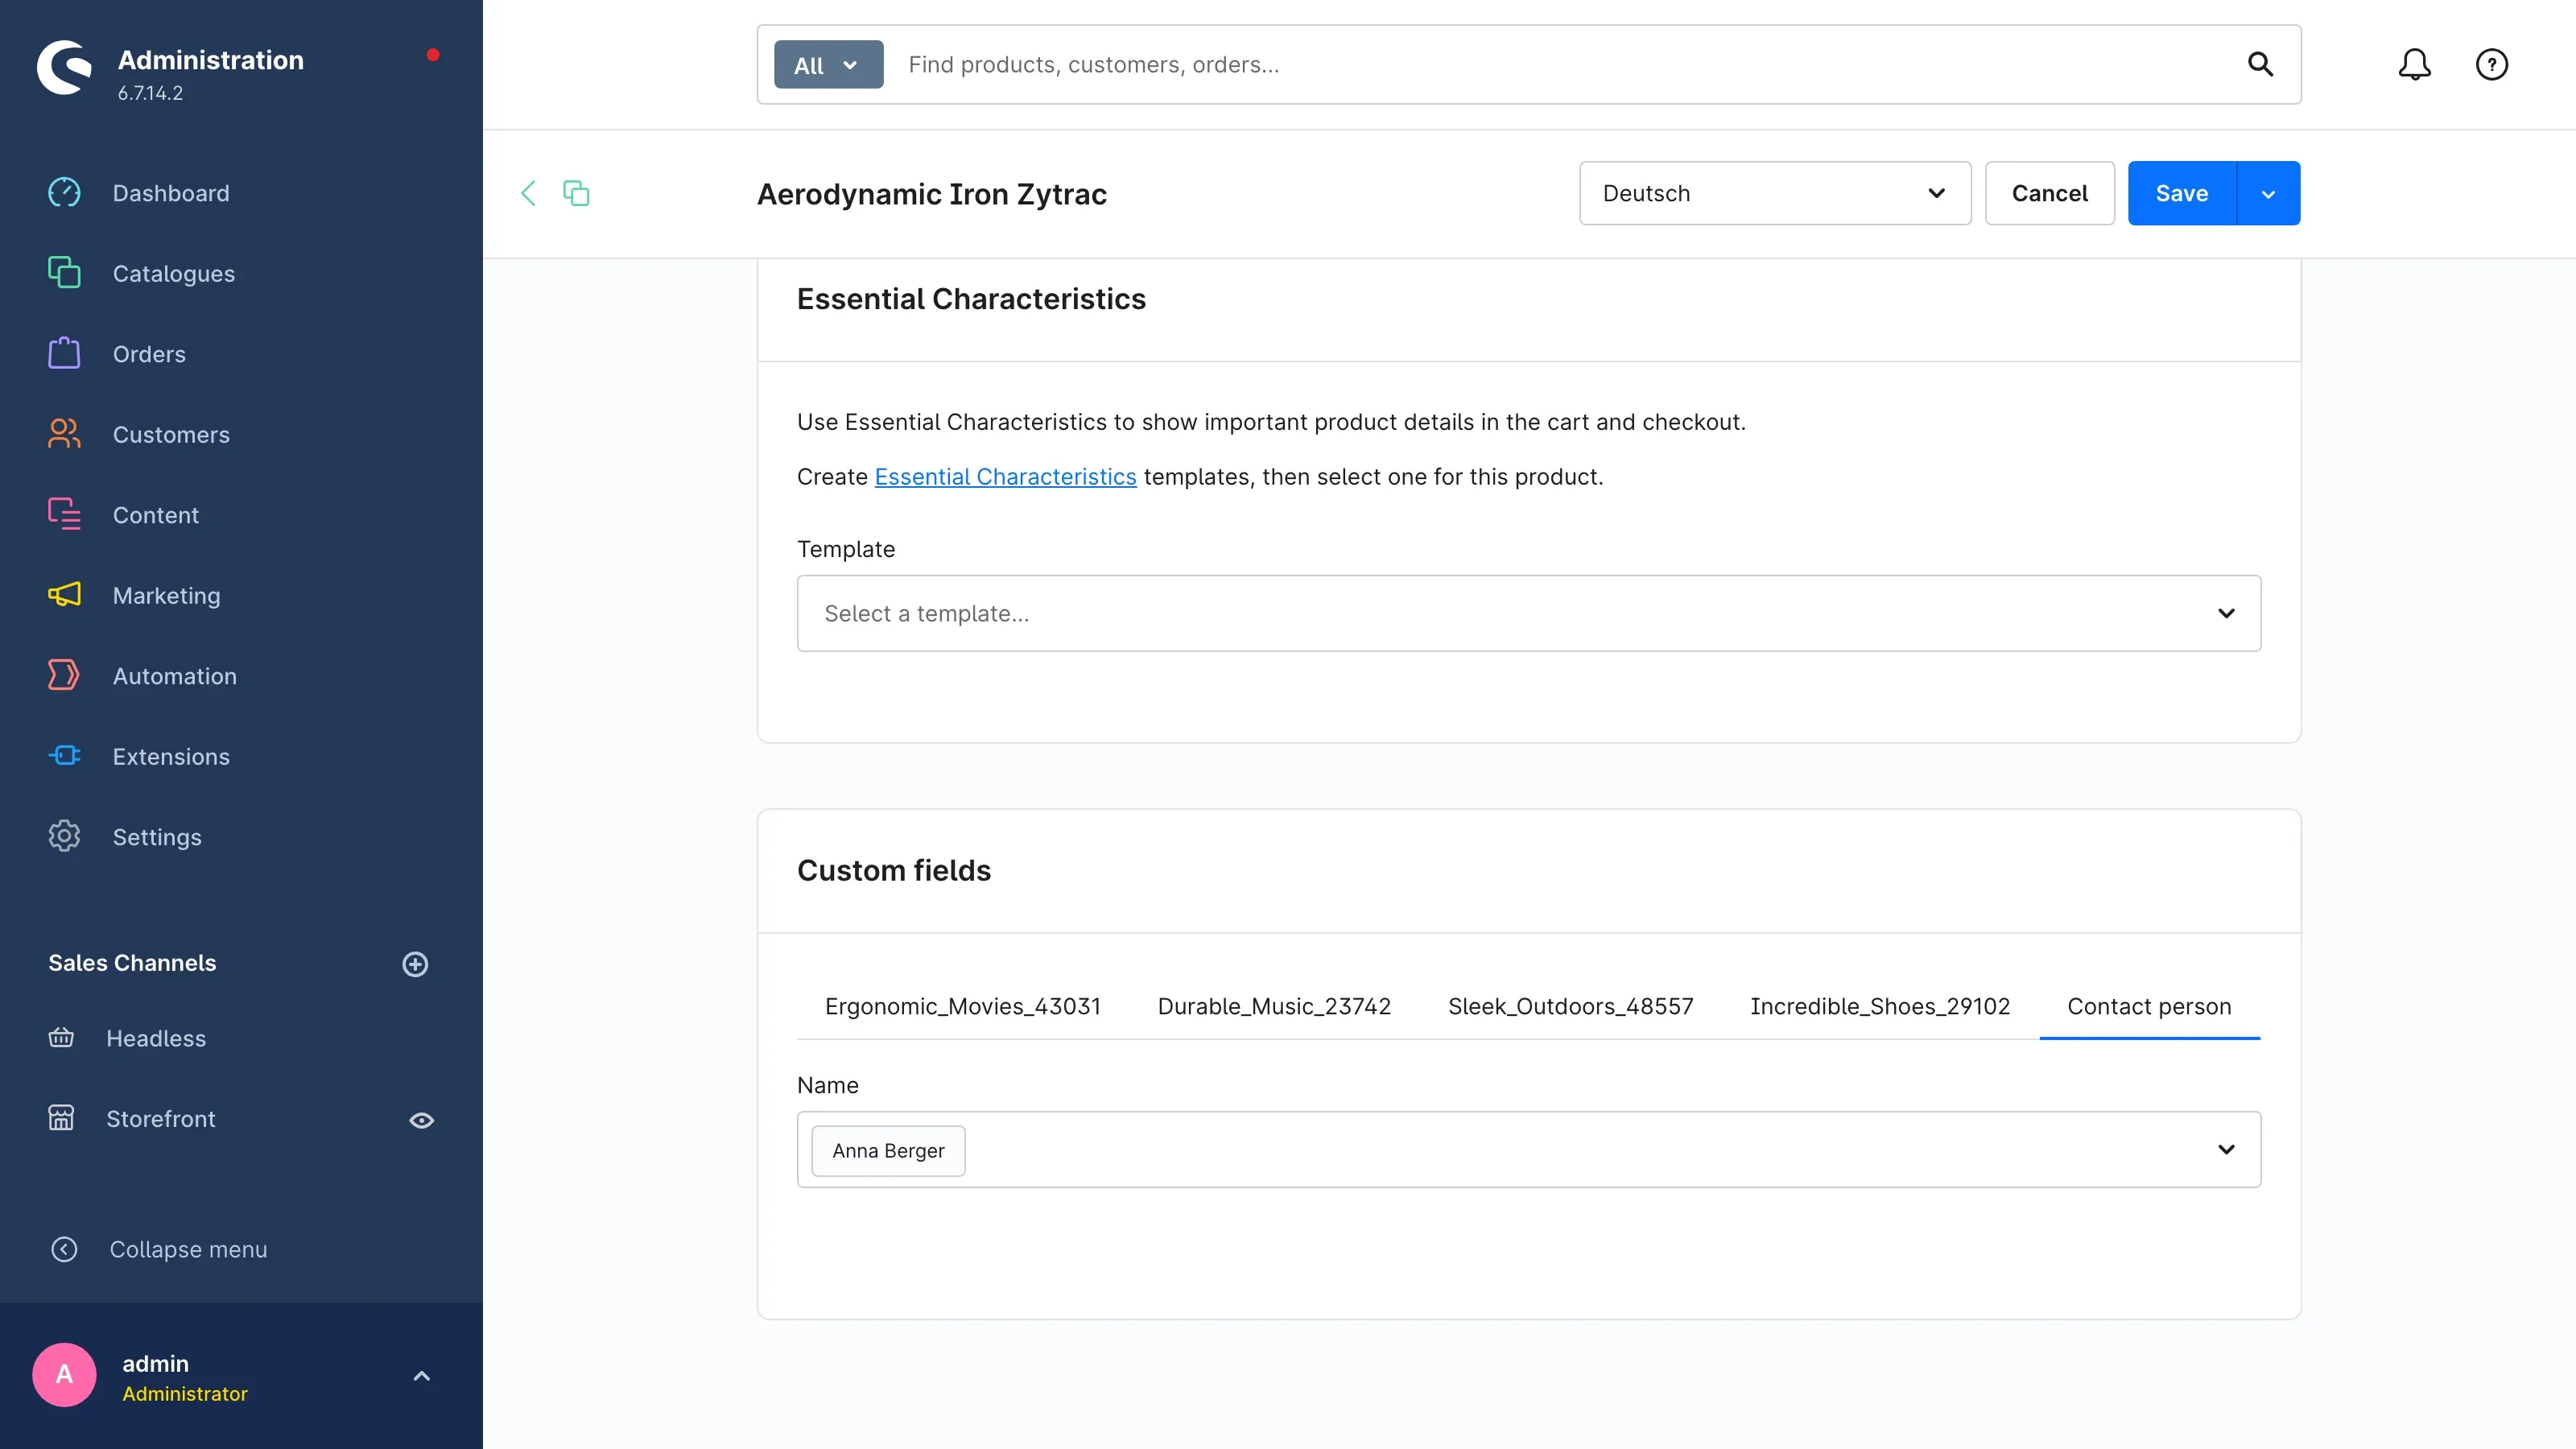 Fig. 18: A person is stored on the product in the Contact person tab.
These persons appear on the product page — typically the specialist adviser for that product group.
On the category
Open the category under Catalogues → Categories. Assigning works the same way there, via Custom fields and the Contact person tab.
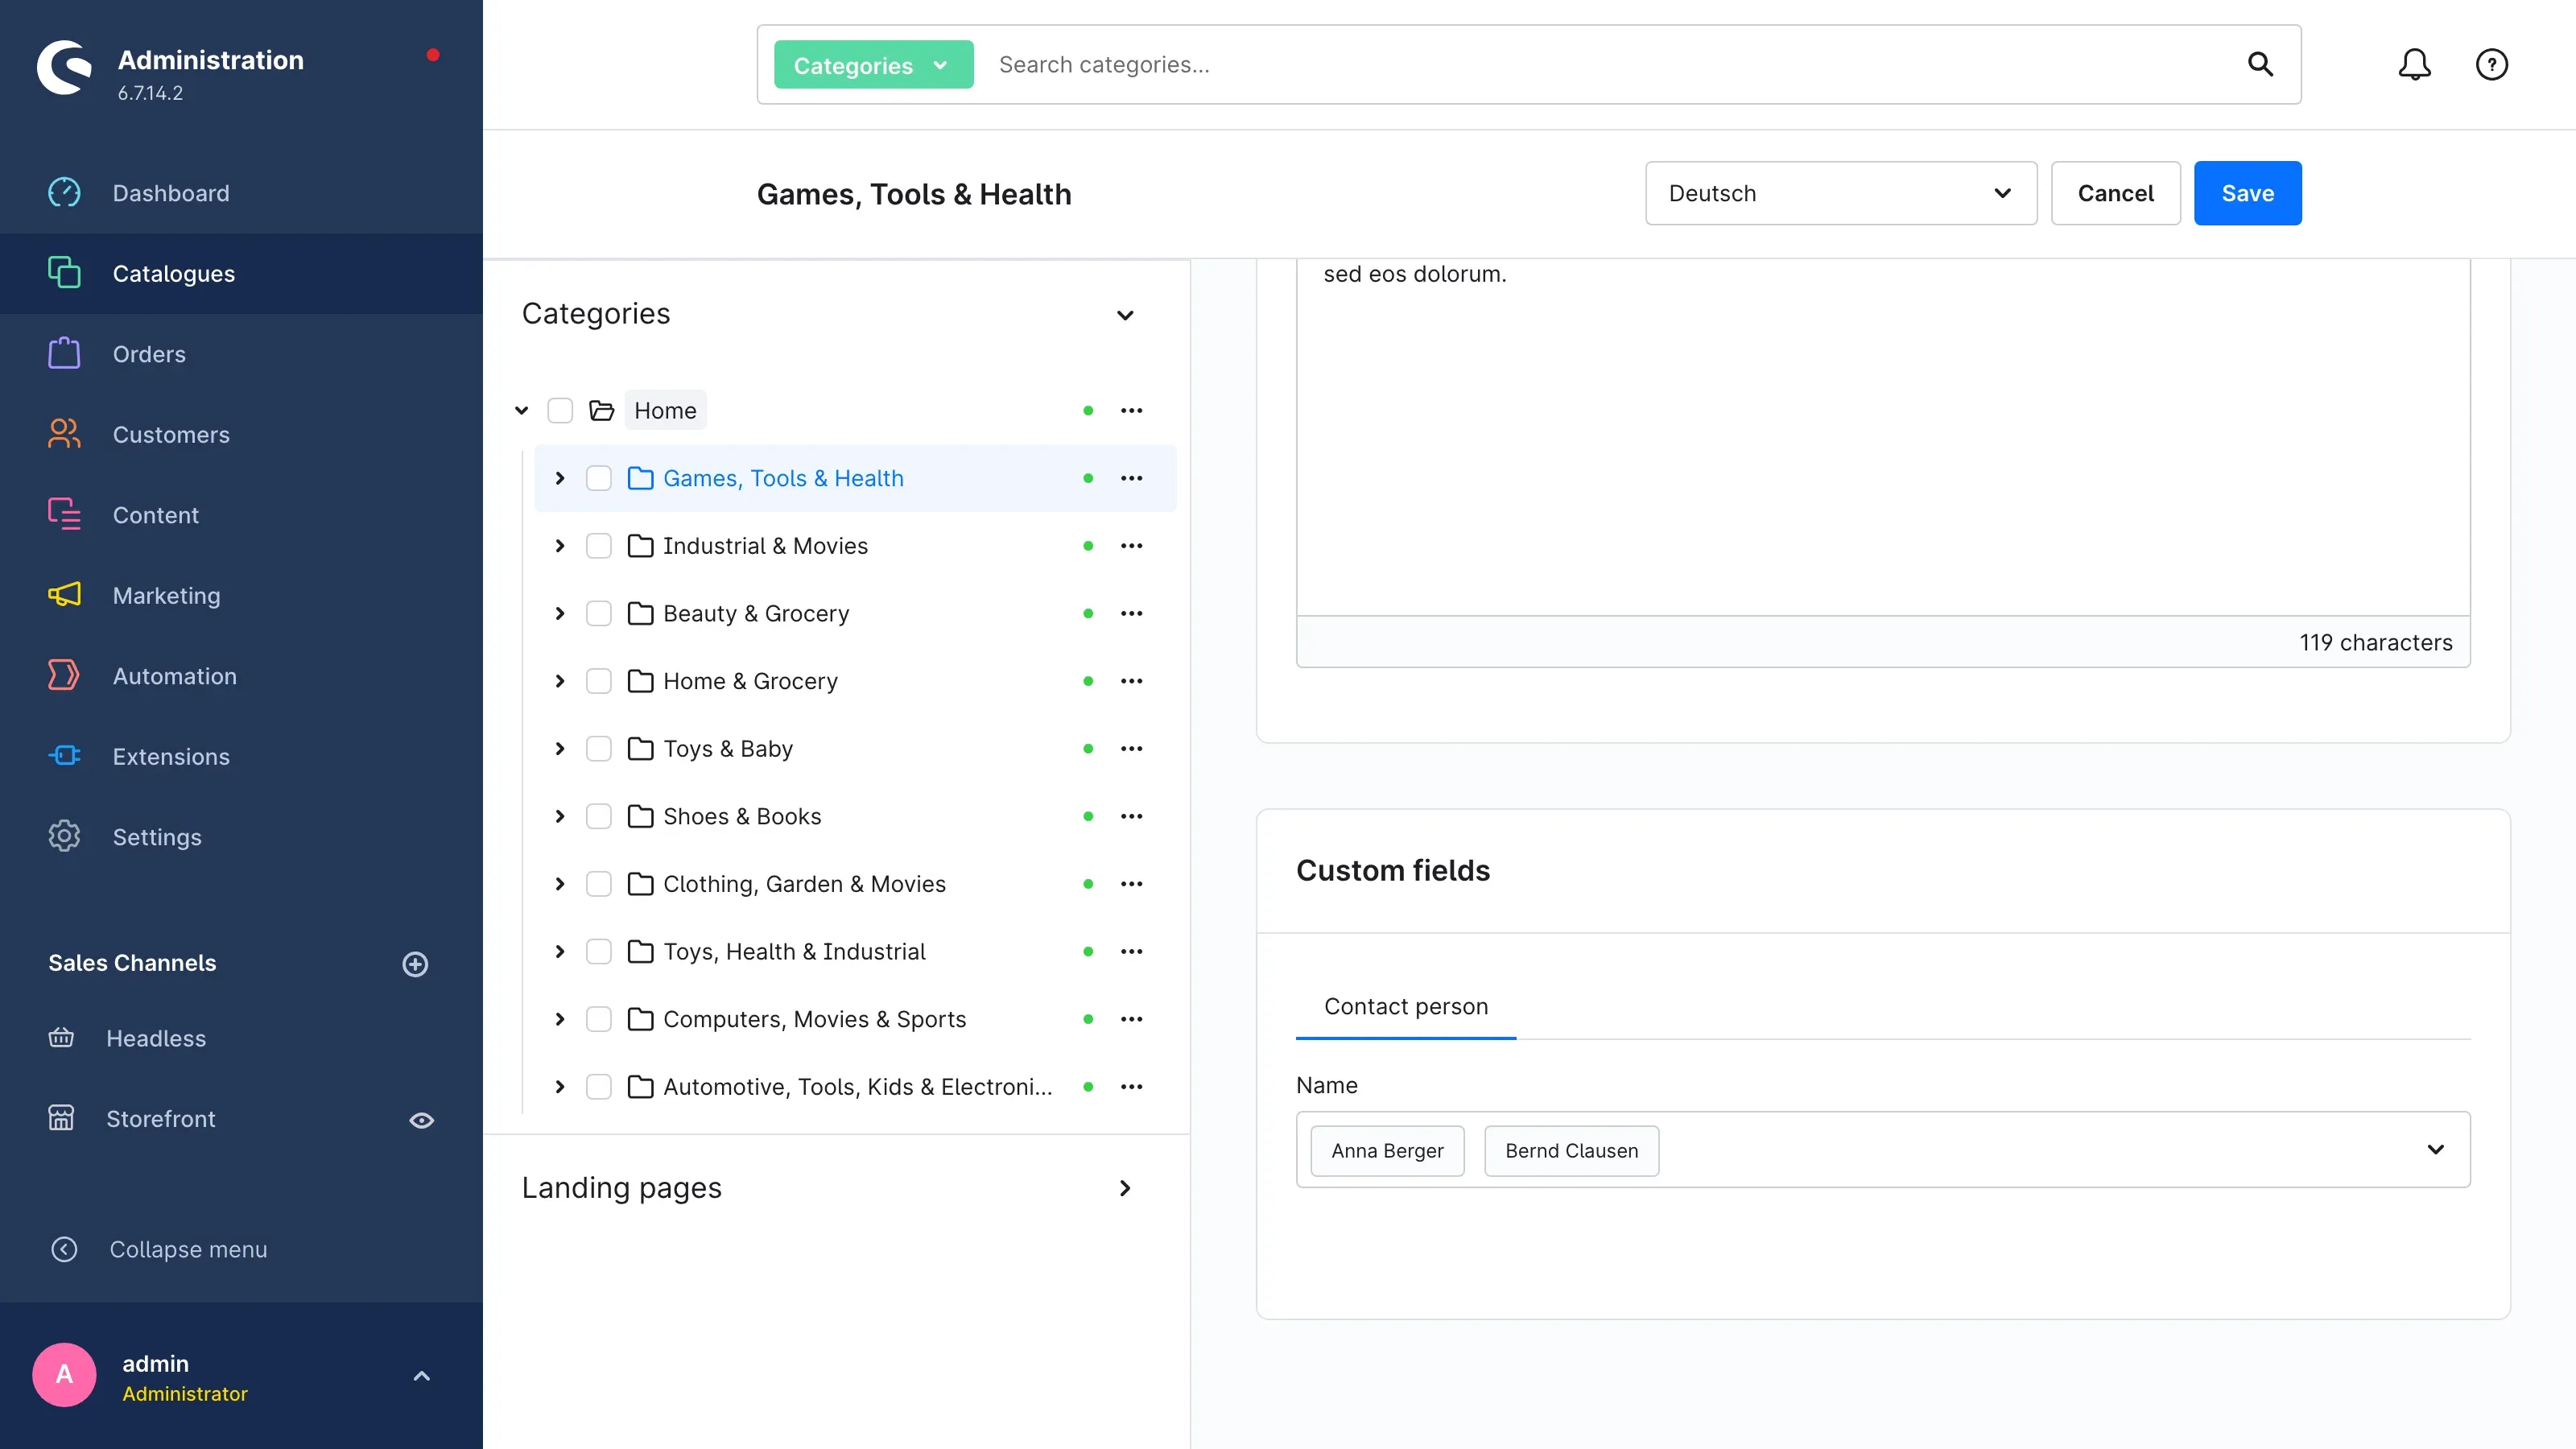
These persons appear on the category page. This lets you cover a whole product range with a single assignment.
On the customer
Open the customer under Customers and click Edit at the top right so that the fields can be changed.
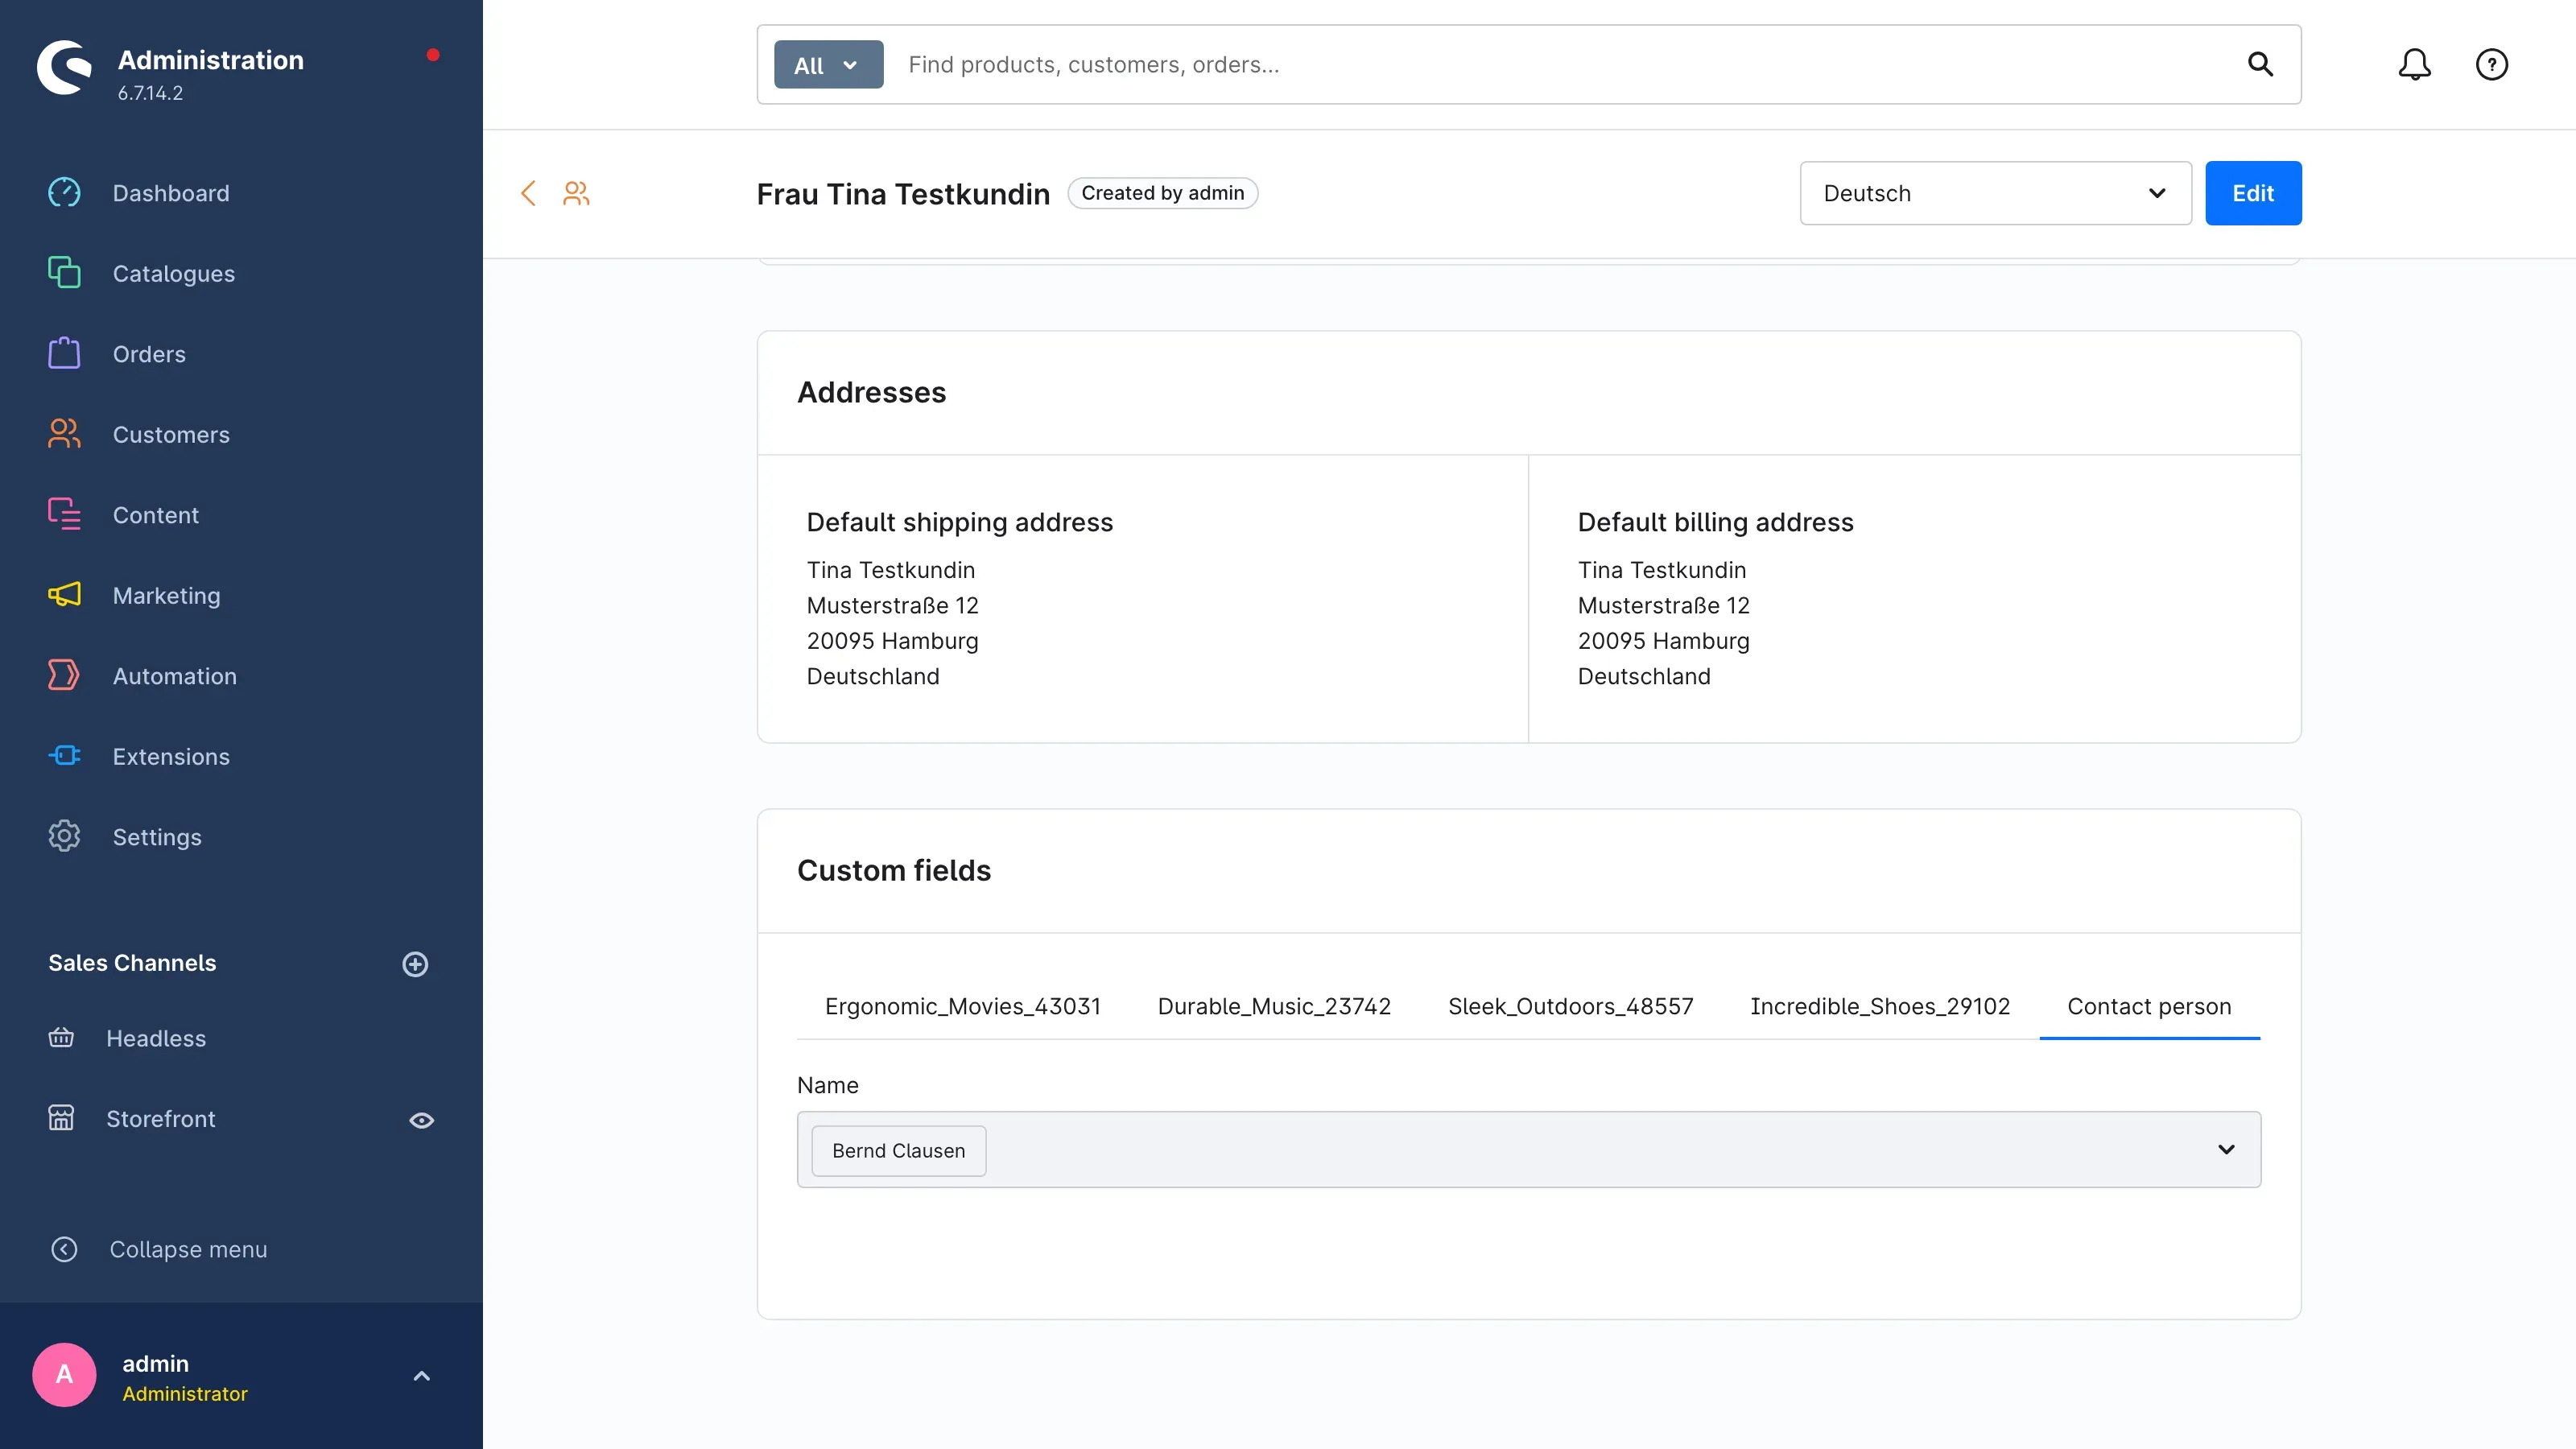 Fig. 19: A personal account manager stored directly on the customer.
Only this one customer sees these persons — in their customer account (chapter 10). This is the way to set up the personal account manager in B2B business.
On the customer group
Open the customer group under Settings → Customer groups.
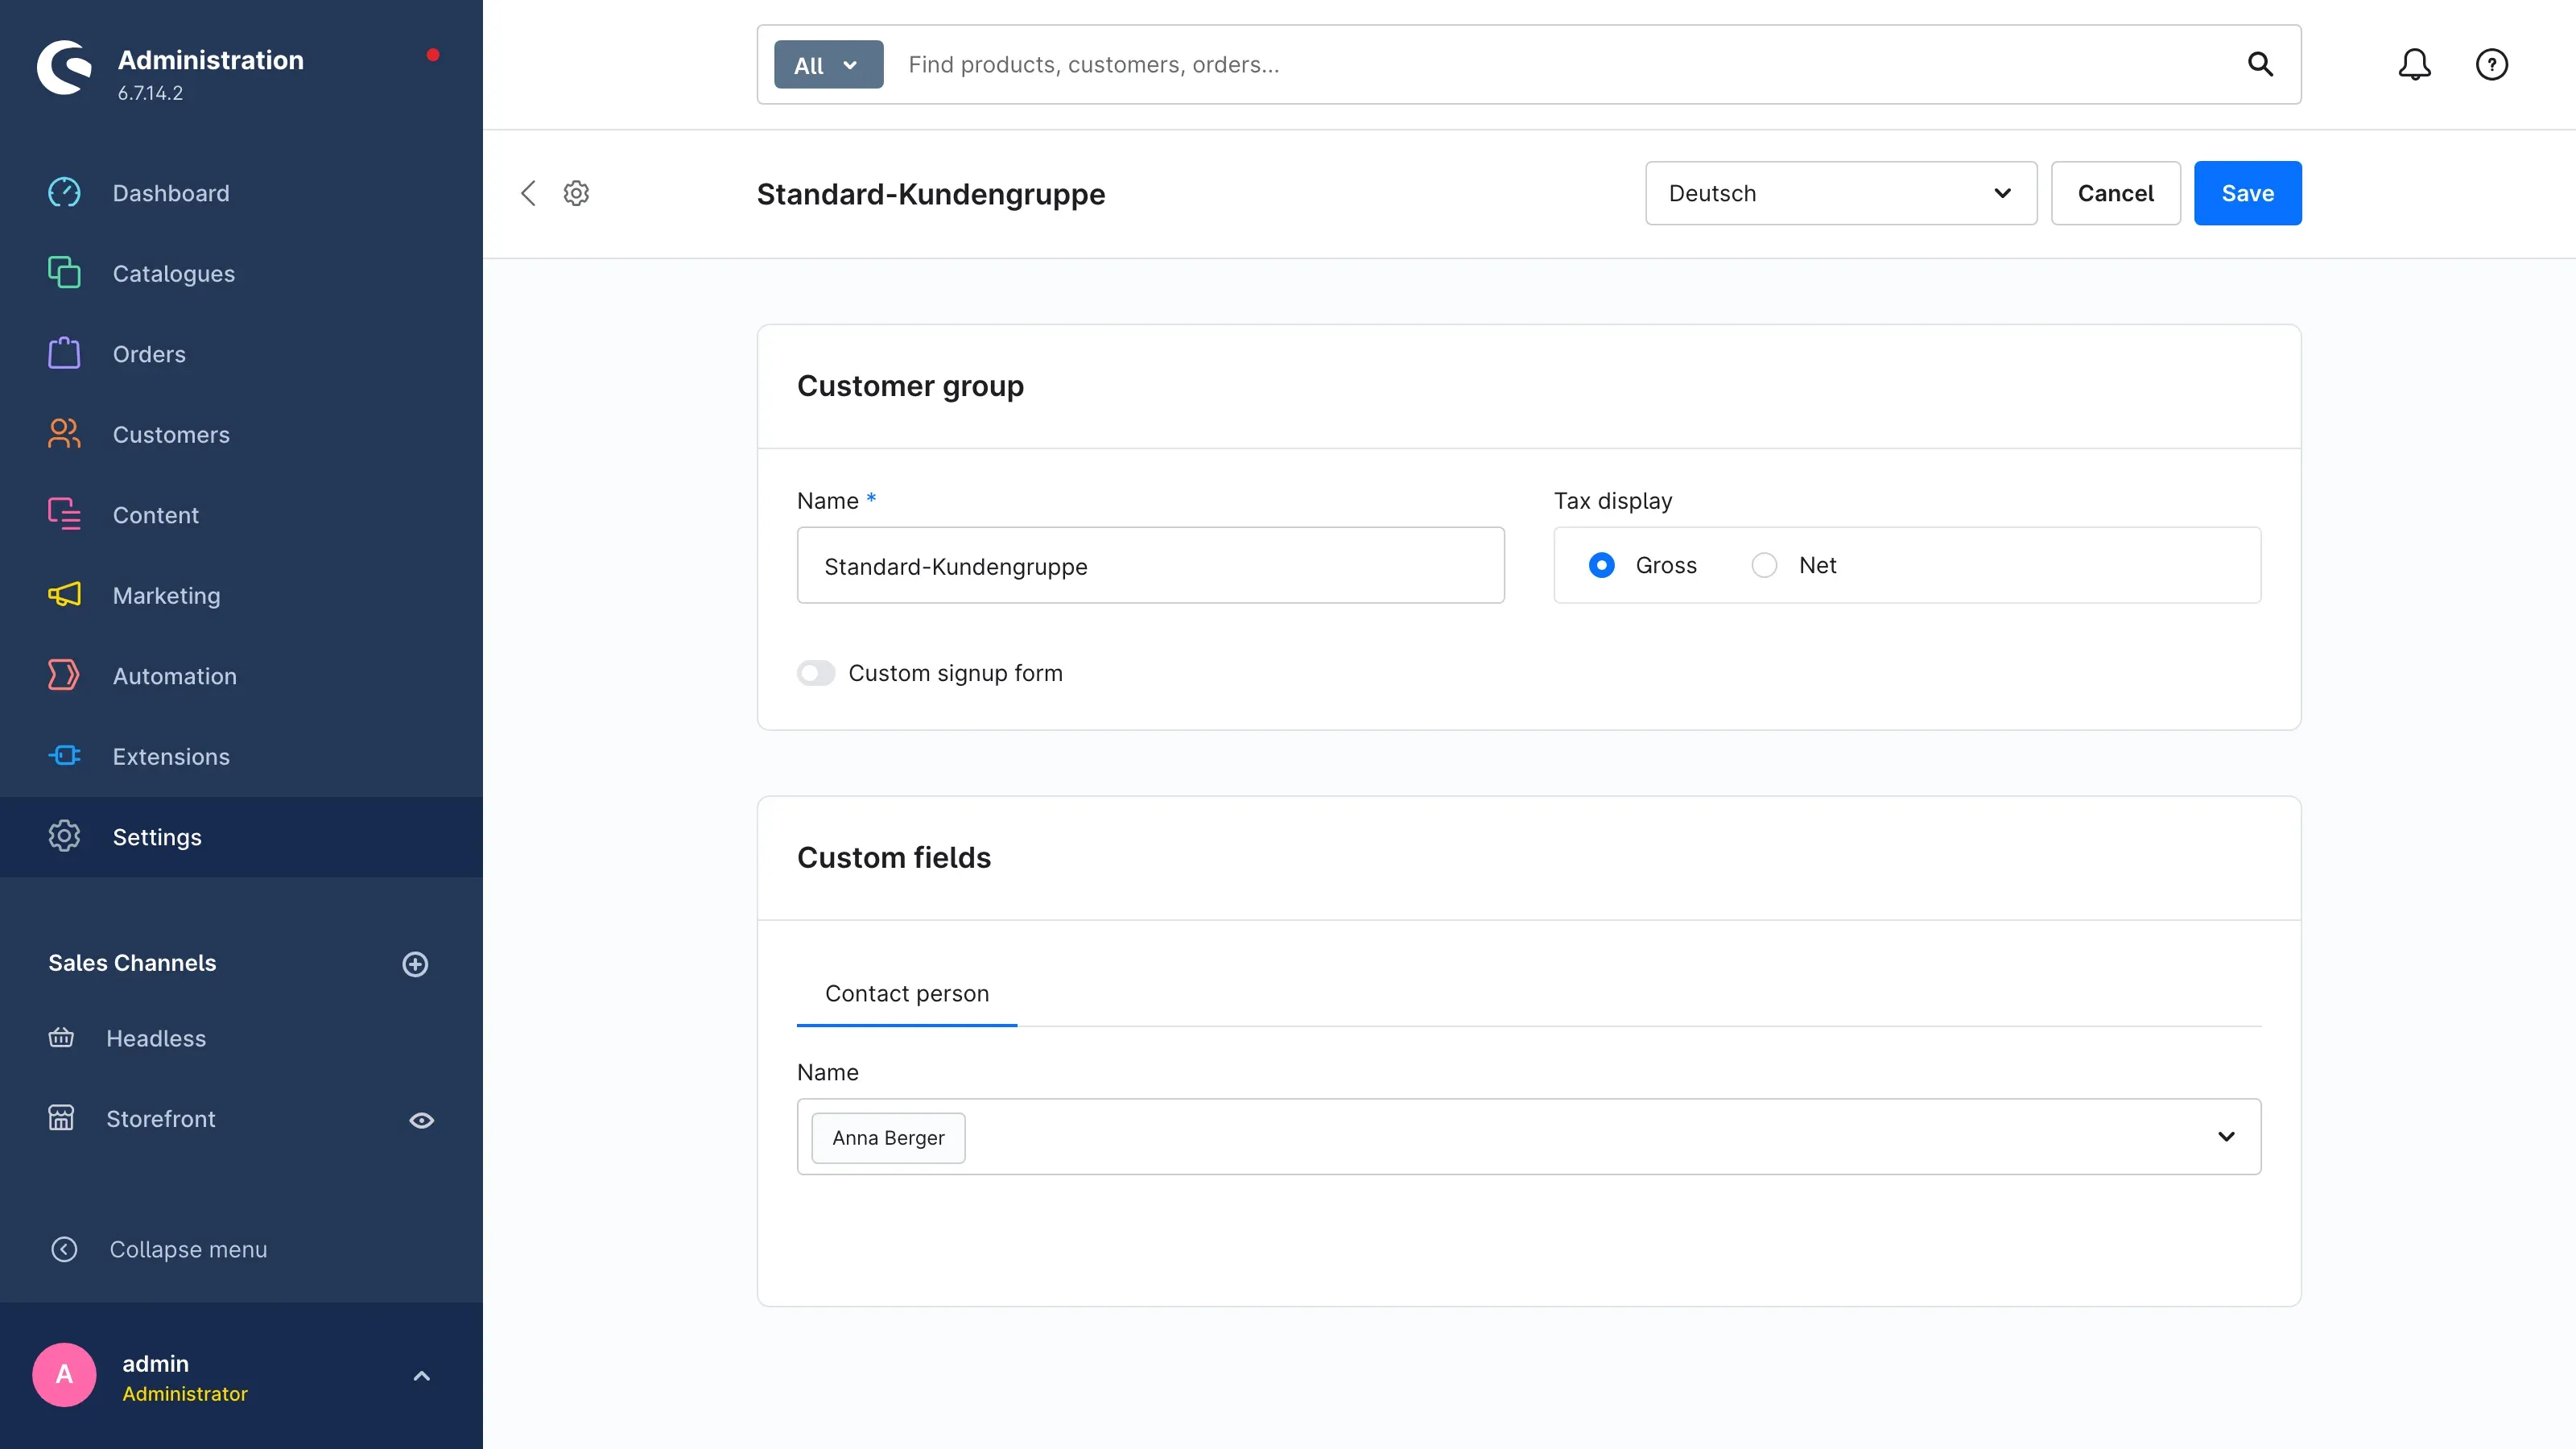 Fig. 20: Persons stored on a customer group apply to all customers of that group.
All customers of the customer group see these persons in their customer account. This lets you give all resellers the same support team, for example, without maintaining each customer individually.
Tip: Combine both: the general team on the customer group, plus the personal account manager on the individual customer. Both then appear in the customer account.
In which order do the persons appear? The person’s Sort order decides first (section 5.6). For persons with the same sort order, the order of your selection applies.
Showing contact persons in Shopping Experiences
What this gives you: Your customers see the responsible persons exactly where they are browsing. You decide where in the layout that happens.
On product and category pages, persons are shown via the Contact person block in Shopping Experiences. Only once the block is part of the layout do your customers see the assignments.
Adding the block to your layout
-
Open Content → Shopping Experiences and the layout in which the contact persons should appear — for assignments, a layout for product pages or category pages.
-
Open the block selection on the right and set Block category to Commerce.
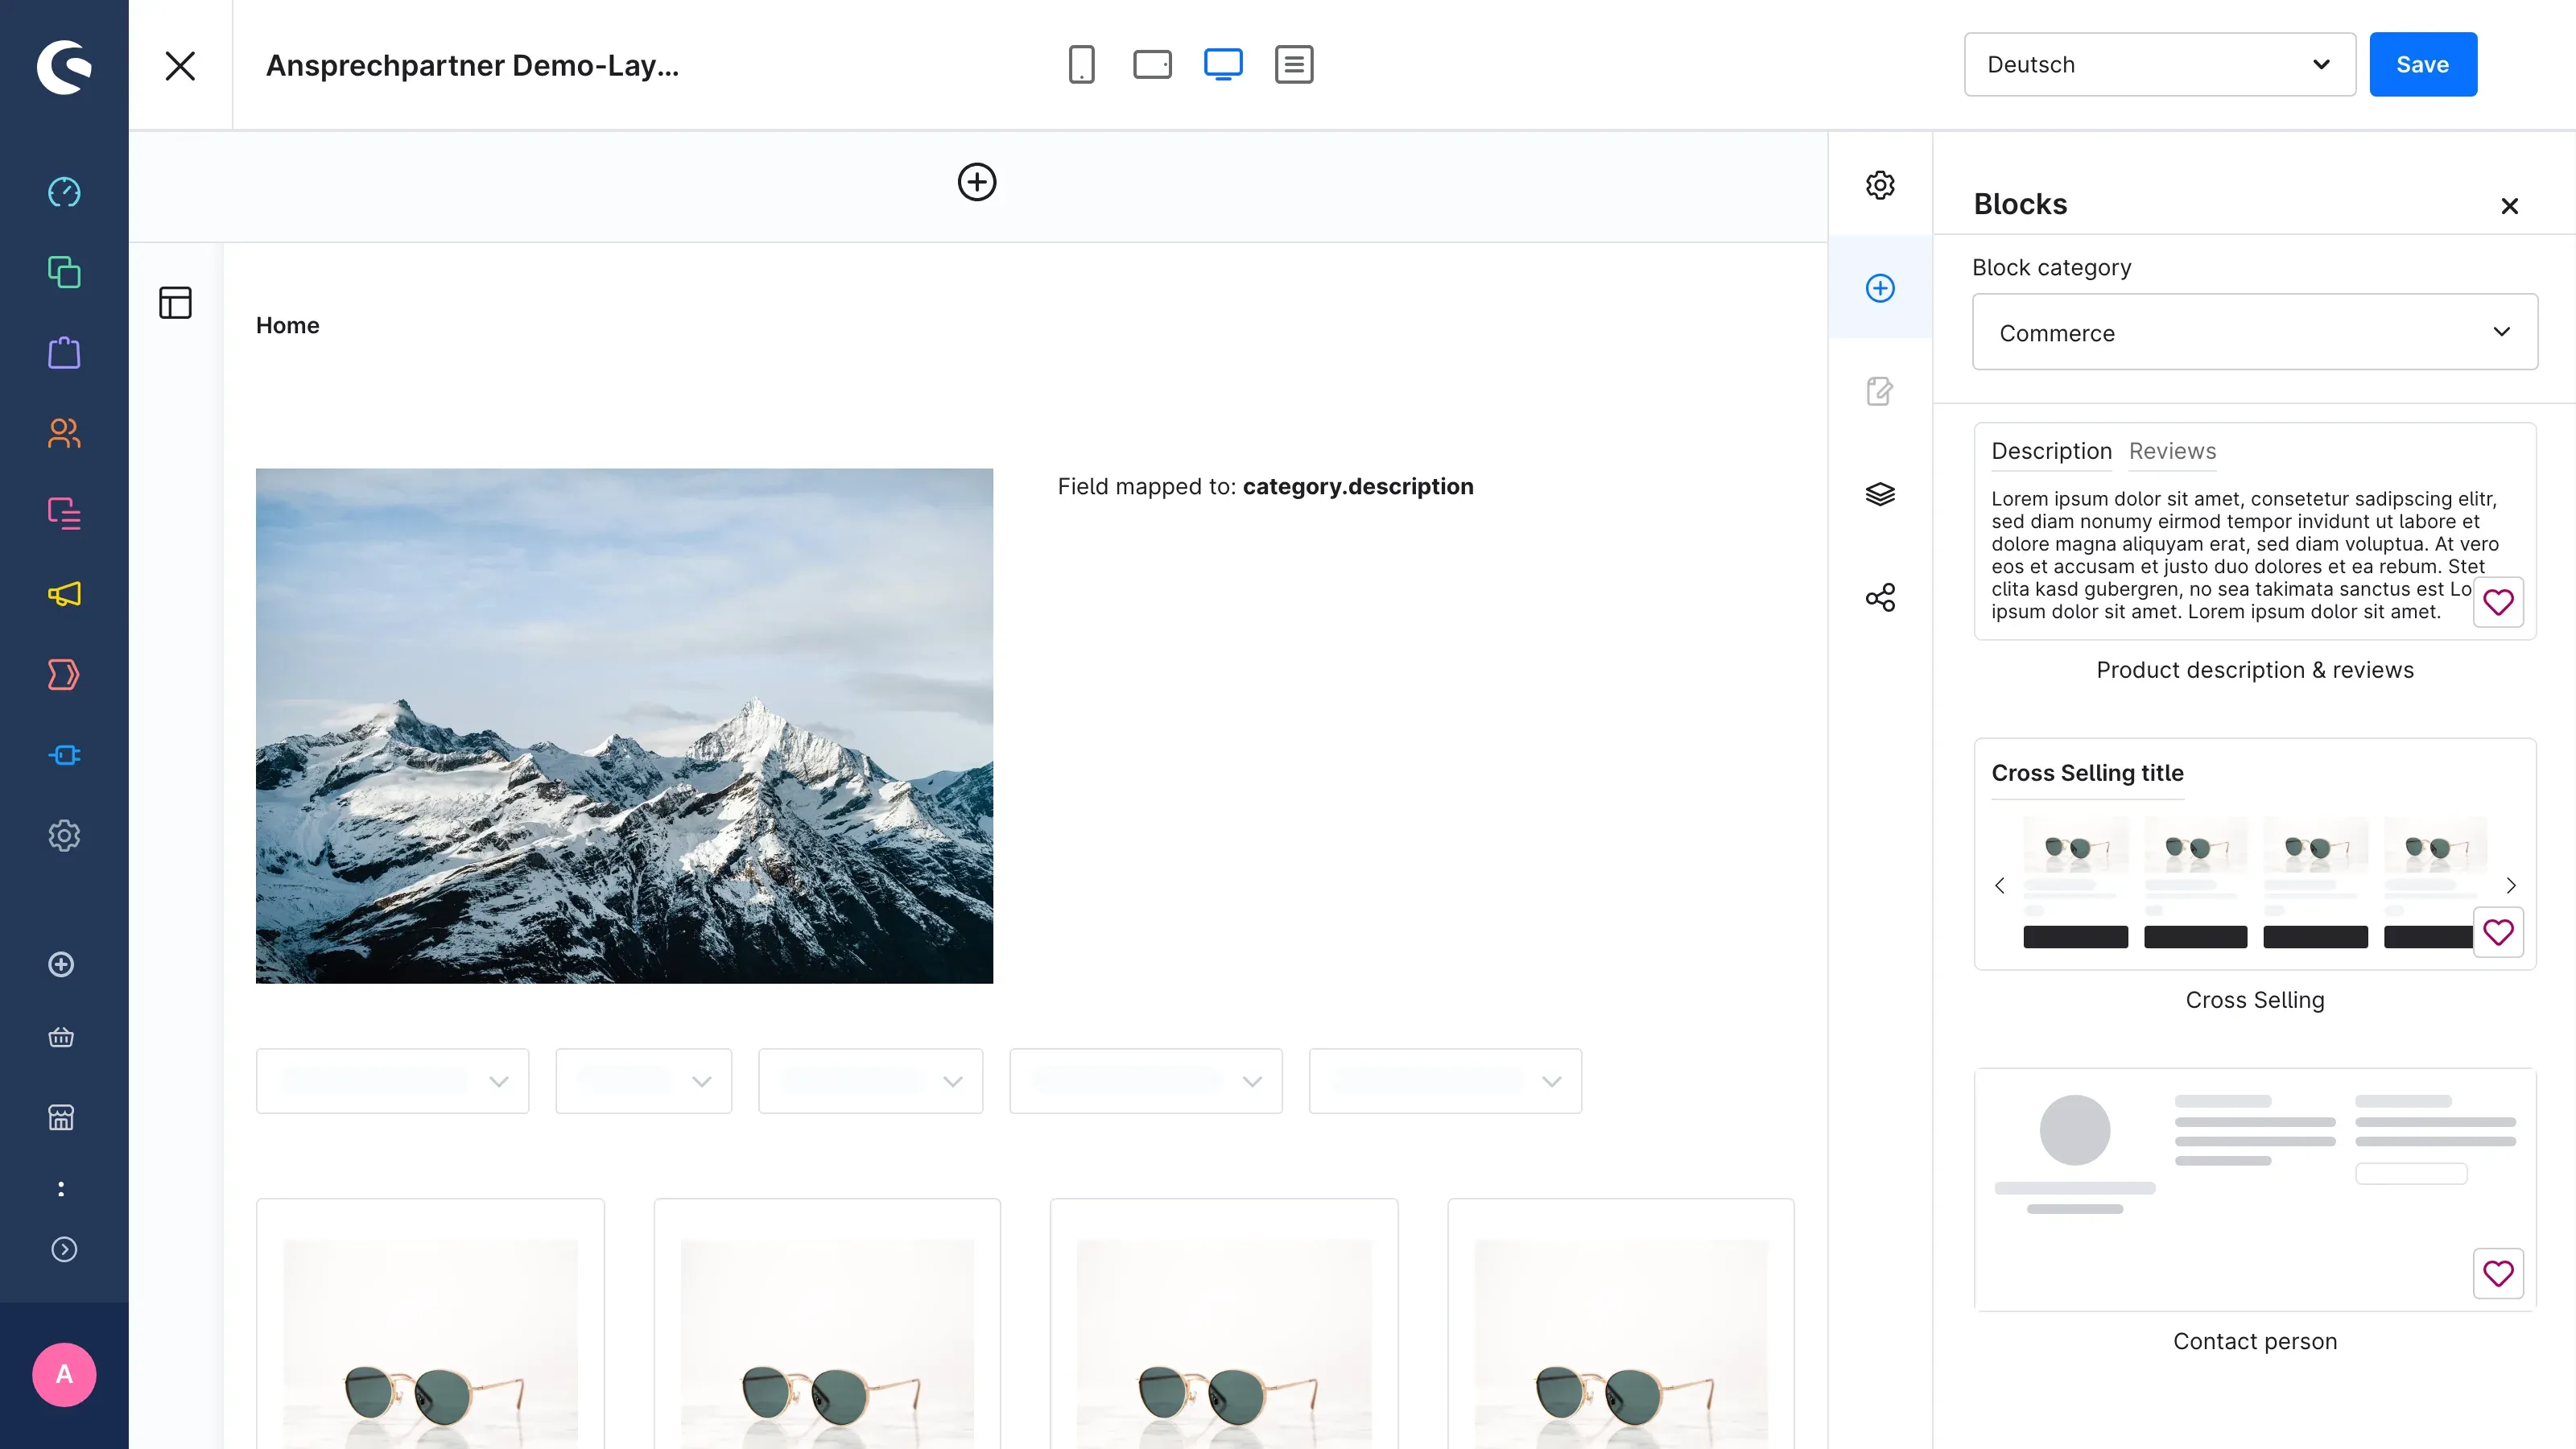 Fig. 21: The Contact person block in the Commerce block category.
 -
Drag the Contact person block to the desired position in the layout.
-
Save the layout and make sure it is assigned to your products or categories.
Setting source and headline
The block contains the Contact persons element. In its Element settings you decide which persons appear.
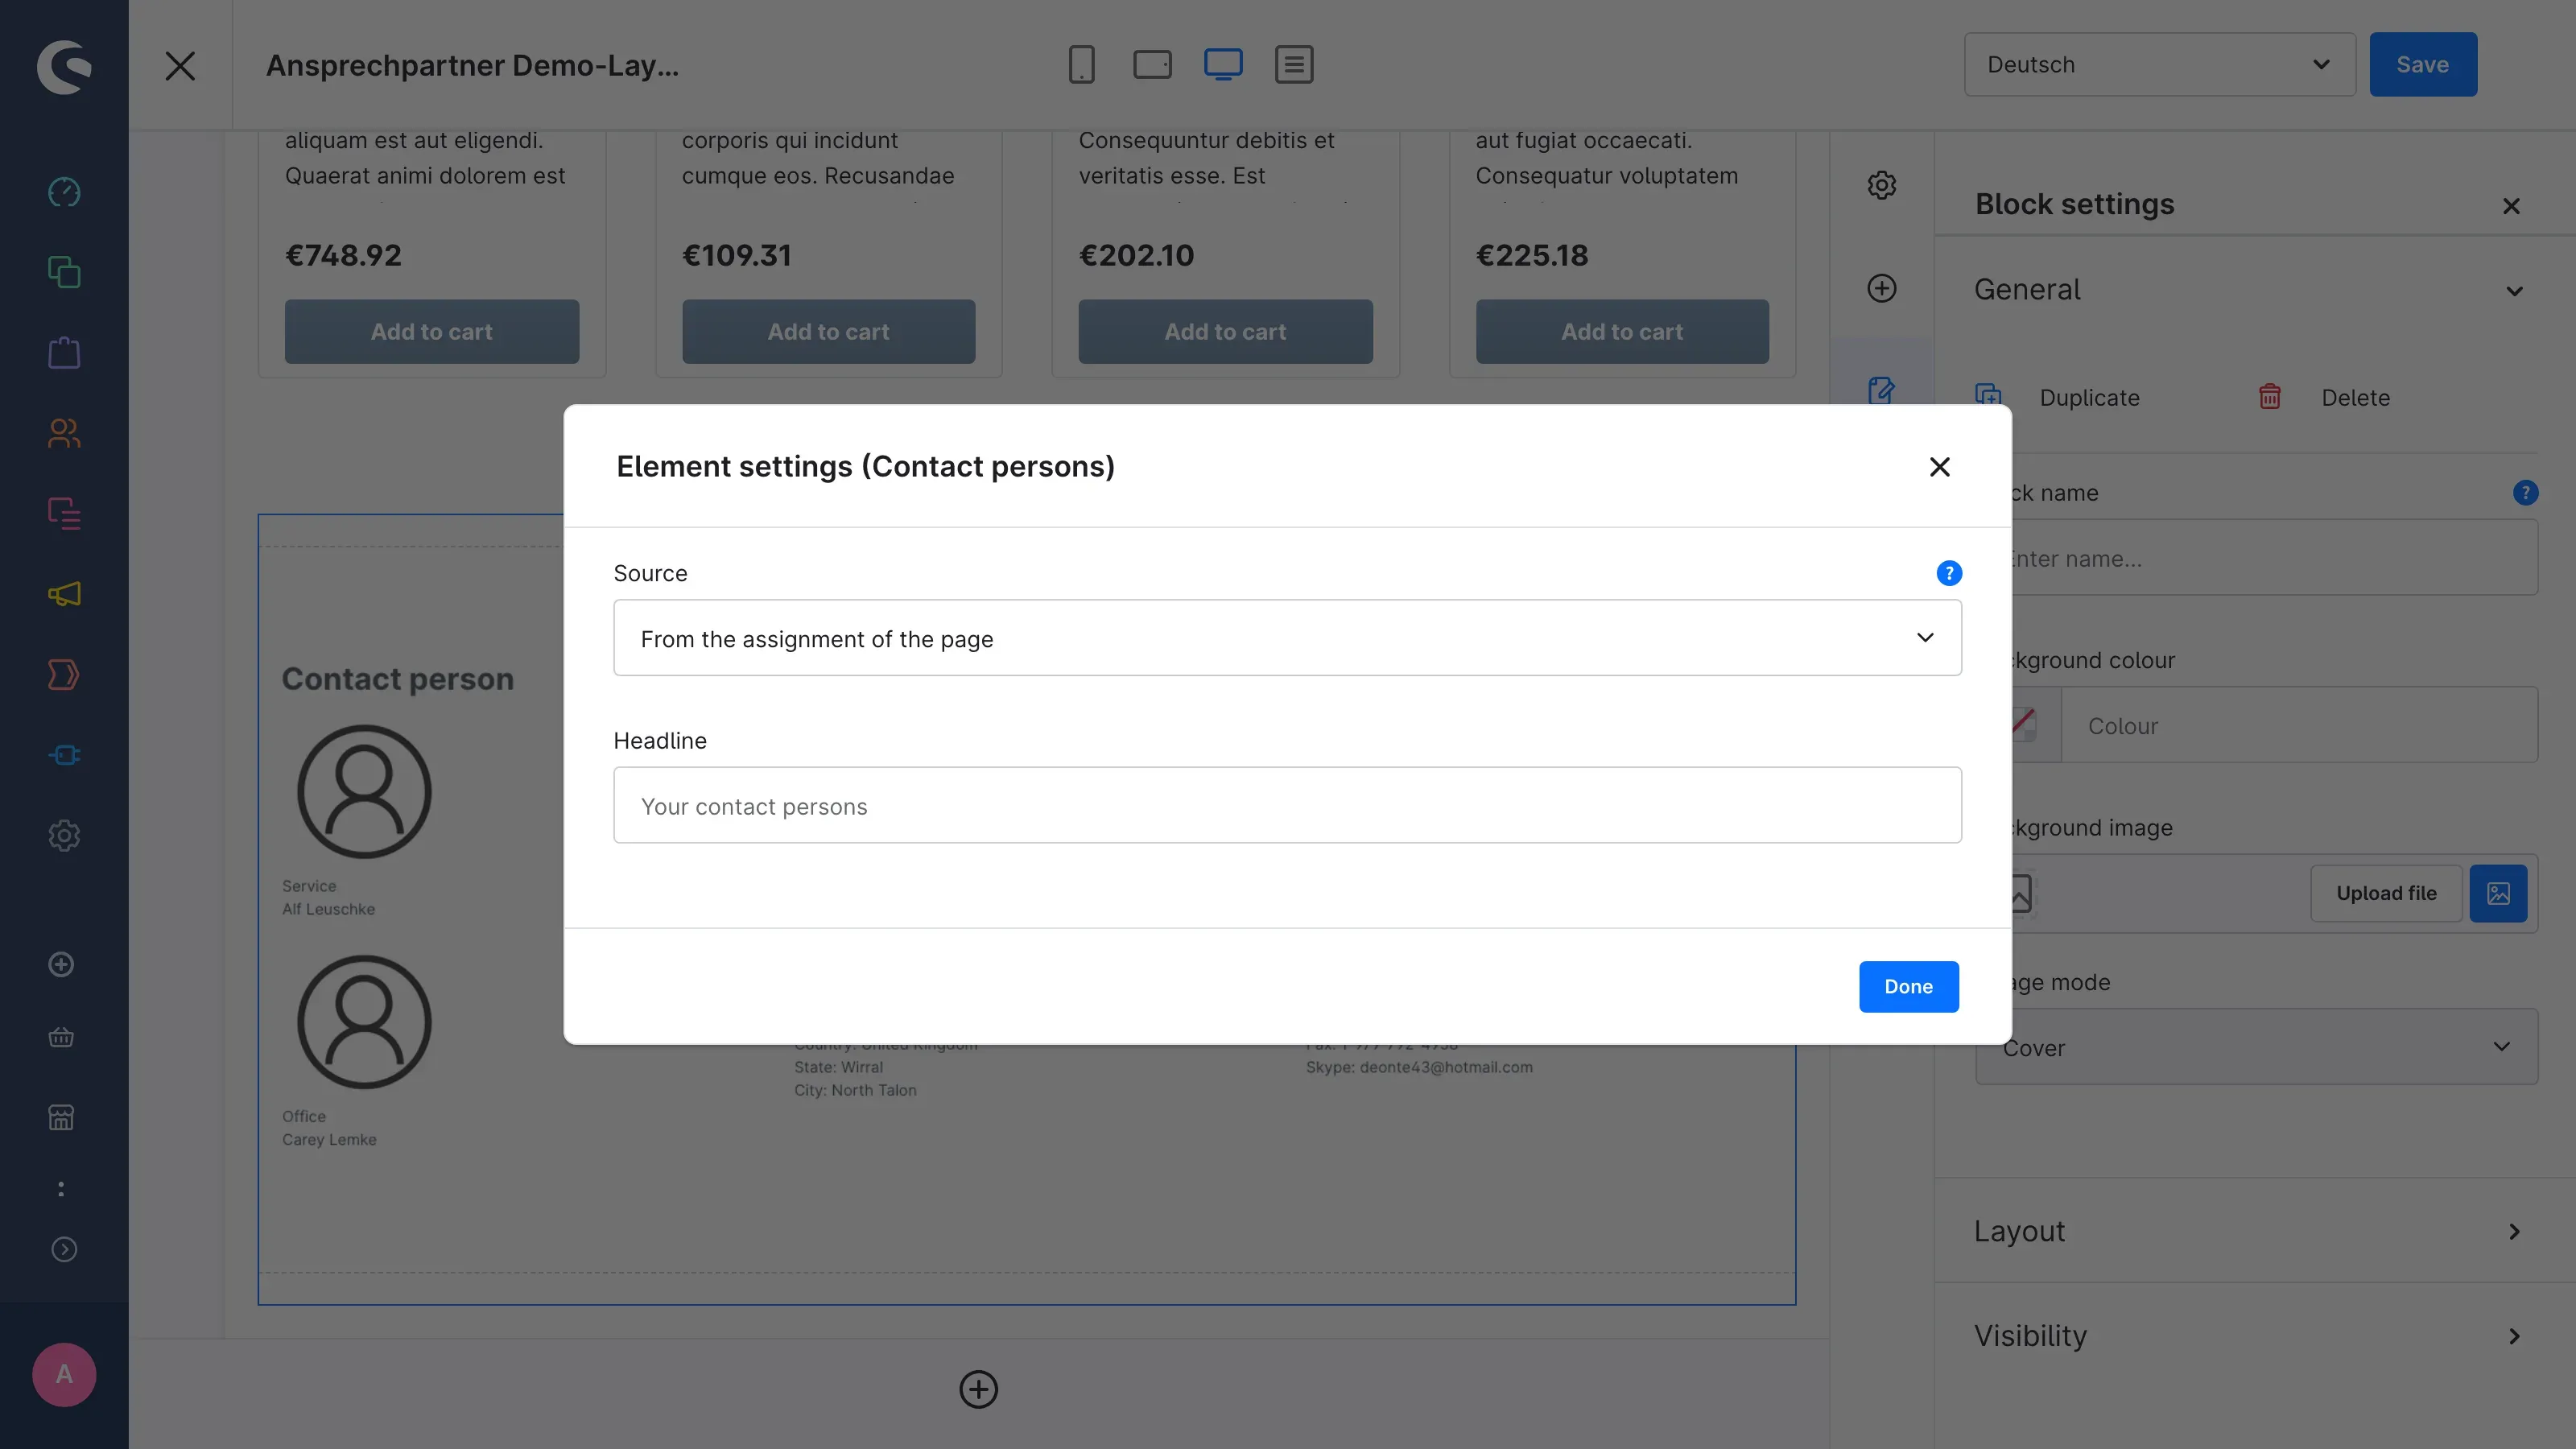 Fig. 22: The Element settings (Contact persons) with Source and Headline.
- Source
- From the assignment of the page shows the persons assigned to the product or category of the page being viewed (chapter 7). This is the default.
- Fixed selection always shows the same persons, which you select below in the Contact persons field. This suits pages without a product or category, such as a contact or landing page.
- Headline — the heading above the persons, for example “Your contact persons”. If the field stays empty, “Contact person” is shown.
Click Done to close the settings. Then save the layout.
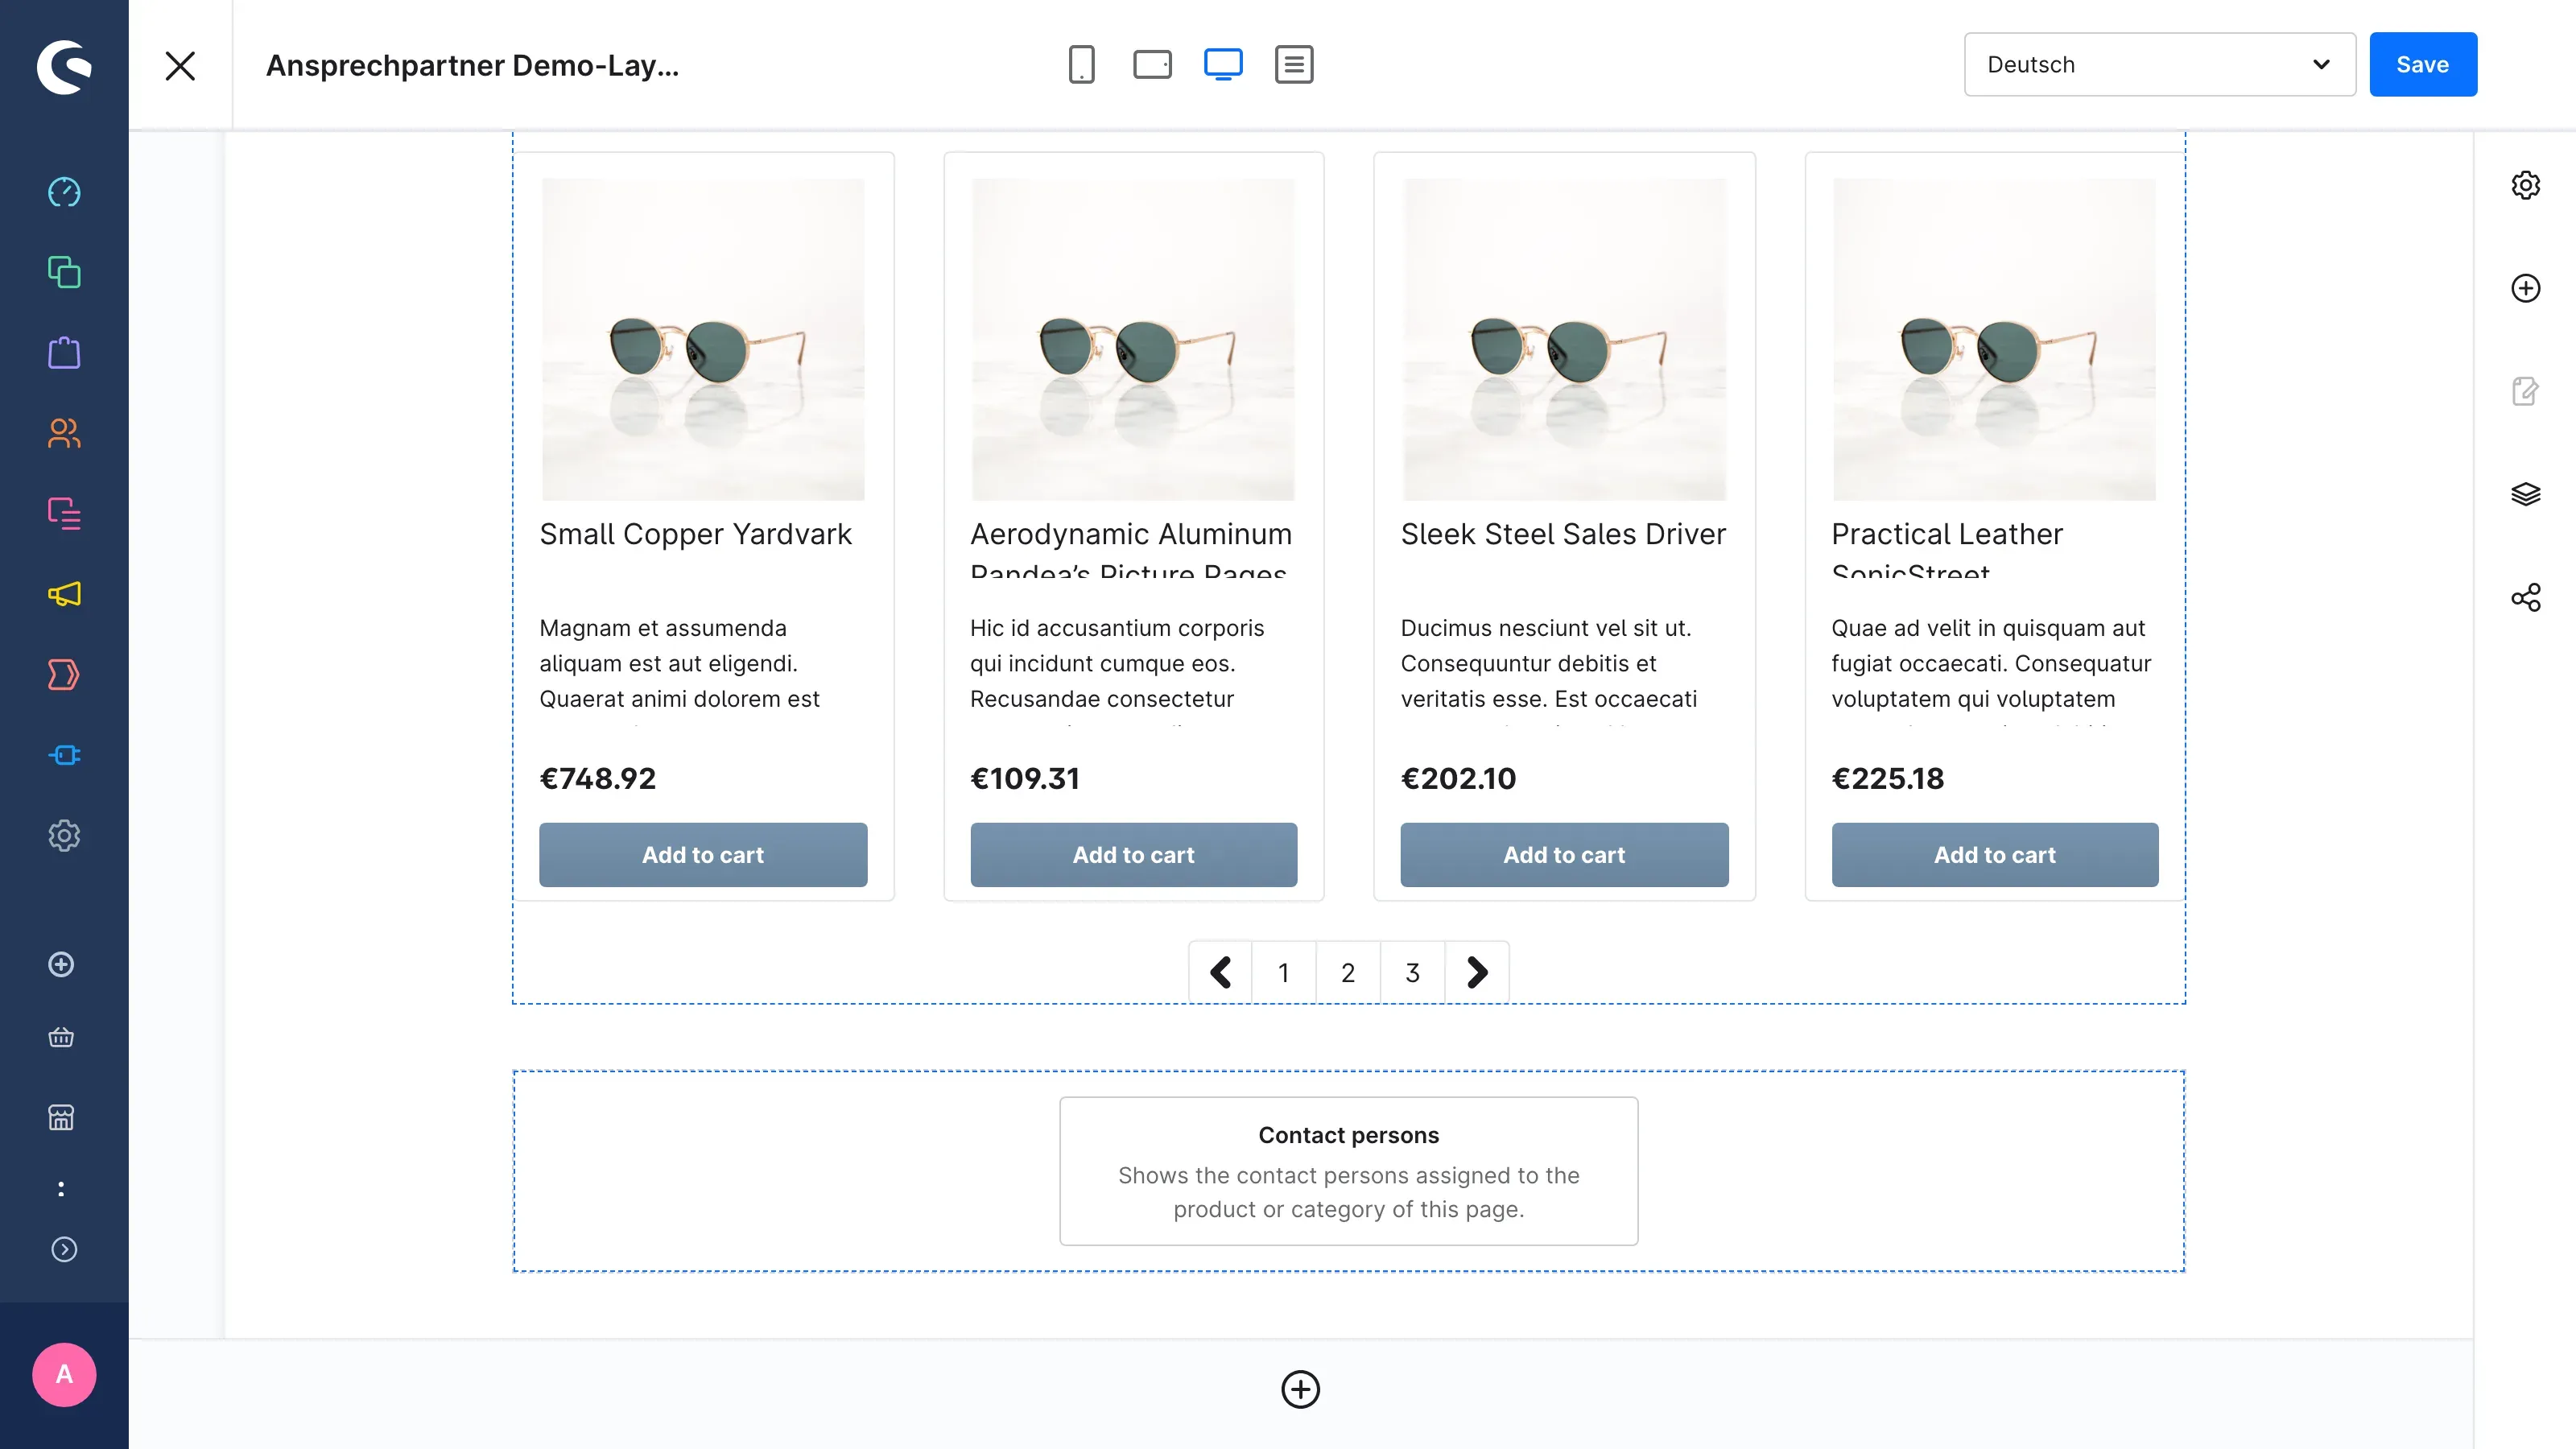 Fig. 23: The inserted block in the editor.
Important: In the block, the editor shows a note on which persons will appear — not your real contact persons. Which persons appear is only decided when your customers open a specific page.
You can also place the Contact persons element in other blocks of your layout.
What your customers see
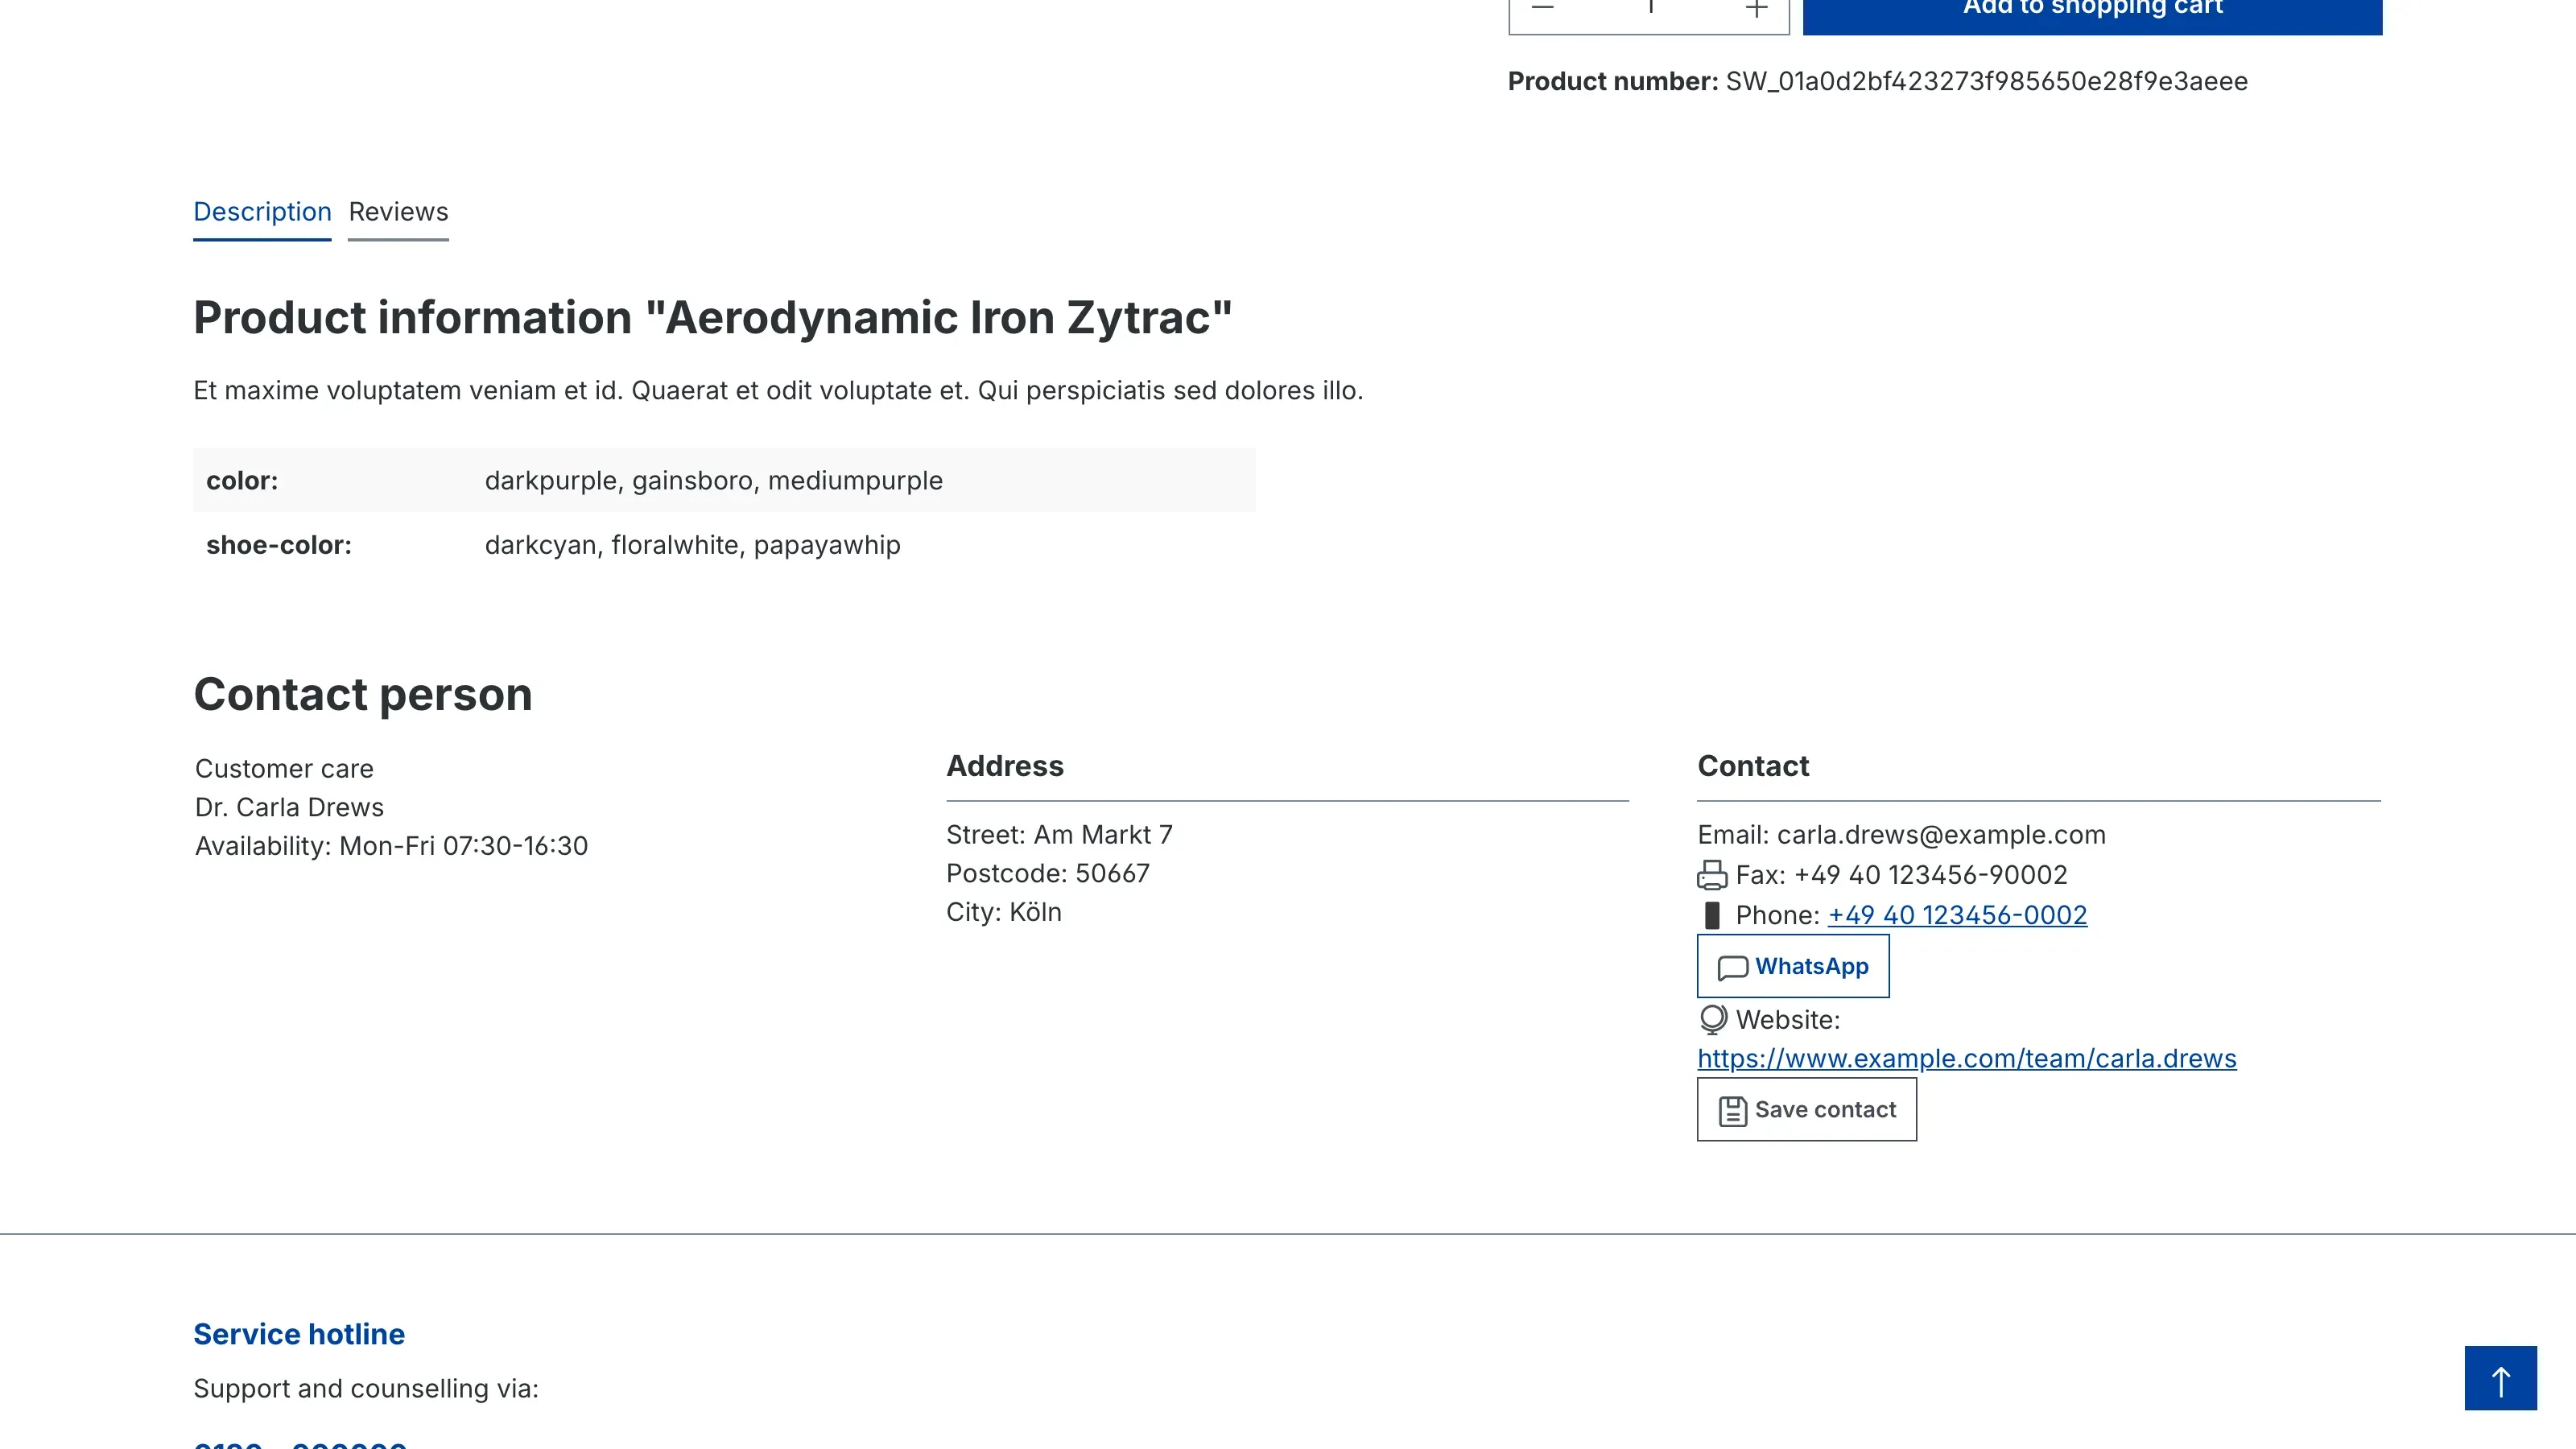 Fig. 24: On the product page, the assigned person appears below the heading Contact person.
Each person appears in three sections: on the left group, job title, name and availability (plus picture and languages where maintained), in the middle the Address, on the right the Contact with the email address, the contact ways and the Save contact button.
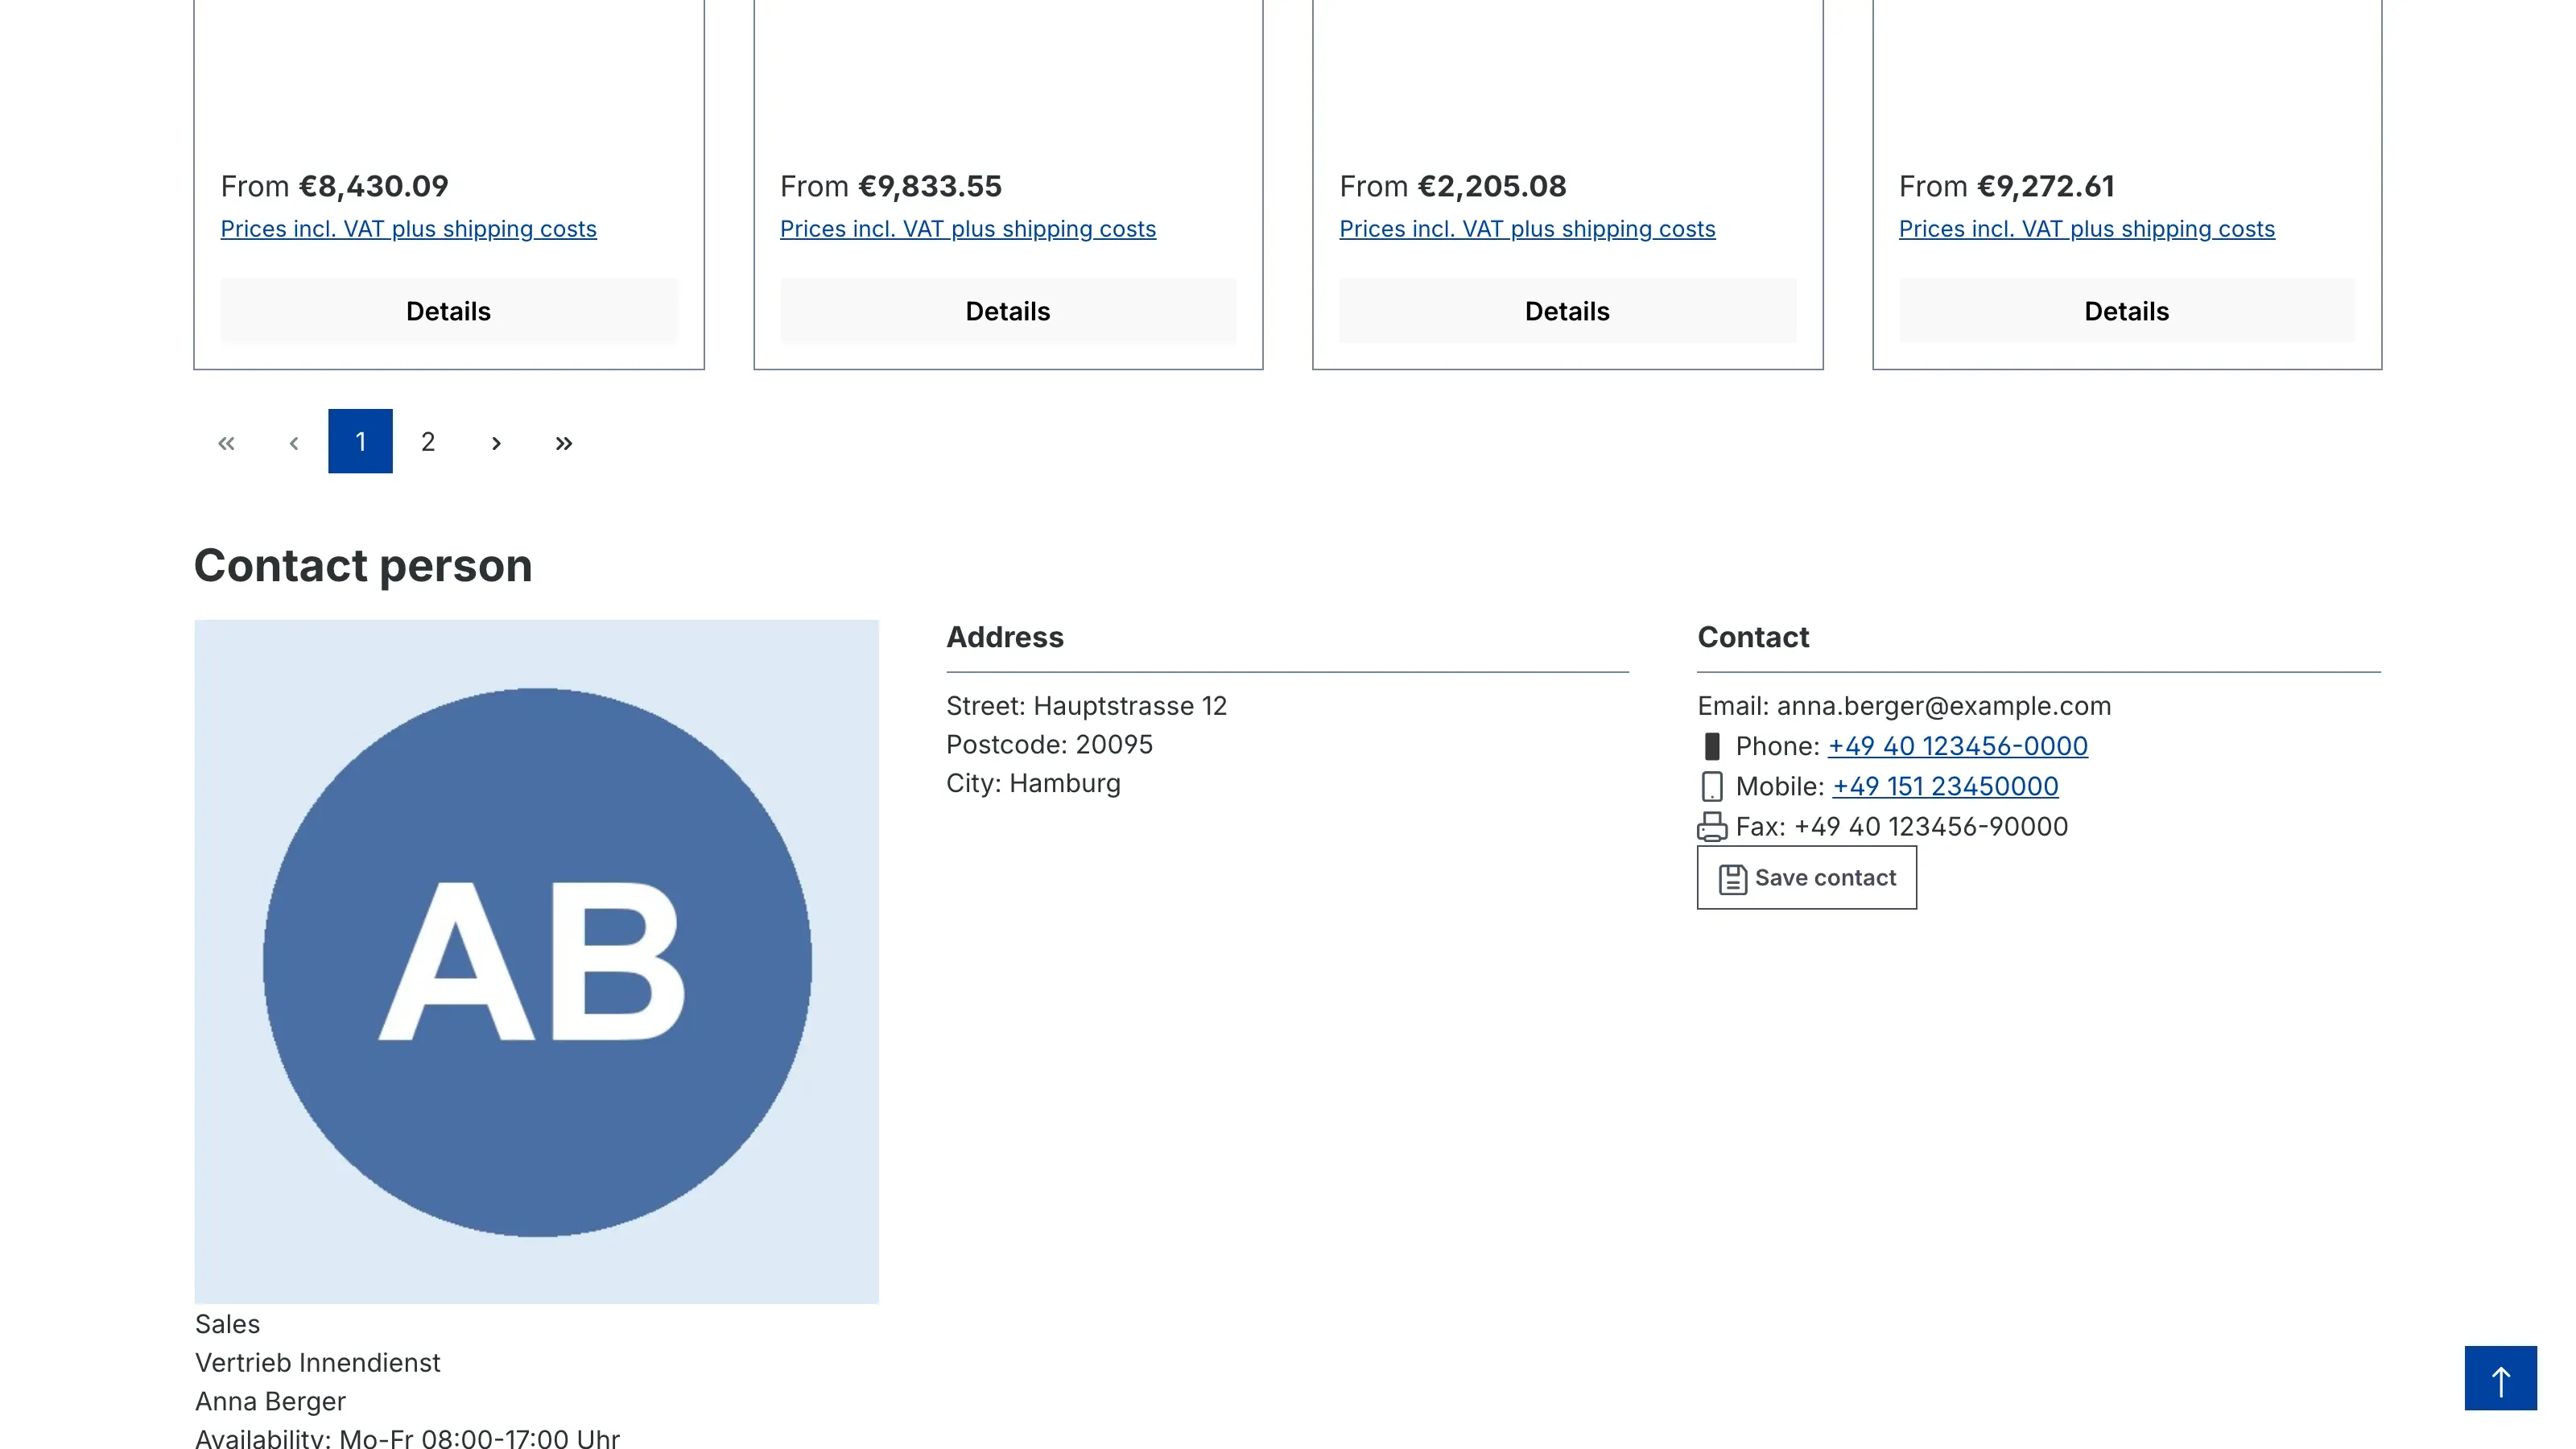 Fig. 25: On the category page, the person stored on the category appears, here with a picture.
Which lines appear is up to your settings (chapter 4). Details that are empty for a person are left out — no empty lines appear. If nobody is assigned to the page being viewed, the block does not appear at all.
Saving a contact as a vCard
What this gives you: Your customers add their contact person to the address book of their phone or computer in one click.
Each person’s contact section contains the Save contact button (fig. 24 and 25). A click downloads a vCard file that address books open directly.
- The vCard only contains details that are visible in the sales channel. Whatever you hide in the settings is not in the file either.
- The picture is only included if Embed photo in the vCard is switched on and the picture is no larger than 200 KB.
- The button only appears if Offer “Save contact” button, Show image block and Show name are switched on. Address books would discard a vCard without a name.
The related settings are described in section 4.3.
Contact persons in the customer account
What this gives you: Your logged-in customers always have their personal contact at hand — for regular B2B customers often the most important place in the whole shop.
You do not need to set up this page. It is available as soon as the plugin is active in the sales channel.
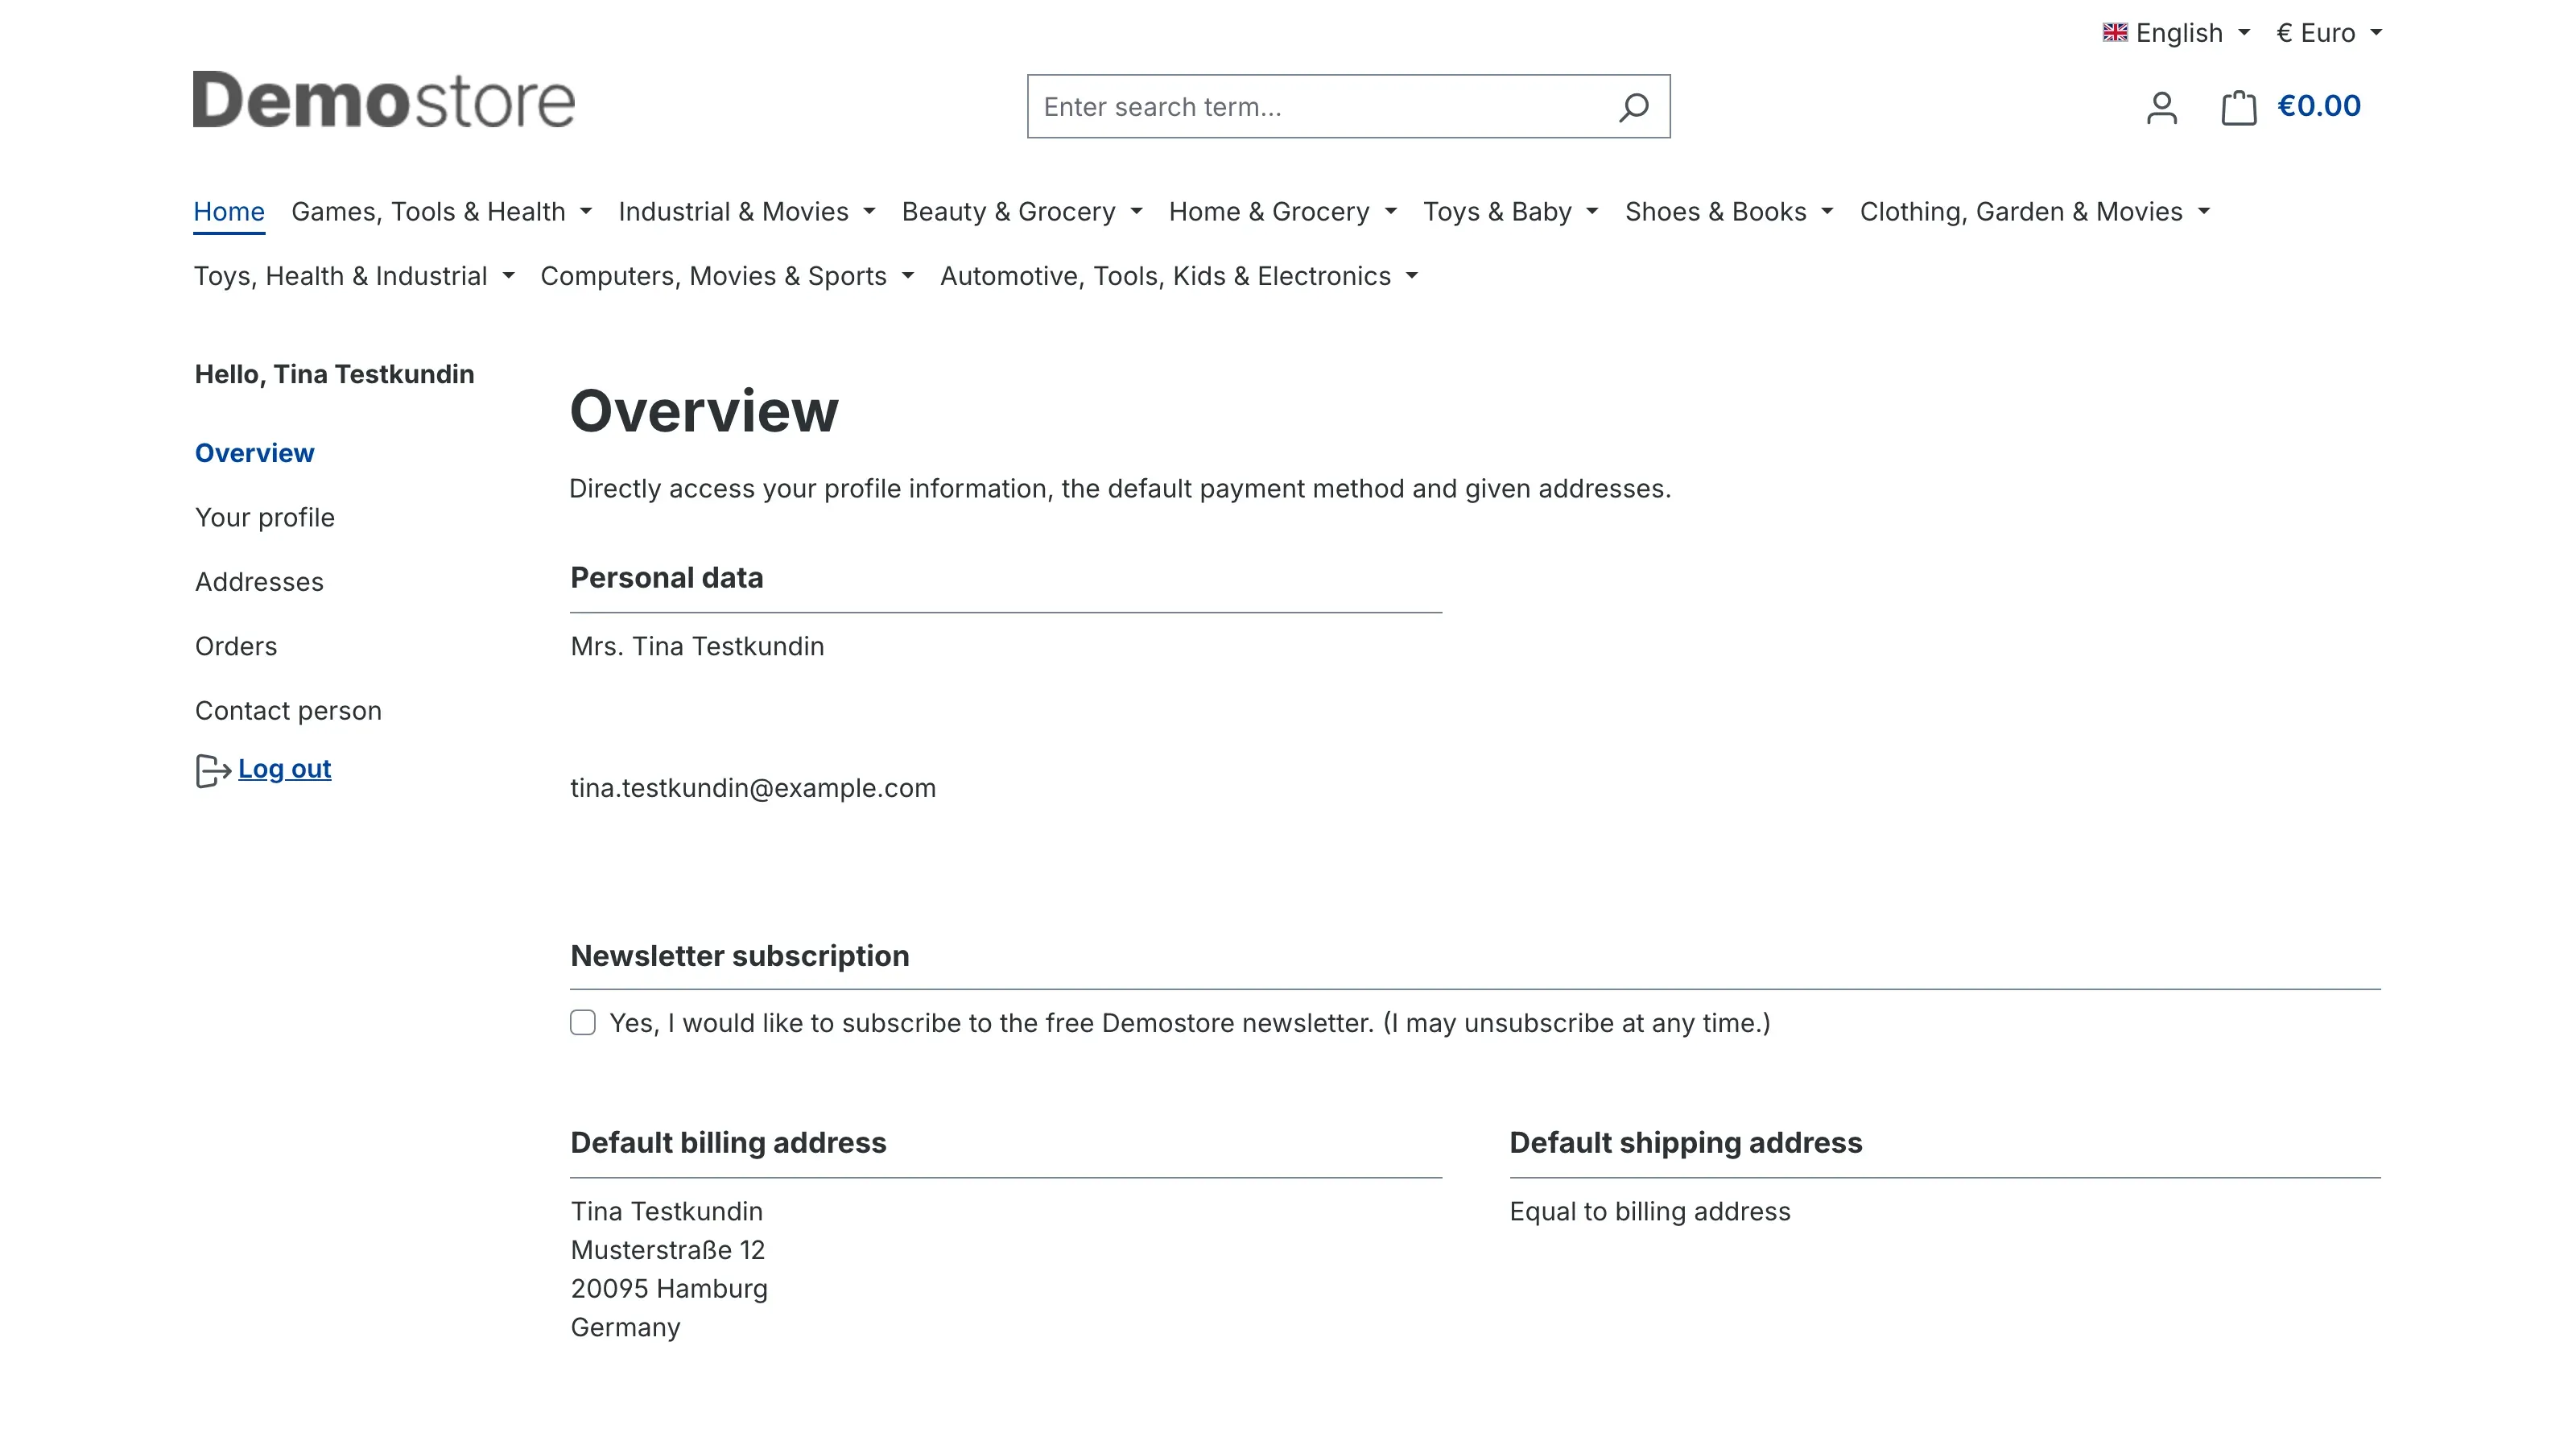 Fig. 26: In the customer account, the Contact person entry sits between Orders and Log out.
When a customer logs in, they find the Contact person entry in their customer account.
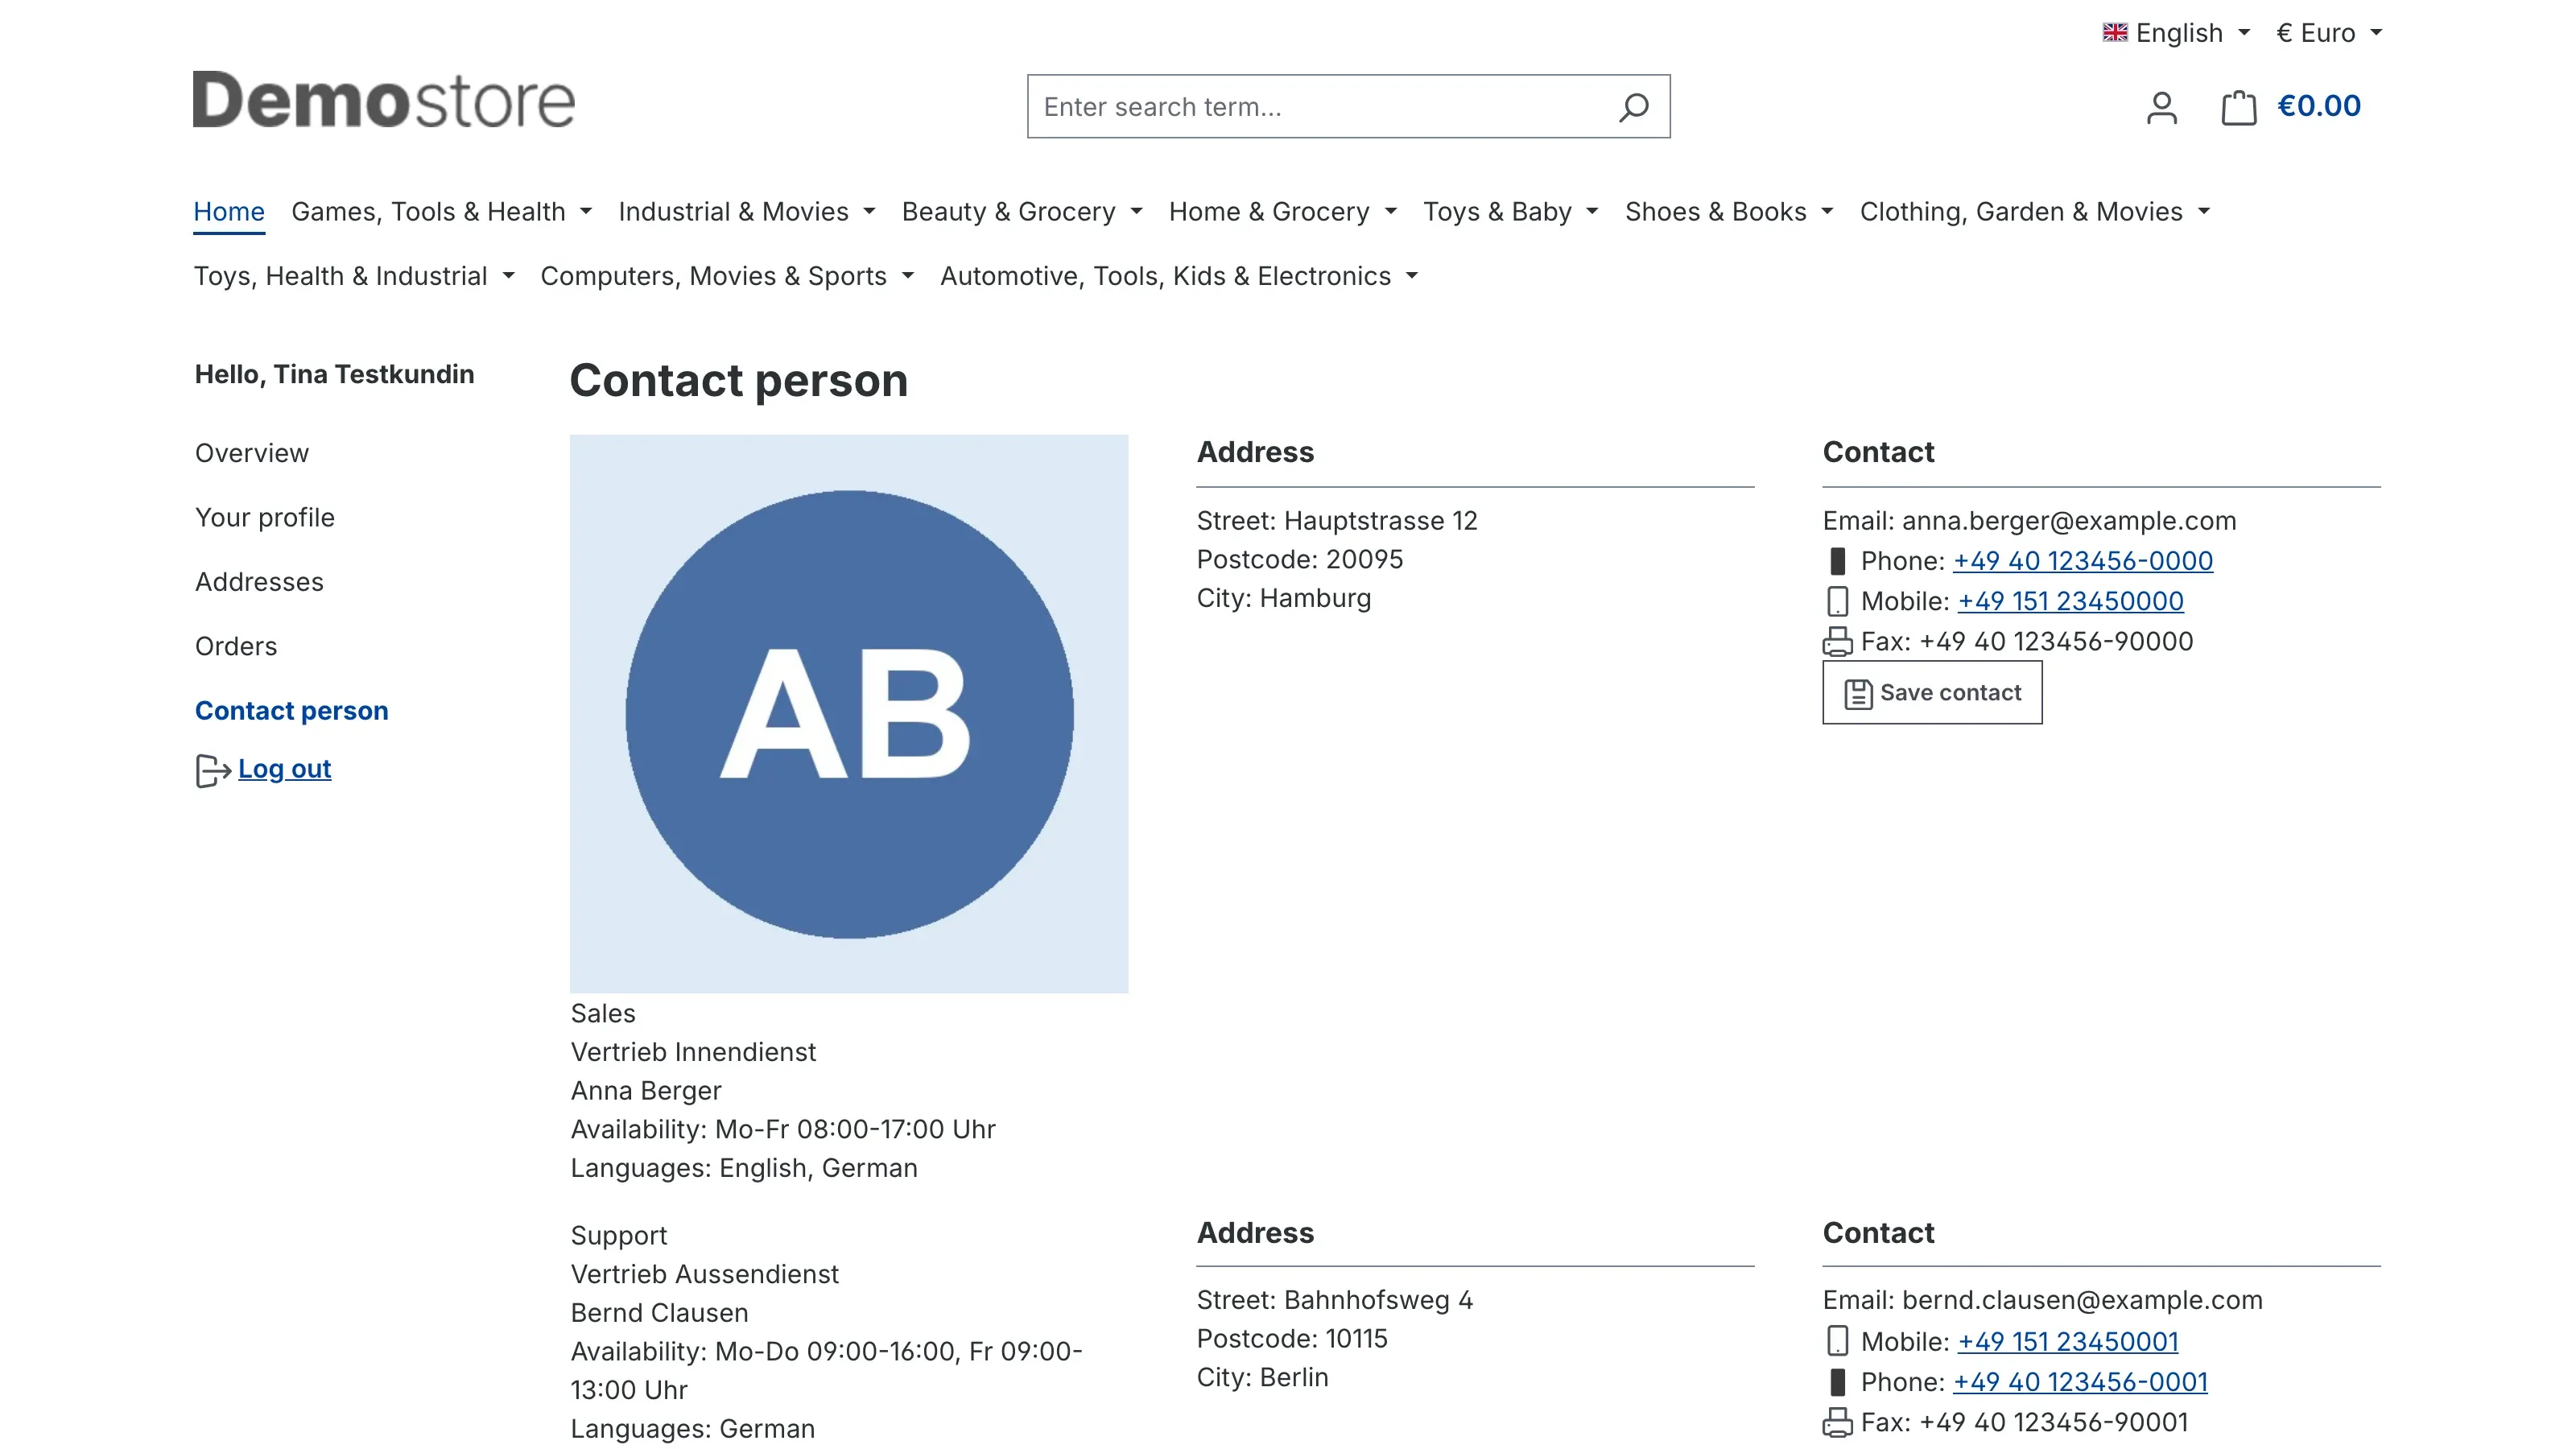 Fig. 27: The page shows the persons of the customer group and the persons stored directly on the customer.
On this page the customer sees, together:
- the persons you stored on their customer group (section 7.4), and
- the persons you stored directly on their customer account (section 7.3).
If both are empty, the page reads No contact persons available. The display follows the same settings as in Shopping Experiences, including Save contact.
Important: The page is only open to logged-in customers. Anyone opening it without logging in is taken to the login as usual.
Access rights for your team
What this gives you: You decide who may maintain contact persons. Your customer service keeps the directory up to date without getting access to everything else.
- Open Settings → Users & permissions.
- Create a role or edit an existing one.
- In the permissions, look for the Contact person row under Other.
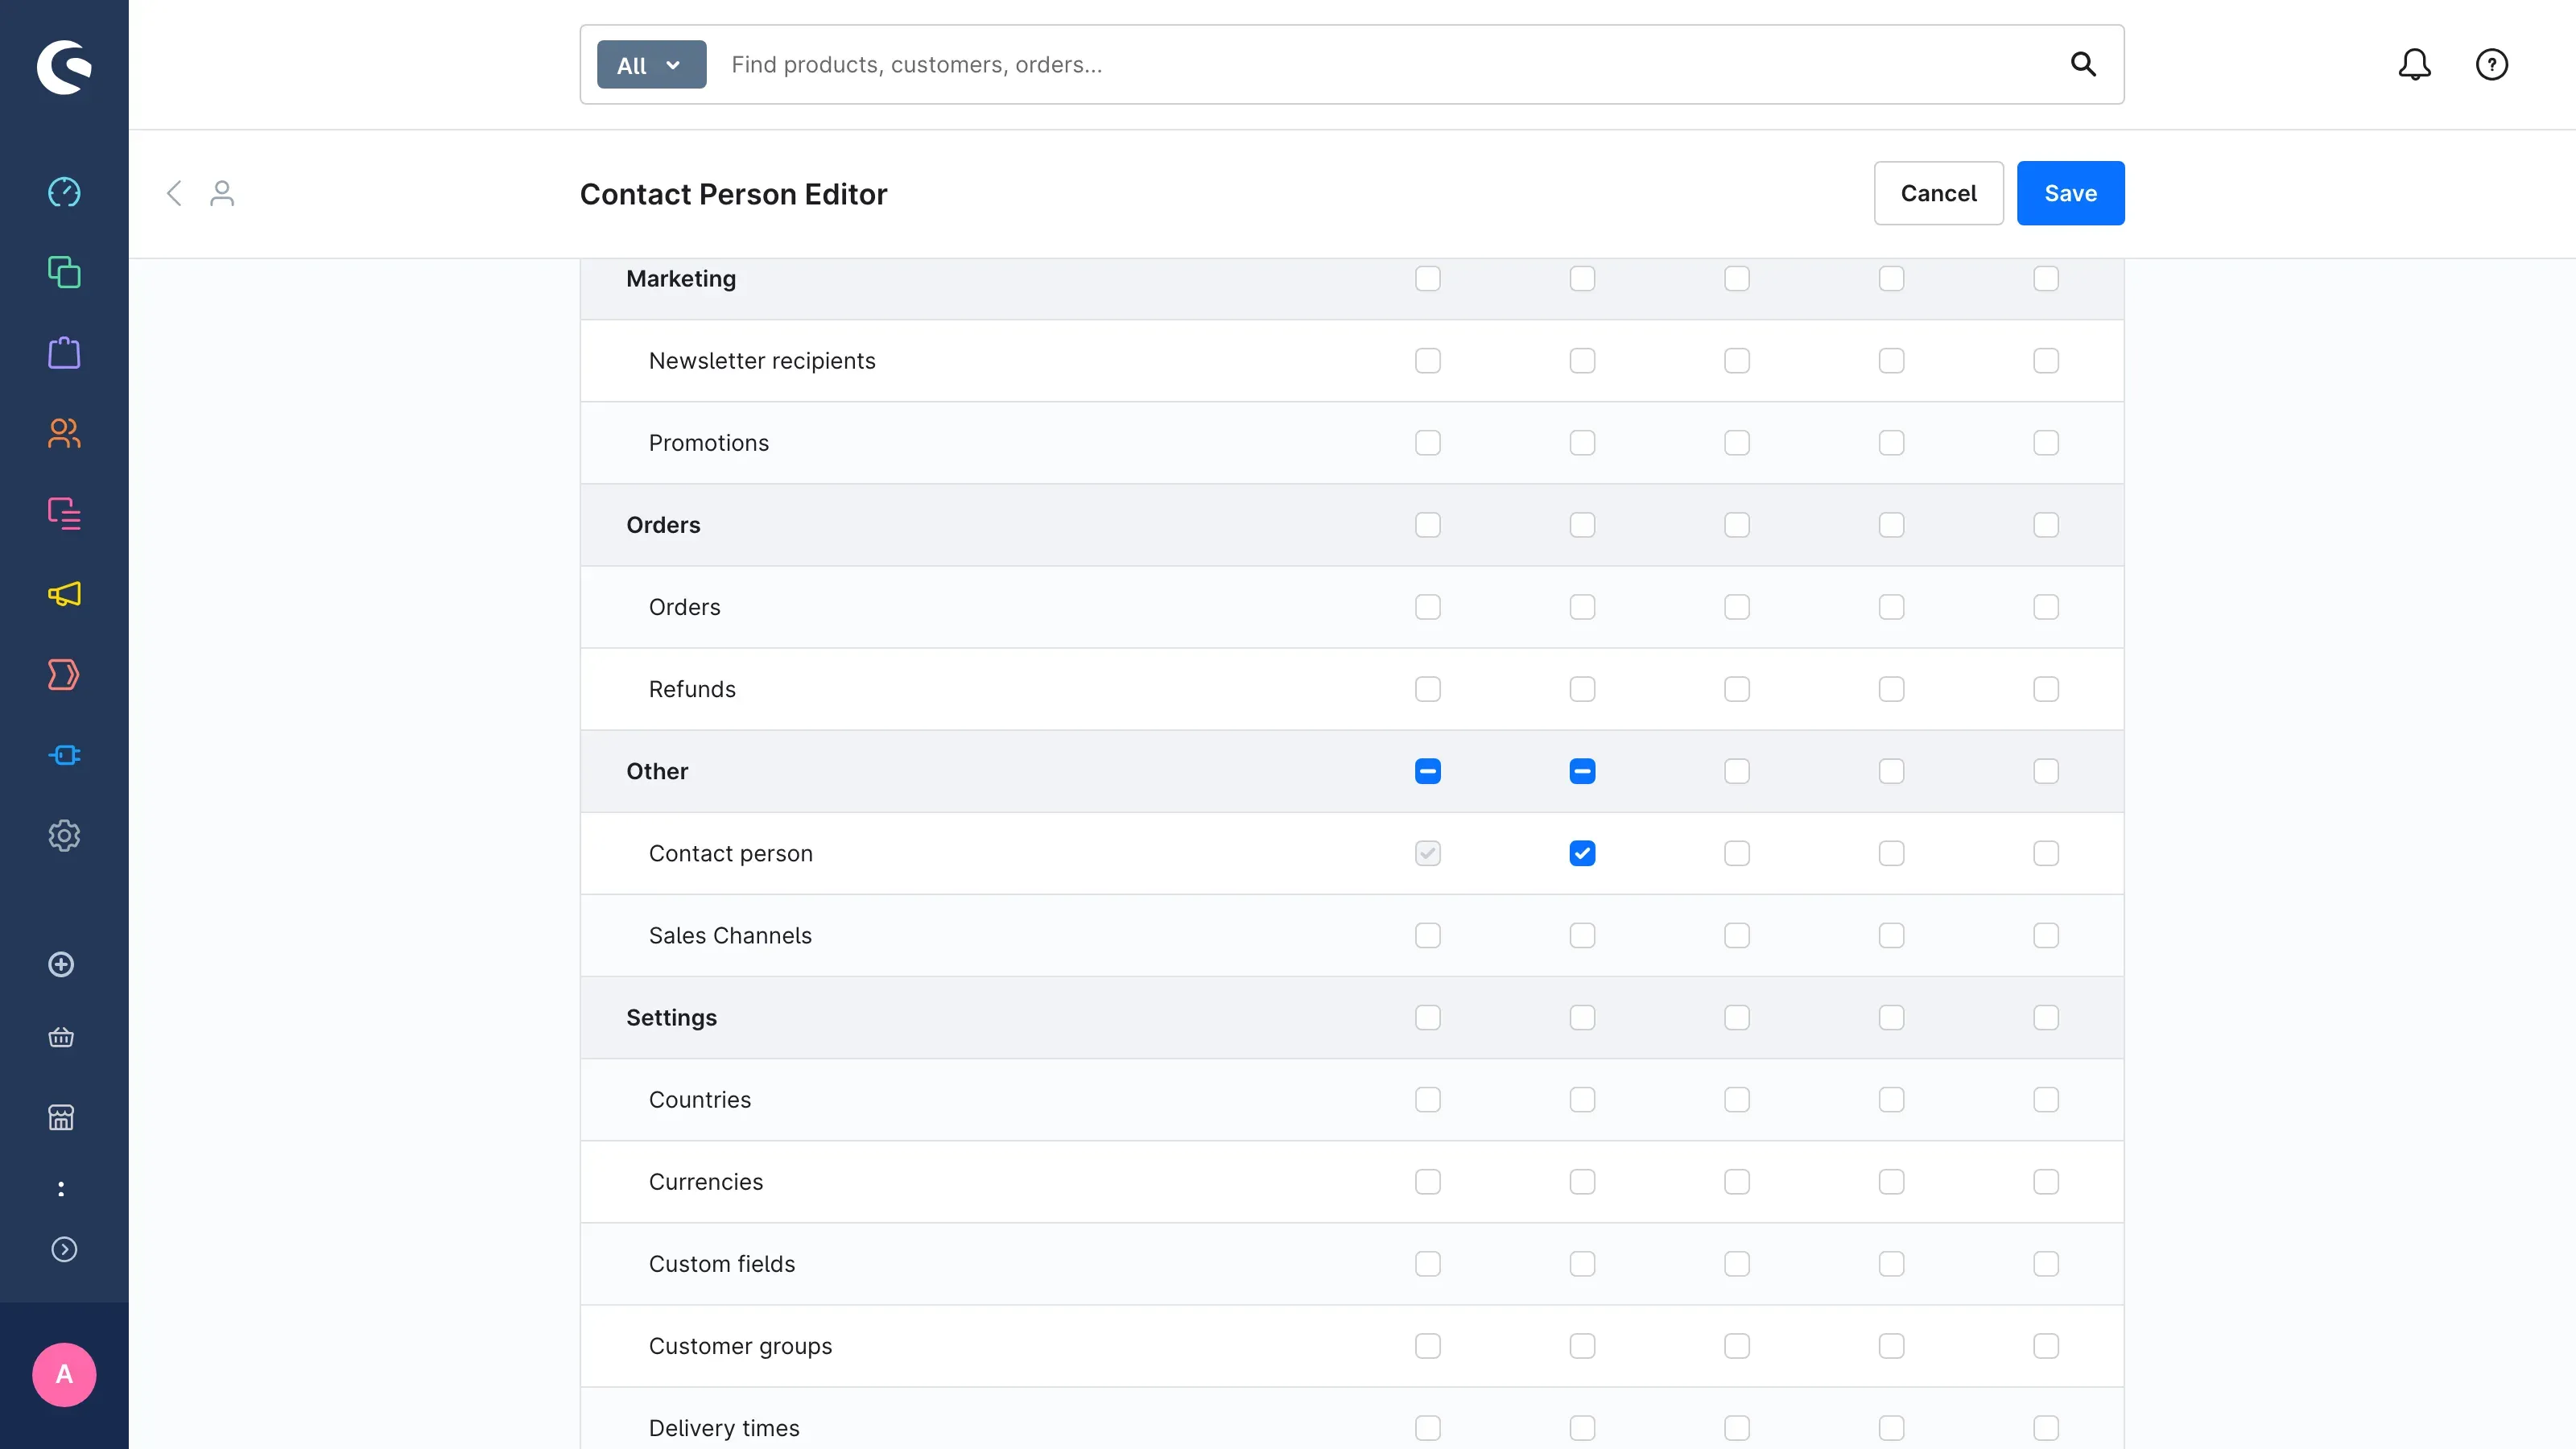 Fig. 28: A role that may view and edit contact persons.
You grant:
- View — open and view persons and groups.
- Edit — change existing entries. View is granted automatically as well.
- Create — create new entries.
- Delete — remove entries.
The rights apply to persons and groups together. Then assign the role to your staff.
Tip: A role with View and Edit only is the usual set-up for maintenance: phone numbers can be updated, accidental deletion is ruled out.
Troubleshooting
No contact person appears in the storefront
Cause: Usually one of five points is open.
Solution: Check in this order:
- Is the plugin enabled in the right sales channel? Choose the affected sales channel at the top of the settings and check Enable plugin for this sales channel.
- Is the person active and assigned to the sales channel? Check the Active switch and the Sales channels in the Visibility card (section 5.6).
- Is anybody assigned at all? Look at the product or category in Custom fields, Contact person tab.
- Is the block in the layout? The Contact person block has to be part of the Shopping Experiences layout assigned to the page (chapter 8).
- Is the source right? If Source is set to Fixed selection, only the persons selected there appear.
If it still stays empty, clear the cache under Settings → Caches & indexes.
All contact persons are missing in a new sales channel
Cause: A newly created sales channel is not yet assigned to the existing persons.
Solution: Open the persons and add the new channel under Sales channels in the Visibility card.
The “Contact person” entry is missing in the customer account
Cause: The entry only appears if the plugin is enabled in that sales channel, and only for logged-in customers.
Solution: Check Enable plugin for this sales channel for exactly this channel and log in to the storefront as a customer to test.
The page in the customer account is empty
Cause: The page only shows persons stored on the customer’s group or directly on the customer. Assignments on products and categories deliberately do not appear here.
Solution: Store the persons on the customer group (section 7.4) or on the customer (section 7.3).
The “Save contact” button is missing
Cause: It only appears if Offer “Save contact” button, Show image block, Show name and Show contact block are switched on.
Solution: Check these switches for the affected sales channel (chapter 4).
A contact way does not appear in the storefront
Cause: The contact way is inactive, Show contact ways is off, or it is a phone or fax number and Show phone number or Show fax number is off.
Solution: Check the Active switch on the contact way and the settings mentioned. For LinkedIn, Xing, Website and Book an appointment, the address has to start with https://, otherwise it is not turned into a link.
The email address appears twice in the contact section
Cause: In addition to the email address from the Address card, a contact way of the type Email is maintained.
Solution: Remove the Email contact way or switch off Show email address — then only the linked contact way remains.
The contact person’s picture is missing
Cause: No Display image is stored, or Show image or Show image block is off.
Solution: Check the Display image in the Profile card and both switches in the settings.
Group name, job title or availability appear in the wrong language
Cause: No separate version is maintained for the language of this sales channel. The storefront then shows the version from the main language.
Solution: Choose the language on the detail page of the person or group and enter the translation (sections 5.8 and 6.3).
Changes are not visible in the storefront right away
Cause: The browser is still showing an older version of the page.
Solution: Reload the page in the storefront. If that does not help, clear the cache under Settings → Caches & indexes.
FAQ
Q: Can I store several contact persons on one product?
A: Yes. The Name field in the Contact person tab of the custom fields accepts any number of persons.
Q: Do I have to assign every person to a group?
A: No. Without a group, simply no group name is shown.
Q: Can I use the same person several times?
A: Yes, that is exactly what the directory is for. You create them once and assign them to as many products, categories, customers and customer groups as you like.
Q: Do my customers also see the category’s contact persons on the product page?
A: No. The product page shows the persons stored on the product, the category page those stored on the category. If the same person should appear in both places, assign them to both.
Q: Can I show contact persons on a page without a product or category, such as a contact page?
A: Yes. Set the element’s Source to Fixed selection and select the persons directly (section 8.2).
Q: Can I hide a person temporarily?
A: Yes. Switch off Active in the Visibility card. All assignments are kept.
Q: Can I use the plugin in one sales channel but not in another?
A: Yes. All settings apply per sales channel, including the main switch. In addition, you decide per person in which sales channels they appear.
Q: Will I lose my data if I switch the plugin off in a sales channel?
A: No. Enable plugin for this sales channel only controls the output. Persons, groups and assignments are kept.
Q: What happens to my existing phone and fax numbers after the update?
A: They were automatically taken over as contact ways and continue to appear in the storefront. You do not need to do anything.
Q: Why does a person’s name look different after the update?
A: When you update to version 6.7.2, the plugin rebuilds the displayed name of every person once from Title, First name and Last name (section 5.2). Names that were previously written differently in a single field then appear in a consistent form:
- “Mr. Max Miller” becomes “Max Miller” — the salutation belongs in the Salutation field,
- “Miller, Anna” becomes “Anna Miller”.
Titles such as “Dr.” are kept. A salutation recognised in the name (Mr, Mrs, Herr, Frau …) is moved into the Salutation field and still appears in front of the name in the storefront. The same applies to names that later arrive through an import or interface as a single full name: they are saved in this form right away. After the update, take a quick look at the list under Customers → Contact persons and add the Salutation only where it was not recognised. From then on, the name stays up to date automatically whenever you change it.
Q: In which language do country and state appear?
A: In the language of the sales channel — the plugin uses the country and state names that come with Shopware.
For administrators / Technical details
This section is aimed at technical administrators. You do not need it for normal use.
System requirements
- Shopware: 6.7.0 or later (version 6.7.x)
- PHP: 8.2 or later
- Database: MySQL 8.0 / 8.4 or MariaDB 10.11 or later
Headless frontend (Store API)
All data shown in the storefront is also available via the Store API. A headless frontend therefore shows exactly the same persons, with the same rules for the active switch, sales channel, display switches and order.
- Persons of a page:
/store-api/swp-contact-person, stating the product or category. - Persons of the logged-in customer:
/store-api/account/swp-contact-person. - vCard:
/store-api/swp-contact-person/{personId}/vcard.
The data of the Shopping Experiences blocks travels with the Store API layout response. For Composable Frontends, the components are named CmsBlockSwpContactPerson (block) and CmsElementSwpContactPerson (element). If your frontend provides components with these names, it renders the contact persons there.
Data storage
The plugin creates its own tables for persons, groups, contact ways and their translations. Existing Shopware tables are not changed. The assignments to products, categories, customers and customer groups are kept in a dedicated custom field set. The plugin does not contact any external servers.
Address of the customer account page
The customer account page is available at /account/swp-contactperson. It requires login, is not cached and is blocked for search engines.
Uninstalling
When uninstalling, Shopware asks whether user data should be kept:
- keep user data: persons, groups and assignments are kept. After reinstalling, everything is back.
- do not keep user data: the plugin’s data, its settings, the custom field set and its media folder are removed. The pictures themselves remain in the media library.
Customisation via theme or own plugin
The storefront output is divided into Twig blocks that can be extended from your own theme or plugin without changing this plugin. The blocks of the person output start with element_swp_contact_person_, those of the customer account page with page_account_swp_contact_person_.
This manual was written for Contact Person (SwpContactPersonSix) version 6.7.2.
More manuals
Admin Password Reminder
Admin Password Reminder: your backend users renew their passwords on time, prompted after login and by a daily email. Premium locks expired accounts until the password is changed.
Open manual Shopware 6Age Check
Tobacco, spirits, knives: visitors who do not confirm their age never see the restricted items at all. You tick a box per product, the plugin hides it everywhere.
Open manual Shopware 6AI Media Labelling
AI labelling for images and videos: flag a media item once in the media manager and the badge with your notice appears wherever it shows up in your shop. No template work needed.
Open manualNeed a team that keeps your shop running?
We have been maintaining Shopware shops for more than 20 years, including updates, hotfixes and the plugins you are configuring right now.