Quickbuy
Quick order for B2B: your customers type a product or manufacturer number, set the quantity and add the whole list to the cart in one click. No browsing through categories.
On this page
- Introduction
- What you achieve with this plugin
- Who is this plugin for?
- Installation
- Getting Started
- Settings
- Choosing the sales channel
- to documentation
- Enable plugin for this sales channel
- Remove header search on the quick order page
- Minimum characters before suggestions appear
- Search mode
- Quantity selection
- Deactivate for the following customer groups
- How your customers order via the Quickbuy page
- Opening the Quickbuy page
- Searching for articles
- Selecting variants
- Building the order list
- Adding everything to the cart
- How your settings affect the shop
- On a smartphone
- How to add Quickbuy to shopping experiences
- Working with other plugins
- Troubleshooting
- The Quickbuy icon does not appear in the header
- Calling up the Quickbuy page shows the home page
- No suggestions appear
- The regular search field in the header is missing
- The “Quickbuy Product Listing” block is empty in the layout editor
- FAQ
- For Administrators / Technical Details
- System requirements
- Installation via the command line
- Address of the Quickbuy page
- Working with other plugins
Introduction
Quickbuy helps your customers order many articles in one go: search for articles, choose quantities and add the whole list to the cart with a single click — without browsing through categories and product pages.
What you achieve with this plugin
- Your customers reach the Article Quickbuy page at any time via a dedicated icon in the header.
- Matching articles appear as suggestions while typing. One click adds the article to an order list.
- Articles with variants (for example colours or sizes) expand right inside the suggestions. Your customers pick the right variant without opening the product page.
- Add all to shopping cart puts all positions into the cart together.
- You decide whether the search looks for article names or only for complete product or manufacturer numbers — ideal for regular customers who know their numbers.
- You can switch Quickbuy on and off per sales channel and hide it for individual customer groups.
- Two blocks for shopping experiences bring Quickbuy to any page and turn a category into an order list.
Who is this plugin for?
For shops whose customers regularly reorder several articles — typically in B2B: retailers, trade businesses, corporate buyers or regular customers with fixed order lists.
Installation
After your purchase, the plugin is already available in your Administration — there is nothing to download.
- Log in to your Shopware Administration (
YourShop.com/admin). - Open Extensions → My extensions.
- Click Install next to Quickbuy.
- Activate the plugin with the switch to the left of the entry — done.
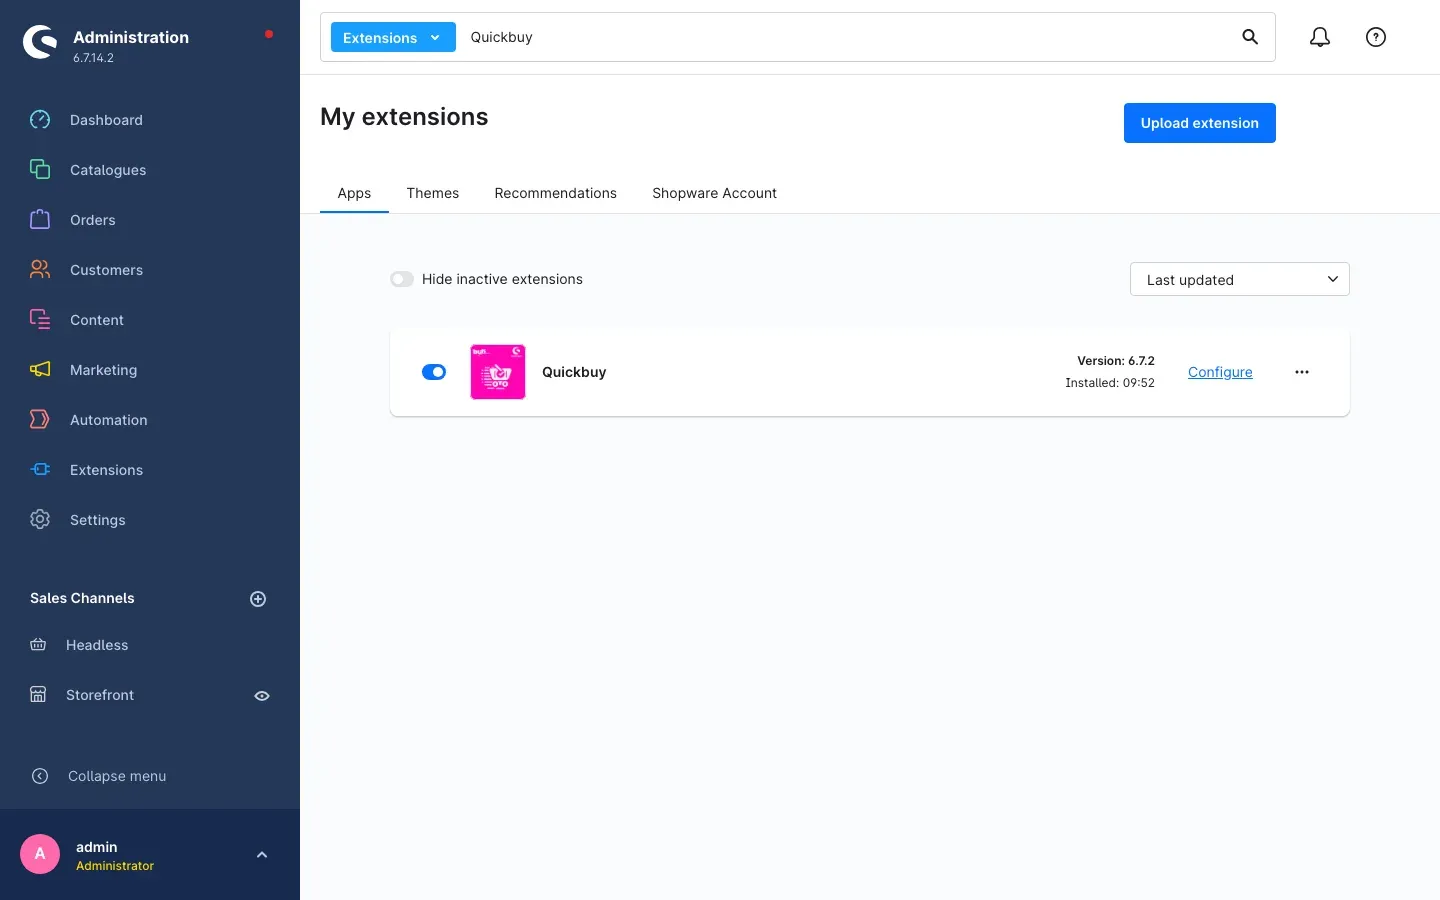 Fig. 1: Quickbuy under Extensions → My extensions — the switch on the left is on; on the right, “Configure” takes you to the settings.
If Quickbuy does not appear in the list, your Shopware account is not yet connected to the shop. You can do this under Extensions → My extensions in the Shopware Account tab by logging in with your Shopware account.
Getting Started
Right after activation, Quickbuy is switched on in all sales channels. You don’t need to set anything else up for it to work.
- Open the settings: Under Extensions → My extensions, click Configure next to Quickbuy.
- Set the essentials: Under Search mode, decide whether your customers search by article name or only by complete numbers. Then click Save.
- Check the result: Open your shop. The header now shows a new icon to the left of the customer account icon. When you hover over it, “Quickbuy” appears. Clicking it opens the Article Quickbuy page.
Settings
You open the settings under Extensions → My extensions with Configure next to Quickbuy. The page is divided into three sections: Channel configuration, Search settings and View settings. Apply your changes with Save at the top right.
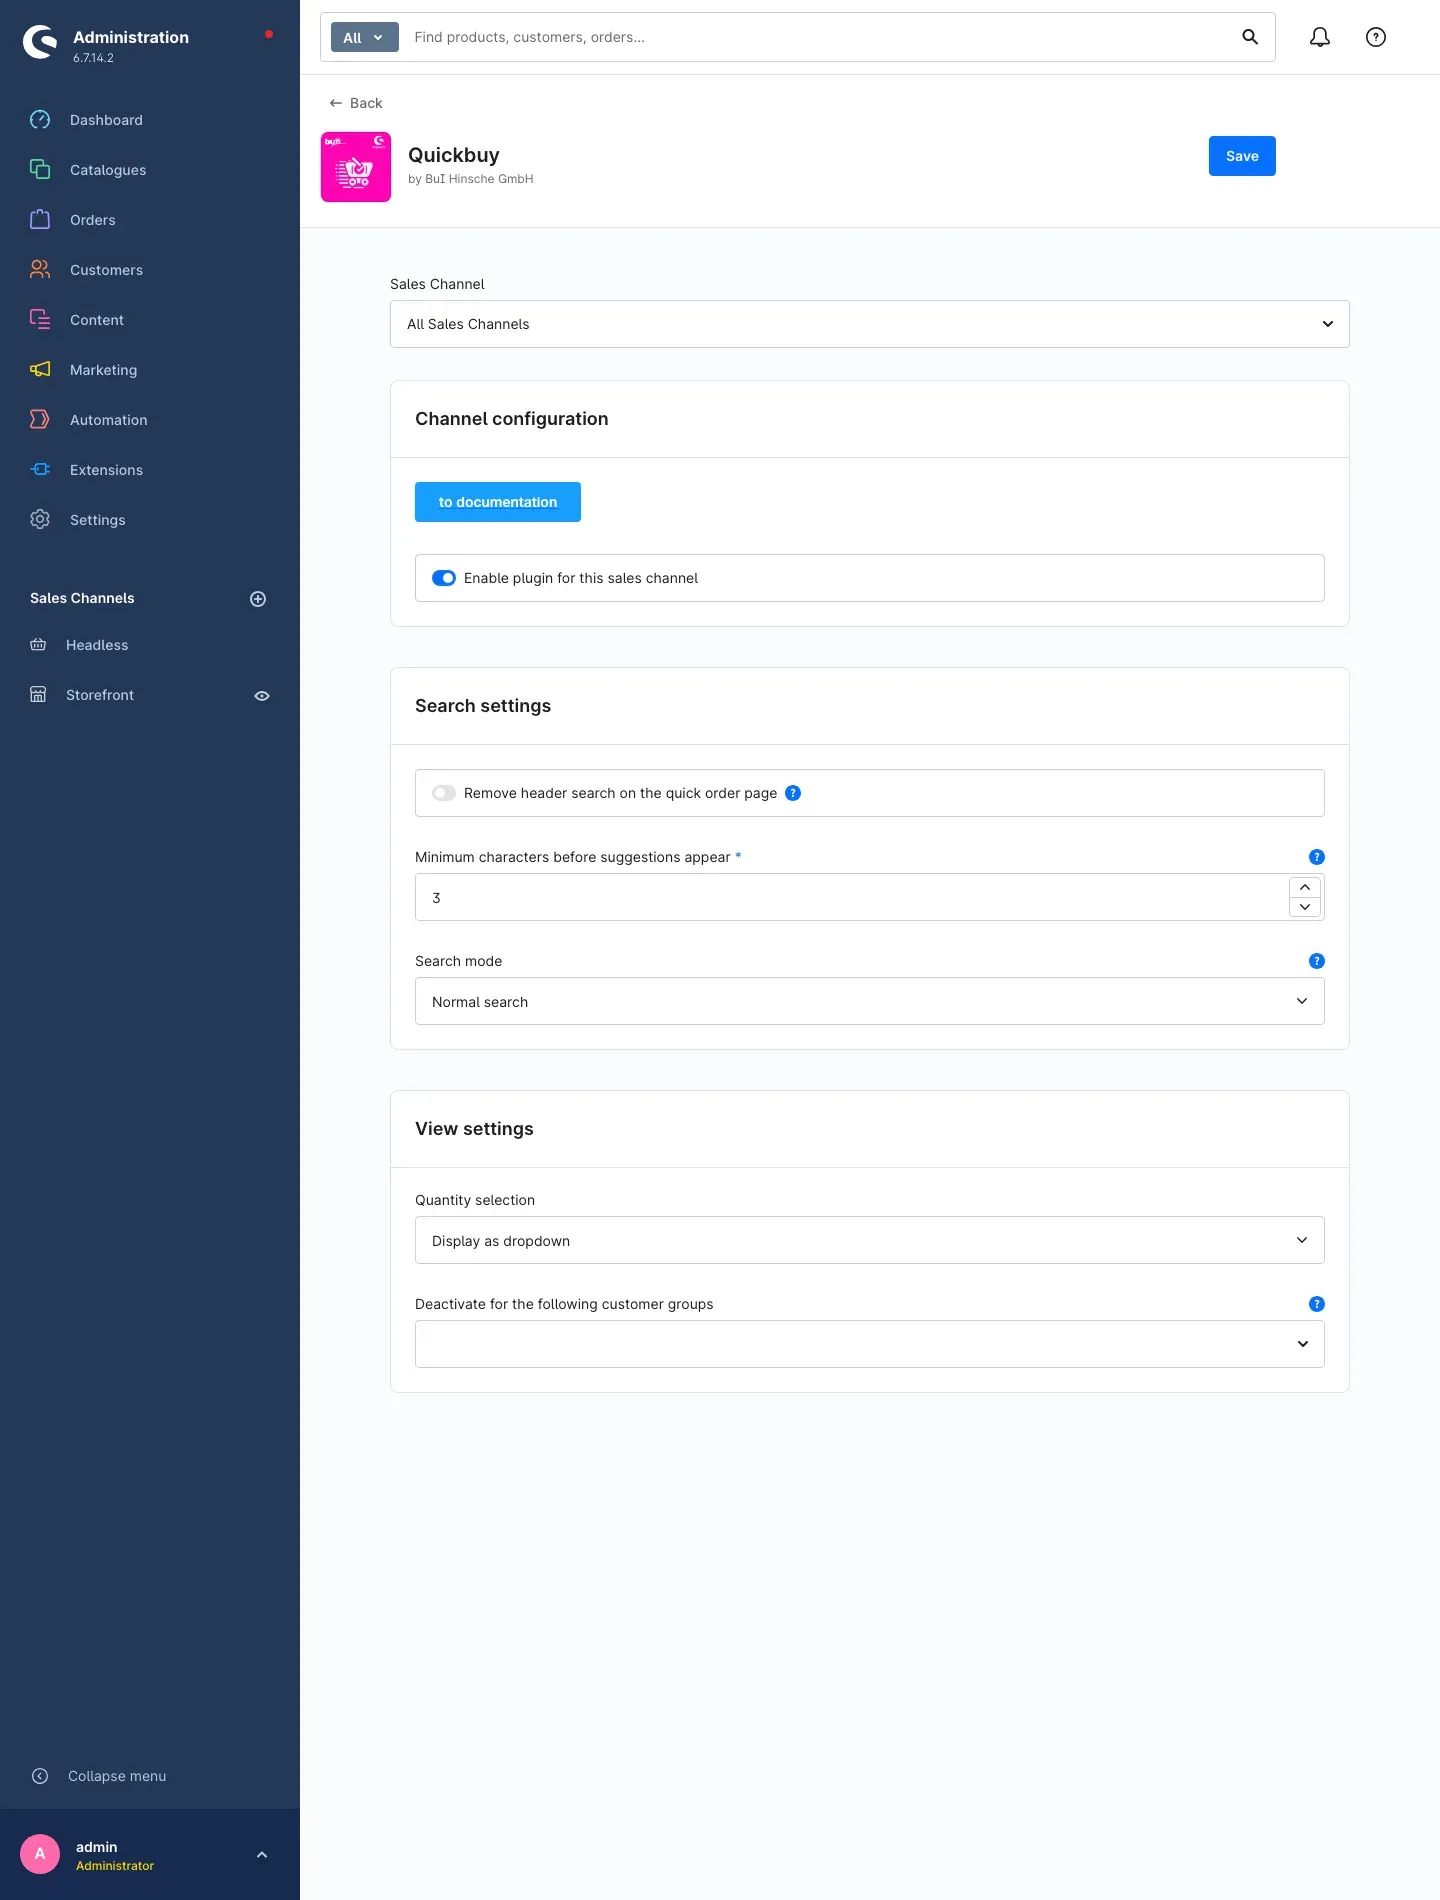 Fig. 2: The complete Quickbuy configuration page.
Choosing the sales channel
At the very top, use Sales Channel to choose which shop your settings apply to. All Sales Channels sets the default for all shops. If you select a single sales channel, you can set individual settings differently there — anything you don’t change is taken over from the default.
Why this is useful: If you run one shop for business customers and one for consumers, for example, you offer Quickbuy only in the business shop or configure it differently there.
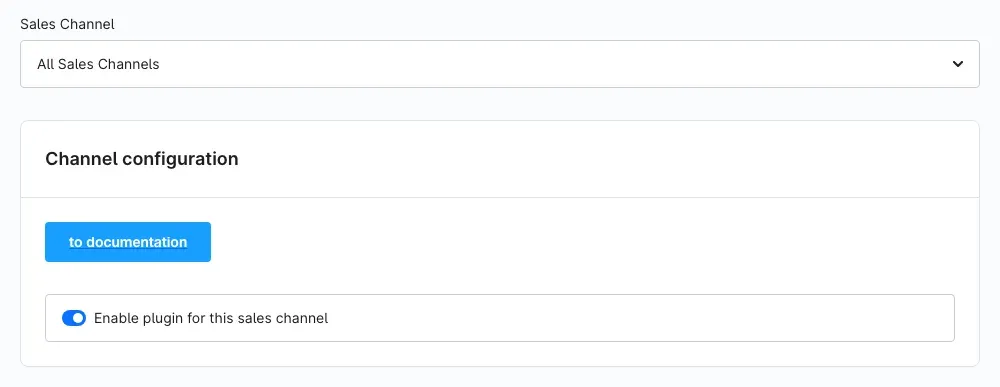 Fig. 3: Sales channel selection and the “Channel configuration” section.
to documentation
The to documentation button in the Channel configuration section opens this manual online — handy when you want to look something up while setting things up.
Enable plugin for this sales channel
The Enable plugin for this sales channel switch determines whether Quickbuy is active in the selected sales channel. It is switched on by default. If you switch it off, the header icon, the Quickbuy page and the Quickbuy blocks in your shopping experiences disappear in this channel. Anyone who calls up the page directly is shown the home page instead.
Why this is useful: You can pause Quickbuy in individual shops without uninstalling the plugin. Your settings are kept.
Remove header search on the quick order page
Remove header search on the quick order page removes the regular search field in the header while your customers are on the Quickbuy page. Only the Quickbuy search remains there. This setting is switched off by default.
Why this is useful: Two search fields on top of each other are confusing. With this setting, your customers always type into the right field and don’t accidentally end up on the regular search results page.
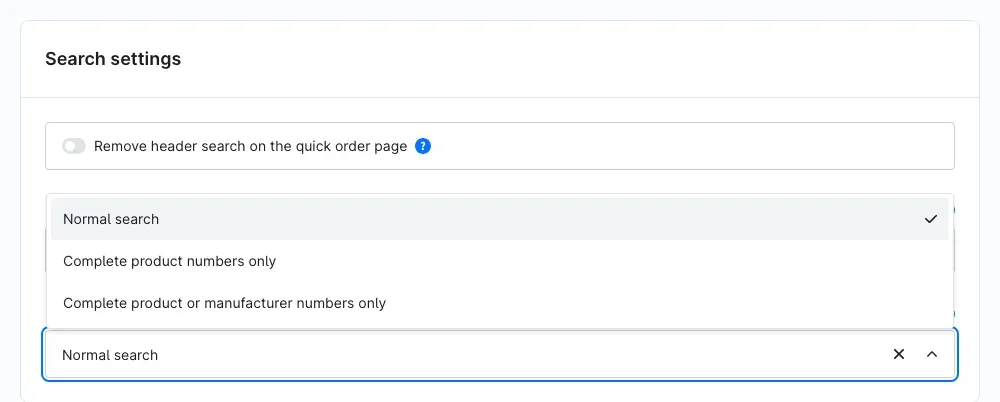 Fig. 4: The “Search settings” section with the three search modes.
Minimum characters before suggestions appear
Minimum characters before suggestions appear sets after how many typed characters the search starts and suggestions are shown. The default is 3 characters. This field must not be left empty.
Why this is useful: A lower number shows suggestions earlier but increases the load on your server. A higher number gives more accurate suggestions because more of the search term is already known. The default value suits most shops.
Search mode
Search mode defines what the Quickbuy search looks for:
- Normal search — The search finds articles in the same way as your shop’s search suggestions, for example by article name. The search field shows the hint “Enter article…”. This is the default.
- Complete product numbers only — The search finds an article only if its complete product number is entered exactly. The search field shows “Enter article number…”.
- Complete product or manufacturer numbers only — As above; in addition, an article is also found by its complete manufacturer number. The search field shows “Enter article or manufacturer number…”.
Why this is useful: Customers who know their order numbers from a catalogue or their own ERP system get exactly the one right article with the number modes — without similar hits. Normal search is the right choice if your customers tend to search by name.
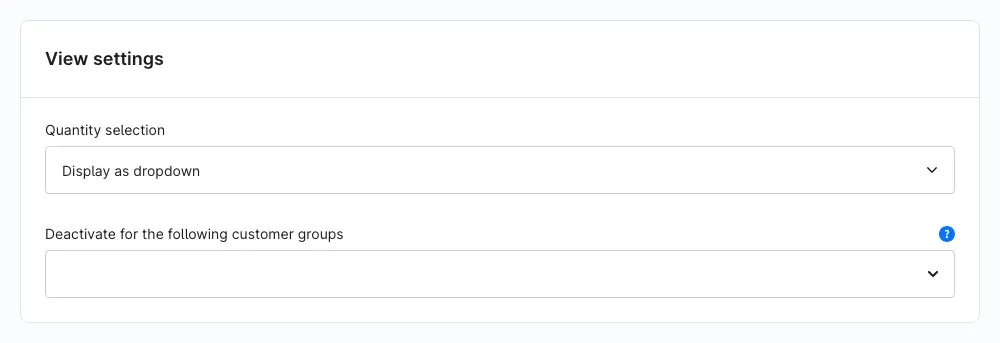 Fig. 5: The “View settings” section.
Quantity selection
Quantity selection determines how your customers set the quantity per article:
- Display as dropdown — A selection list with quantities from 1 to 99. This is the default.
- Display as number field — An input field where your customers type in the quantity directly.
Why this is useful: The dropdown is quick to use with the mouse. The number field is more practical if your customers often order larger quantities or prefer to enter everything via the keyboard.
Deactivate for the following customer groups
Under Deactivate for the following customer groups, select the customer groups for which Quickbuy is hidden. Customers in these groups see neither the header icon nor the Quickbuy page nor the Quickbuy blocks in your shopping experiences. By default, no customer group is selected, so Quickbuy is available to everyone.
Why this is useful: You offer Quickbuy specifically to your business customers and hide it for consumers.
How your customers order via the Quickbuy page
What this gives you: Your customers put together their order on a single page and add it to the cart in one click. Repeat orders become much faster.
Opening the Quickbuy page
In your shop’s header, the Quickbuy icon sits to the left of the customer account icon. When your customers hover over it, the hint “Quickbuy” appears.
 Fig. 6: The Quickbuy icon in the header, to the left of the customer account.
Clicking it opens the Article Quickbuy page. The search field is at the top, below it the order list with the columns Article name, Price and Quantity.
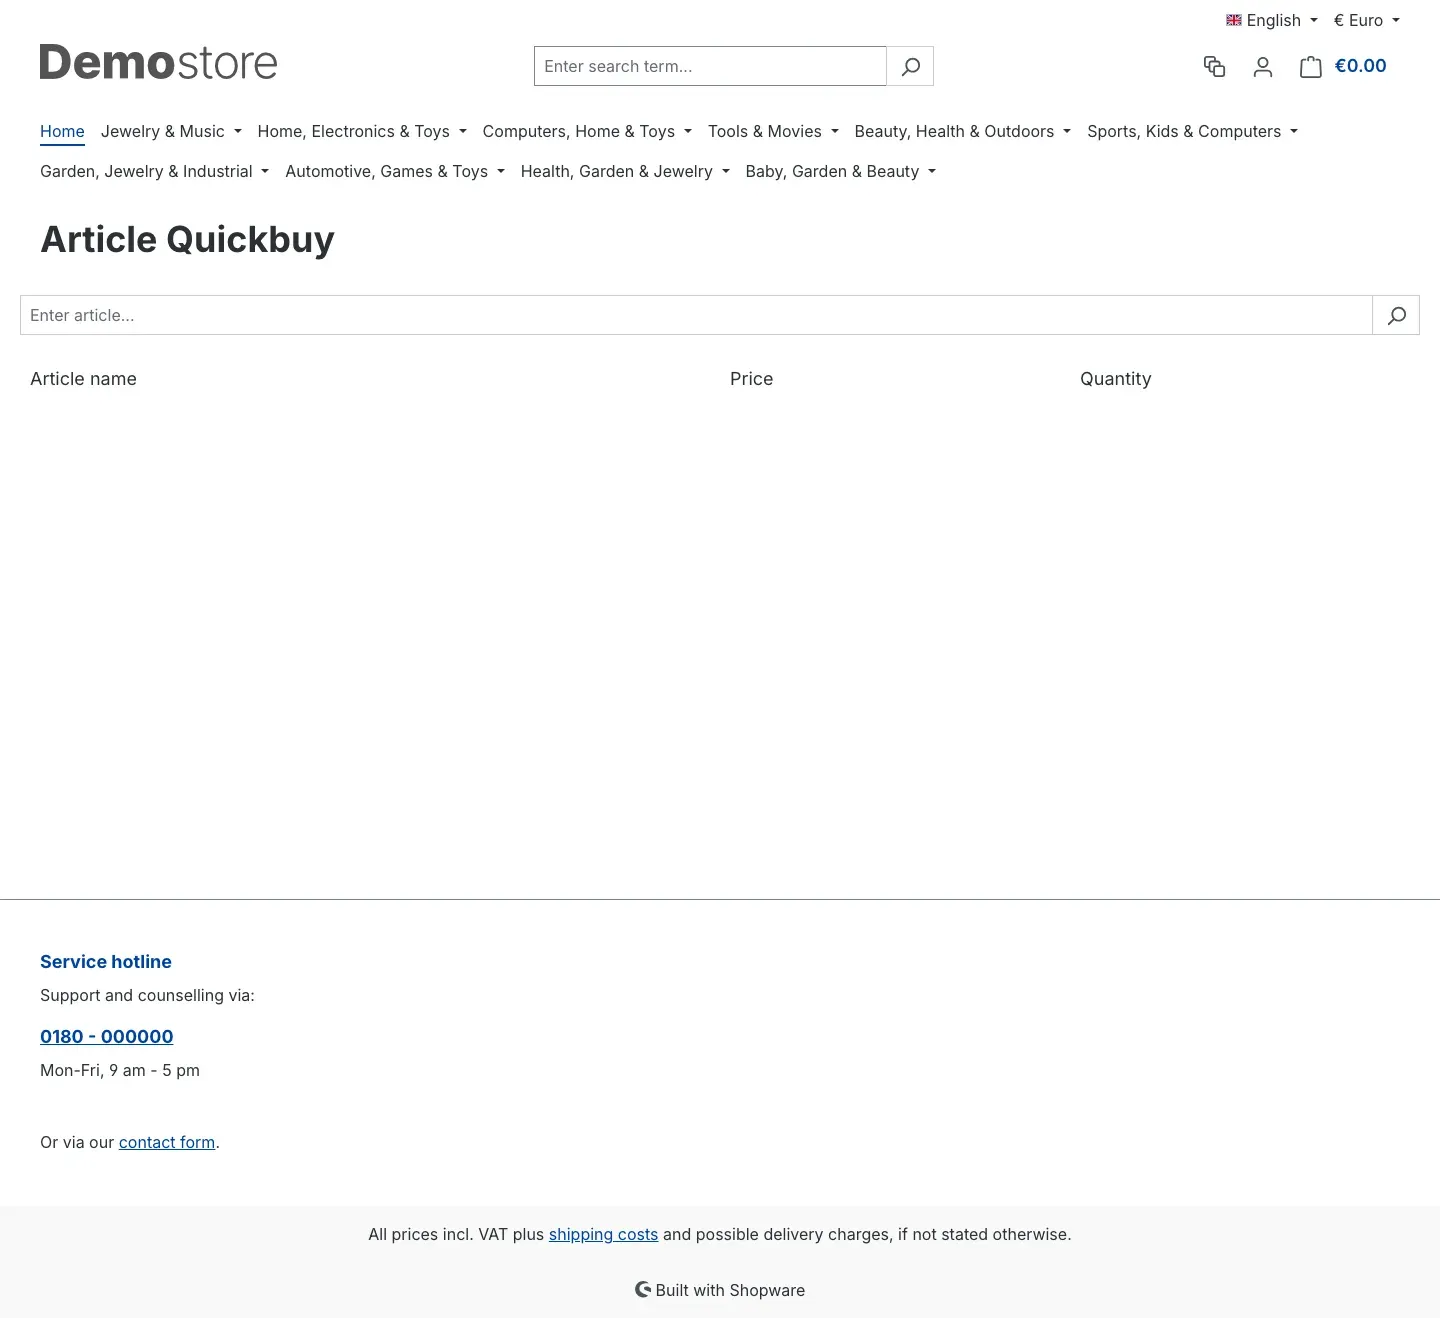 Fig. 7: The “Article Quickbuy” page before any article has been searched for.
Searching for articles
As soon as your customers have typed the configured minimum number of characters, matching articles appear right below the search field — with image, name and price. Below the suggestions, the number of results found is shown.
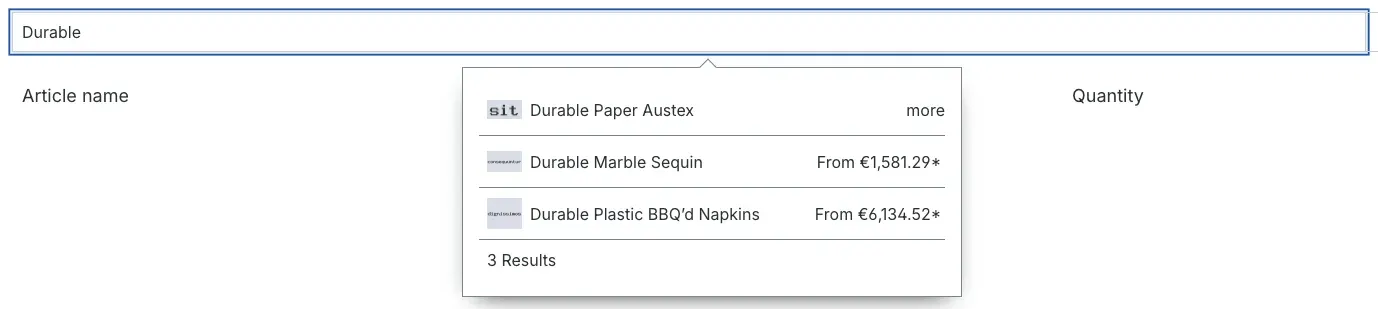 Fig. 8: Suggestions while typing.
Selecting variants
If an article has variants, the suggestions show “more” instead of the price. Clicking the article expands its variants, for example all colours. Your customers then click the variant they want.
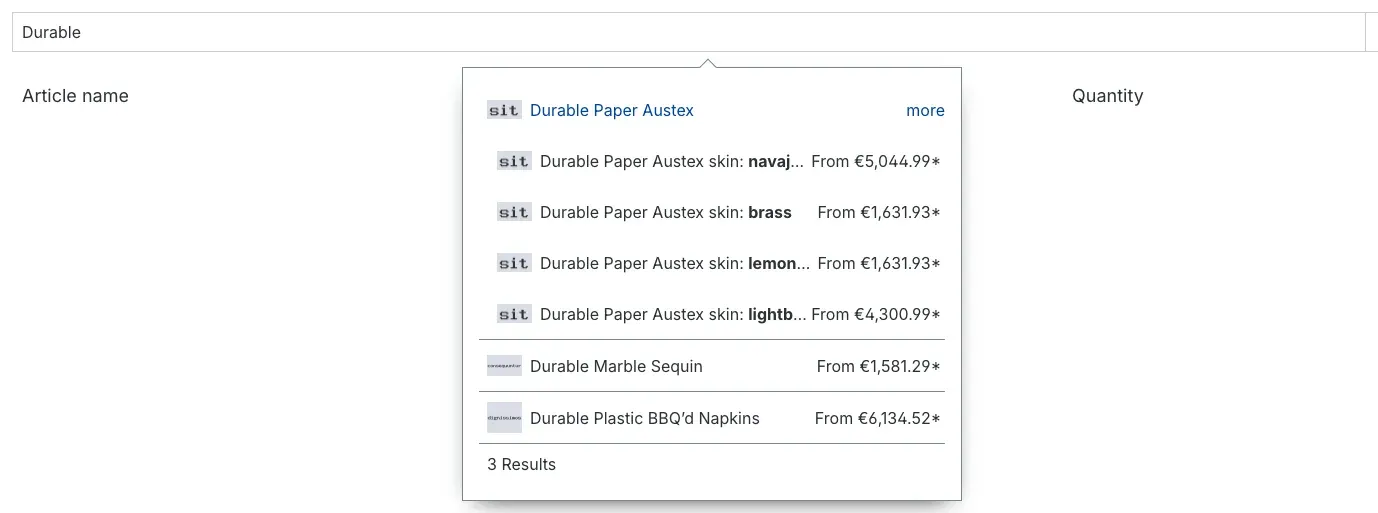 Fig. 9: The variants of an article are expanded.
Per search, Quickbuy shows at most 50 variants of an article. If an article has more, the link “More variants (number) on the product page” appears below them. It leads to the product page, where all variants are available.
Building the order list
Clicking a suggestion adds the article to the order list. Your customers then simply search for the next article. For each position, they choose the quantity they need. The X at the end of a row removes a position from the list again.
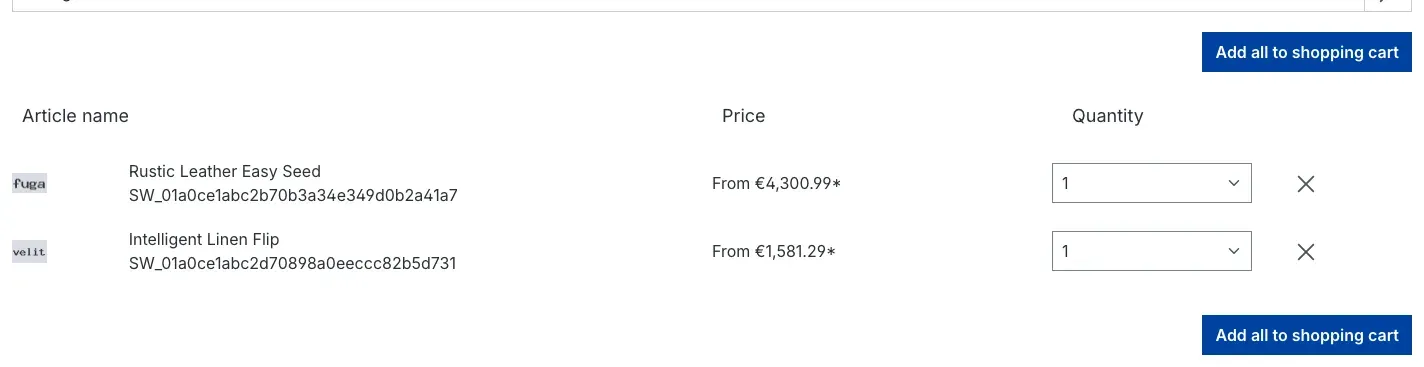 Fig. 10: The order list with two articles.
Adding everything to the cart
Once the list is complete, your customers click Add all to shopping cart. The button appears above and below the list. All positions go into the cart together; the cart then opens at the side and confirms how many products were added. From there, checkout continues as usual.
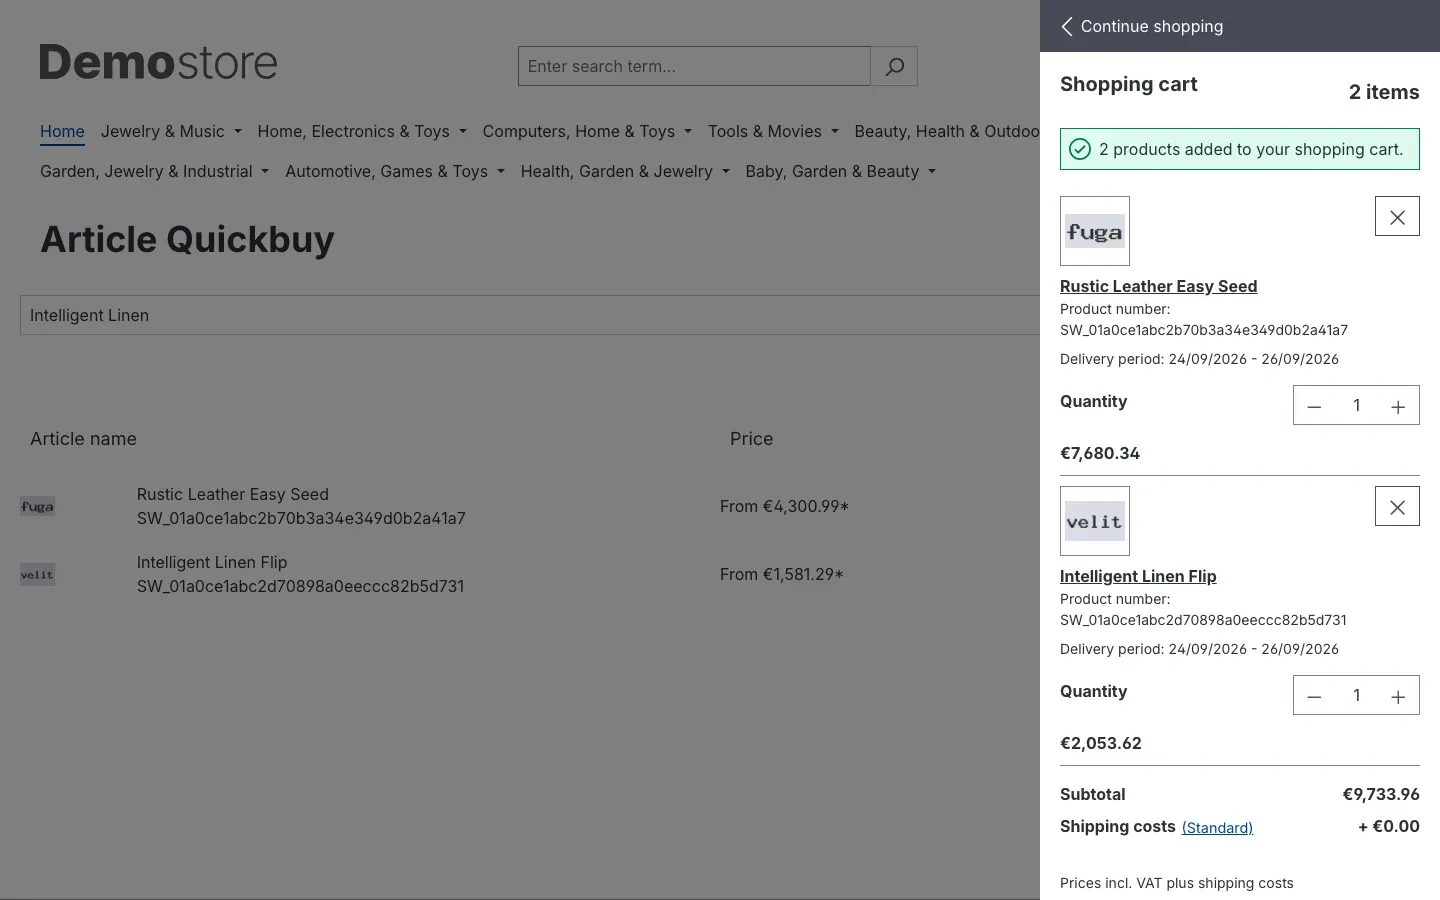 Fig. 11: The cart opens with all added articles.
How your settings affect the shop
Quantity as a number field: If you selected Display as number field under Quantity selection, your customers type in the quantity directly instead of choosing it from a list.
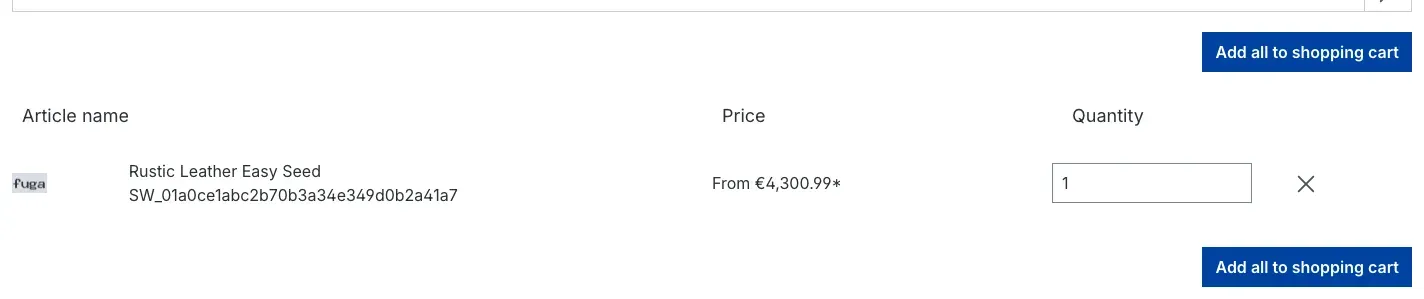 Fig. 12: Quantity selection as a number field.
Searching by number: With the Search mode Complete product numbers only, the search field shows the hint “Enter article number…”.
 Fig. 13: The search field in product number mode.
The matching article only appears once the product number has been entered completely and exactly. Parts of a number do not produce a hit.
 Fig. 14: Exactly one hit for the complete product number.
Without the header search: If Remove header search on the quick order page is switched on, the regular search field in the header is missing on the Quickbuy page. Your customers only use the Quickbuy search.
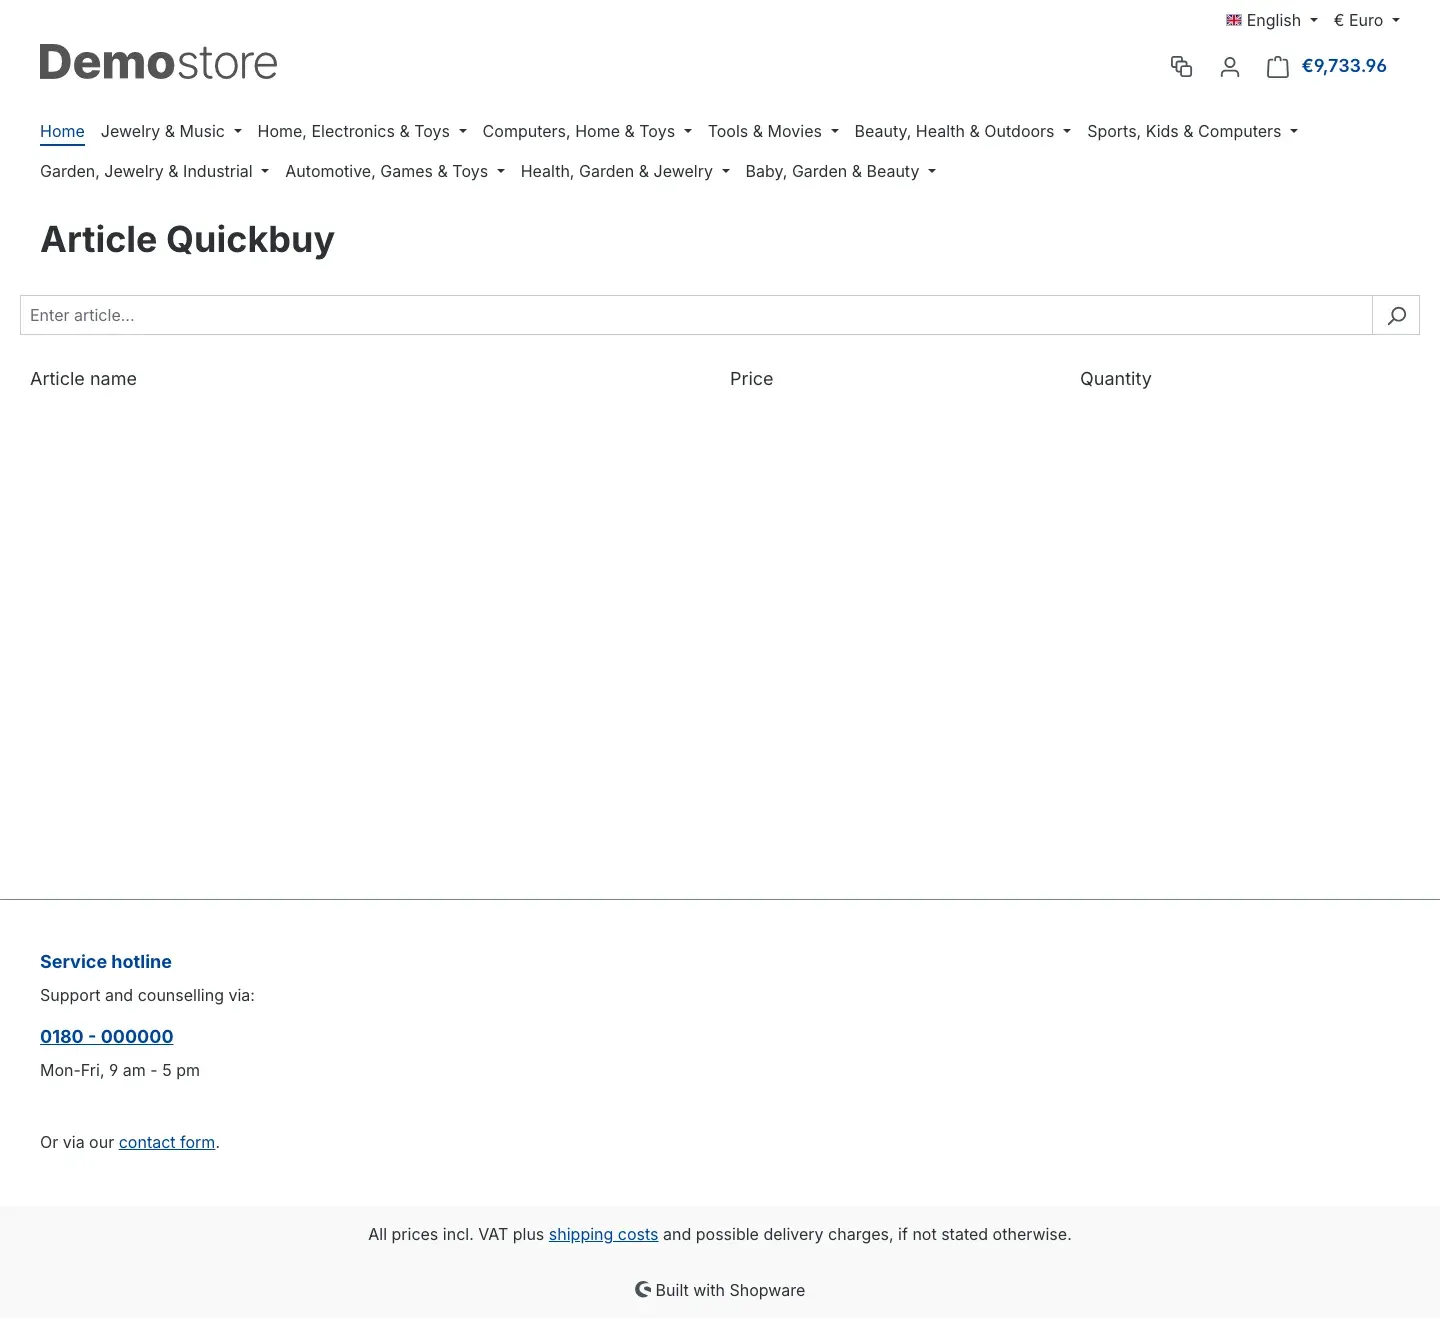 Fig. 15: The Quickbuy page without the header search.
On a smartphone
The Quickbuy page adapts to small screens. The Quickbuy icon is also shown in the mobile header; the search field and order list use the full width.
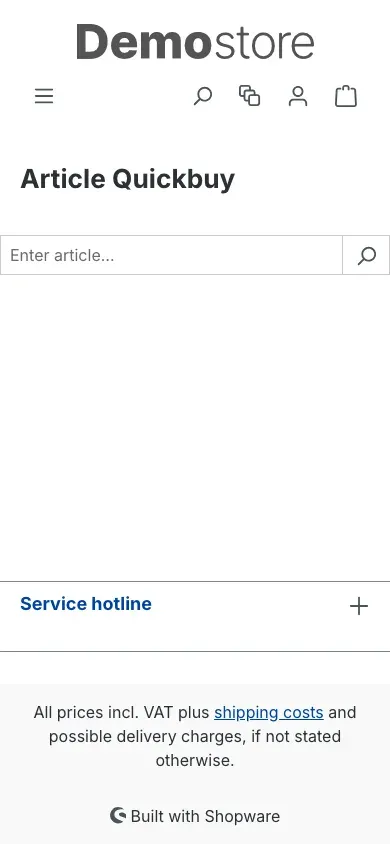 Fig. 16: The Quickbuy page on a smartphone.
Tip: The Quickbuy page is hidden from search engines. It does not show up in search results and does not compete with your product and category pages.
How to add Quickbuy to shopping experiences
What this gives you: You offer Quickbuy not only on its own page but wherever it helps your customers — for example on a page for business customers. You can also display a category as an order list where your customers enter a quantity for several articles at once.
The plugin provides two blocks for this. You find them in the layout editor under Content → Shopping Experiences in the Block category Commerce:
- Quickbuy — the complete Quickbuy search with order list, just like on the Article Quickbuy page. You can place this block in any layout.
- Quickbuy Product Listing — shows the products of a category as an order list. Each article has its own quantity field, starting at 0. Your customers enter a quantity for all articles they want and click Add all to shopping cart. This block belongs in a layout of the type Listing page.
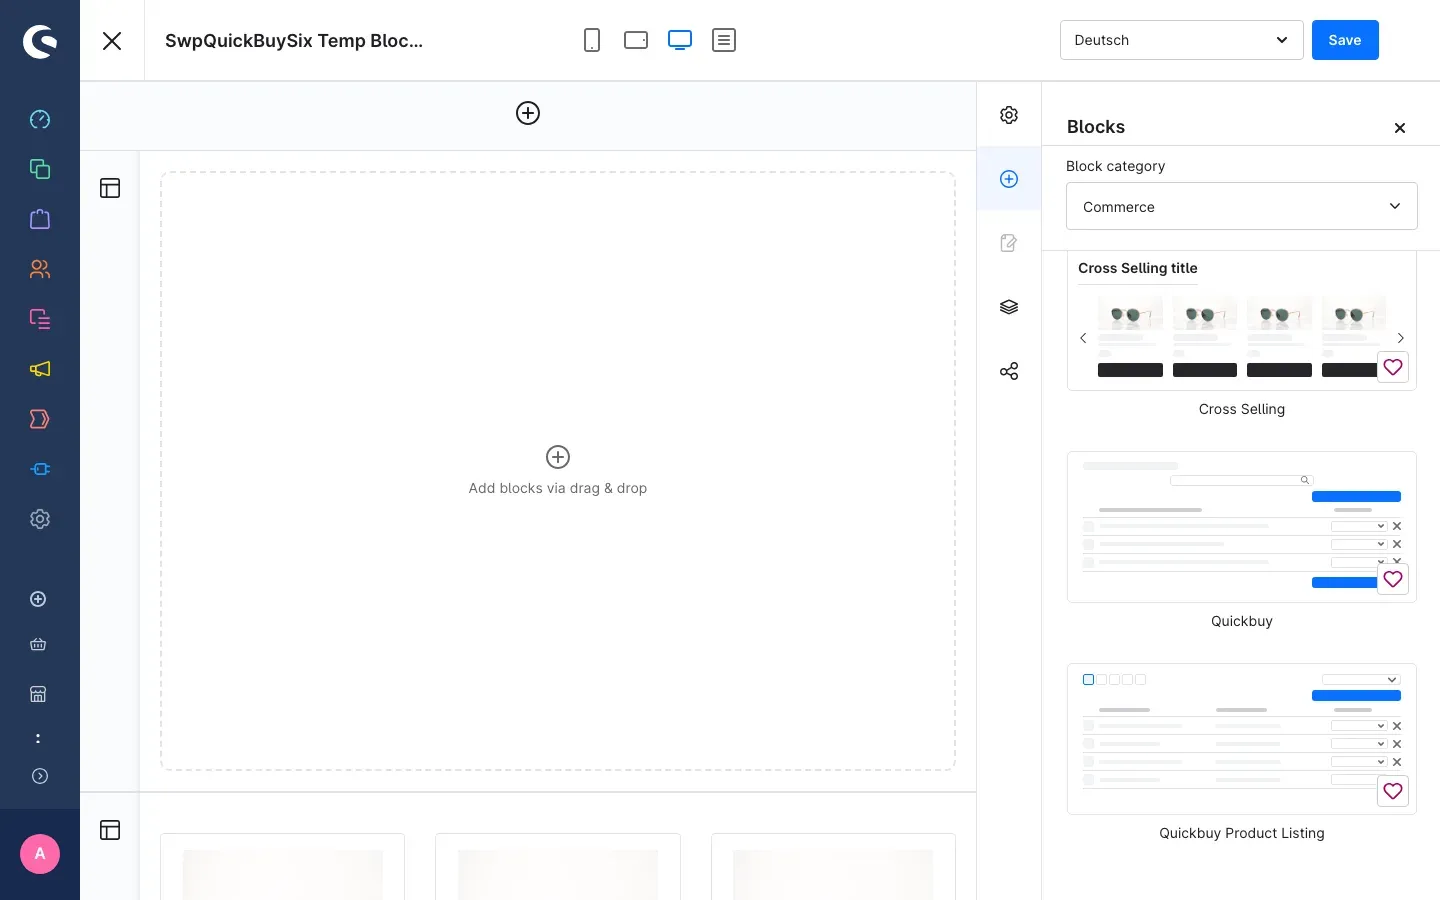 Fig. 17: The two Quickbuy blocks in the “Commerce” block category.
Step by step
- Go to Content → Shopping Experiences.
- Open an existing layout or click Create new layout. For the Quickbuy Product Listing block, choose the type Listing page.
- Open the Blocks sidebar on the right and select Commerce under Block category.
- Drag the Quickbuy or Quickbuy Product Listing block to the desired position in the layout.
- Click Save.
- Assign the layout to the page you want — for the Quickbuy Product Listing block under Catalogues → Categories in the relevant category, in the Layout area via Assign layout or Change layout. Save the category.
In the shop, the category then looks like this: the Quickbuy order list with all articles of the category is at the top, below it — if you kept it in the layout — the usual product listing.
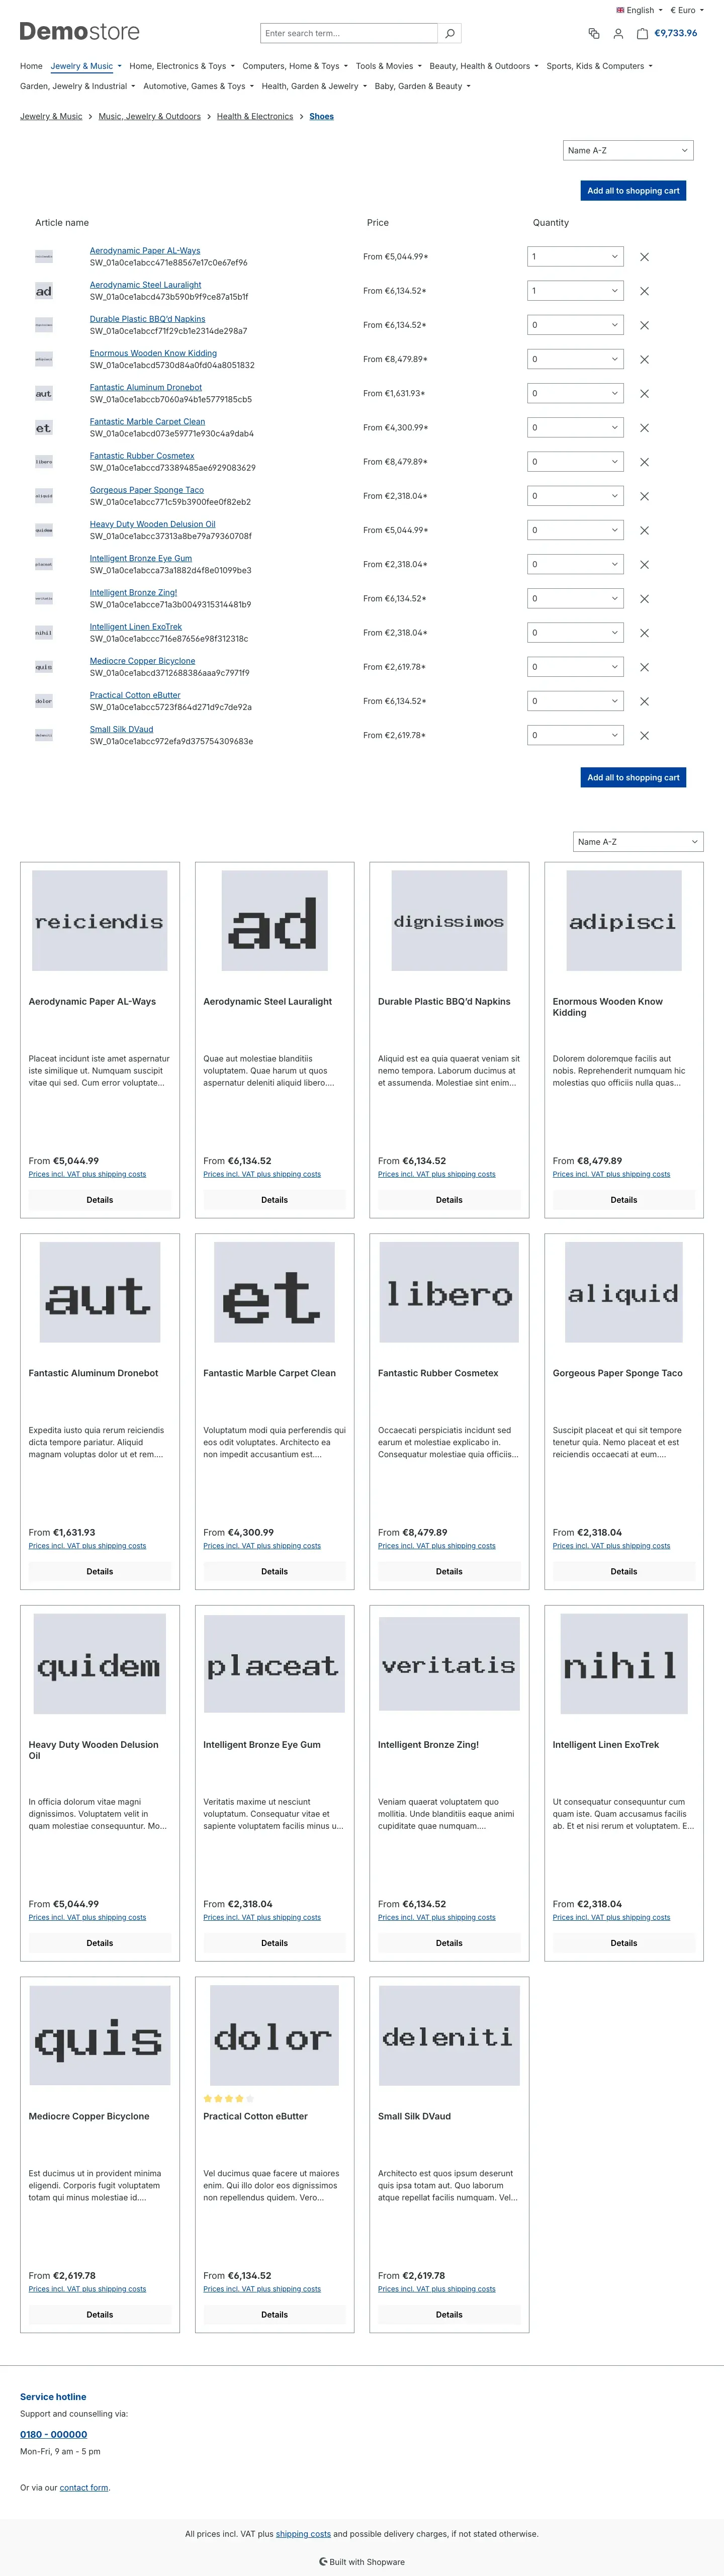 Fig. 18: The “Quickbuy Product Listing” block on a category page in the shop.
Tip: In the layout editor, the Quickbuy Product Listing block only shows a schematic preview without real articles. That is expected: the articles only come from the category you assign the layout to once the page is shown in the shop. Check the result directly on the category page in your shop.
Important: The settings from chapter 4 also apply to the blocks. If Quickbuy is switched off in a sales channel or hidden for a customer group, the blocks show nothing there. The Quantity selection setting applies to the blocks as well.
Working with other plugins
Quickbuy works together with two other plugins by BuI Hinsche GmbH. You don’t need them — but if you use them, Quickbuy takes their rules into account automatically.
- Packaging units (German store name: „Verpackungseinheiten“): If you have defined packaging steps for a customer group, the quantity selection in Quickbuy only offers these steps. Your customers cannot order quantities you don’t deliver.
- Price on request (German store name: „Preis auf Anfrage“): Articles whose price is only given on request cannot be ordered via the Quickbuy search and are hidden in Quickbuy order lists. This way, no article without a fixed price ends up in the cart.
Troubleshooting
The Quickbuy icon does not appear in the header
Cause: The plugin is not yet activated, switched off in the sales channel or hidden for the customer’s customer group — or the cache still shows an old state.
How to fix it:
- Open Extensions → My extensions and check that the switch next to Quickbuy is on.
- Click Configure, select the affected Sales Channel at the top and check that Enable plugin for this sales channel is switched on.
- Under Deactivate for the following customer groups, check whether the customer’s group is selected there.
- Clear the cache: Settings → System → Caches & indexes → Clear cache.
Calling up the Quickbuy page shows the home page
Cause: Quickbuy is switched off in this sales channel or hidden for the customer’s group. In this case, the shop deliberately shows the home page.
How to fix it: Check steps 2 and 3 from the previous section.
No suggestions appear
Cause: Fewer characters were typed than set under Minimum characters before suggestions appear — or a number search mode is active and the number is not yet complete.
How to fix it:
- Check the value under Minimum characters before suggestions appear.
- If Search mode is set to Complete product numbers only or Complete product or manufacturer numbers only, the number must be entered completely and exactly. Customers who want to search by name need Normal search.
The regular search field in the header is missing
Cause: The setting Remove header search on the quick order page is switched on. The search field is only missing on the Quickbuy page; it is present on all other pages.
How to fix it: Switch the setting off if you want to show the search field on the Quickbuy page too.
The “Quickbuy Product Listing” block is empty in the layout editor
Cause: This is not an error. The block only receives its articles in the shop, from the assigned category.
How to fix it: Assign the layout to a category and check the result on the category page in your shop.
FAQ
Q: Can I offer Quickbuy to business customers only?
A: Yes. Under Deactivate for the following customer groups, select all customer groups that should not see Quickbuy. Keep visitors who are not logged in in mind: they belong to the customer group set as the default in your sales channel.
Q: Can I offer Quickbuy in one sales channel but not in another?
A: Yes. Select the sales channel at the top of the configuration page and switch off Enable plugin for this sales channel there. The other channels are not affected.
Q: How many pieces can a customer choose per article?
A: With Display as dropdown, quantities from 1 to 99 are available. If your customers need other quantities, switch to Display as number field.
Q: Why can’t my customers find an article by part of its product number?
A: In the search modes Complete product numbers only and Complete product or manufacturer numbers only, the search finds an article only by its complete, exact number. This way your customers get exactly the one right article. To search by parts or names, switch to Normal search.
Q: An article has a very large number of variants. Are all of them shown?
A: Per search, Quickbuy shows at most 50 variants of an article. If there are more, the link “More variants (number) on the product page” leads to all variants.
Q: Is the Quickbuy page found by Google?
A: No. The page is hidden from search engines. It is a tool for your customers and is not meant to appear in search results.
Q: Why does the layout editor show no articles in the “Quickbuy Product Listing” block?
A: The block only gets its articles in the shop, from the category you assign the layout to. On the category page in your shop, they appear in full.
For Administrators / Technical Details
This section is intended for technical administrators. You don’t need it for everyday use.
System requirements
- Shopware: 6.7 (tested with 6.7.14.2)
- PHP: 8.2 or newer
Installation via the command line
php bin/console plugin:refresh
php bin/console plugin:install SwpQuickBuySix --activate
php bin/console cache:clear
Address of the Quickbuy page
The Quickbuy page is available at /quickbuy in your sales channel, for example YourShop.com/quickbuy. You can therefore also link it in your main navigation, in the footer or in emails to your customers.
Working with other plugins
The plugins mentioned in chapter 7 are technically named SwpPackingUnitsSix (packaging units) and SwpPriceOnRequestSix (price on request). Quickbuy detects them automatically when they are installed and active.
This manual was written for Quickbuy version 6.7.2.
More manuals
Age Check
Tobacco, spirits, knives: visitors who do not confirm their age never see the restricted items at all. You tick a box per product, the plugin hides it everywhere.
Open manual Shopware 6AI SEO All-in-One: SEO and GEO suite for Shopware 6
Google finds your shop, ChatGPT never mentions it. This plugin checks both in one run, fills empty meta fields from templates and turns the findings into a to-do list.
Open manual Shopware 6Area Calculation
Area calculation on the product page: your customer knows the square metres, not the number of packs. The plugin works it out, adds the offcut and fills the quantity field.
Open manualNeed a team that keeps your shop running?
We have been maintaining Shopware shops for more than 20 years, including updates, hotfixes and the plugins you are configuring right now.